Optimizing Font Management in Next.js: Transitioning from Google Fonts to next/font Custom Fonts for Production

Introduction
In the initial stages of development, speed and flexibility are key priorities, which is why many developers use Design Extensions’s Google Fonts integration in Next.js. This setup allows for quick font selection and implementation, enabling teams to iterate rapidly. However, as projects move towards production, optimizing font loading becomes essential to ensure optimal performance and a smoother user experience.
In this article, we’ll guide you through transitioning from Design Extensions’s default Google Fonts integration to a more refined, performance-focused setup with next/font. You’ll see how to retain Design Extensions compatibility by registering fonts as “custom,” enabling their names to remain available as parameters within Design Extensions.
Quick Development with Design Extensions Google Font
Design Extensions’s Google Fonts integration allows you to add fonts by selecting from Google’s extensive library and quickly applying them to your project. This setup offers:
• Effortless Font Selection: Choose fonts directly from Google’s library.
• Rapid Setup: Minimal configuration, ideal for initial development stages where speed and flexibility are more critical than optimization.
Using Design Extensions’s Google Fonts is a great solution for early development. But as your project matures and nears production, a more efficient approach to font handling can improve performance, reduce load times, and contribute to better SEO.
Preparing for Production: Why Use next/font?
next/font is a built-in Next.js feature that enables optimized font loading by controlling which styles, weights, and subsets to include. By transitioning to next/font, you can:
• Reduce Render-Blocking Requests: With next/font, only the necessary font files are loaded, minimizing render-blocking requests.
• Gain Greater Control Over Font Display: Set options like display: swap to ensure a seamless font fallback while your custom fonts are loading.
• Maintain Design Extensions Compatibility: By specifying fonts as “custom” in Design Extensions, you can still reference these fonts’ names as parameters, allowing a smooth transition without breaking design consistency.
Step-by-Step Implementation of next/font Custom Fonts
This section will guide you through setting up next/font in a way that retainsDesign Extensions compatibility by registering fonts as “custom.” This approach ensures your project benefits from next/font’s optimization capabilities while keeping font names available for Design Extensions parameters.
Step 1: Define Fonts with next/font
Create a file in your project (e.g., fonts/index.ts) to define and configure the fonts using next/font. Here’s an example configuration:
In this file:
• Subsets are defined for each font, limiting font data to only the necessary characters.
• Weight and Style Options specify the font variations required, helping to reduce the overall data loaded.
• Preload and display: ‘swap’ ensure the fonts load smoothly without blocking rendering, using a fallback font until the custom fonts are ready.
Step 2: Applying Fonts Globally in the Layout
Next, open your global layout file (e.g., app/layout.tsx) and apply the custom font variables to the <body> element. This allows the fonts to be loaded throughout the entire application:
Applying the fonts globally ensures consistency and avoids the need to load fonts individually for each component.
Step 3: Update Design Extensions to Use “Custom” Fonts
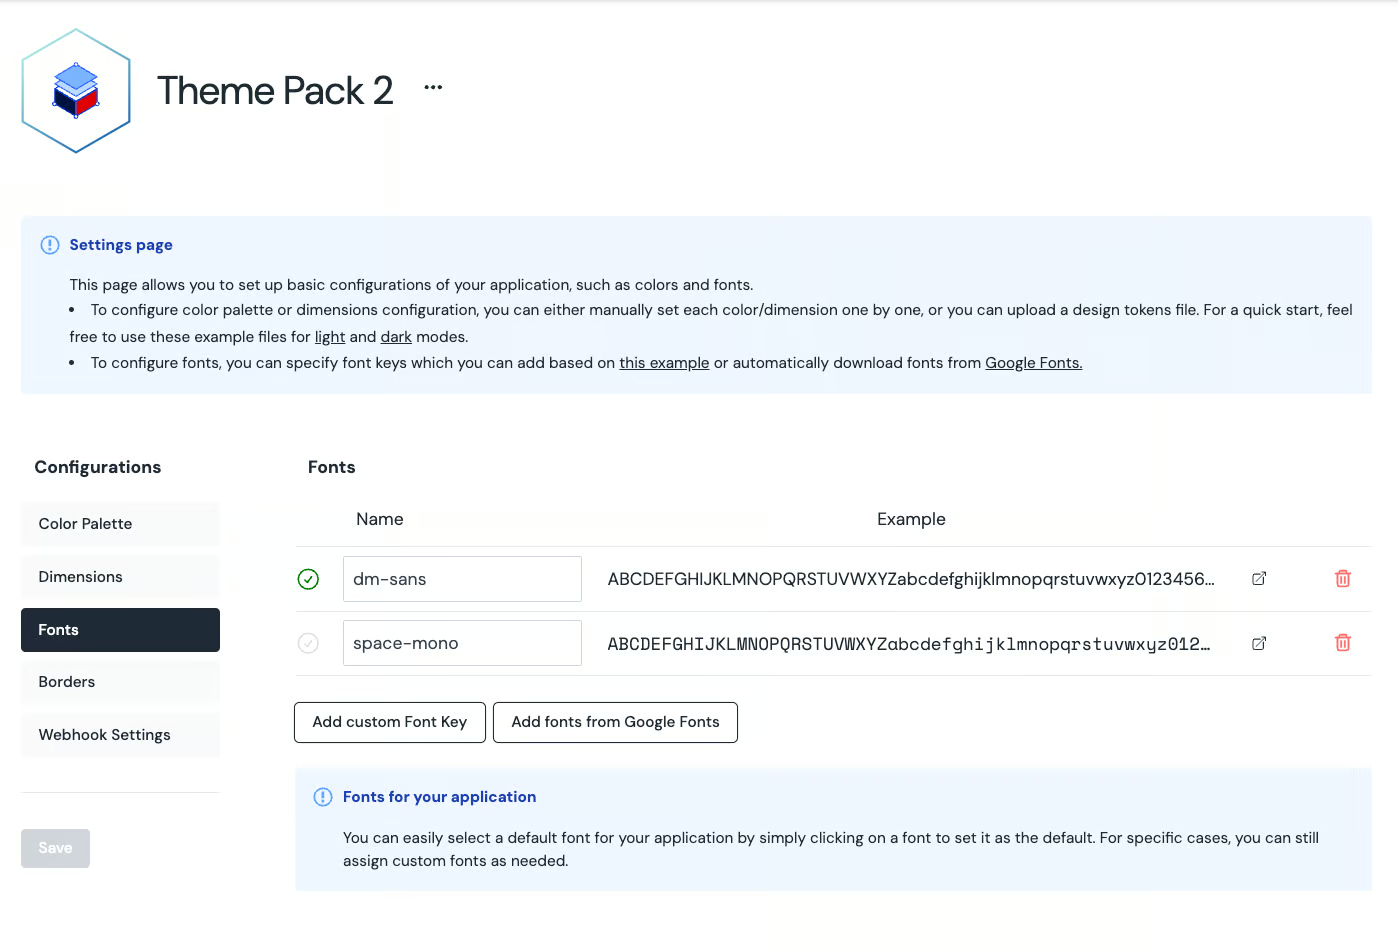
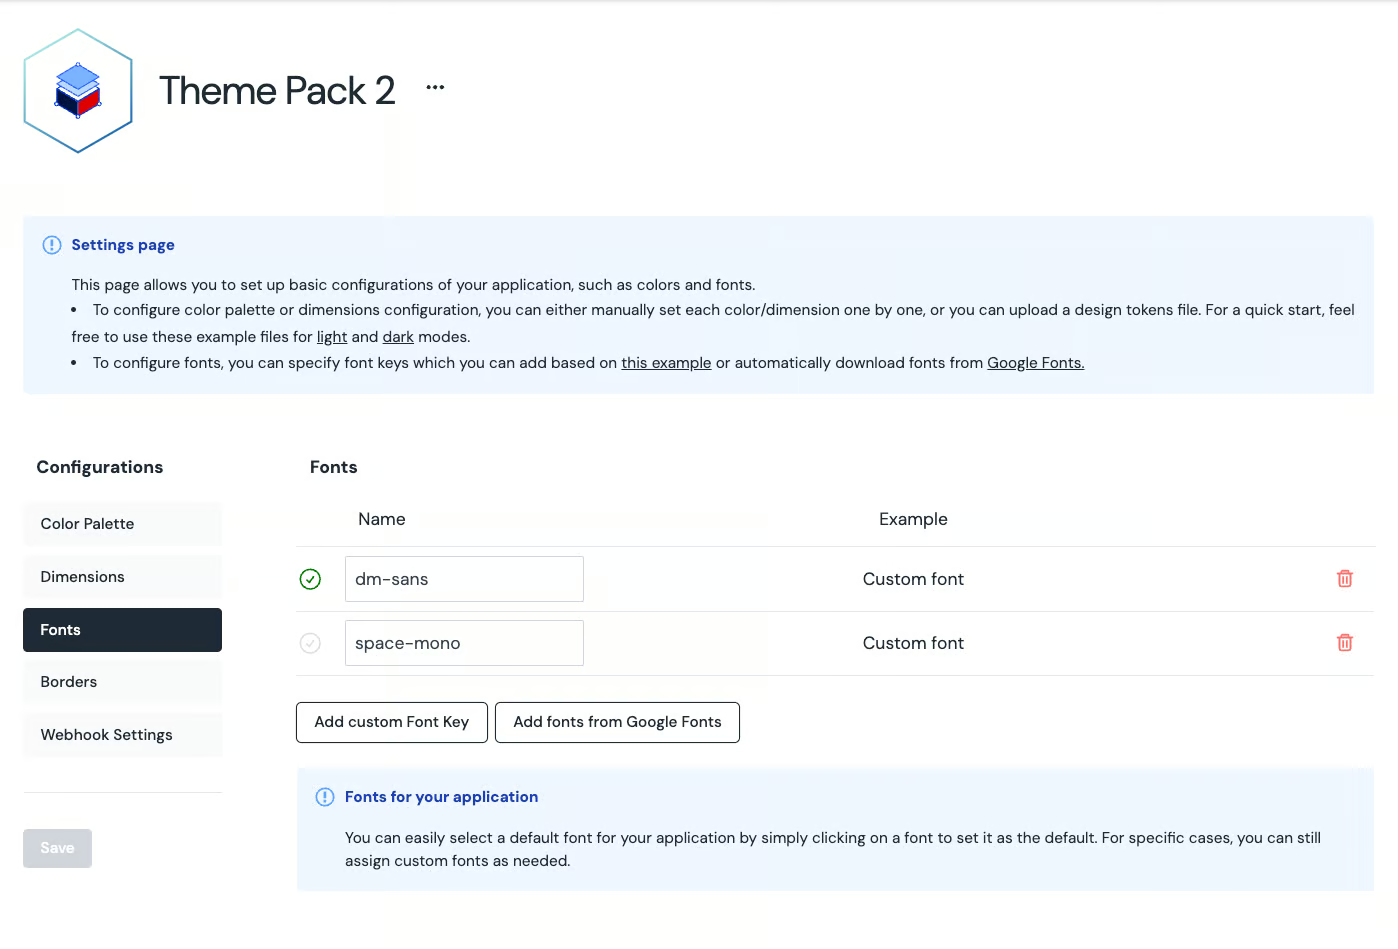
With the fonts now integrated using next/font, it’s time to update Design Extensions. Remove the previously configured Google Fonts from Design Extensions and replace them with entries labeled as “custom fonts.” Ensure that the “Name” remains consistent with your earlier setup to avoid any disruptions in styling. This approach maintains compatibility with Theme Pack 2, keeping font names registered and accessible as parameters.
Here’s an example of how this configuration looks in Design Extensions:
• Before Updating to Custom Fonts:

• After Updating to Custom Fonts:

By specifying these fonts as custom in Design Extensions, you ensure that all font references remain functional, allowing for easy adjustments and continued use of parameters.
Conclusion
Transitioning from Design Extensions’s Google Fonts to a next/font setup is a recommended step as your Next.js project nears production. By doing so, you maintain the flexibility and integration benefits of Design Extensions while enhancing performance through optimized font loading. This simple, impactful change ensures a better user experience and faster load times, making it a best practice for any production-ready Next.js application.