Hello World starter
This starter is a good choice if you want to kick off a new project after you gained some familiarity with Uniform.
The Hello World starter is the most basic starter; it ships with a single component and a single page.
About the starter#
The starter is implemented in Next.js 13+ and Nuxt 3 and includes:
- Live preview for all page types and in-line editing enabled.
- Personalization and A/B testing.
- The ability to manage sitemap in project map.
Live demo#
Here is a live version of the starter.
Source code#
Check out the Next.js version of the starter (using page router).
Check out the latest Next.js app router version of the starter.
Feature in preview
The SDK for Next.js app router (featuring React Server Components) are in preview and not recommended for production use yet.
Check out the Nuxt 3 version of the starter.
Installation via CLI#
While you can git clone this starter and set it up manually, Uniform recommends using the CLI if you have limited experience with Uniform.
Open a terminal, and navigate to where you want your local project to be created.
Run this in terminal or command line:
npx @uniformdev/cli@latest newand enter the following values when prompted:
Prompt Response Can we open a browser window to get a Uniform auth token? Y Paste your Uniform auth token [hidden] [Paste in the value from your clipboard] Hey [username]! Choose a Uniform team for your new project [Select appropriate team name] Choose your preferred framework Next.js Choose one of the Uniform starters (for Next.js) Hello World (Page Router) or Hello World (App Router) What's your project name? [Give a descriptive name for your project] About this step
This command performs a number of tasks for you:
- Creates a new Uniform project.
- Populates the Uniform project with sample content.
- Creates a new front-end application using your preferred framework connected to your new Uniform project.
- Starts the new front-end app locally.
Open your browser to http://localhost:3000 to access the front-end.
Try out Canvas#
Now you can see how a user can make changes to the site content and layout without changing any code in the front-end application.
In Uniform, open your project.
Navigate to Canvas > Compositions.
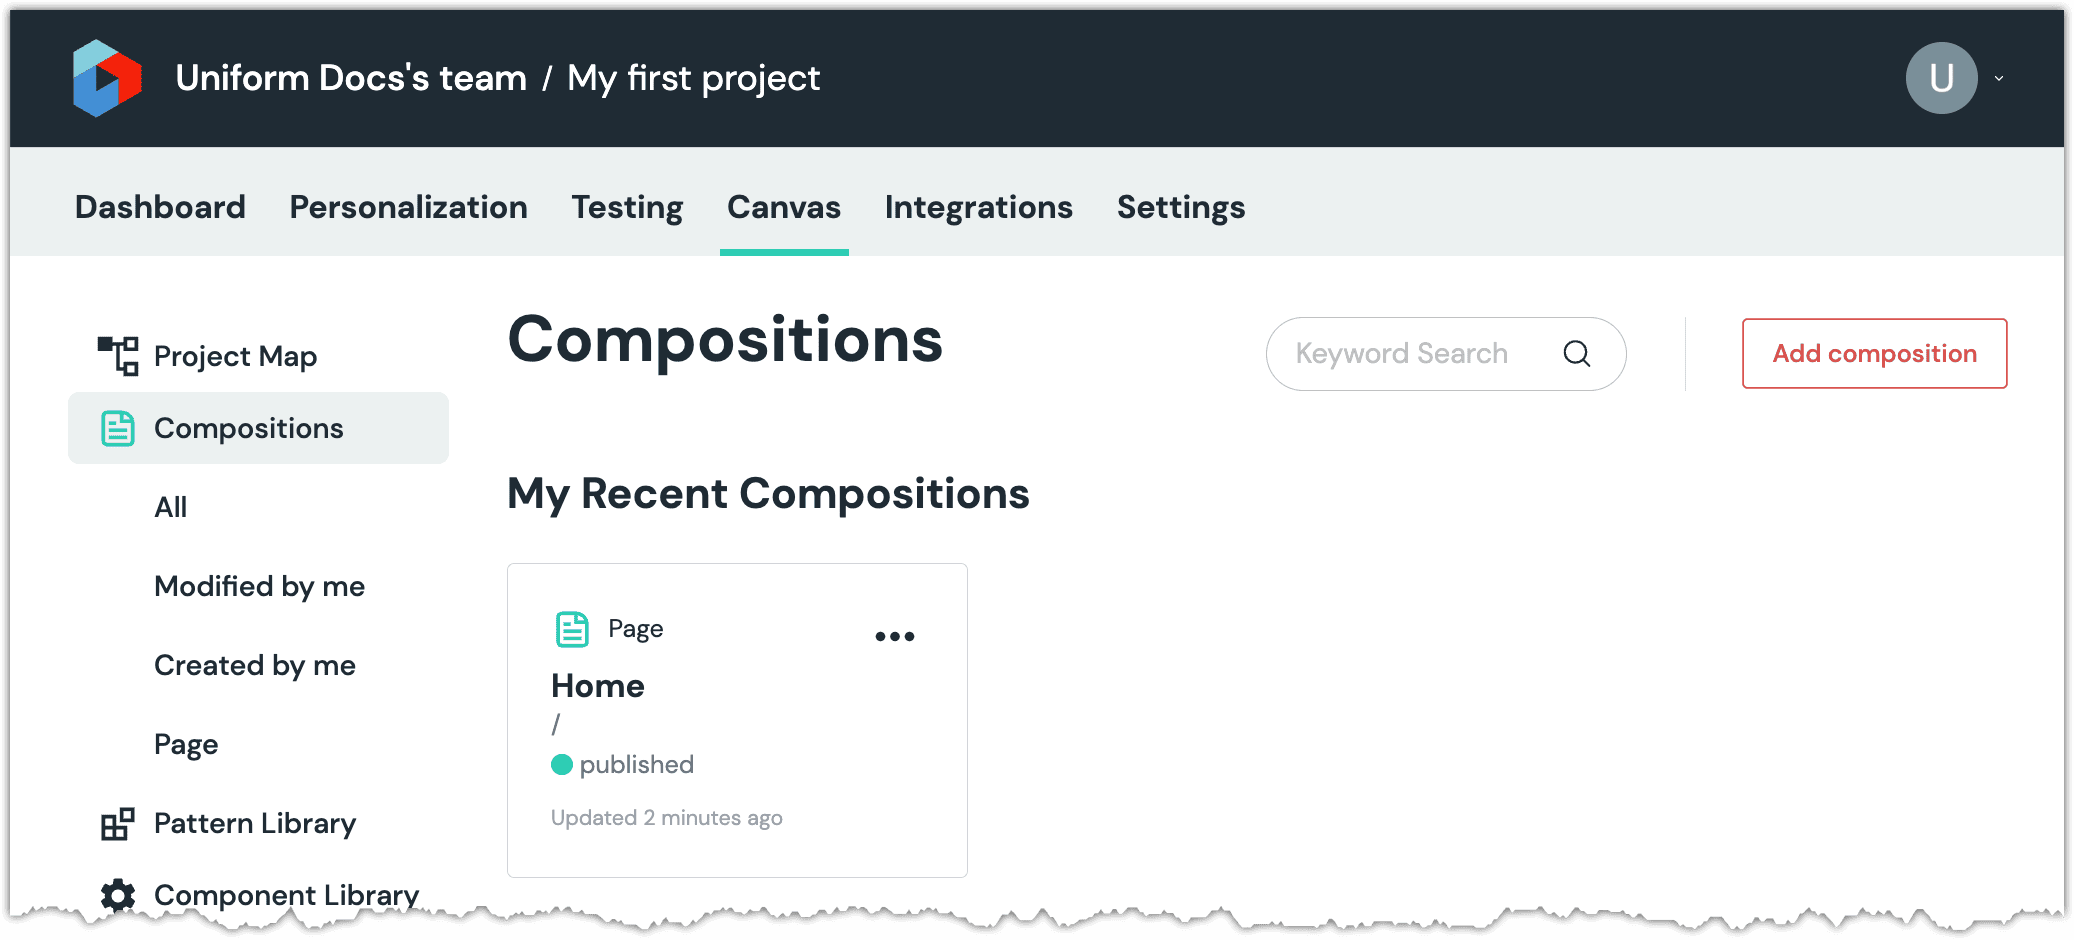
Click the composition Home.
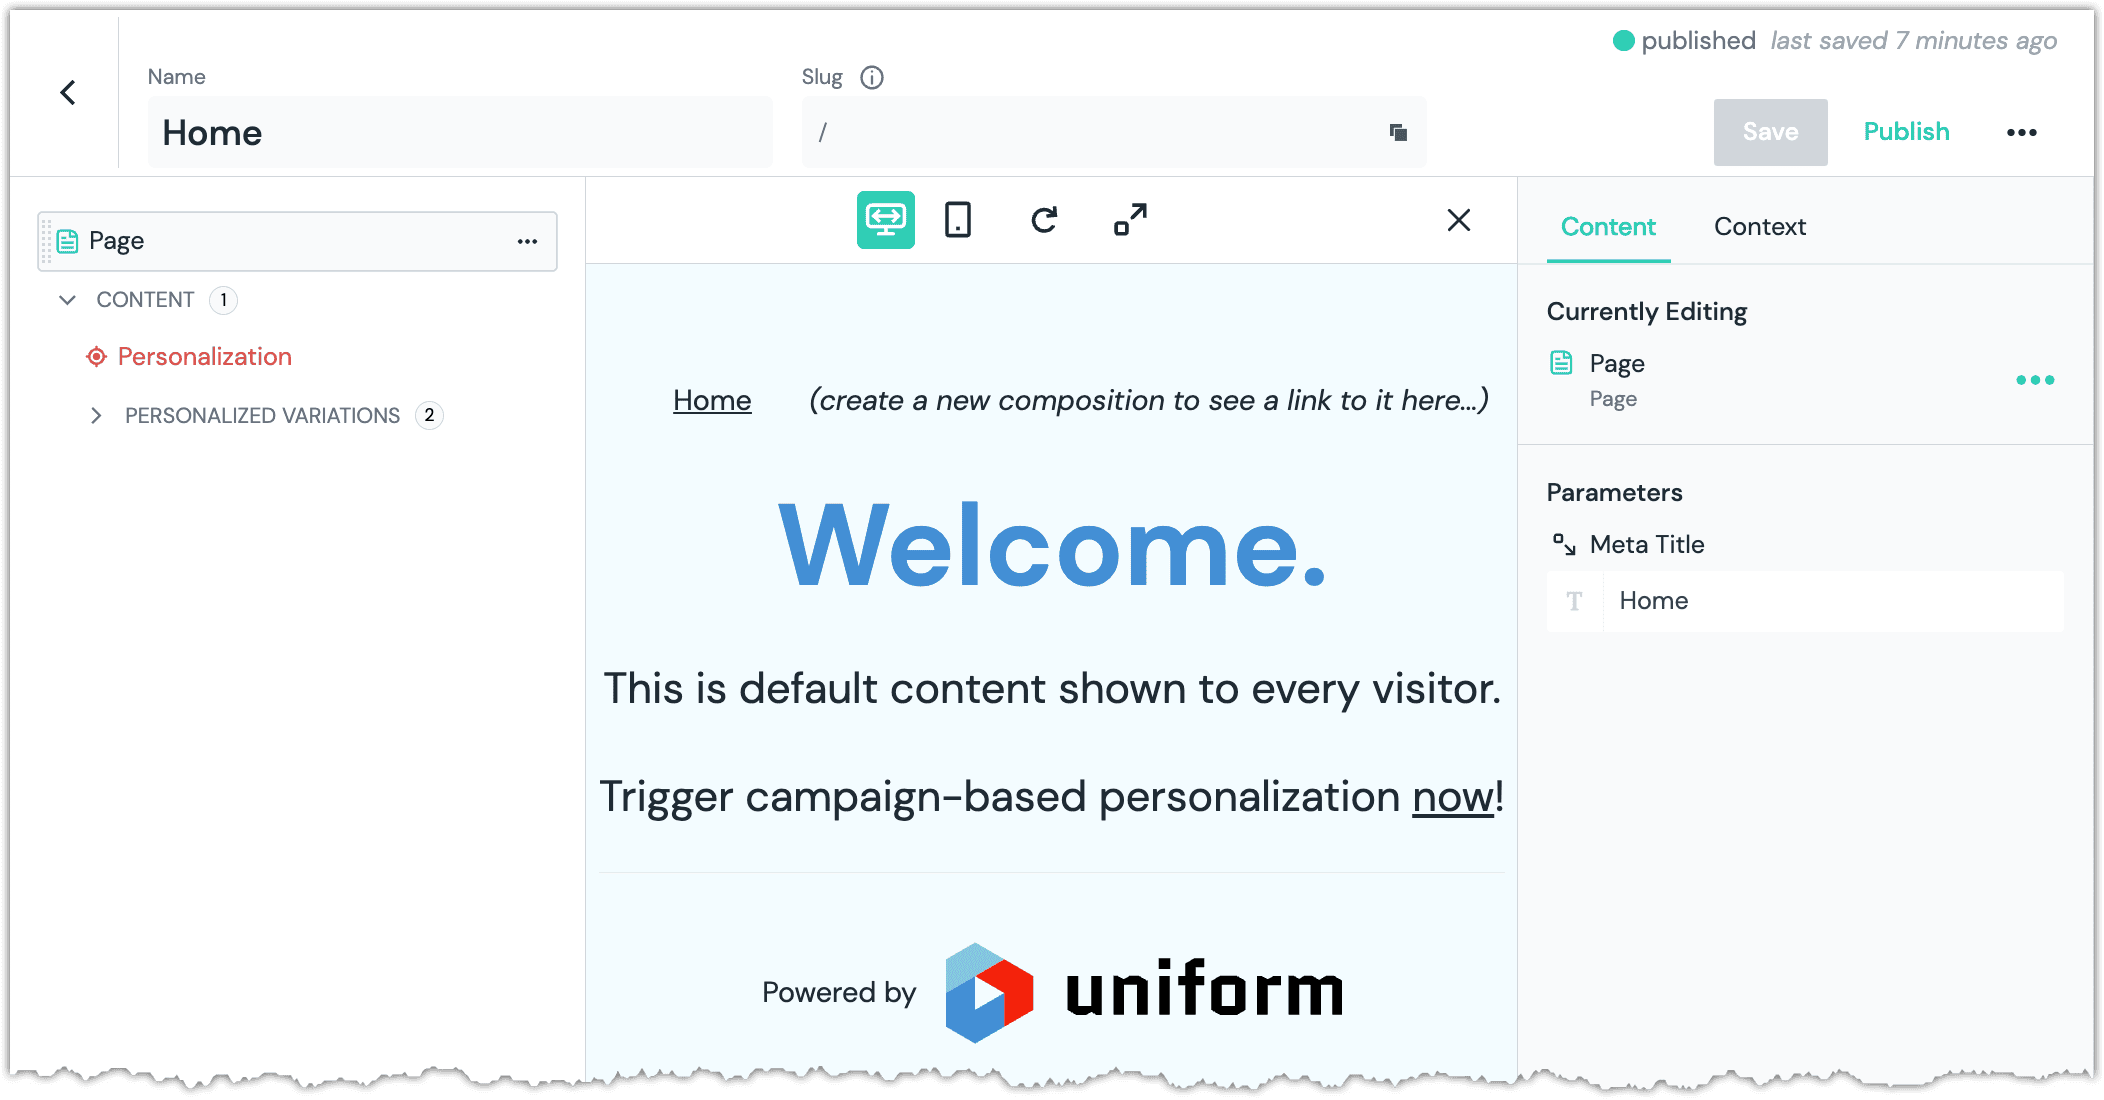
About this step
You will see your Next.js application along with the settings for the composition.
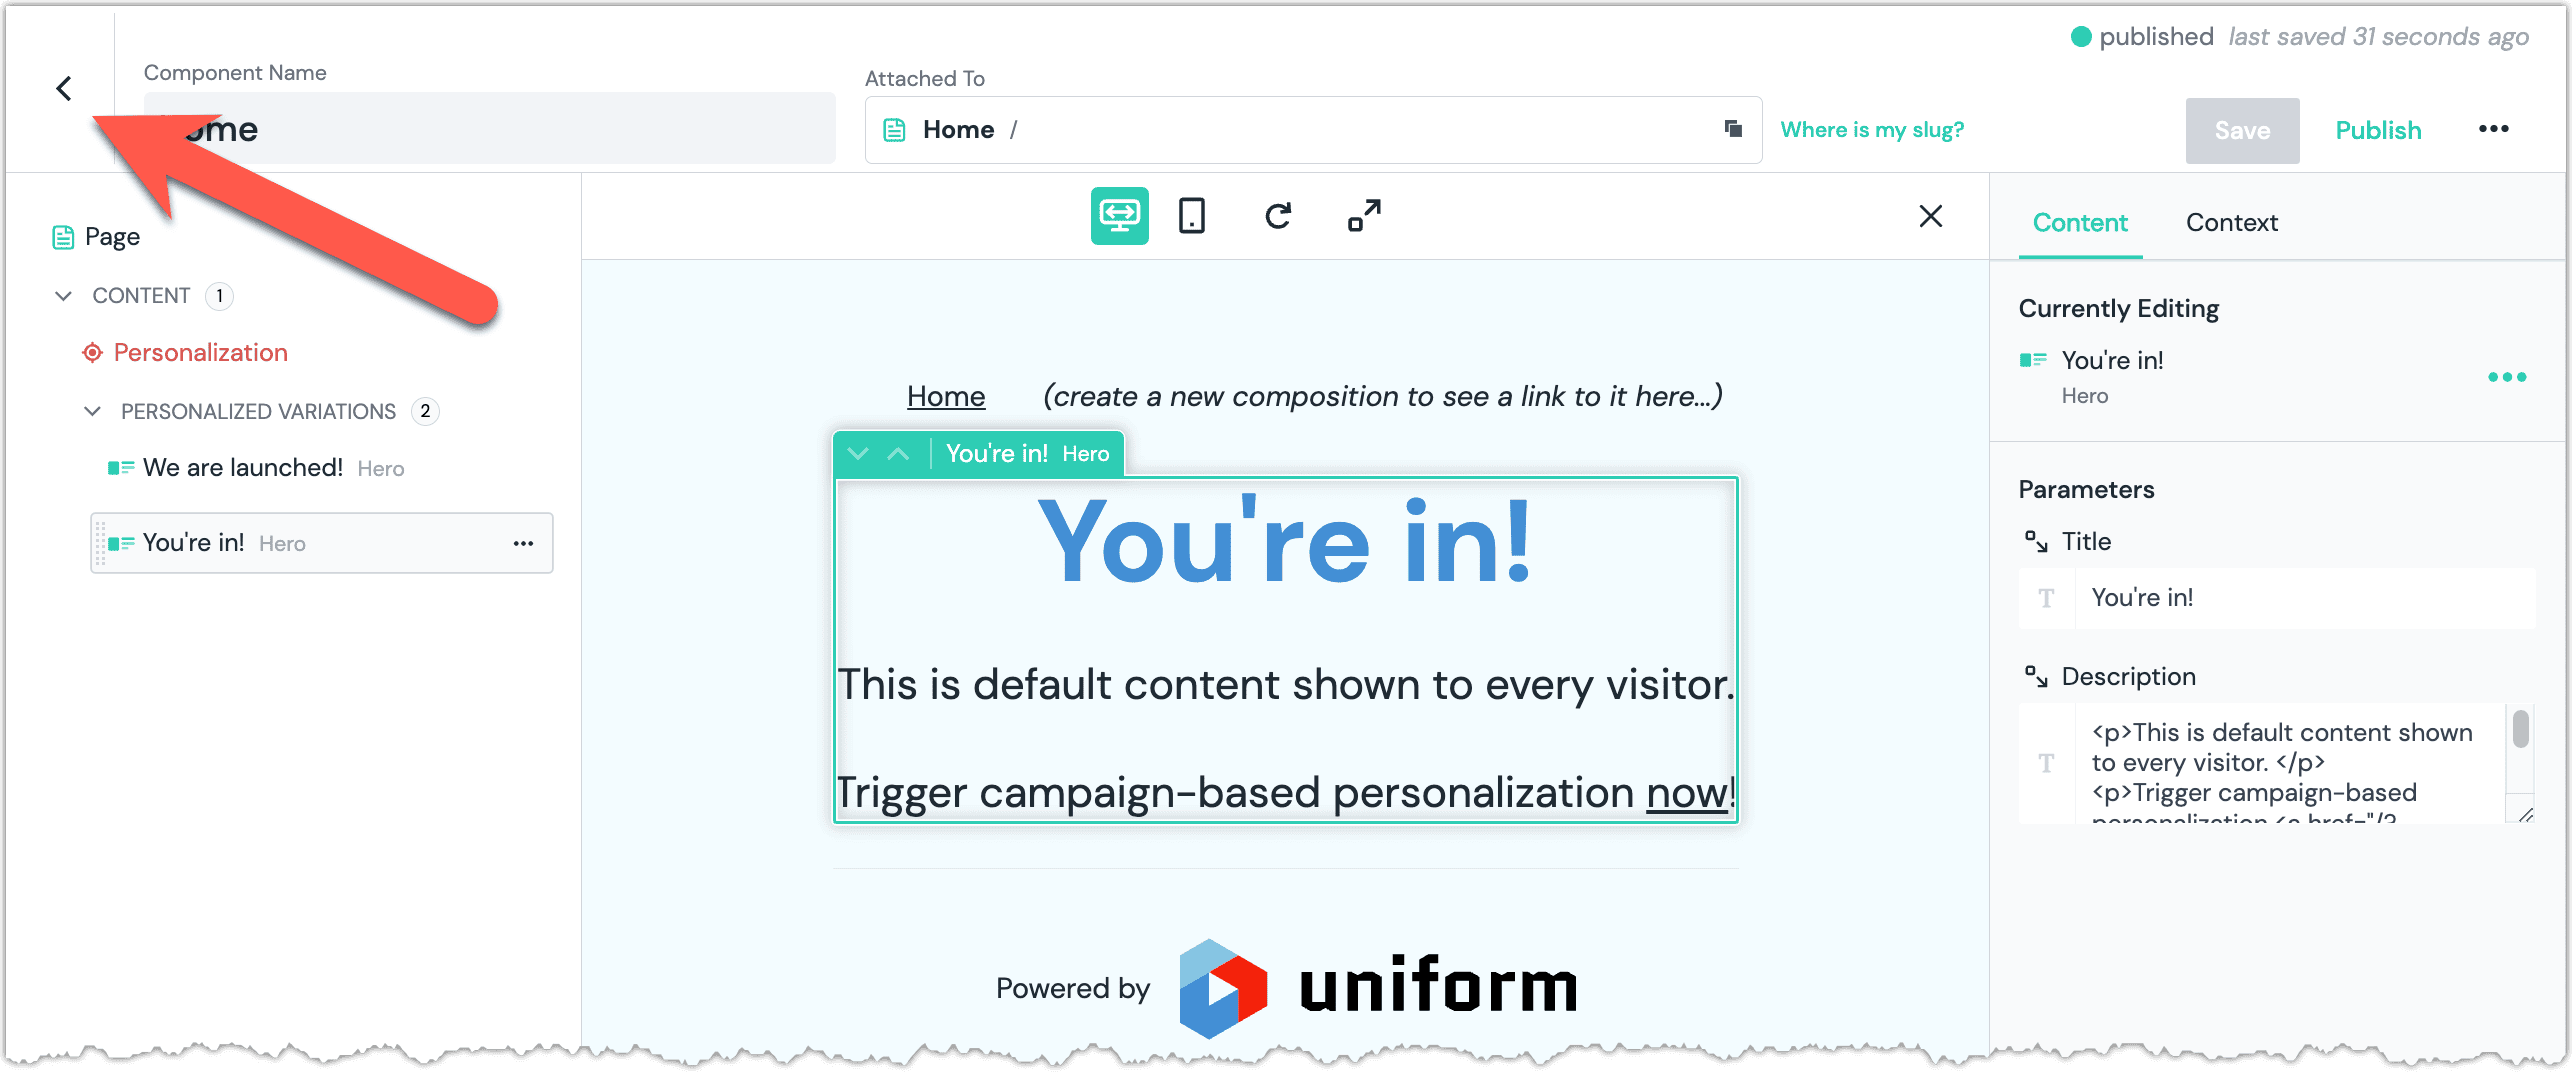
In the left nav, navigate to Page > Content > Personalized variations > Welcome.
About this step
You have selected the Hero component that displays the welcome message. There is a React component in your Next.js app that corresponds to this component. The mapping of which React component is used to render a Uniform component is configured in the Next.js app.
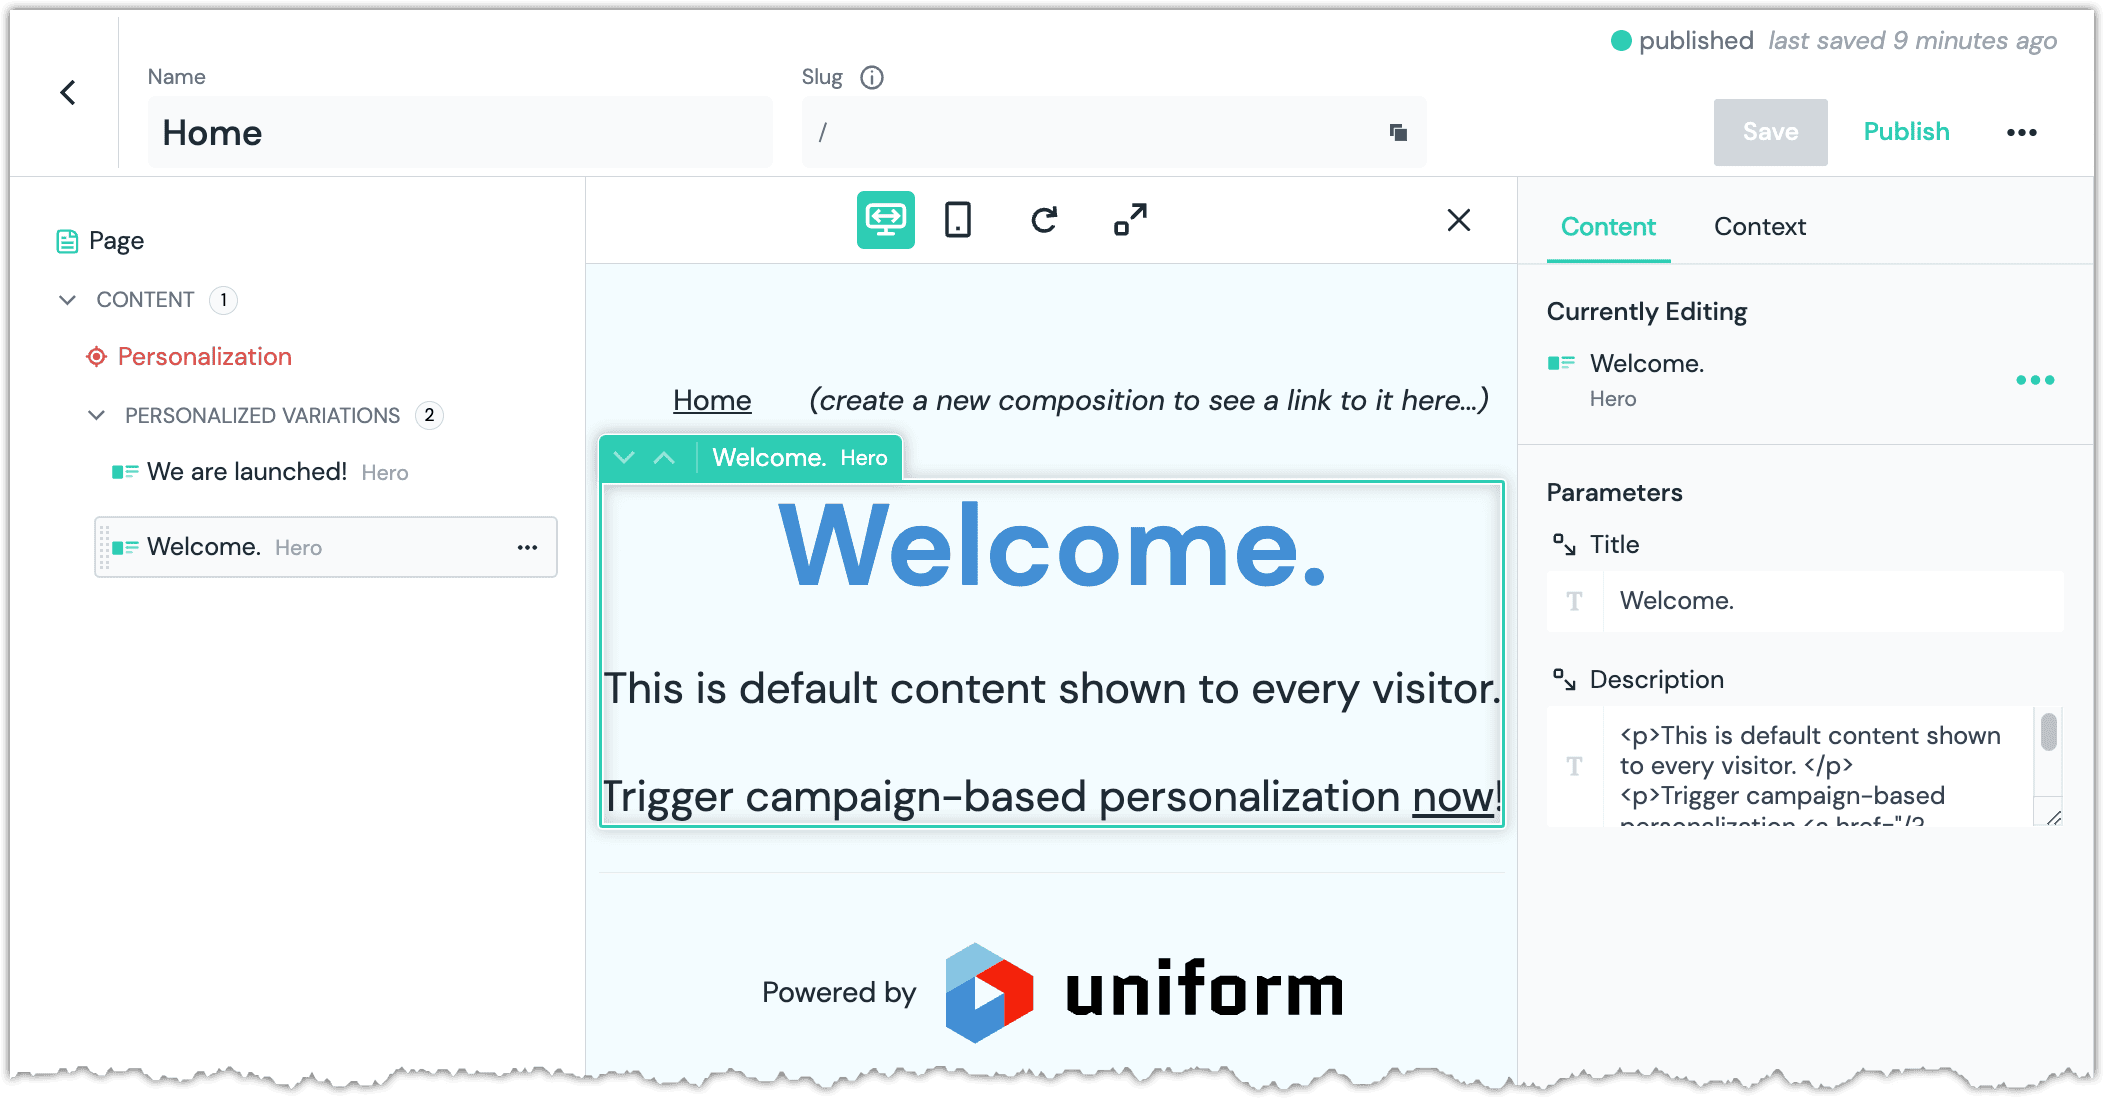
On the right, in the section Parameters, change the value of the parameter Title to the following:
You're in!
About this step
The parameters on the Uniform component are passed as props to the React component.
Click Publish to save and publish your change.
Summary
Now you have a Uniform project that defines a personalized experience for the index page of modern web application. In the next sections you will build off of this starting point to learn how web applications powered by Uniform are built.
Add a new page#
Goals
- Add a new page to the site without changing any code.
- Update site navigation without changing any code.
- Add a Hero component to the new page without changing any code.
Add new composition#
If you are in Canvas, click .
In the left menu, click Project Map.
Click Add node.
Enter the following values:
Section/field Action Node type select Composition Composition click Page Name enter AboutLocation click Home 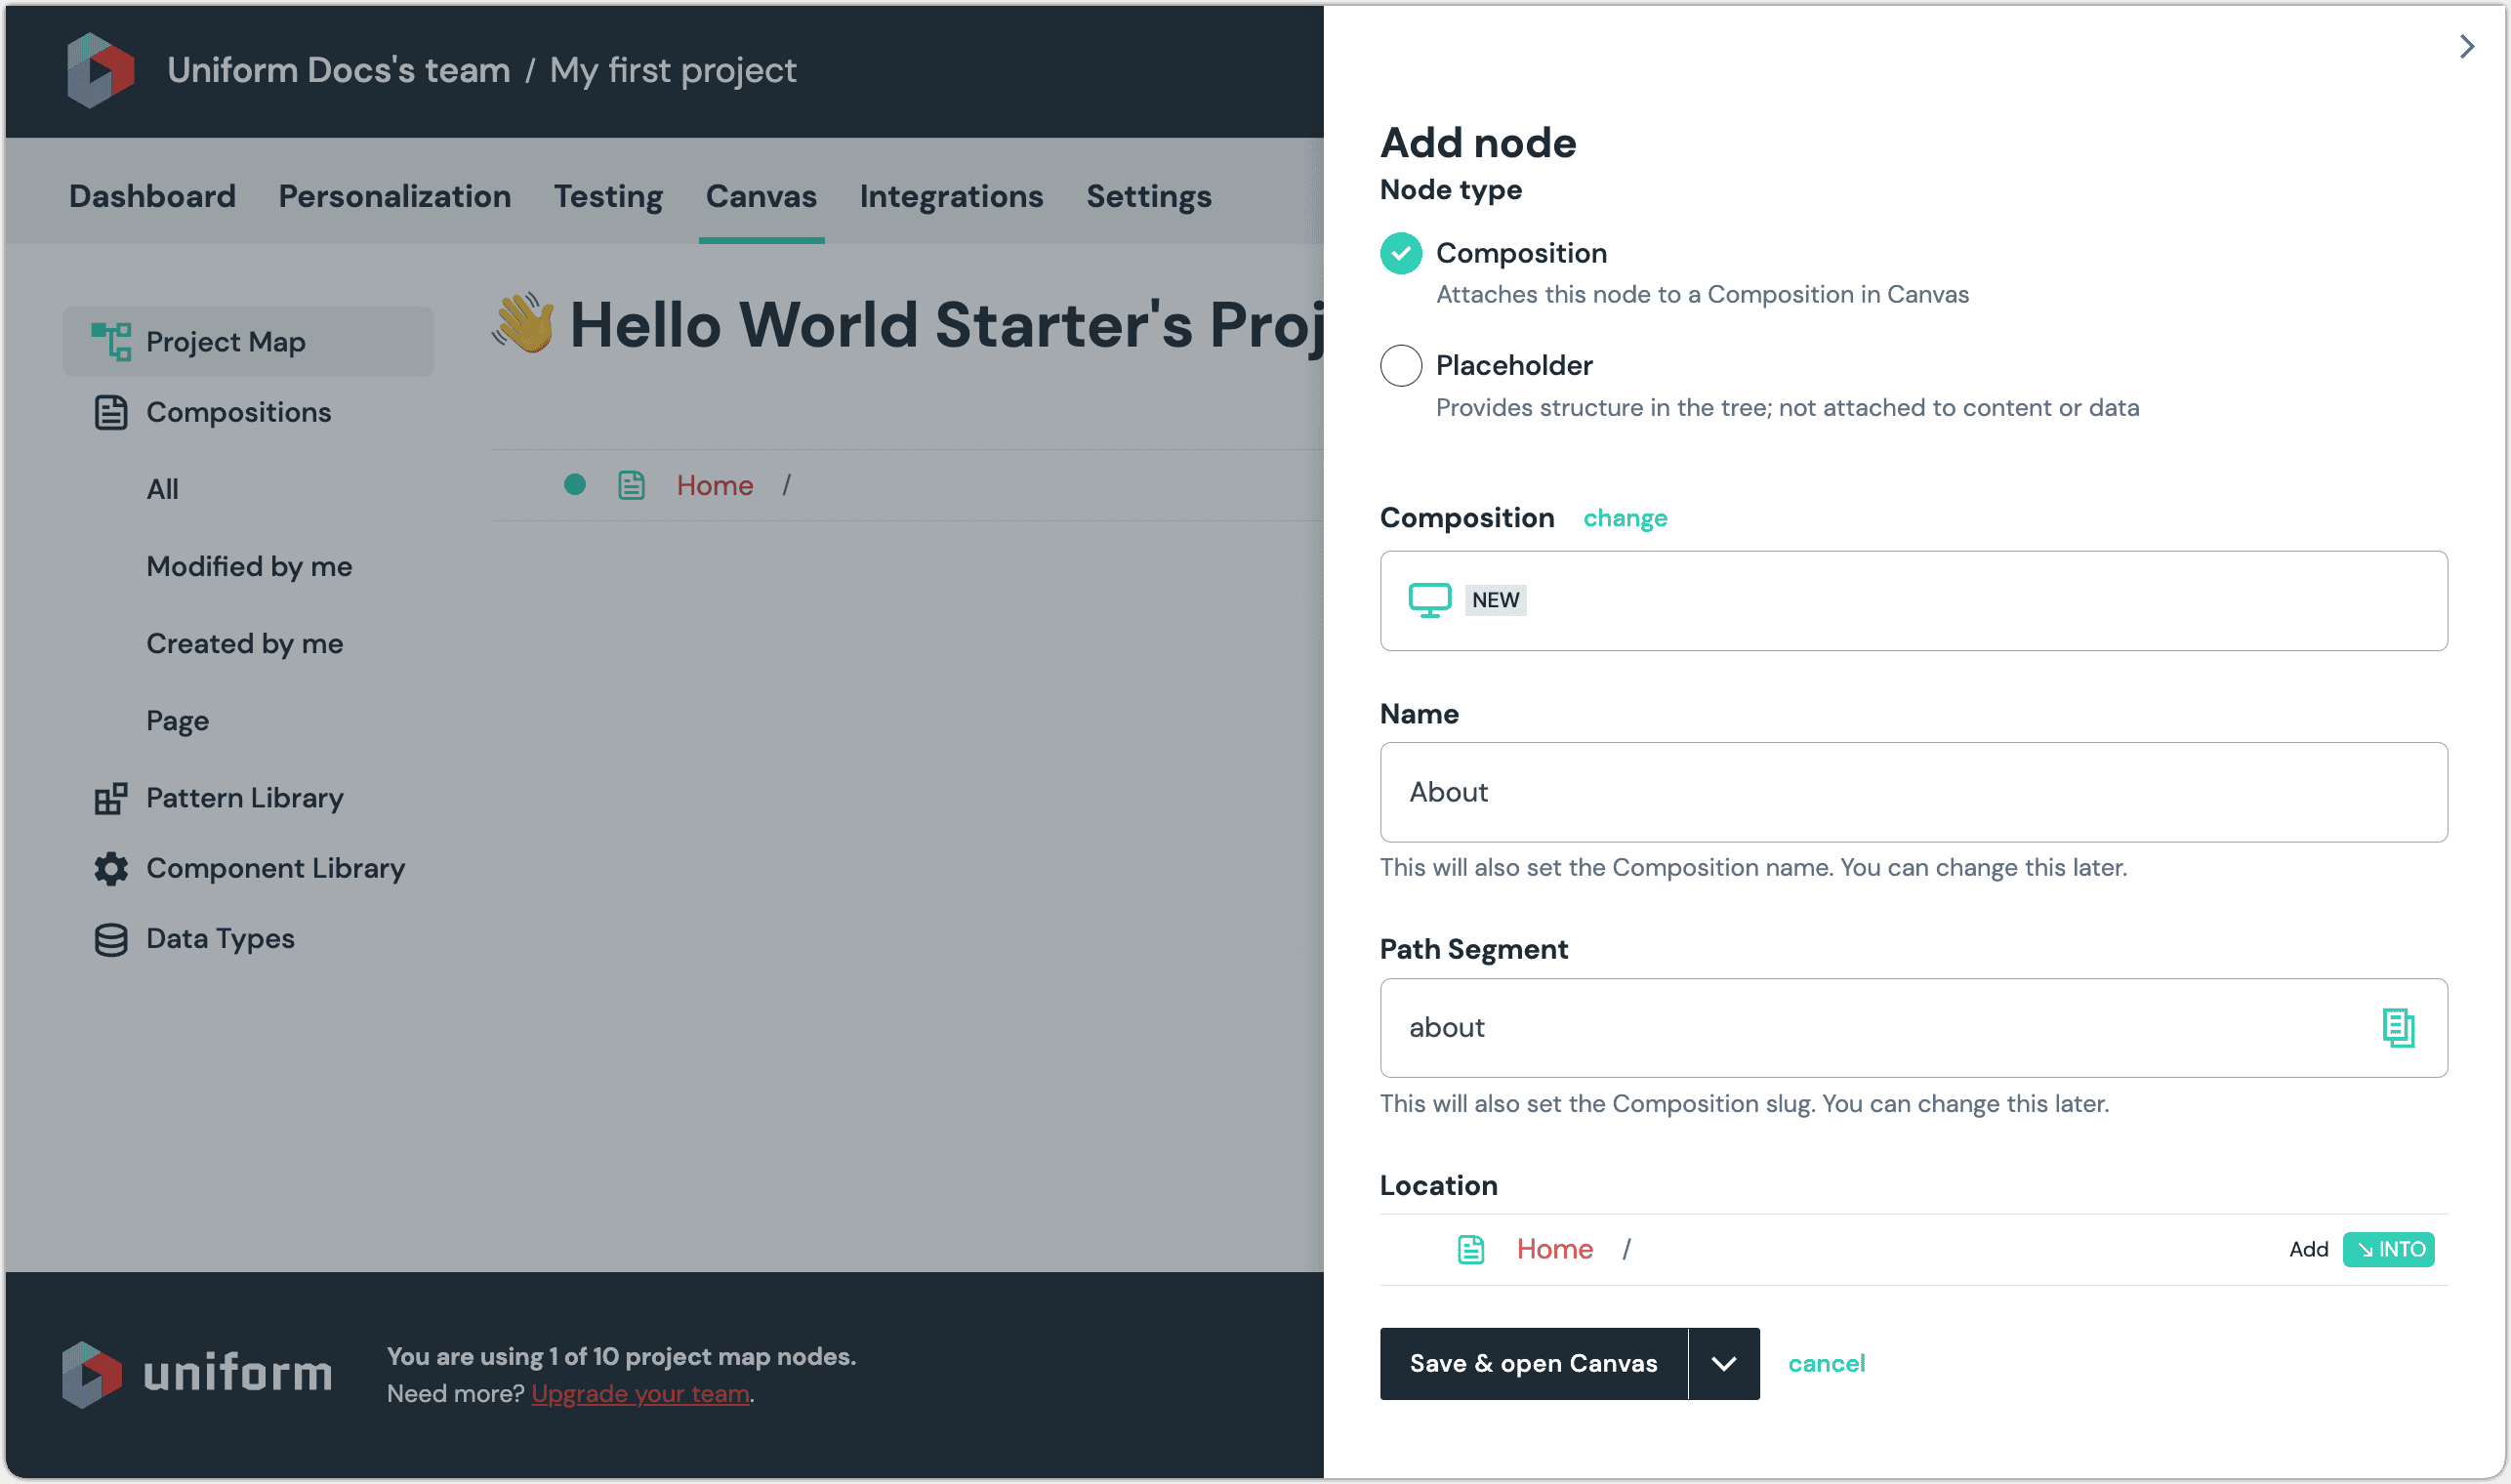
Click Save & open Canvas.
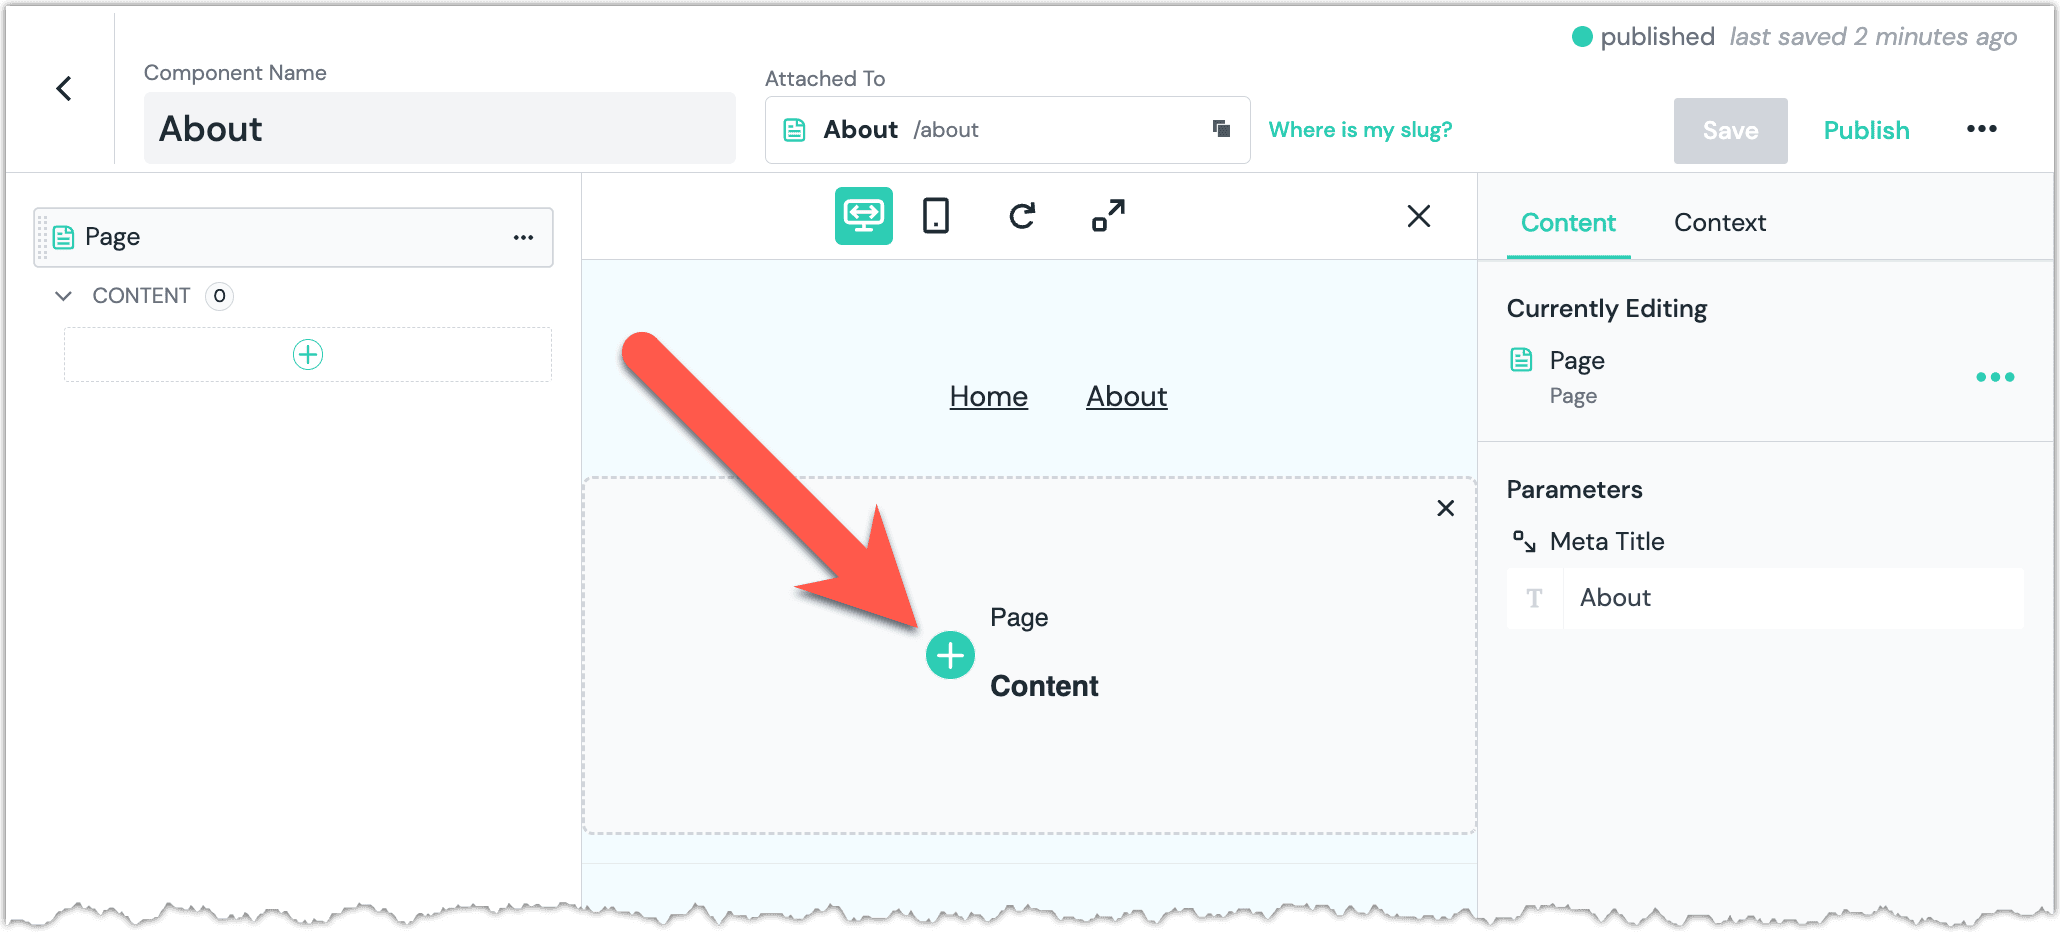
On the right, in the section Parameters, change the value of the parameter Meta Title to the following:
AboutClick Publish.
Add a Hero component to the page#
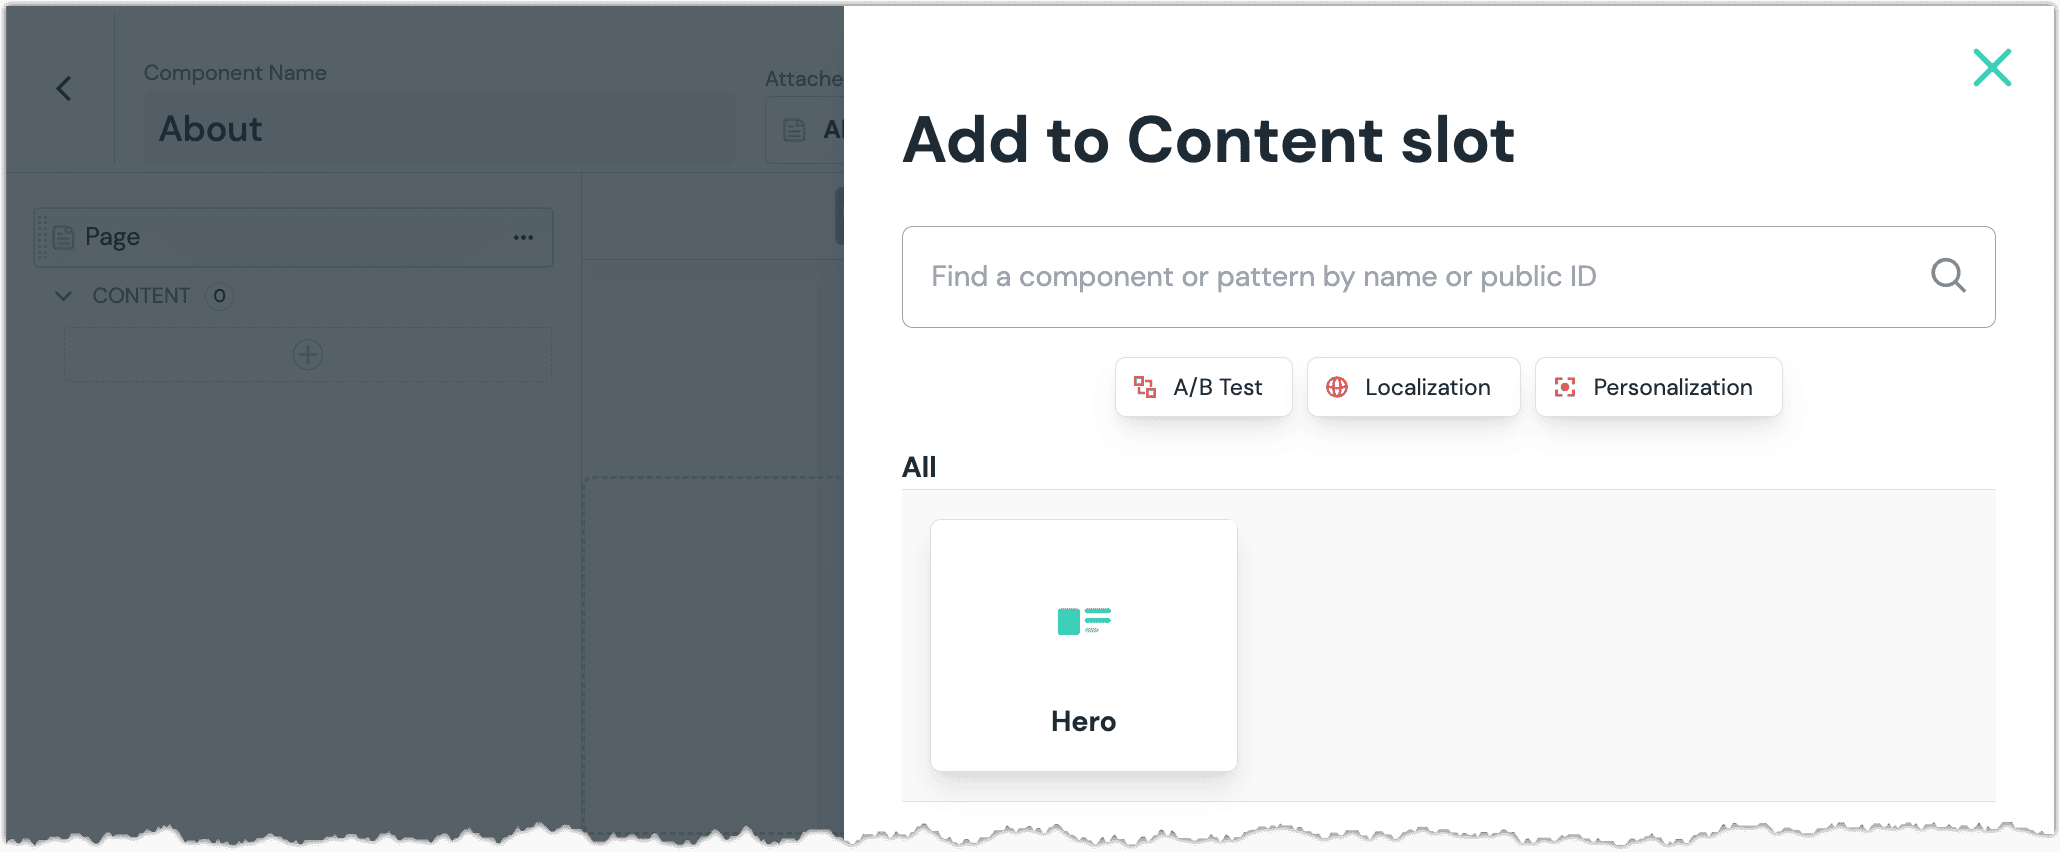
In Canvas, click the green circle with a on it.
Click Hero.
Enter the following values:
Parameter Value Title About Us Description This section explains all about us. 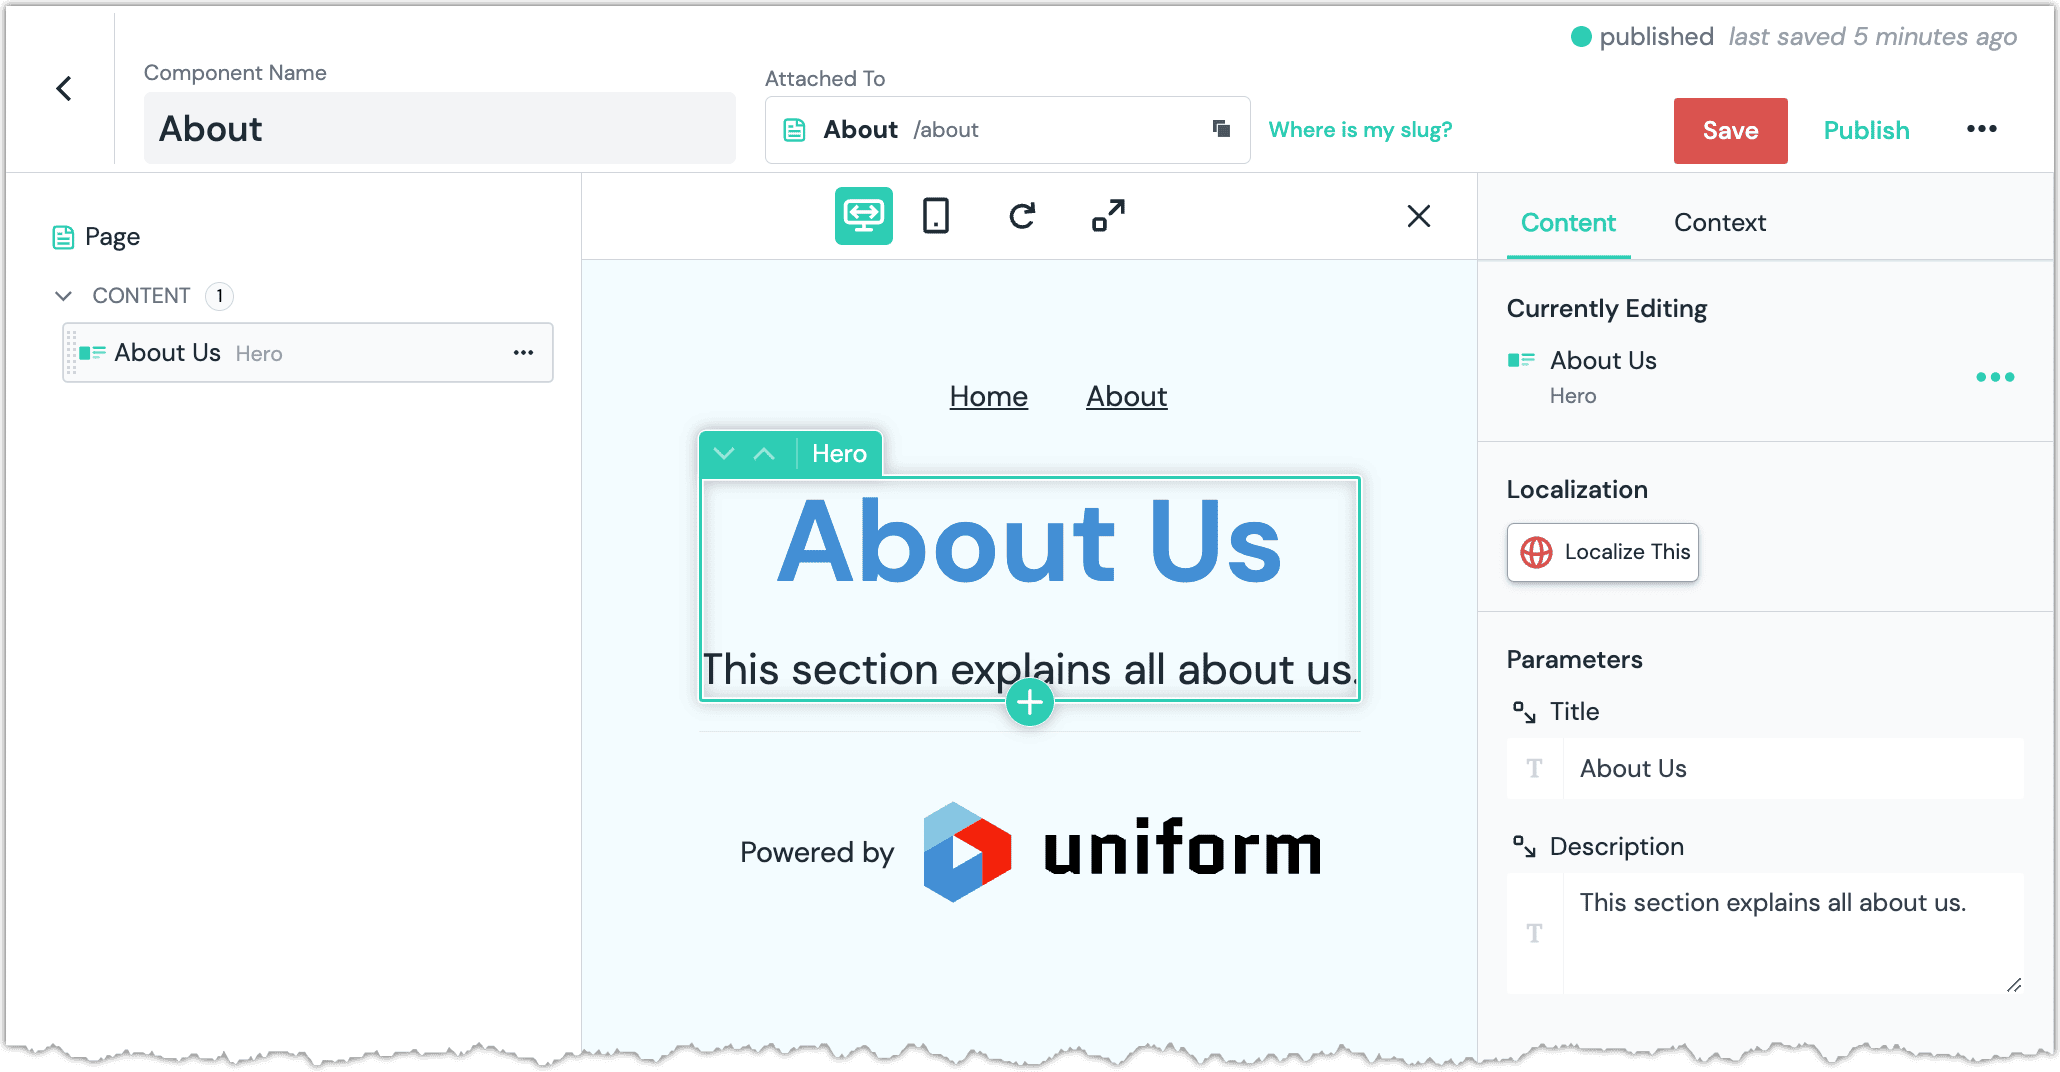
Click Publish.
Open your browser to http://localhost:3000/about.
Summary
Now you have added a new page to your site and have controlled its layout without having to write any code. In the next section you will develop a new component and add it to the page.
View new page#
- Open your browser to http://localhost:3000.
- Click the link About in the site navigation to view the page you created.
About this step
This link appears in the site navigation because you added a new node to the Project Map. The front-end application has a component that renders the nodes in the Project Map as navigation links.
Create a new component#
Build a new component managed in Canvas.
Goals
- Create a new component definition in Component Library
- Create a new React component.
- Register your new React component with Uniform SDK.
- Add your new component to a page.
Define component in Uniform#
- In Uniform, navigate to Canvas > Component Library.
- Click Add component.
- Enter the following values:
Field Value Component Name Call to Action Public ID callToAction Component icon Phone - Click Add parameter.
- Enter the following values and click OK
Field Value Parameter Name Title Public ID title Type Text - Add another parameter using the following values:
Field Value Parameter Name Text Public ID text Type RichText - From the dropdown Title Parameter, select Title.
- Click Save and close.
Implement component#
The component you created in Uniform needs to be implemented in your front-end application.
- Add the following file to your front-end application:
/components/callToAction.tsx
import { registerUniformComponent, ComponentProps, UniformText } from "@uniformdev/canvas-react"; import { UniformRichText } from "@uniformdev/canvas-next"; //ComponentProps makes the Uniform composition available //to the React component. Using this type is optional. type HeroProps = ComponentProps<{ title: string; text?: string; }>; const CallToAction: React.FC<HeroProps> = () => ( <div> <UniformText className="title" parameterId="title" as="h1" /> <UniformRichText parameterId="description" className="text" /> </div> ); // //Map the React component to the Uniform component's public ID. registerUniformComponent({ type: "callToAction", component: CallToAction, }); export default CallToAction; - Edit the following file:
components/canvasComponents.ts
// IMPORTANT: all Canvas managed components have to be imported here in order to be discovered by the <UniformSlot /> and rendered: import "./Hero"; import "./CallToAction";
- Add the following file to your front-end application:
/components/callToAction.tsx
import { registerUniformComponent, ComponentProps } from "@uniformdev/canvas-next-rsc"; //ComponentProps makes the Uniform composition available //to the React component. Using this type is optional. type HeroProps = ComponentProps<{ title: string; text?: string; }>; const CallToAction: React.FC<HeroProps> = ({ title, text }: HeroProps) => ( <div> <h1 className="title">{title}</h1> <div className="text" dangerouslySetInnerHTML={{ __html: text }} /> </div> ); // //Map the React component to the Uniform component's public ID. registerUniformComponent({ type: "callToAction", component: CallToAction, }); export default CallToAction; - Edit the following file:
components/canvasComponents.ts
// IMPORTANT: all Canvas managed components have to be imported here in order to be discovered by the <UniformSlot /> and rendered: import "./Hero"; import "./CallToAction";
Coming soon
Allow component in slot#
- In Uniform, navigate to Canvas > Component Library.
- Click Page.
- Navigate to Slots > Content.
- Under Allowed Components, click Call to Action.
- Click OK.
- Click Save and close.
Add component to page#
- Navigate to Project Map.
- Click About.
- Click on the Hero component.
- Click the green circle with a on it.
- Click Call to Action.
- Enter the following values:
Parameter Value Title Join us today! Text We are ready and waiting for you. Sign up for our newsletter. - Click Publish.
- Open your browser to http://localhost:3000/about.
Summary
Now you have updated the page on your site to incorporate a newly created component. You were able to set content on the component without having to make any code changes.
Next steps#
- Check out other starters that contain more features.
- Connect external data into one of the components.
- Add an integration for a system that's a part of your stack.
- Try out personalization.
- Deploy to your preferred delivery platform. Uniform offers special capabilities with some CDNs,such as edge-side personalization. Please refer to the list of CDN integrations.