Coveo integration
Coveo offers AI-powered enterprise search solutions and personalization.
The Uniform Coveo integration gives business users the ability to build personalized digital experiences by with content from your Coveo search platform.
The integration provides value for both content authors and developers by bringing Coveo index data into your front-end components to provide search-driven digital experiences.
This section provides guides on how to install and configure the integration and use it with Uniform Canvas.
Add Uniform integration#
The Coveo integration adds data from your search index to compositions into your Uniform project.
Before you start
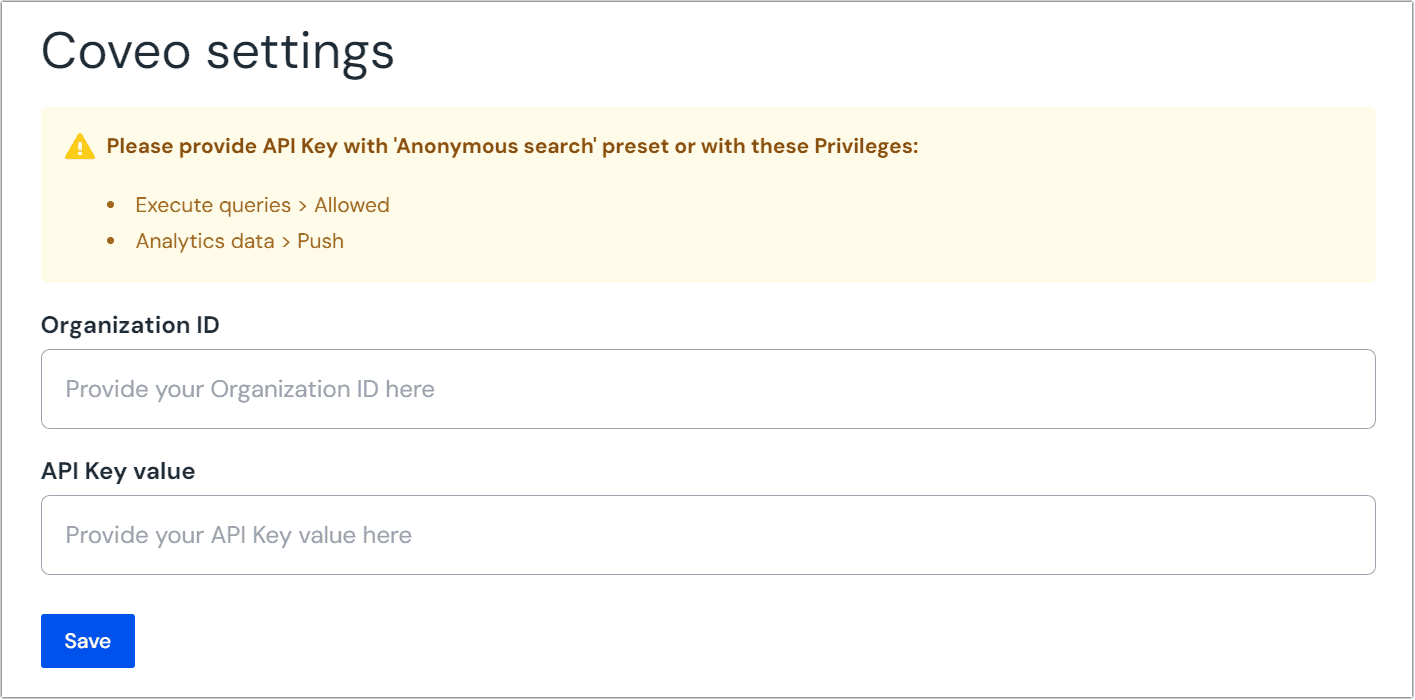
You need to have the following values from Coveo to add the integration to your project:
- Organization ID
- API key
In Uniform, open your project.
Navigate to Settings > Integrations.
Scroll to the section Browse Integrations.
Search for Coveo, find the integration and click Add to project.
 Add the integration to your project.
Enter your Organization ID and API Key value and click Save.
 Enter your organization information.
You're now ready to configure your data types to bring information into components.
Configure the data source#
Once you've installed the integration, the next step is to connect Coveo to your Uniform project by creating a new data source.
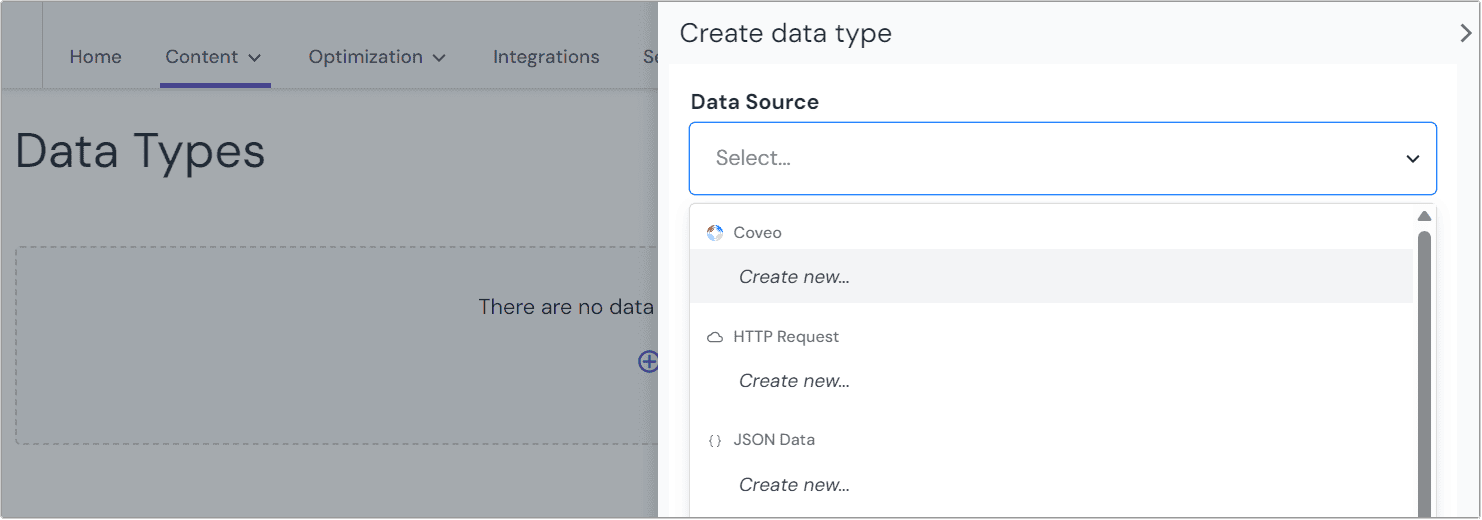
Navigate to Experience > Data Types. A data type is an element that can be retrieved from a data source, so the first step is to identify a data source.
Create a new data source click the Add data type button and select the "Create new" option under the Coveo label.
 Enter your organization information.
Name your data source. Choose a name that helps to inform your editorial users where the content is coming from. The name of the Coveo organization is a good option here.
Coveo data types#
Before you start connecting Coveo data to your Uniform compositions, it's important to first create some data types. Data types define which types of data editors can use.
Fields to configure data types appear once you've saved the data resource. Or, they can be added by going to Experience > Data Types and click the Add data type button from below the Coveo data source that you set up earlier.
Next, you will want to select and configure an archetype from the options below.
Query#
The query archetype returns a list of items from your Coveo index. You can configure the query to return different selections to expose specific data to content authors by adding additional (and optional) settings:
- Filter by source
- Select search field
- Select image thumbnail
- Facets for filtering
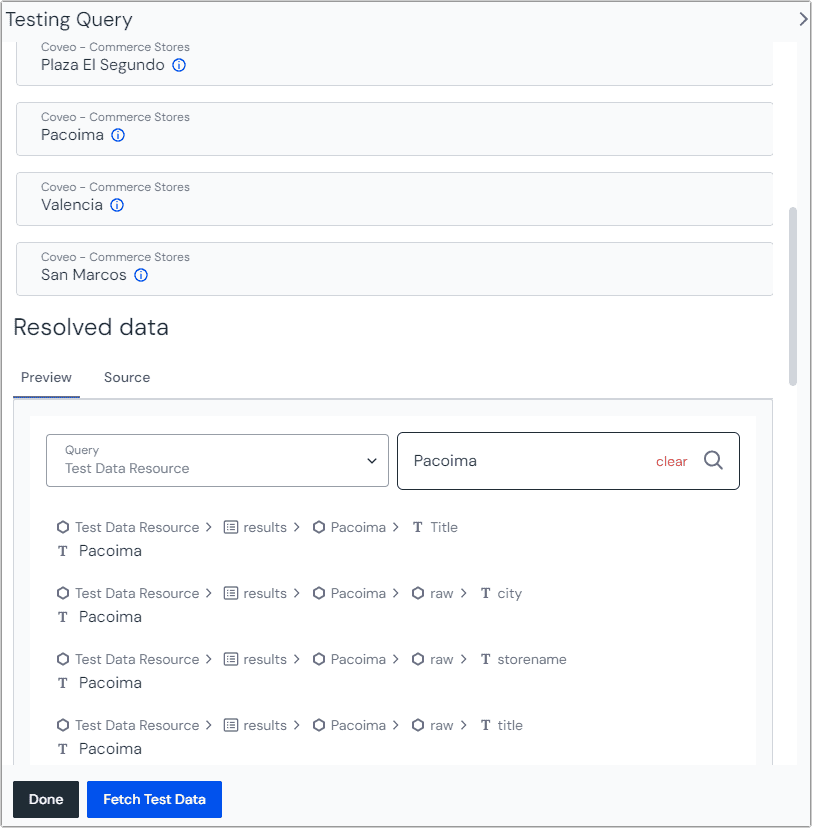
You can test your selections by clicking the Save and test button. This will show items matching the query. From here you can also Fetch Test Data to see how the data is returned in JSON format.
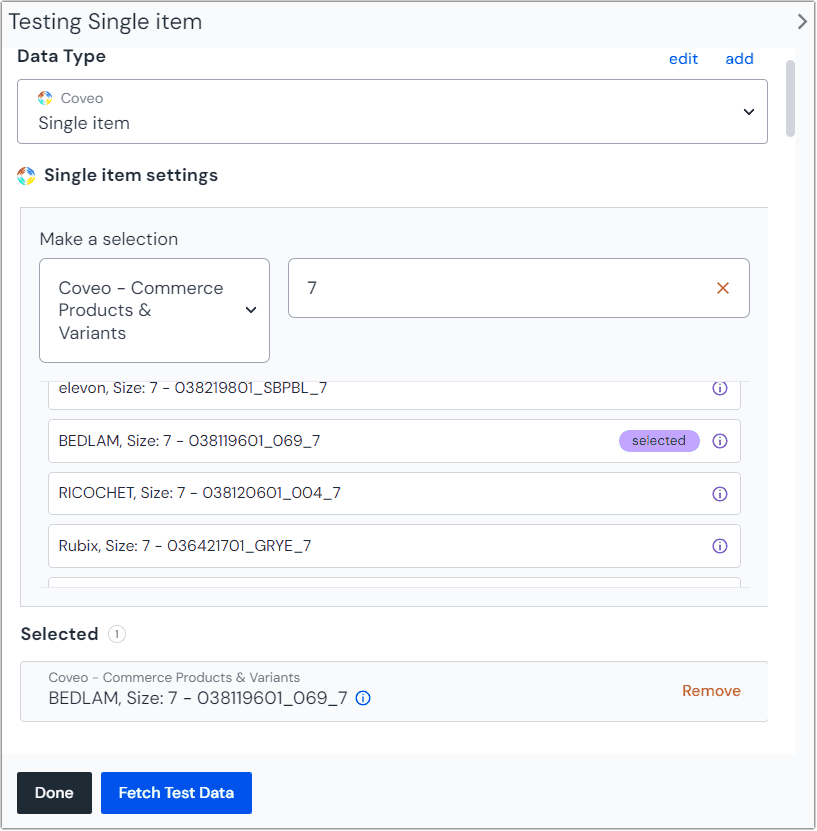
Single item#
The single entry archetype will return a single item from Coveo, based on a selection by the editor in Uniform. This is useful for non-list elements that render as an independent item. You can configure the archetype to return different selections to expose specific data to content authors by adding additional (and optional) settings:
- Filter by source
- Select search field
- Select image thumbnail
- Facets for filtering
You can test your selections by clicking the Save and test button. This will show items matching the query. From here you can also Fetch Test Data to see how the data is returned in JSON format.
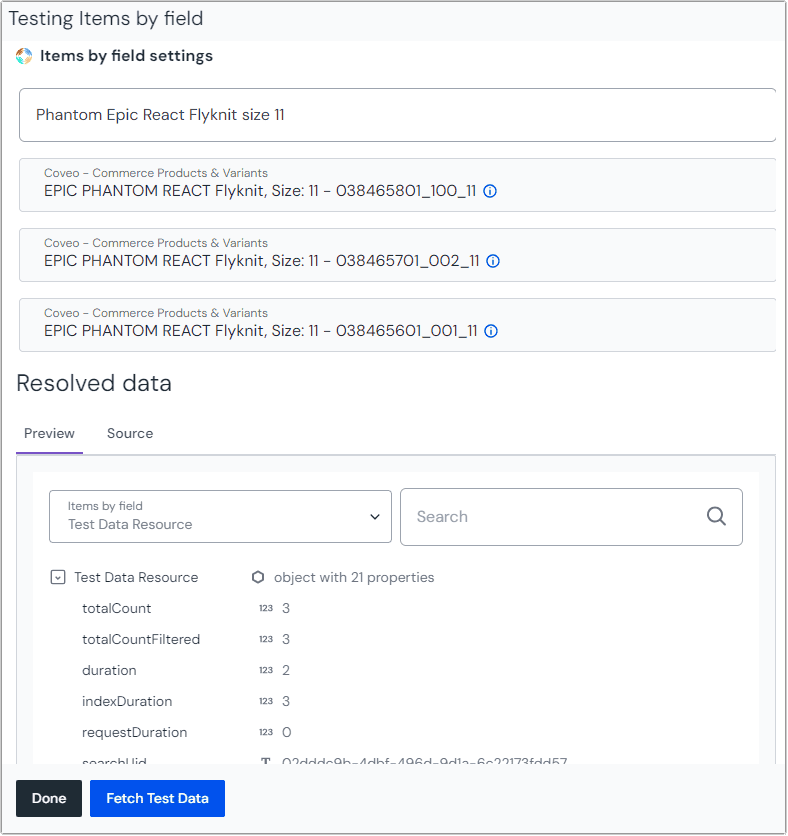
Items by field#
This archetype functions like the query archetype except that when you configure it, you can select one of the index fields for authors to define. The search will then only return exact matches. You can configure the archetype to return different selections to expose specific data to content authors by adding additional (and optional) settings:
- Filter by source
- Select image thumbnail
You can test your selections by clicking the Save and test button. This will show items matching the query. From here you can also Fetch Test Data to see how the data is returned in JSON format.
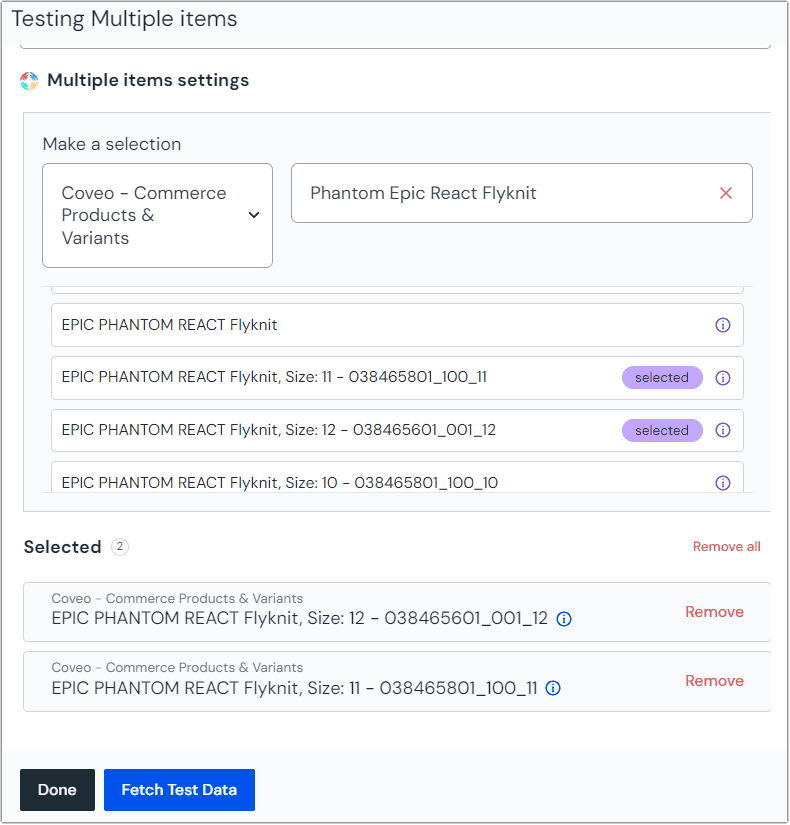
Multiple items#
The multiple items archetype lets an editor hand pick multiple items to render as a list. This is useful when a small selection of specific items is required, such as in a "featured" carousel. You can configure the archetype to return different selections to expose specific data to content authors by adding additional (and optional) settings:
- Filter by source
- Select search field
- Select image thumbnail
- Facets for filtering
You can test your selections by clicking the Save and test button. This will show items matching the query. From here you can also Fetch Test Data to see how the data is returned in JSON format.