Data source set up and data modeling
info
This page is only relevant if you are using an Edgehancer-based approach to connect to external data sources.
To connect your components to external data, first you need to specify where the data is coming from, how to connect to it, and how to query it.
On a high-level this involves the following steps in Canvas:
- Define data sources, which represent a data instance such as a CMS instance or API base URL, and store secure credentials.
- Define data types, which are a specific type of data contained in a data source such as a CMS content type or REST API resource.
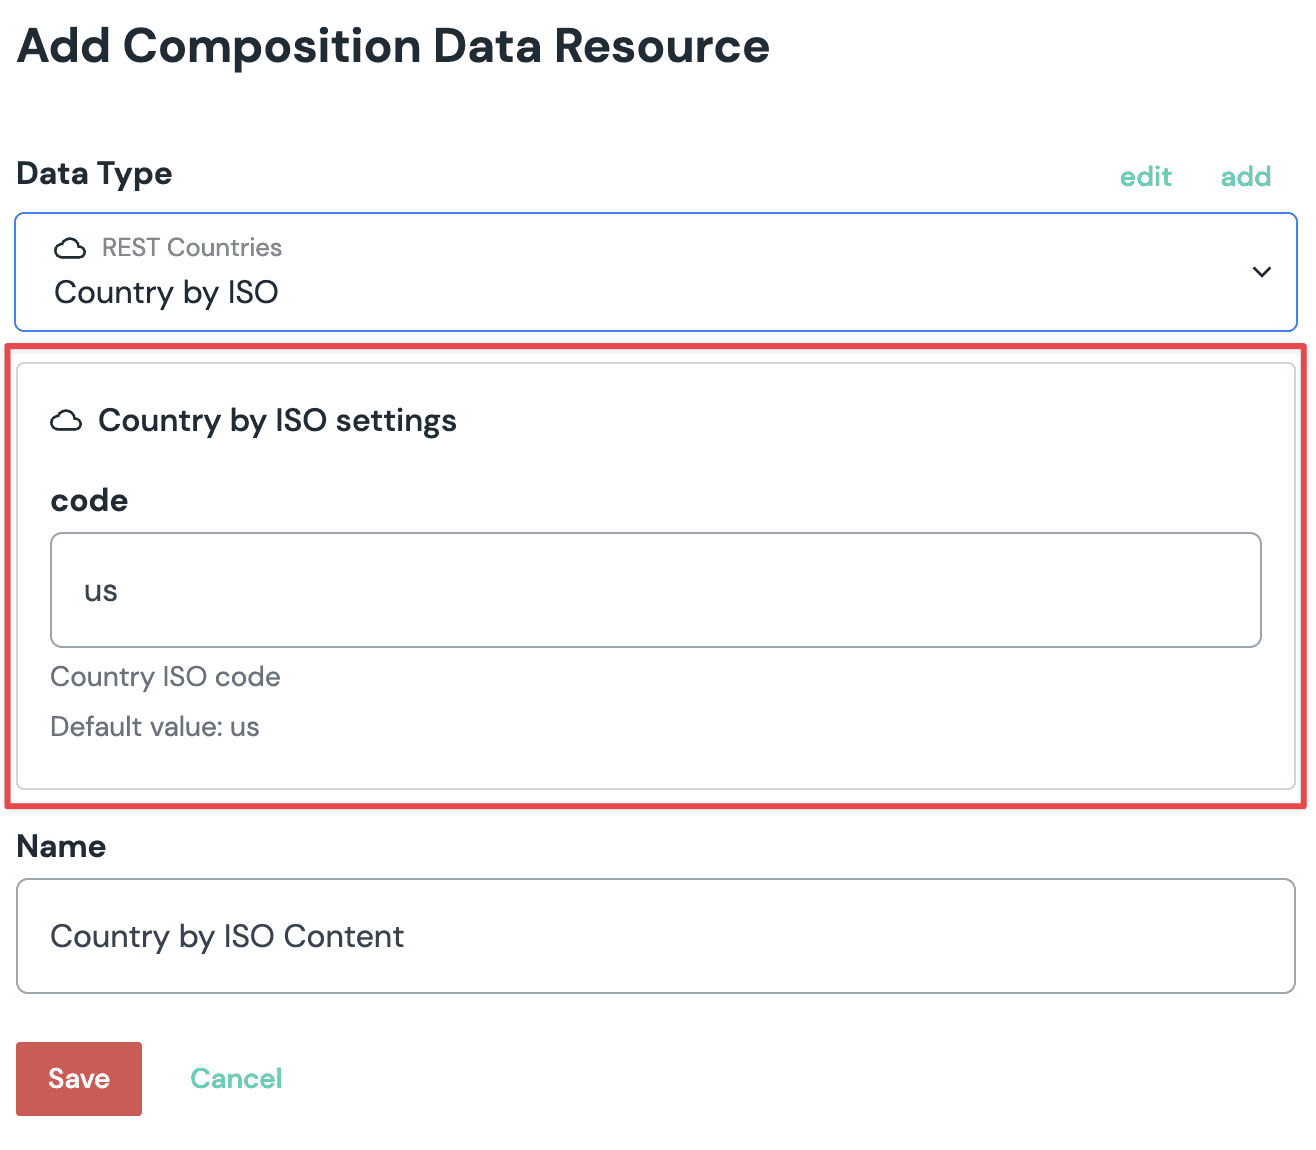
- Create a data resource or a pattern to make a specific instance of a data type available to composition or pattern, such as a specific piece of CMS content or a product query result.
Here is a visualization of these steps using an example "Search" data type:
Configure data sources#
A data source defines the common settings needed to integrate with an instance of an API. Data sources are links to sets of data. Examples of data sources might include:
- The development instance of your CMS using a specific API key
- A publicly-available API such as
https://serpapi.com, using an authorization header (resources in this API are data types) - Any composable system that offers an API that can return data in JSON format is a candidate to connect to Uniform
attention
Access credentials for APIs should only be configured in data sources where they're secure.
These credentials aren't exposed through any public API, SDK or CLI commands. They're only used internally by Uniform's Edge API to perform API calls to external services.
Data sources are based on data connectors that can provide bespoke and service-specific user interfaces and settings for managing data sources, data types, and data resources.
By default, Uniform provides two built-in data connectors:
- JSON data provides arbitrary, static JSON data for prototyping or mocking APIs. Adding this data source will let you create data types for individual JSON document data sources. You will enter:
- Name: Identifies the data source
- Public ID: Uniform auto populates this field with the information you added in the "Name" field. You can change the information in this field, but only until the data source is saved. Once created, you can't change it.
- HTTP requests bring in data from any publicly available API, such as REST or GraphQL APIs. These are a great way to add external APIs just by configuring some endpoints without having to create a custom integration. You will enter:
- Base URL of the API
- Query parameters
- Headers
In addition, installed integrations can also add their own data connectors to a project. Integrations provide a simplified user experience for retrieving data from their target system. You can also build your own integrations.
Unpublished content mode#
Some data sources support Unpublished content mode. This mode allows content authors to select and use content that hasn't been published yet (or passed through normal workflow stages to become live) when creating compositions and content entries. This is particularly useful during the content creation and review process, as it enables authors to work with the latest content updates before they are publicly available. It is also useful for previewing non-curated content lists, such as latest news, blog posts or product listings that are not yet published.
To enable unpublished content mode:
- Go to Experience > Data types
- Add or edit a data source that supports unpublished content.
- Look for the Enable unpublished content mode toggle.
- Provide additional credentials if necessary.
- Save the data source.
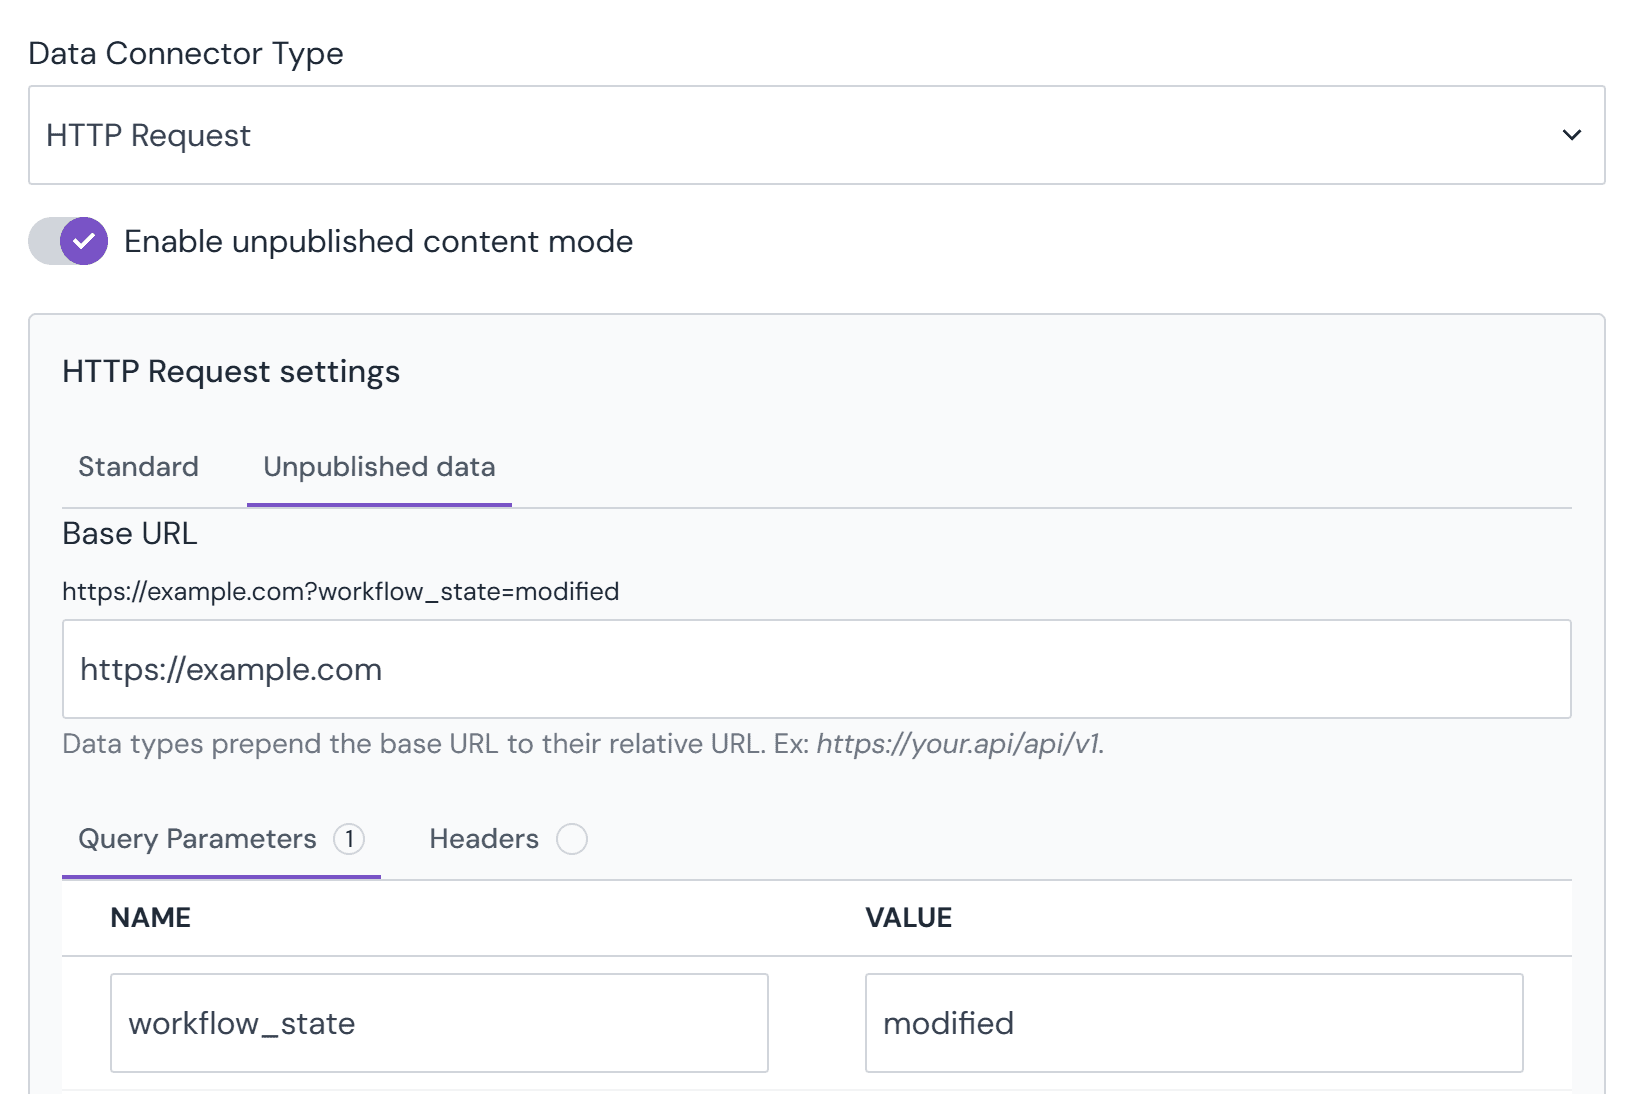
Once enabled, content authors can select unpublished content from the data source when creating or editing a data resource of the corresponding data source.
info
Not all data sources support unpublished content mode. Check the documentation of your specific integration to see if this feature is available.
Locale mapping for data sources#
When building localized experiences and integrating with third party systems there might be differences how locale identifiers are represented in each data source.
For example in Uniform you might have configured your locale for "English" using a region-specific ISO language code such as en-US but in the third party CMS or PIM system English is represented as a generic en locale code. These differences might exist due to technical reasons or to implementation decisions that were made in the past (for example when integrating a legacy system).
To make it easier to fetch locale-aware data from such external data sources where the locale definitions don't match you can define a mapping between the Uniform locales and the equivalent locale definitions in the external system.
- Edit a data source
- Expand the Locale mapping section which will show a table of all existing Uniform locales
- Enter the matching locale code from the external data source for each locale
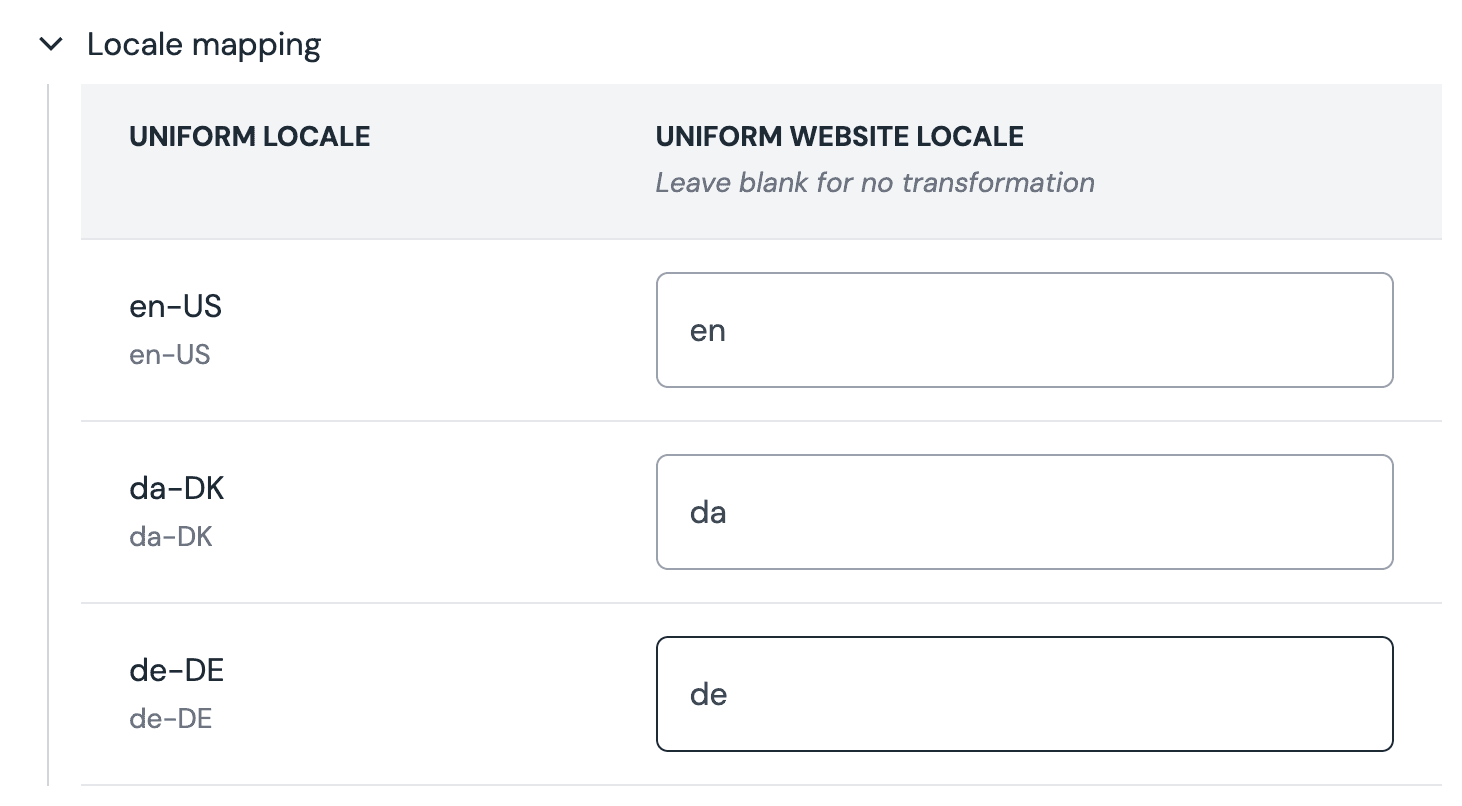
Once this locale mapping is configured the provided matching locale code will be used for all data types of the data source when fetching data with Edgehancers.
Configure data types#
Once you've configured your data sources, you can start defining which kinds of data you want to connect to by creating a data type. Data types represent a specific form of data that you want to retrieve from a data source, such as a specific product or the results of querying for a content type or product category. Behind the scenes, they extend the base URL from the data source with a specific resource path for the data type.
info
Any query strings or HTTP headers defined for the data source are automatically applied to its data types. If both define the same key, the data type will overwrite the data source.
To configure data types:
- Log into your project in Uniform and select Data types from the Content menu.
- Click the "Add data type" button. A dropdown list of available data sources is provided. The list will include any integrations that are in the project and support Edgehancers, and the built-in HTTP request or JSON data sources. If the project doesn't have any configured data sources yet, this is can be done by choosing the "Create new" option in the appropriate section.
- Depending on the chosen option the interface in the next step will differ:
- JSON data: allows you to enter a static JSON string into the "JSON Data" input
- HTTP request: define the specifics of the API call definition
- Relative path of the API endpoint
- Variables for dynamic queries
- Query parameters
- Headers
- Integration: shows integration-specific inputs for configuring which external resources to fetch from the external system.
- Give the data type a name and public ID.
- Name: Identifies the data type.
- Public ID: Uniform auto populates this field with the information you added in the "Name" field. You can change the information in this field, but only until the data type is saved. Once created, you can't change it.
- Review the Advanced Options (optional).
- Allowed on Components: Whitelist of components on which the data type can be used. Defaults to all components if left empty.
- Enable Edge Cache: Turn this off to disable caching of external data on the edge. It's enabled by default.
- Edge Cache Time: How long (in seconds) the resource data should be cached at the edge before being updated. Default is 30 seconds.
- Edge Cache Purging: Provides purge keys to invalidate the edge cache for this data type.
- Click Save to save and return to the Data types overview screen or click Test to check if the correct data is returned by the API call.
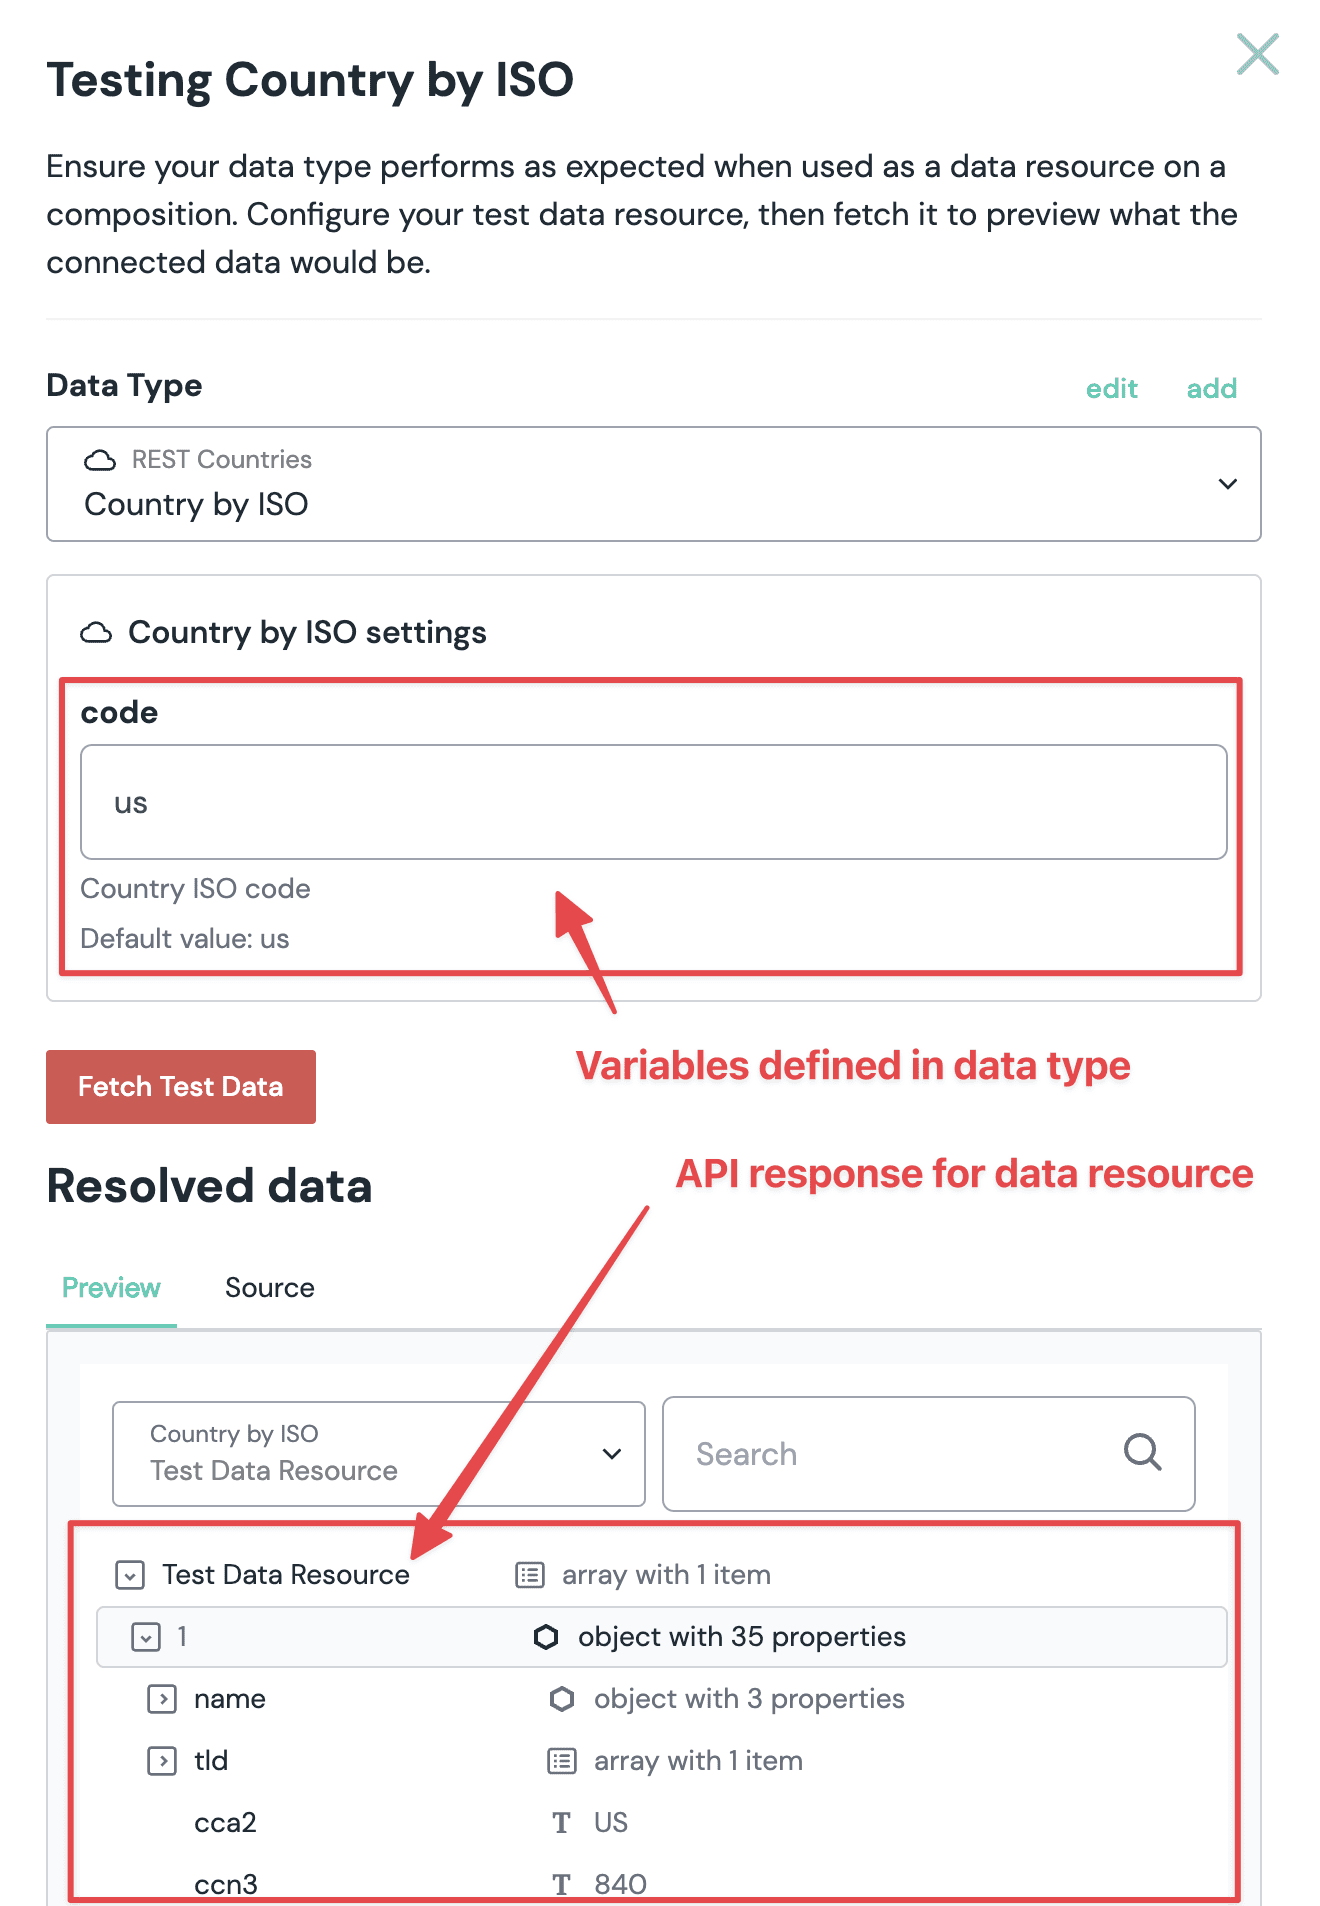 Example of testing the API response of a data type
Variables in data types#
You can create custom variables for HTTP Request data types so authors can provide a static or dynamic input value for any data resource of that data type. For example, you can let an author specify a product ID to retrieve from product data resource, or to specify a category, keyword, and page number for a product list data resource.
These variables can be inserted in any part of the API query which includes API path, query parameters, and headers. To insert a variable you need to type $$ in the input field to open the "Insert variable" dropdown. Or, you can click on the Insert Variable button on the input field and select the desired variable from the list in the dropdown:
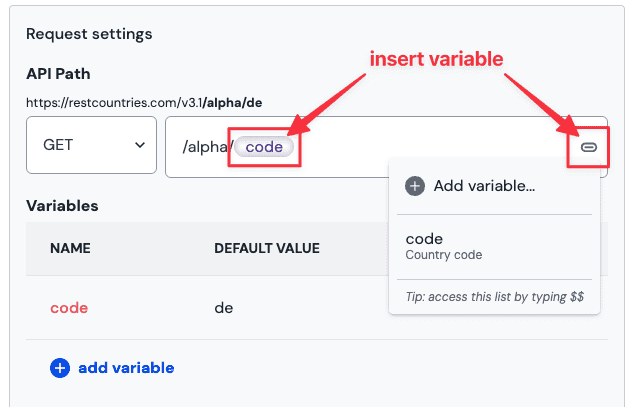
To create a new variable click on the add variable button and fill out the name, help text, and default value in the "Add Variable" form. Once you click Ok the variable is added to the variable list and can be inserted in the desired location (see screenshot above).
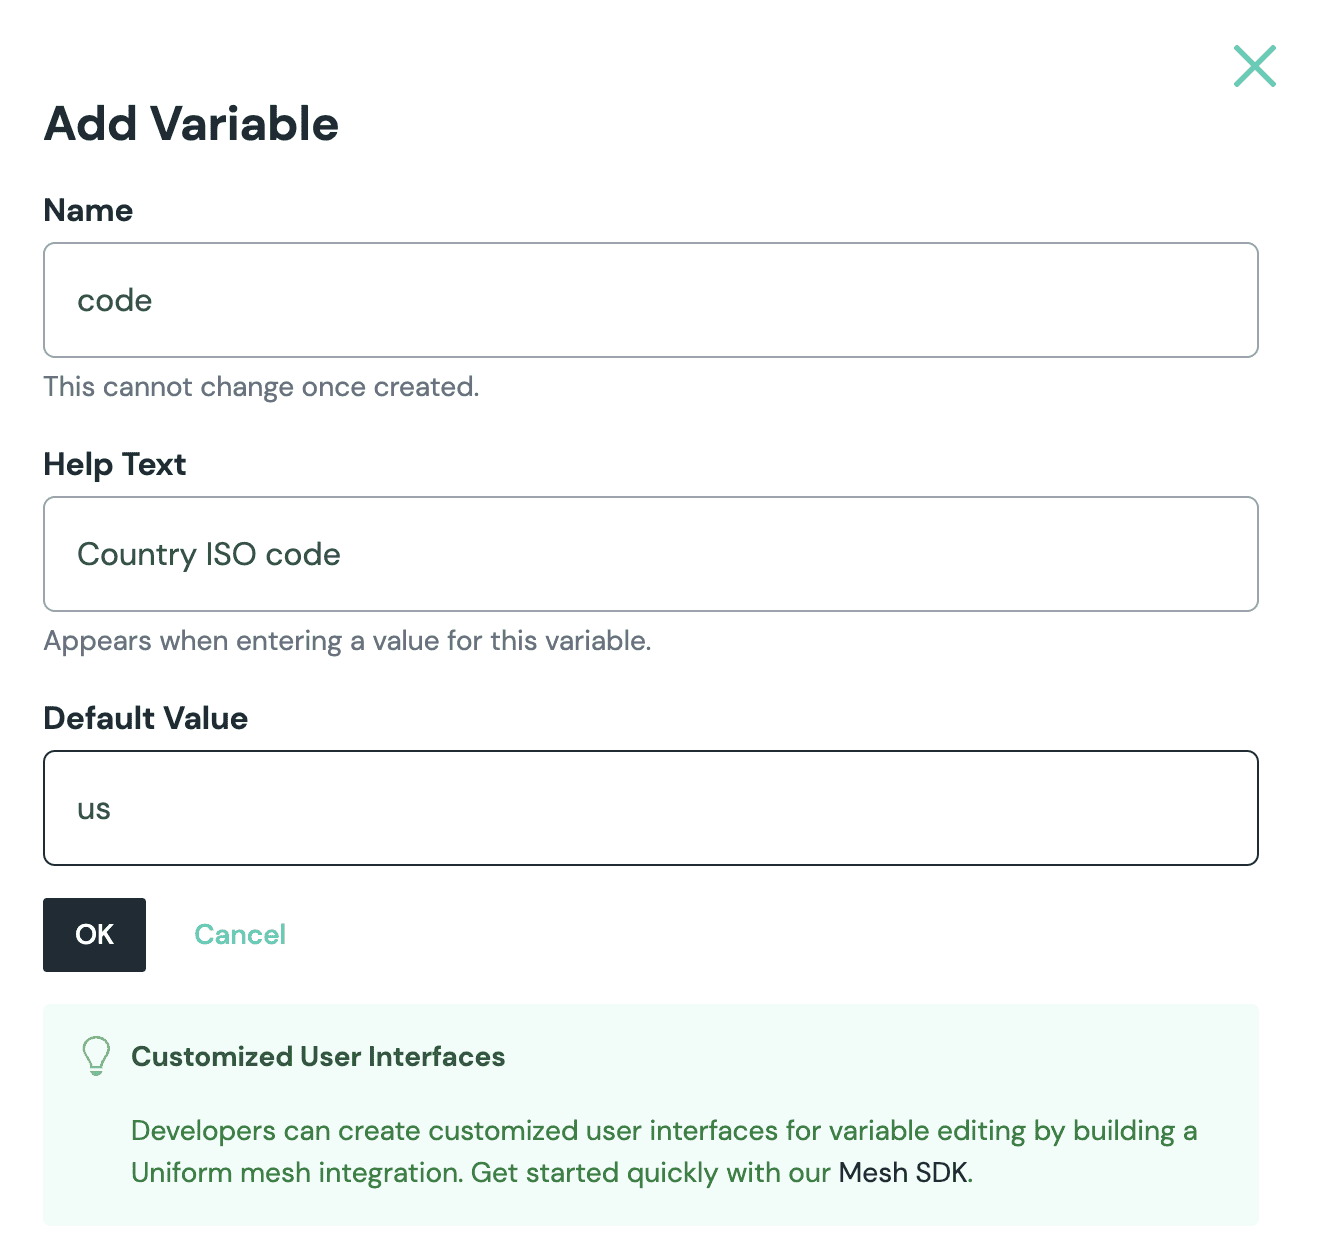
Once a variable is defined it will show up as a text input on data resources that are instantiated from the data type.
