A/B testing
Optimize your experience with A/B tests. Expose changes to some users while showing others the unchanged, original experience. Based on how users engage with the experiences, you can determine if you want to roll the changes out to the rest of the users, or if the original experience performs better.
Uniform gives you the ability to create and control all aspects of A/B tests so you can iterate faster during your digital production process.
How A/B testing works#
Uniform implements A/B testing through an A/B test component that you place within a composition. This component contains multiple variations that can be displayed to visitors. Each variation can be assigned a specific distribution percentage, which determines what portion of your audience will see that particular variation.
To select a test variation, Uniform generates a random number between 0 and 100. This random number determines which variation is shown.
For example:
| Variation | Distribution | Number range |
|---|---|---|
| Variation A | 50% | 0 - 50 |
| Variation B | 40% | 50 - 90 |
| Variation C | 10% | 90 - 100 |
Uniform matches the random number with the corresponding range for the variation. If the number generated was 40, the visitor would see Variation A.
Document your hypothesis#
Each A/B test component includes a Hypothesis field where you can document the reasoning behind your experiment. Use this field to record:
- What you expect to learn from the test
- Why you believe one variation might perform better than another
- The business goal or metric you're trying to improve
Documenting your hypothesis helps with team communication and experiment governance. It also provides context when reviewing test results later.
AI-assisted variation creation
When you use Scout to help create test variations, Scout reads the hypothesis field to understand the purpose of your test and generates more relevant content suggestions.
Measuring effectiveness#
Any effective testing strategy must be measured to make sure it's having a positive effect. To enable this, Uniform enables you to connect its test results to any analytics tool available. Each A/B Test component has a name which is sent to any connected analytics along with the variation that was selected. The resulting data can then be analyzed and reported on in any way the analytics tool allows.
Inside of the Uniform Testing dashboard, you are able to connect the Google Analytics integration and view reporting associated with the test.
Uniform ships with a connector for Google Analytics v4 (gtag), and a generic event-handling interface that adapts to any tool with minimal code.
Choosing a winner#
Once a test has been completed, a winning variation is able to be declared using the Uniform Testing dashboard. Once a winner is declared and has been republished in the dashboard, only the winning variation will be shown to every visitor on the site even if they’ve previously seen a different variation in the past.
Completed tests should periodically be removed with the winning variation directly to avoid building up a large amount of completed tests across the site.
Activate A/B testing#
If you are using Uniform Canvas, A/B testing is handled automatically. However, if you aren't using Canvas, you can still take advantage of testing, you just have to add it to your front-end application yourself.
The following example tests a component.
info
This code requires the following:
- The Uniform tracker is added to the front-end application.
- Manifest has an A/B test with the id
dxcpTest.
Handle tracker events#
You can define event handlers for the events that are emitted from the Uniform tracker during the testing process.
Test result#
Coming soon
Manage A/B testing in Uniform#
Create test#
In Uniform, navigate to the Optimization > Testing tab.
Click the red (+) button.
Enter the following values:
Field Description Name Name that describes the test. Public ID Name that uniquely identifies the test. This value is available to developers. Click Create.
note
A test involves Uniform automatically selecting one component in a slot to be displayed. Testing must be enabled on the slot with the components you want to test.
Enable testing on slot#
Before you start
Before you can test a component, you must have a component defined. For information on how to define a component, see the components guide.
In Uniform, navigate to a component with a slot that you want to test.
Click the component.
Select the slot tab and select the desired slot.
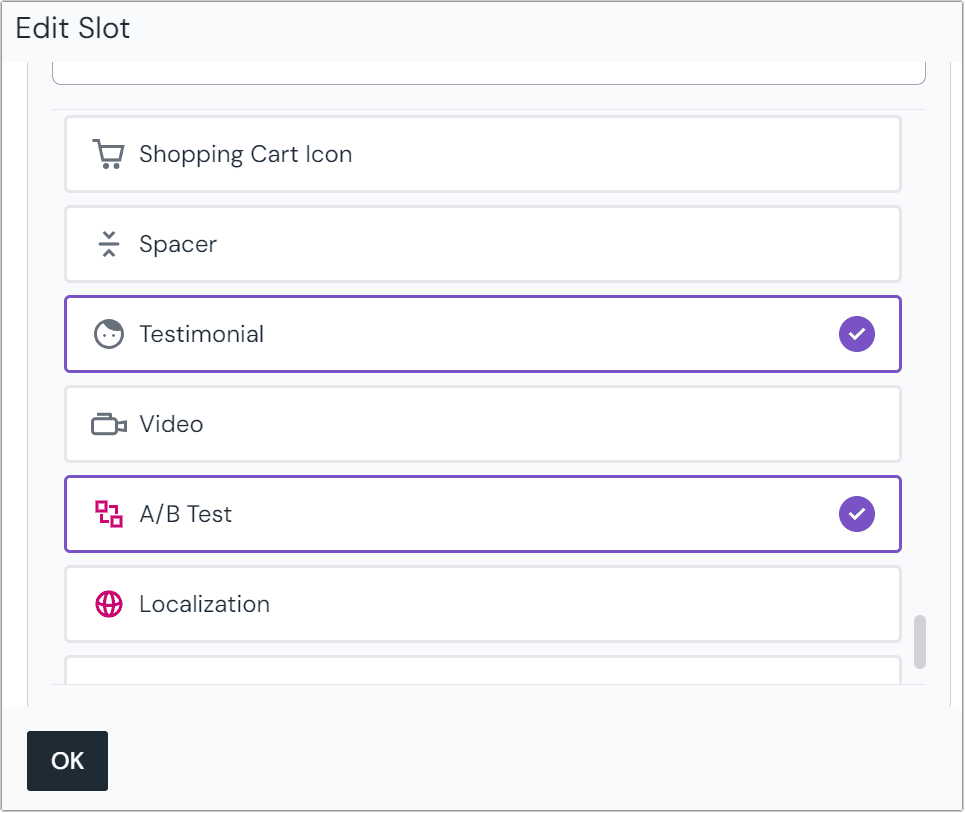
In the section Allowed Components, select the component A/B Test. You can search or find it at the bottom of the list of components.
 This configuration will allow the testimonials component to be tested in the slot.
About this step
You must have other component types selected on the slot. Those will be the component types that can be tested in this slot.
Click OK. Be sure to save and close the component.
info
Next you must configure a test on a component.
Configure test on component#
In Canvas, open a composition with a component you want to test.
Select the component you want to test.
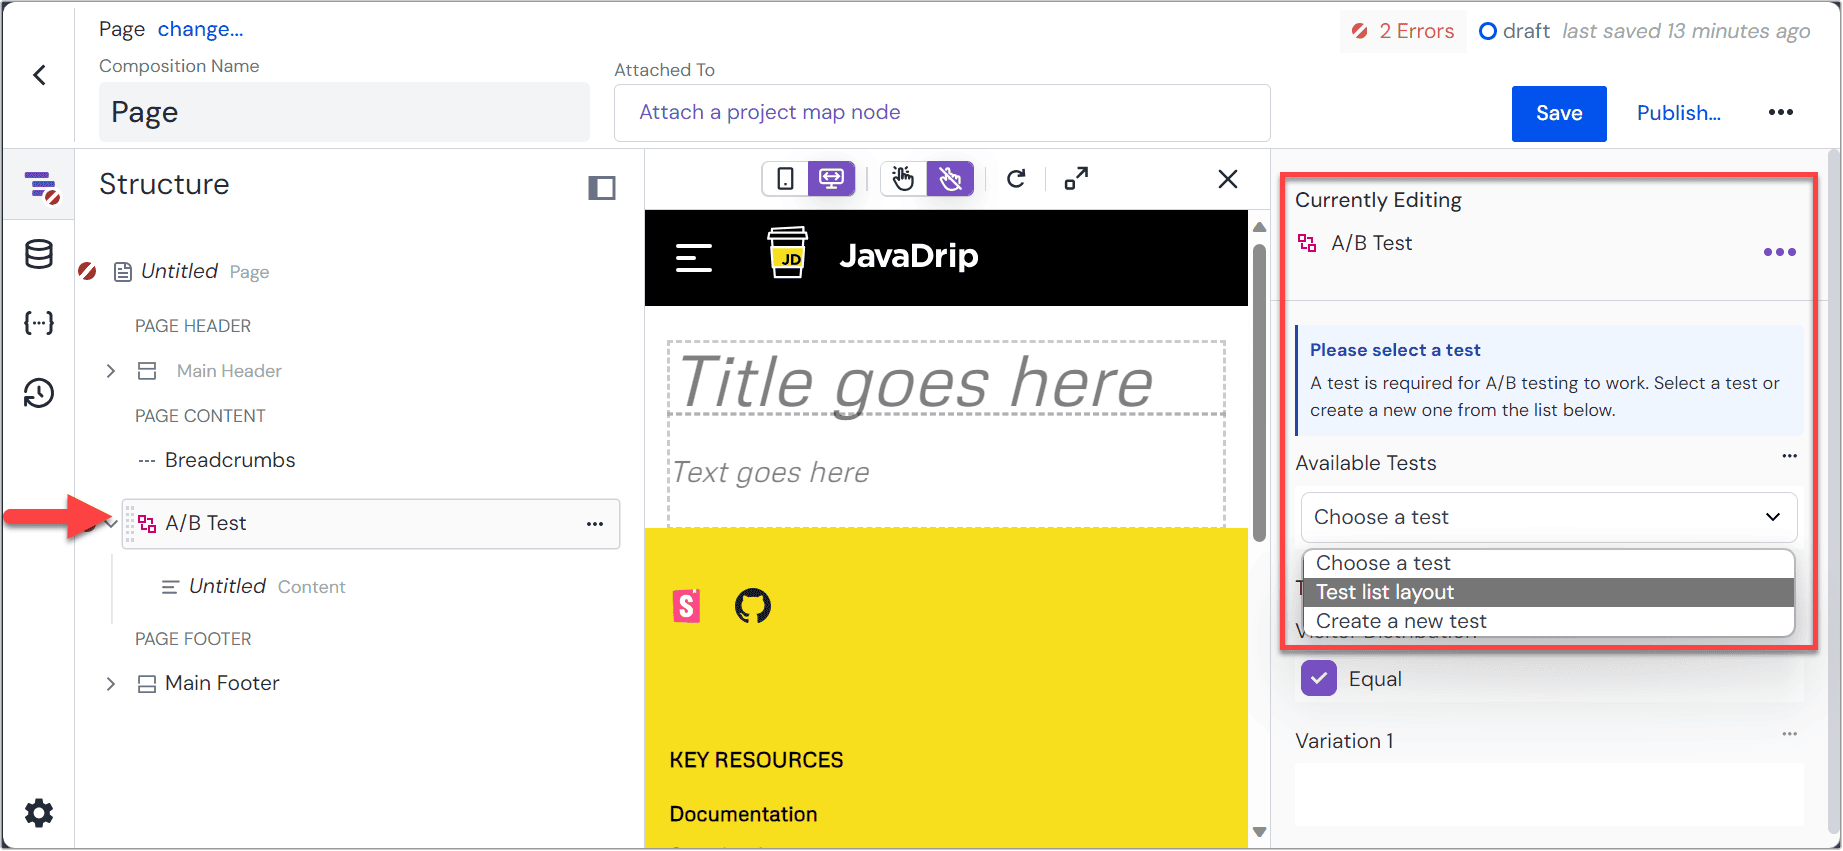
Click the Context tab in the property panel and select A/B Test This. If this button isn't available, you probably didn't complete the section where you enable testing on a slot.
About this step
When you click the button A/B Test This, a new component A/B Test is inserted as the parent of the component you have selected. You use this component to configure how the test affects the component you selected.
 A view of Canvas after selecting A/B Test This, showing the new component added as a parent. The user is selecting a previously-configured test to apply.
Add additional components under the test component.
About this step
In order for a test to do anything, there must be at least two components under the test component. These are called "test variations."
When you add additional components, new fields appear in the property panel to configure the test:
Field Description Variation name Label that describes this variation. It's used in reporting. Visitor Distribution By default (no value specified), all variations have an equal chance of being displayed. You can set this value to make this variation more or less likely to be displayed. Save the composition.
You must publish your composition before the A/B test you've configured is available to the front-end.
tip
A/B testing is already integrated into Canvas, so there are no front-end code changes you need to make. After you publish your composition, test content should be available right away.