Edge personalization
You can use Netlify Edge Functions to execute personalization on the edge. This approach gives you the user experience benefits of server-side rendering with the performance and scalability benefits of a CDN.
This section explains how to configure and enable edge-side personalization on Netlify.
tip
For more information about the benefits of executing personalization using Netlify Edge Functions, see the overview of edge-side personalization.
Before you start#
Front-end framework use
This guide is using Next.js as the front-end framework, however, this approach is compatible with any server-side render-able React or Vue meta-frameworks. Please contact us if you are using a different framework and need help putting it together.
You must have the following available to complete the instructions in this section:
- The ability to clone a GitHub repository.
- Node.js v16+ installed locally.
- An application with edge-side personalization activated.
- The application configured to be deployed to Netlify. You can use their free tier if you don't have an account.
- The Netlify CLI is installed and configured. See the instructions on this page.
- An npm access token from Uniform. Edge-side personalization requires private packages. If you don't have an access token, contact us.
Configure CLI#
Netlify CLI enables you to send commands to Netlify without having to log into the Netlify dashboard. In fact, some Netlify functionality isn't available through the dashboard.
- Install Netlify CLI with:
- Authenticate to Netlify with:
Now you are ready to create the Netlify Edge Function, which executes the personalization instructions exposed by your front-end application.
Pick your journey#
This guide provides the following options to get started:
- Option 1 - if you would like to start with a more feature rich demo to experience the power of edge-side personalization.
- Option 2 - if you would like to go through all the steps to add an edge function into your application and understand all the mechanics first.
- Option 3 - if you are starting a new project and would like to begin with a "hello world" starter kit.
Option 1: Quick start demo#
This section guides you through the process of getting a pre-built sample application deployed and running on Netlify with personalization executed using Netlify Edge Functions.
Before you start
Don't use this application as a foundation or starting point to build your own application. This is a sample app designed to demonstrate edge-side personalization using Netlify Edge Functions.
You must have the following available to complete the instructions in this section:
- The ability to clone a GitHub repository.
- Node.js v16+ installed locally.
- The Netlify CLI installed and configured. See instructions above.
- An npm access token from Uniform. Edge-side personalization requires private packages. If you don't have an access token, contact us.
Open a terminal and enter the following:
git clone https://github.com/uniformdev/examples.gitand this:
cd examples/context-edge-netlifyEnsure your npm access token is configured.
About this step
The sample code includes a file
.npmrcthat's set to look for an environment variableNPM_TOKEN. You can set an environment variable on your workstation to your npm access token to meet this requirement.Another option is to set your npm access token directly in the
.npmrcfile.Enter the following command:
npm installBeware
If you get an error like the following, the problem is most likely that either you do have your npm access token configured correctly, or the access token has expired:
'@uniformdev/context-edge-netlify@^17.0.0' is not in this registry.Run
netlify dev, which runs a local instance of Netlify, allowing you to experience the edge-side personalization before deploying it.Open your browser to the following URL.
You should see the personalized hero for "Call for papers."
In your browser, disable JavaScript. You should still see the personalized hero because personalization is happening in the Netlify Edge Function, not in the browser.
Enter the following command:
netlify deploy --build --prodAfter the application is deployed, you can visit the site to see personalization executed by Netlify Edge Functions.
Option 2: Add Edge Function to your app#
This section guides you through the process of activating edge-side personalization on an existing web application using Netlify Edge Functions.
Step 1: Add Uniform Context into your app#
Follow this guide to get your web app instrumented with Uniform Context SDK and configured to run in edge mode by following this guide.
Don't forget
There are two crucial steps you must configure in order for the rest of the steps to work:
NextCookieTransitionDataStoreis configuredoutputType="edge" is set on UniformContext:<UniformContext outputType="edge" />`
Step 2: Create your Edge Function#
This section guides you through the process of building a Netlify Edge Function that can execute Uniform personalization instructions by explaining each step. It takes longer to go through, but it will help you understand why each line of code is needed.
Add the following environment variable to your workstation:
Name Value NPM_TOKENThe npm access token from Uniform. You can't set this value in the
.envfile. That file defines environment variables available within your app, while this environment is needed by another app (such as npm).You can set the environment variable to be system wide or just active in your current terminal.
Add the
.npmrcfile to the root of your application. This file ensures you can access the private packages required for edge-side personalization://registry.npmjs.org/:_authToken=${NPM_TOKEN} engine-strict = trueAdd the following package that includes the SDK to execute personalization via Netlify Edge Functions:
npm install @uniformdev/context-edge-netlifyAdd the following packages as dev dependencies to add cross-platform utility to copy files and run multiple npm scripts (this is optional if you'd like to manage the
copy:denonpm script differently):npm install shx --save-dev npm install npm-run-all --save-devAdd the following two npm scripts to
package.json:"copy:deno": "shx cp node_modules/@uniformdev/context-edge-netlify/dist/index.deno.js lib/uniform", "postinstall": "run-s copy:deno"Netlify Edge Functions run in the Deno runtime instead of Node.js. The package @uniformdev/context-edge-netlify is Deno-compatible. The file in this package must be packaged with the Edge Function during the build process. This script copies the file to a place where it can be picked up at build-time.
Run the following command to copy the deno file to expected location:
npm run copy:denoCreate an empty
context-middleware.tsfile under/netlify/edge-functionsfolder.Add the following imports:
import { createEdgeContext, createUniformEdgeHandler, } from "../../lib/uniform/index.deno.js"; import manifest from '../../contextManifest.json' assert { type: 'json' }; // @ts-ignore: deno imports failing next build import type { Context } from "netlify:edge";This import statement assumes the name and location of your Uniform manifest. If you file is in another location, you will need to change this statement.
Add the edge function body:
export default async (request: Request, netlifyContext: Context) => { const IGNORED_PATHS = /\/.*\.(ico|png|jpg|jpeg|svg|css|js|json)(?:\?.*|$)$/g; if (request.method.toUpperCase() !== "GET" || request.url.match(IGNORED_PATHS)) { return await netlifyContext.next({ sendConditionalRequest: true }); } // this creates the context object that has controls how the personalization process works. const context = createEdgeContext({ manifest, request, }); // This code creates the component that makes a request // to the origin and executes any personalization instructions in the response. const originResponse = await netlifyContext.next(); const handler = createUniformEdgeHandler(); // This code uses the proxy edge handler to make a request to the // origin and execute the personalization instructions in the response. const { processed, response } = await handler({ context, request, response: originResponse, }); if (!processed) { return response; } return new Response(response.body, { ...response, headers: { // ...response.headers, Symbol cannot be destructured 'Cache-Control': 'no-store, must-revalidate', 'Content-Type': 'text/html; charset=utf-8', // To apply automatic deno compression, more info https://deno.com/deploy/docs/compression Expires: '0', }, }); };About this step
The Netlify Edge Function will be applied to all paths. (This isn't a requirement. it's simply the way this example is implemented.) Therefore, the function will need to know which paths it should evaluate and which it should not. The paths that match this expression are known to be static files that have no personalization instructions in them.
The function passes control back to Netlify if the request that isn't an HTTP GET or if it matches the ignored path expression. This means the Netlify Edge Function won't try to execute personalization instructions for the request.
Step 3: Deploy your application#
Add the following file:
[[plugins]] package = "@netlify/plugin-nextjs" [[edge_functions]] path = "/*" function = "context-middleware"About this step
Netlify uses this file during the build and deployment process. This file provides the following instructions to Netlify:
- Use the Next.js plugin during the build process.
- Route all requests to the specified Edge Function.
Enter the following command to do a production build and deployment of the site:
netlify deploy --build --prodDuring the build process you will see log messages in the console.
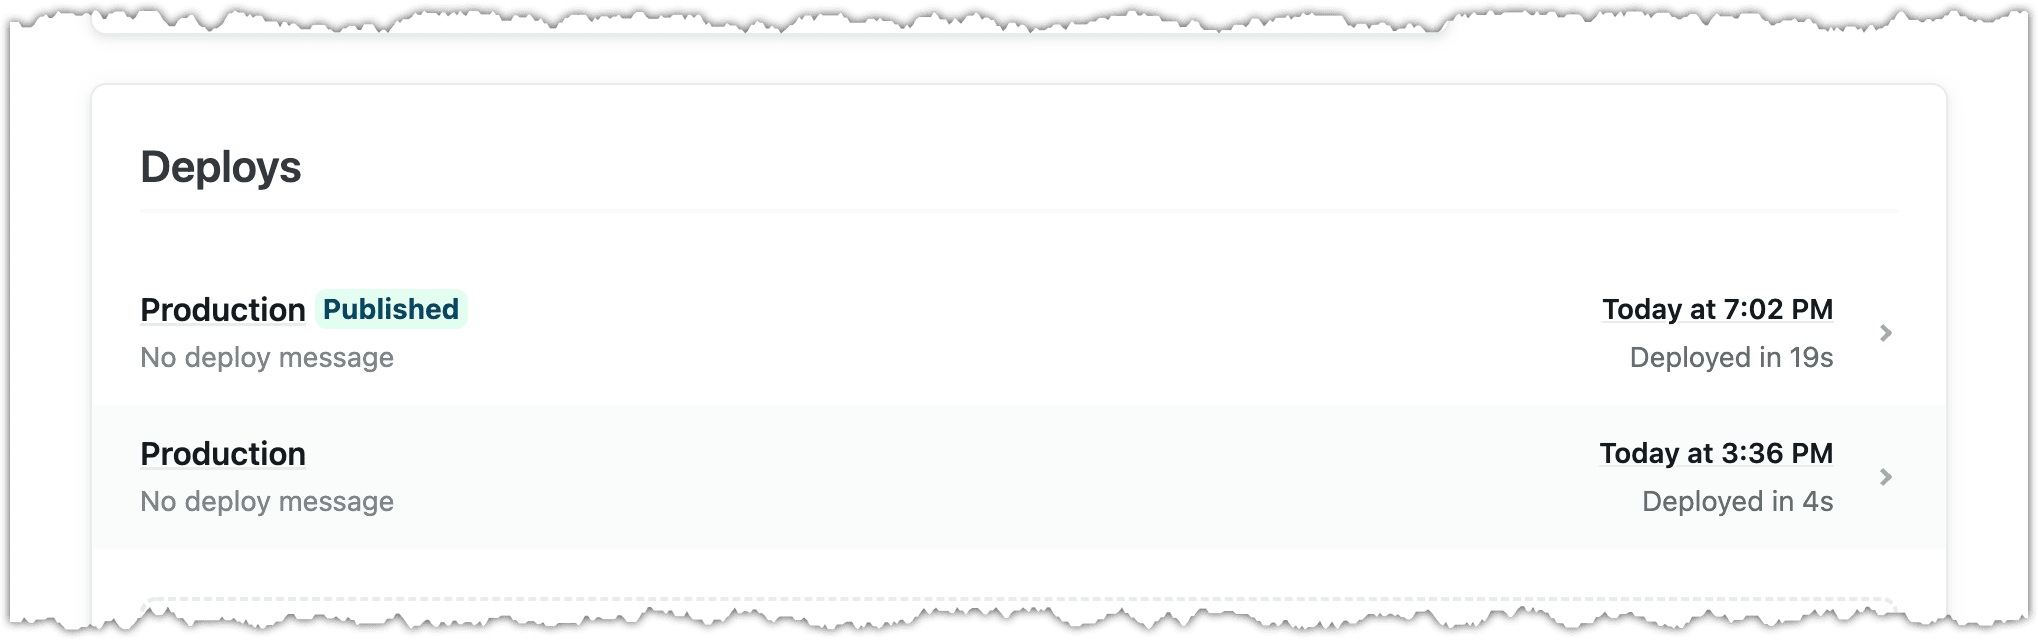
In Netlify, navigate to Deploys, where you will see your application was deployed:
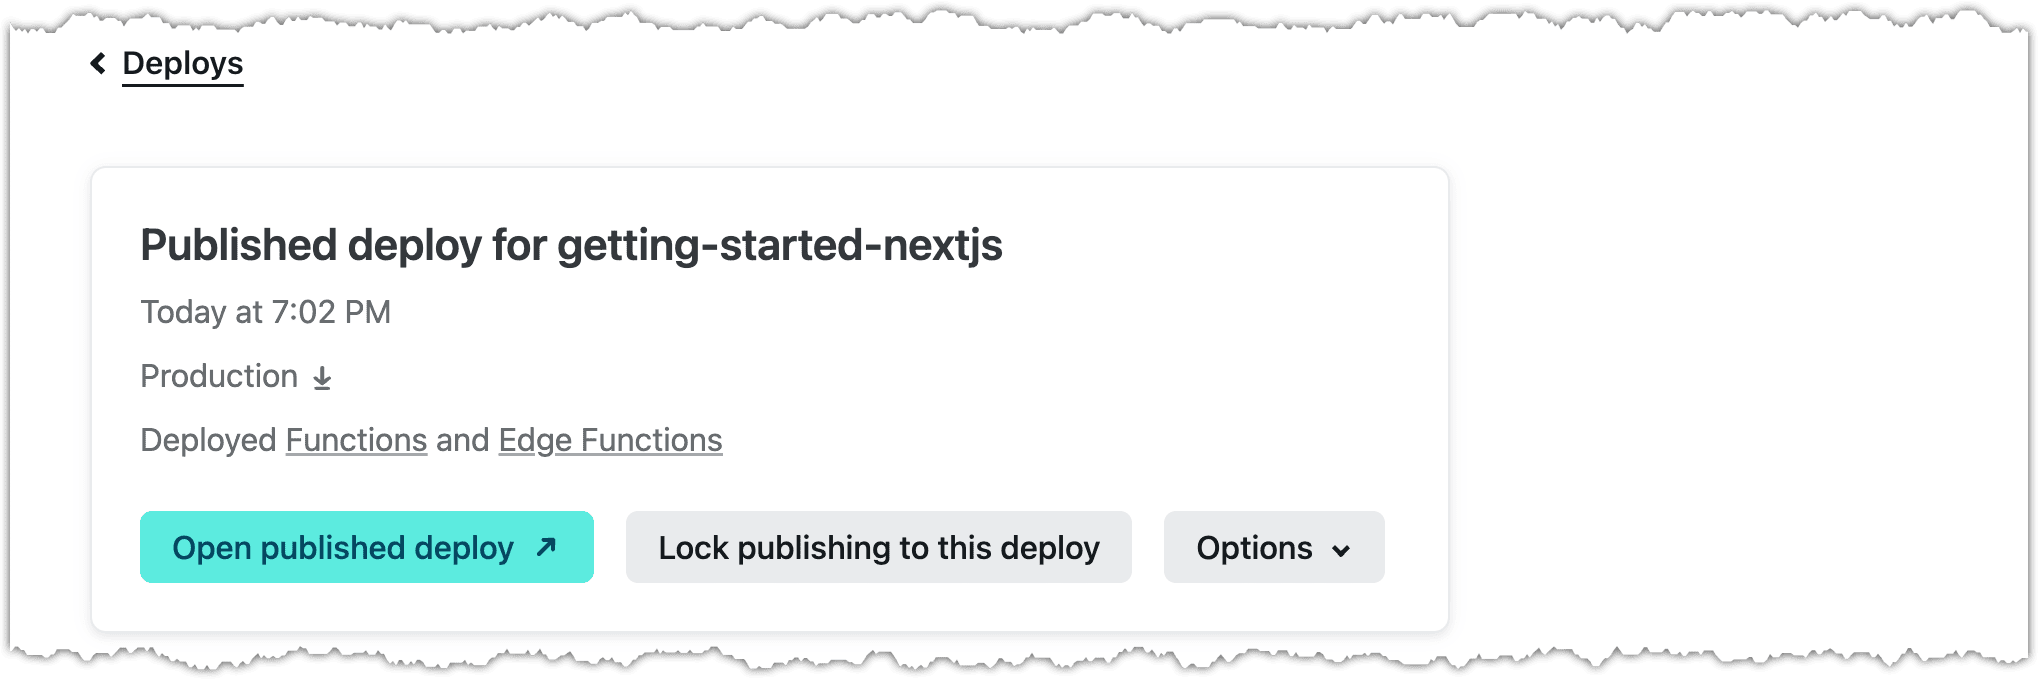
Click the deployment and you will see the edge functions were deployed:
After the application is deployed, you can visit the site to see personalization executed by Netlify Edge Functions.
You can confirm personalization is running in Netlify if you have personalization based on a query-string parameter. Disable JavaScript on your browser and then view a page with personalization. If you see personalized content, you know the personalization was executed in Netlify.
Next steps
Now that you have Netlify delivering edge-side personalization, you might want to take advantage of another feature available when you run personalization using Netlify Edge Functions: location-based personalization.
Option 3: Use Next.js starter#
If you are kicking off a new project using Next.js, consider using this option.
Before you start
You must have the following available to complete the instructions in this section:
- The ability to clone a GitHub repository.
- Node.js v16+ installed locally.
- The Netlify CLI installed and configured. See the instructions on this page.
- An npm access token from Uniform. Edge-side personalization requires private packages. If you don't have an access token, contact us.
Step 1: Get started locally#
Open a terminal and enter the following:
git clone https://github.com/uniformdev/examples.gitand get into the new directory:
cd examples/context-edge-netlifyEnsure your npm access token is configured.
About this step
The sample code includes a file
.npmrcthat's set to look for an environment variableNPM_TOKEN. You can set an environment variable on your workstation to your npm access token to meet this requirement.Another option is to set your npm access token directly in the
.npmrcfile.Run
npm installEnter the following command:Beware
If you get an error like the following, the problem is most likely that either you do have your npm access token configured correctly, or the access token has expired:
'@uniformdev/context-edge-netlify@^17.0.0' is not in this registry.Run
netlify dev, which runs a local instance of Netlify, allowing you to experience the edge-side personalization before deploying it:Open your browser with http://localhost:8888/?utm_campaign=launch.
You should see the personalized hero matching the signal that evaluates when utm_campaign=launch is on the HTTP request.
In your browser, disable JavaScript. You should still see the personalized hero because personalization is happening in the Netlify Edge Function, not in the browser.
Step 2: Deploy this app to your own Netlify account#
Run this command to build and deploy this app to production:
After the application is deployed, you can visit the site to see personalization executed by Netlify Edge Functions.
Step 3: Wire this app to your own Uniform project#
Prerequisites
You must have access to a Uniform team with the ability to create new projects. If you are an active customer or a partner, please get in touch with your Uniform team administrator colleague and ask for an invite.
If you are not sure or your company does not have a Uniform team, you can request a sandbox here.
- If that's your first time creating a team, your first project will have the Hello World starter already installed.
- Head over to the Project Integrations -> Hello World
- Scroll to the section where steps 1 through 4 are displayed and click on the "Generate environment variables" button.
- Paste this environment variables into your
.envfile instead of the demo environment variables.
Now you are connected to your own Uniform project. You can now re-deploy it.