Content types
Content types represent the structure for individual pieces of content stored within Uniform. For example, a blog post could have a single-line text input for title, a multi-line text input for summary, a date picker for publish date, and a rich text editor for body. Each of those elements is referred to as a field.
Organize and find your content types
Use favorites to bookmark the content types and block types you use most, My recents to return to ones you recently worked on, and search, filter, and sort to find a specific one.
Create a content type#
In Uniform, open your project.
Navigate to Experience > Content Types.
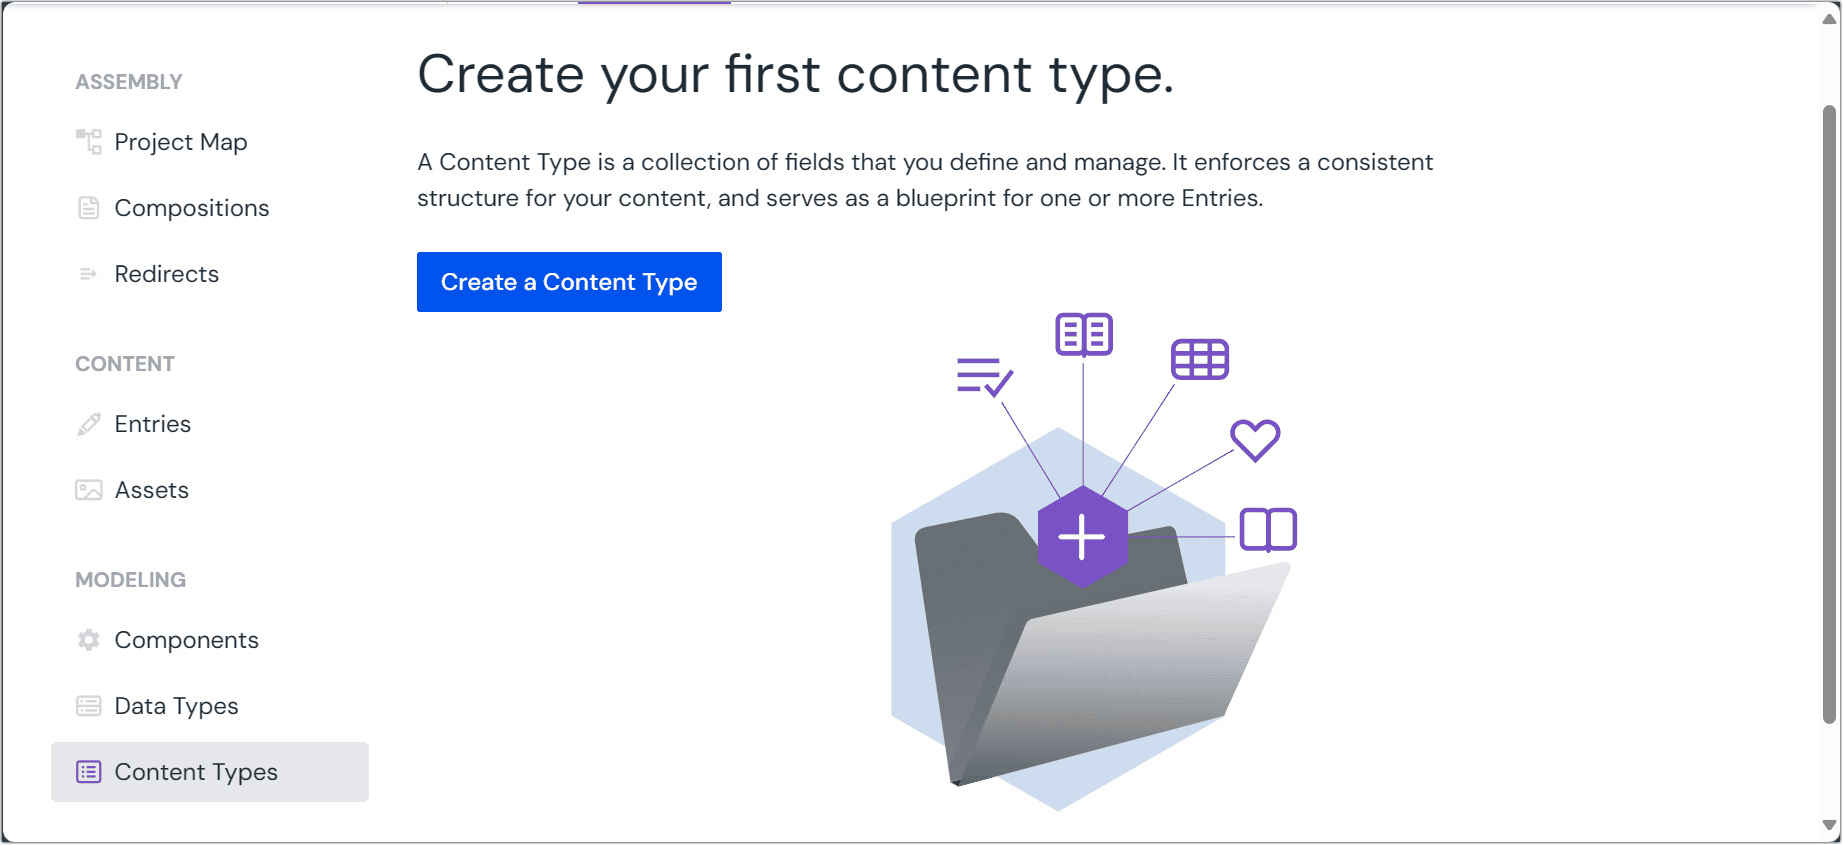 Content Types view. When the list is empty, click Create new; otherwise click Add content type, then choose Content type or Block type.
Click Create new (when you have no content types yet) or Add content type (when the list already has items), then select Content type. For a block type, select Block type instead (see Blocks).
On the General tab, enter the following values:
Field Description Is required? Content Type Name Name that describes the content type or its purpose. Required Public ID Unique identifier for the content type, available to developers. Cannot be changed after the content type is created. Required Autogenerate data types If selected, data types for the content type will be automatically generated. Icon The icon displayed next to the content type and any entries created from it. This helps users identify the type at a glance. Description A brief description of what the content type is for to help authors understand how entries created from it will be used. Workflow Optionally assign a workflow to manage the content creation and publishing process for entries of this content type. Only available if you have defined workflows in your project. Click Save and close to create the content type (or Save from the ⋮ menu to save and stay in the editor).
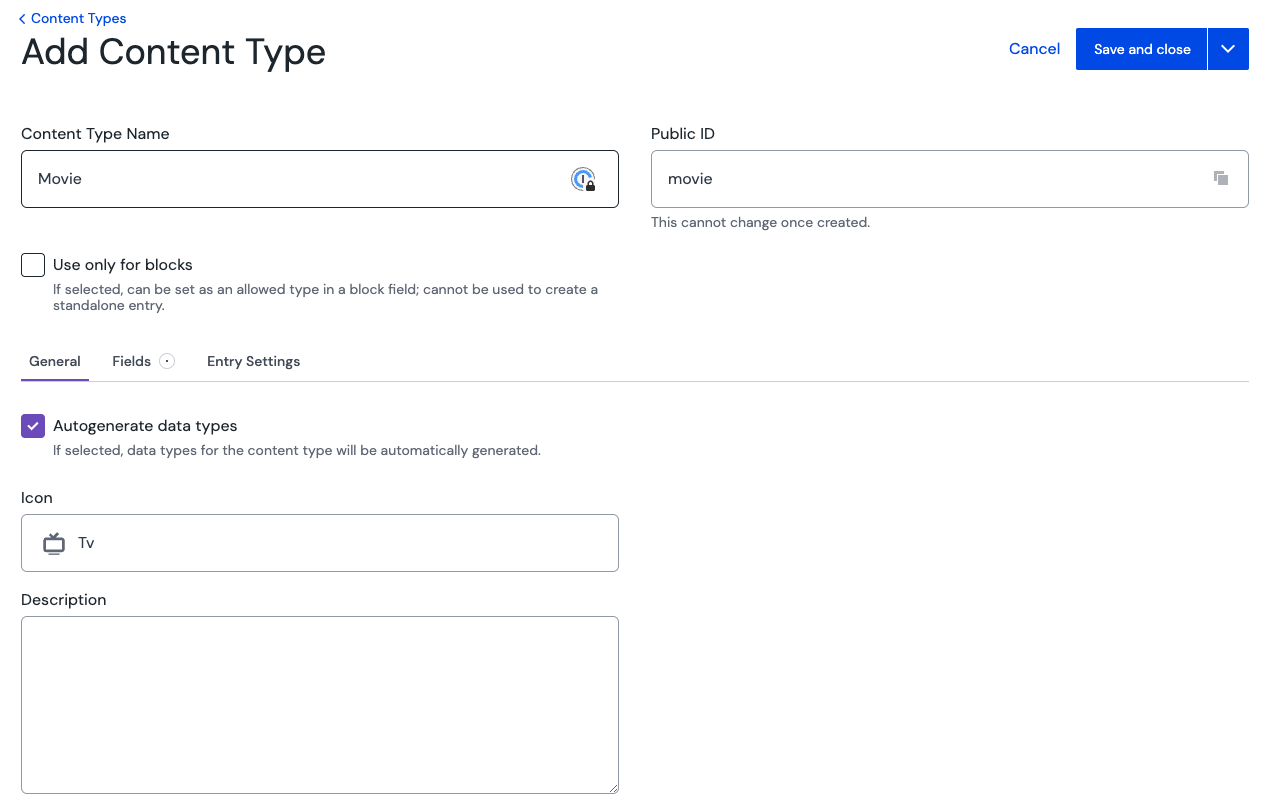 Example: Add a 'Movie' content type.
Fields#
Fields are the individual pieces that make up a content type. To add a field:
Your content type needs to have at least one field. Check our fields guide for more information on how to add fields to your content type.
Entry settings#
Content types include several configuration options that control how entries behave and are managed within your project.
Slug settings#
Slugs provide human-readable URL identifiers for your entries.
Enable and require slugs: You can choose to enable slug generation for entries of this content type. When enabled, you can also make slugs required, ensuring every entry has a URL-friendly identifier.
Slug uniqueness: Control how unique slugs must be across your content:
- None: No uniqueness requirement - multiple entries can have the same slug
- Within the type: Slugs must be unique among entries of the same content type
- Global: Slugs must be unique across all entries in your project
Slug validations: Use regular expressions to define custom validation rules for the slug format.
Permissions#
warning
Permission overrides at the content type level are deprecated and will be replaced in a future release with centralized role-based policies.
You can override team permissions for each role at the content type level to set read, write, create and delete permissions.
Previews#
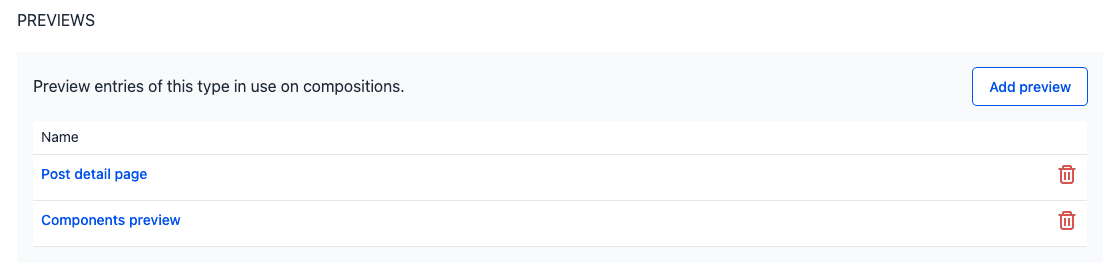
You can configure how content authors can preview entries of this content type before publishing.
Each content type can have multiple entry previews defined.
An entry preview links to a dynamic composition that is used as the detail page for the entry. The dynamic inputs are set to the entry fields. Most commonly this is the slug of the entry.
Add or edit an entry preview#
Follow these steps to configure a preview for your content type:
Open the preview configuration:
- To add a new preview: Click Add preview to open the preview configuration drawer
- To edit an existing preview: Click the name of the preview you want to modify
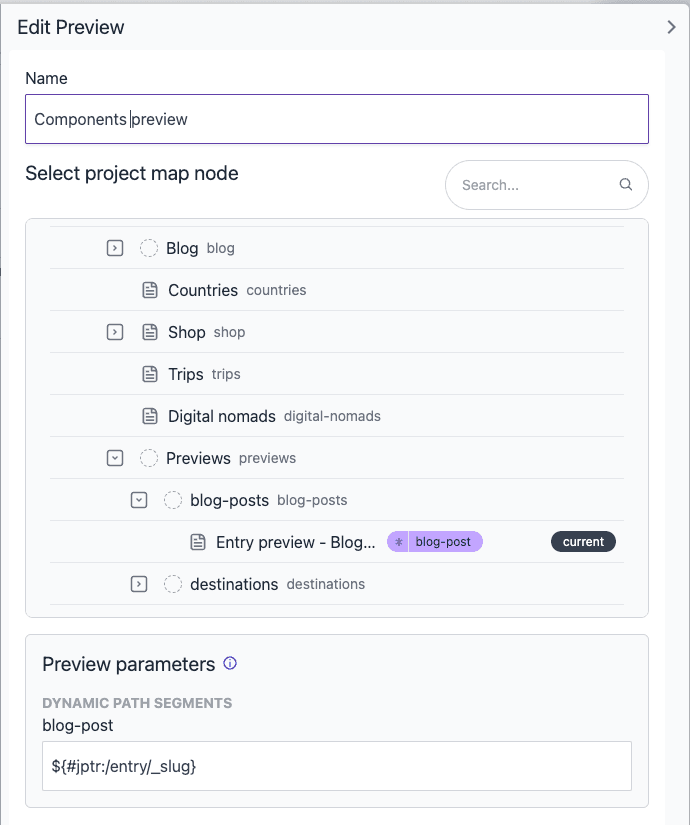
Name your preview: Enter a descriptive name for the preview. This name appears in the preview dropdown menu when authors are editing entries, so choose something that clearly identifies the preview context (e.g., "Product detail page" or "Blog post preview").
Select the target project map node: Choose the project map node that will display the entry. This should be a dynamic node configured to accept entry data as dynamic path segments. Typically, this is your content detail page template.
Configure dynamic path mapping: Set up how entry data maps to the composition's dynamic segments:
- JSON pointer syntax: Use JSON pointer notation to reference entry data. The syntax follows the pattern
${#jptr:/entry/path/to/field} - Common examples:
- Entry slug:
${#jptr:/entry/_slug} - Field values:
${#jptr:/entry/fields/fieldName/value} - Slug on a reference field:
${#jptr:/entry/fields/referenceFieldName/value/entry/_slug}
- Entry slug:
tip
Quick setup: Enable "Use entry slug" to automatically use the entry's slug when no custom mapping is specified. This works well for most content detail pages.
To find the correct JSON path for your entry data, navigate to any entry of this content type and select View Source → Edgehanced to see the available data structure.
- JSON pointer syntax: Use JSON pointer notation to reference entry data. The syntax follows the pattern
Save the preview: Click Accept to save your preview configuration. The preview will be available to content authors when editing entries of this type.