Make card templates in Asset Studio
A card template sets the layout of an Open Graph card: which copy the author types, where it goes, and how it looks. Asset Studio has three built-in templates. Your team can add its own templates, for example with your brand colors, your typeface, and your logo.
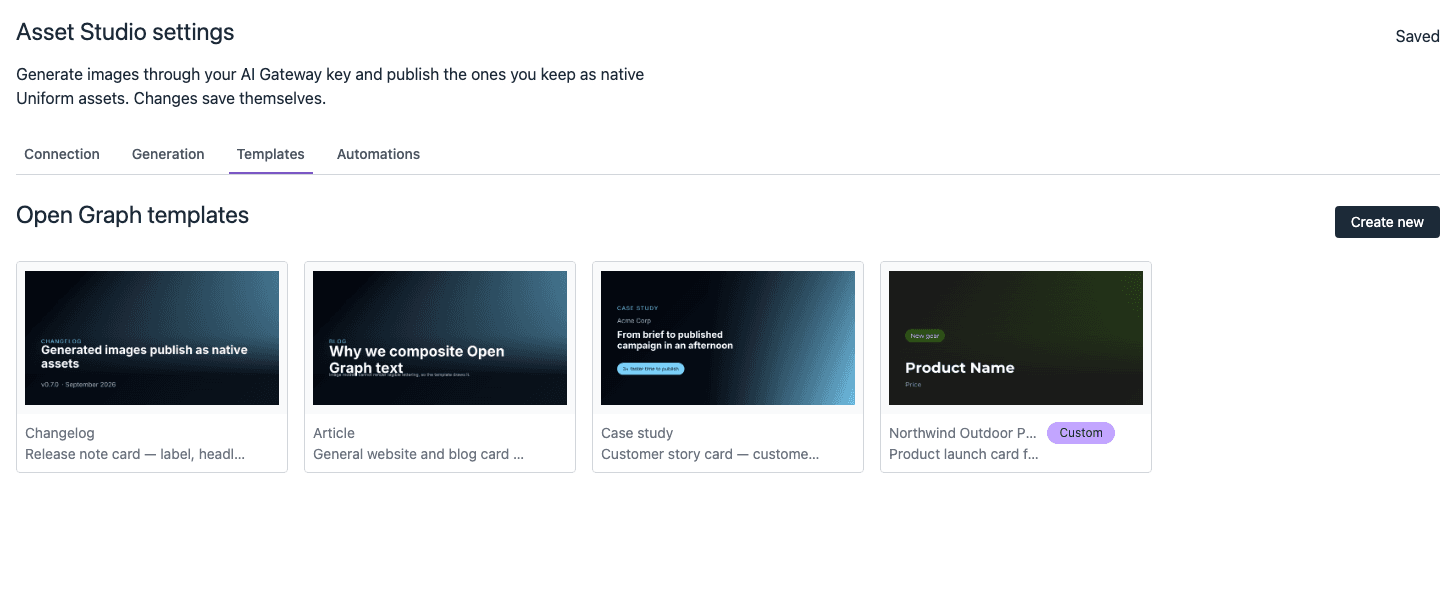
Each template that you save shows in all Asset Studio places in the project, with the Custom badge.
Prerequisites
- Asset Studio is set up in the project.
- You can change the integration settings of the project. Templates are part of the Asset Studio settings.
- To make a template from a description, the AI Gateway key is on the Connection tab. If no Text model is selected on the Generation tab, Asset Studio uses the first text model in the list.
Open the templates#
- Go to Settings > Integrations, and select Asset Studio.
- Select the Templates tab.
The tab shows all templates. To see how a built-in template is made, select it. You cannot change a built-in template, but you can duplicate it and change the copy.
Make a template#
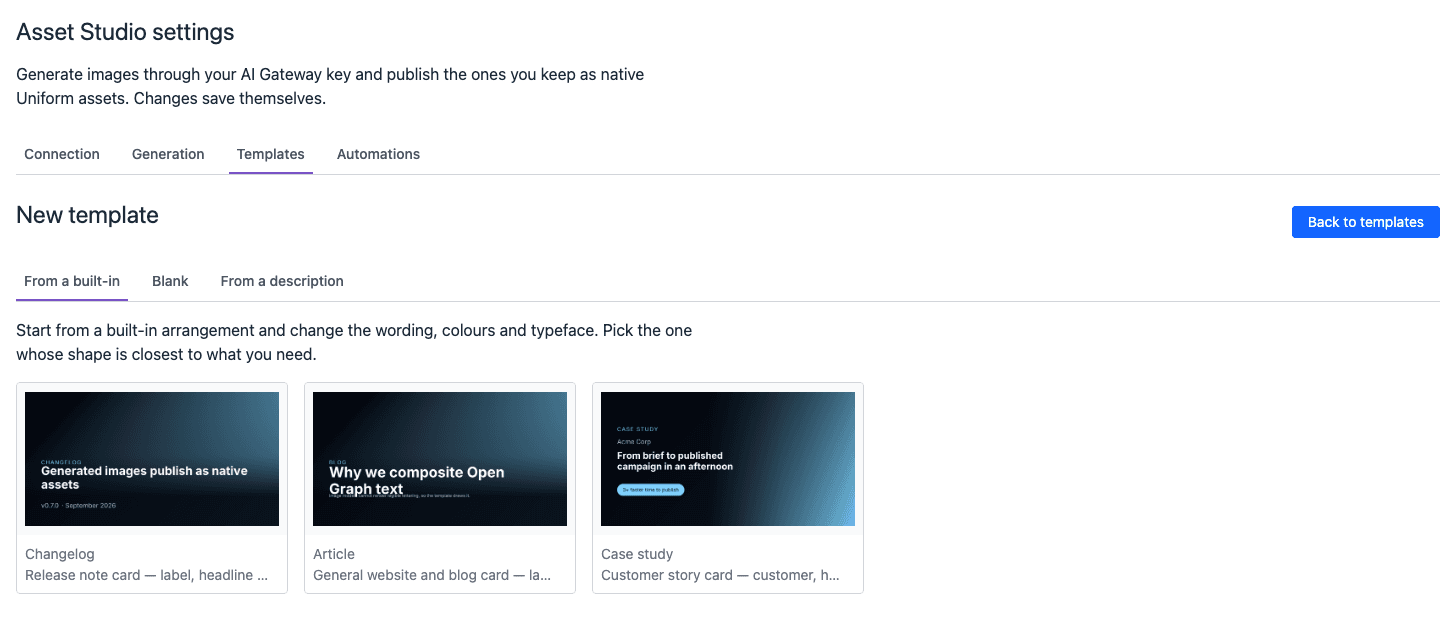
Select Create new. There are three ways to start:
| Start | What you get |
|---|---|
| From a built-in | A copy of a built-in template. Change the words, the colors, and the typeface. Select the built-in template whose shape is nearest to what you need. |
| Blank | A card with one headline. Select Start from scratch, then add the other nodes yourself. A template must have at least one node. |
| From a description | A template that a text model makes from your description. You can change all of it after. |
Make a template from a description#
- Select Create new, then select From a description.
- In Description, describe the card. Tell the model which copy the card needs and how to arrange it. For example: A product launch card: a small "New gear" badge, the product name as a big headline, and the price along the bottom.
- Select Draft template.
After some seconds, the template opens in the editor. The text model is billed to your AI Gateway key, like the image models. If the draft fails, try again, or select a stronger Text model on the Generation tab.
Edit a template#
The editor shows the card at full size, with the parts of the template around it.
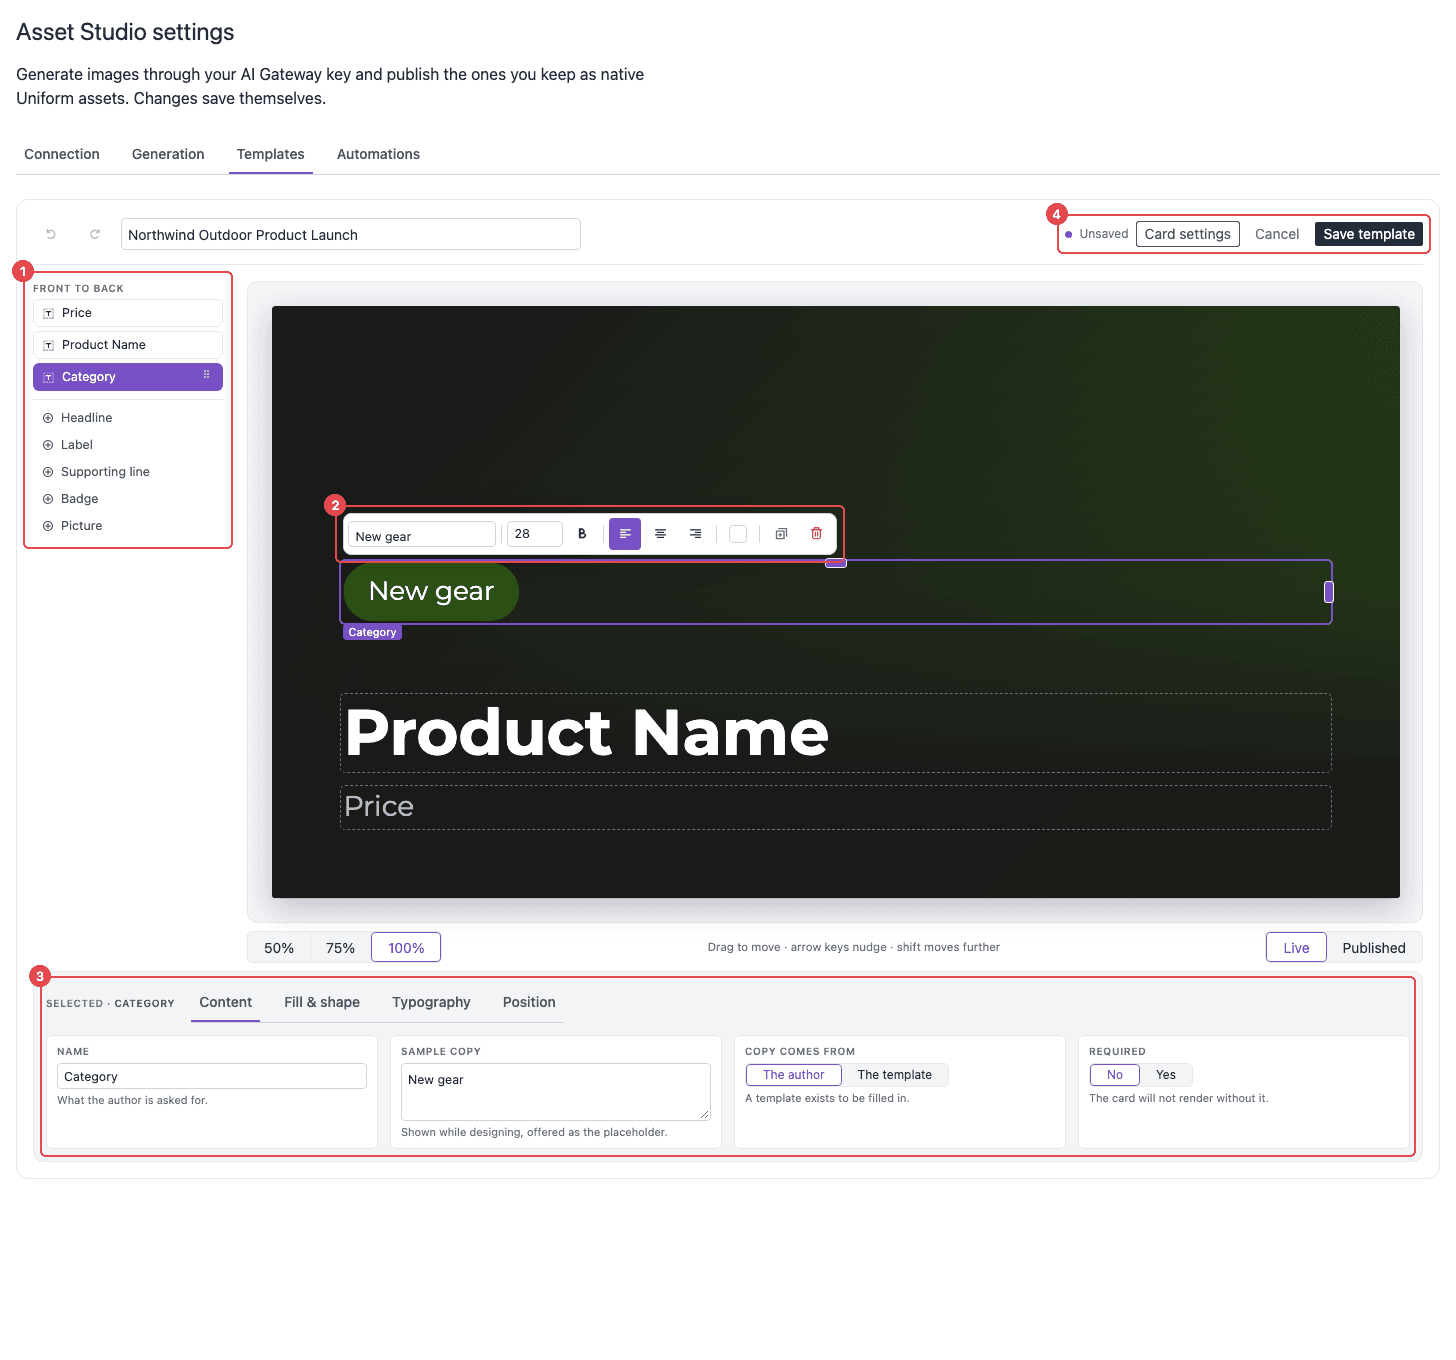
- Layers and presets: Front to back lists the nodes of the card. The node at the top is in front of the others. Drag a node to change the order. Below the list, select a preset to add a node: Headline, Label, Supporting line, Badge, or Picture.
- Node toolbar: select a node on the card to show its toolbar. Change the text, the type size, bold, the alignment, and the color. You can also duplicate or delete the node.
- Node settings: all settings of the selected node, on four tabs. A picture node has no Typography tab. For more information, see node settings.
- Template controls: the name of the template is at the top left, with undo and redo. Unsaved shows that you have changes. Select Card settings to change the settings of the full card. Select Save template to keep your changes, or Cancel to discard them.
On the card, drag a node to move it. Use the arrow keys to move a node a small distance, and Shift and an arrow key to move it further. Below the card, select 50%, 75%, or 100% to zoom. Select Published to see the card exactly as Asset Studio publishes it, and Live to edit again.
Nodes#
A node is text or a picture. A preset is only a start: a label can become a headline if you change its size.
A text node can ask the author for copy, or show the same words on each card:
- If Copy comes from is The author, the node becomes a field in the studio. Its name is the label of the field, and its sample copy is the placeholder.
- If Copy comes from is The template, the node shows its text on each card. For example, the Changelog template always shows the word Changelog.
To add a logo, select the Picture preset, and then select the file. Asset Studio publishes the picture to the asset library and adds the node, and the template uses the picture from there. To change the picture later, select Replace… in the toolbar of the node.
Node settings#
| Tab | Settings |
|---|---|
| Content | Name (the label that the author sees), Sample copy (shown while you design, and the placeholder for the author), Copy comes from, and Required. The card does not show until the author fills in all required nodes. |
| Fill & shape | Fill (Auto, Accent, Shade, or Custom), Corner radius (999 makes a pill), Opacity, the padding at the sides and at the top and bottom, and Fill wraps (the Whole node or only The words). |
| Typography | Capitals, Typeface, Letter spacing, Line height, Lines at most, and Text colour. |
| Position | X, Y, Width, Height, Measured from (Top or Bottom), and Put it against the card, which aligns the node to an edge or the center of the card. |
Card settings#
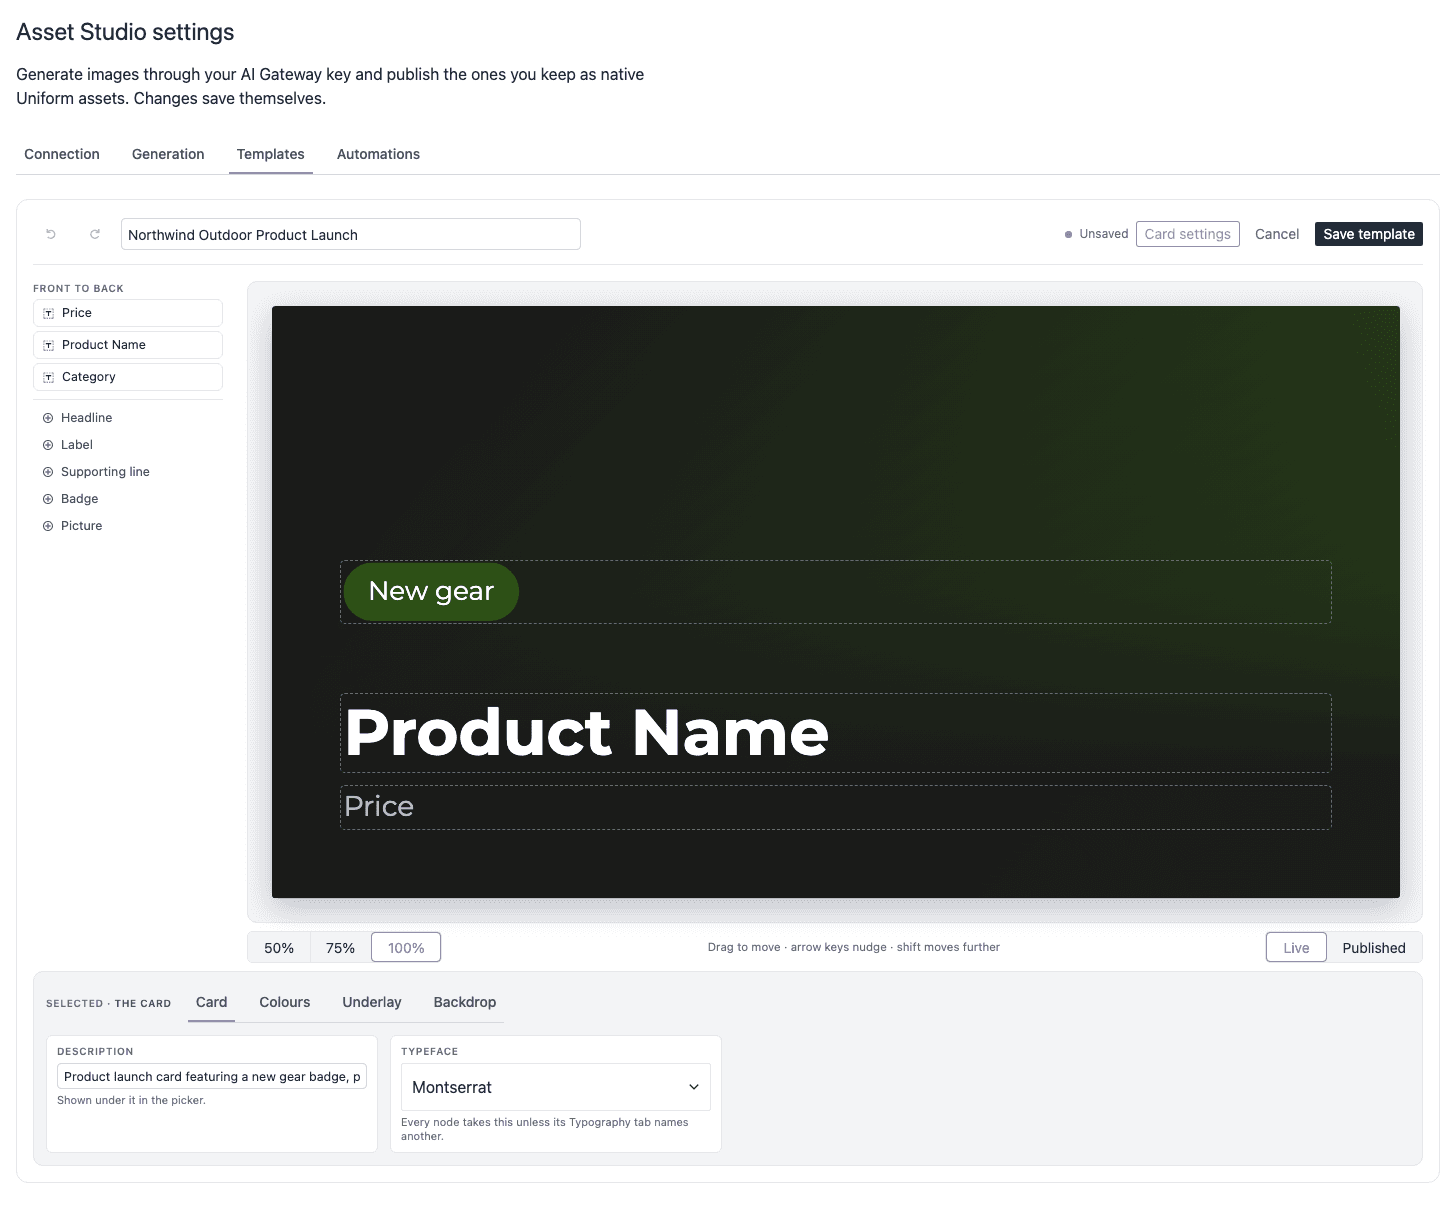
Select Card settings to change the full card. The settings are on four tabs.
| Tab | Settings |
|---|---|
| Card | Description (shown under the template in the picker) and Typeface (used by all nodes that do not set their own). For a saved template, this tab also has Delete template. |
| Colours | Accent and Shade. Auto uses the Accent colour of the project. Shade paints the underlay and all nodes with the Shade fill. |
| Underlay | A dark layer that keeps the copy easy to read on a photograph. Turn it On or Off, and set where it Falls from, its Strength, and its Reach. Fit it to the card puts it where the copy is. |
| Backdrop | Artwork kept clear on (Bottom, Left, or None) and the Instruction that Asset Studio sends to the model with each generated backdrop. Keep the words that tell the model not to write text. When you change Artwork kept clear on, the Instruction goes back to its default text. Thus, set Artwork kept clear on first. |
Save the template#
Select Save template. The template shows on the Templates tab with the Custom badge, and authors can select it in the studio at once.
Duplicate or delete a template#
On the Templates tab, open the menu of a template:
- Select Duplicate to make an editable copy.
- Select Create automation to make cards from this template without an author, or Edit automation if it has one. For more information, see automations.
- Select Delete to remove a template that your team made. Asset Studio asks you to confirm. You cannot undo a delete.
When you delete a template, the cards that you published with it stay in the asset library.