Workflows
What are workflows?#
Workflows in Uniform allow you to operationalise your content creation and publishing processes by providing the ability to define custom content pipelines that can be assigned to components and content types.
With workflows, you can create;
- Editorial processes – including review pipelines to prevent content from being published without approval or a technical evaluation.
- Translation workflows – to ensure that content is localised across multiple regions or languages before being published.
- Taxonomy and structure – workflows stages can be used to classify content based on where it is in the editorial lifecycle, allowing for greater organisation and classification of content within a project.
How do workflows work?#
Workflows are made up of two core components; Workflow Stages, and Workflow Transitions.
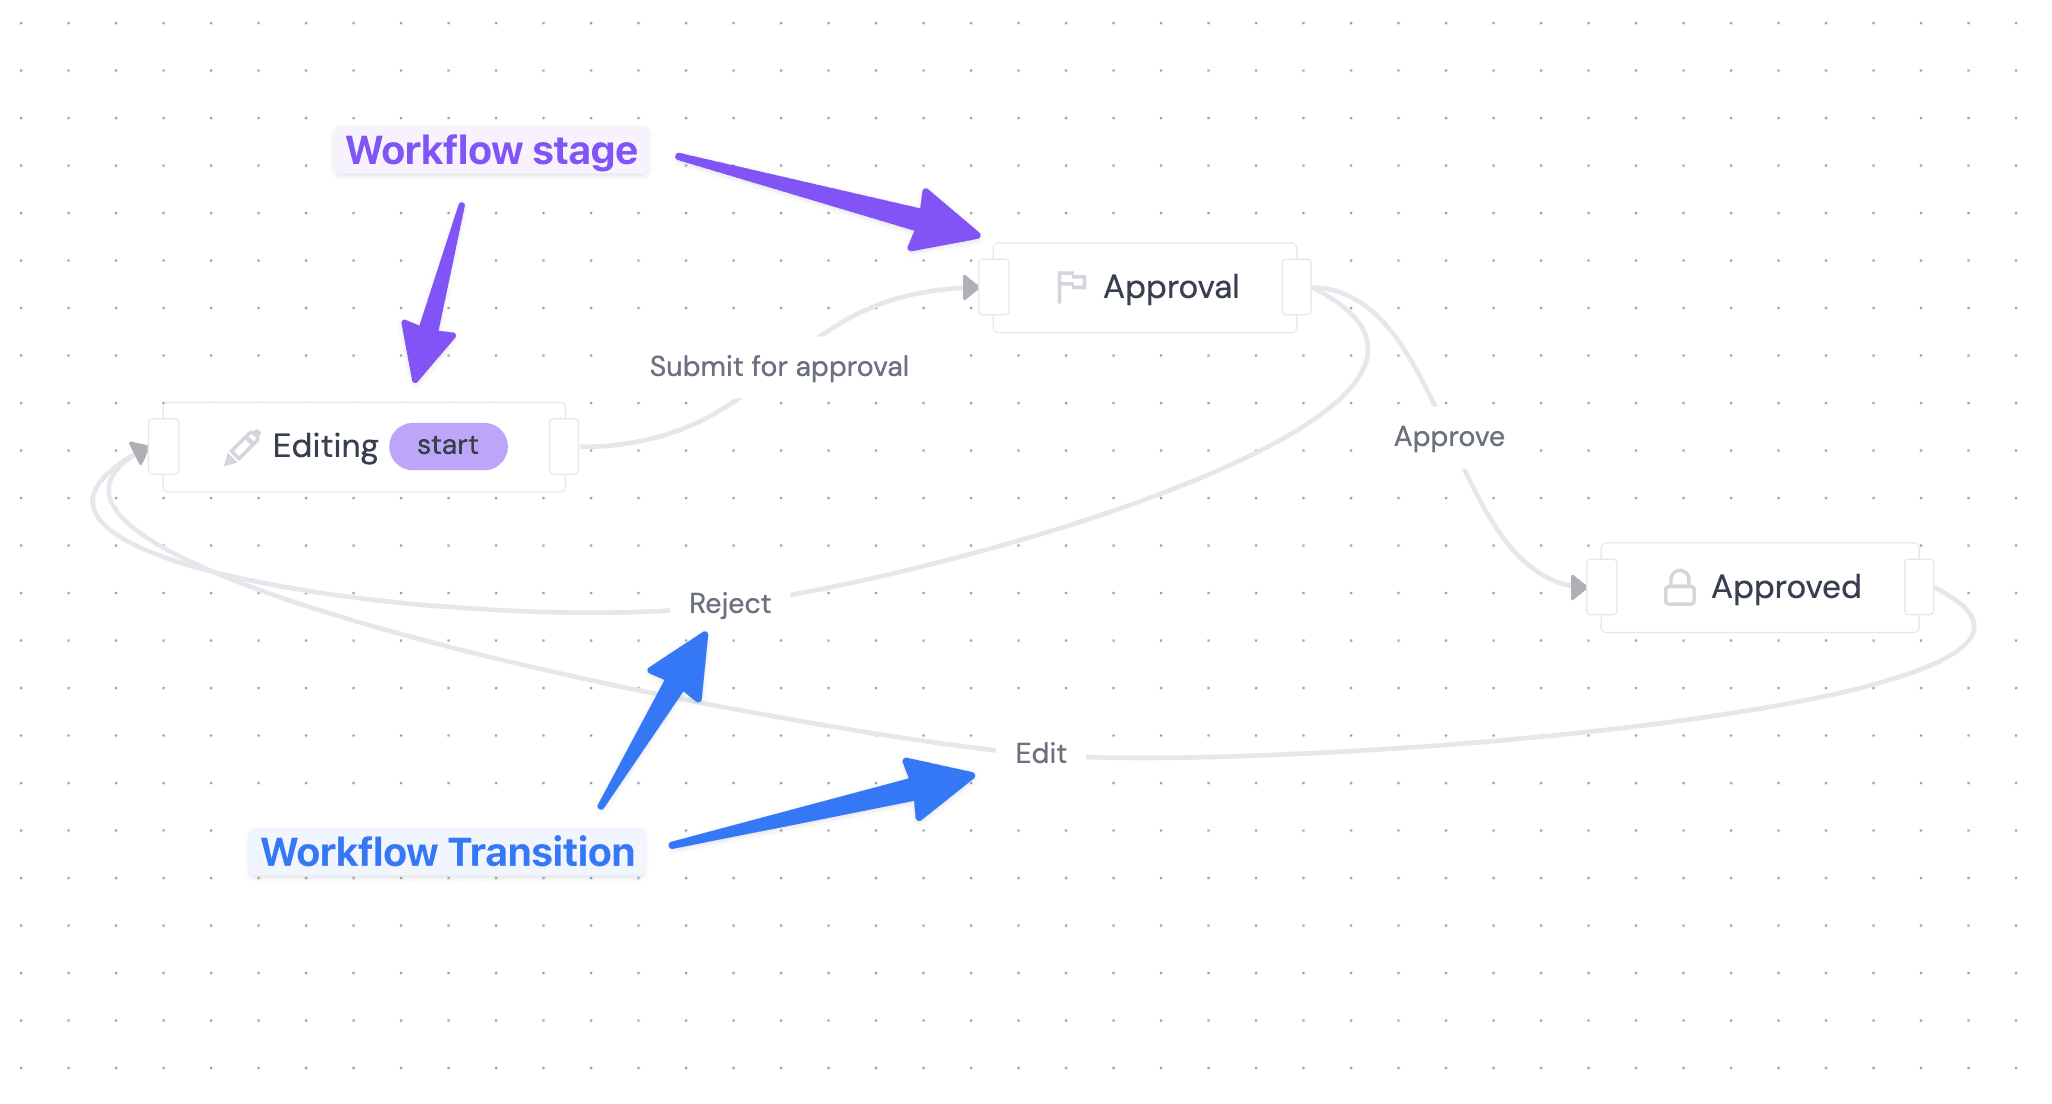
Workflow stages#
A workflow is made up of multiple stages that a piece of content can progress through based on a the links between them (the workflow transition). A workflow stage can be purely representative; assisting with the tagging and tracking of content within a project, or it can carry specific permissions which prevent certain groups of users from altering the draft or published state of content.
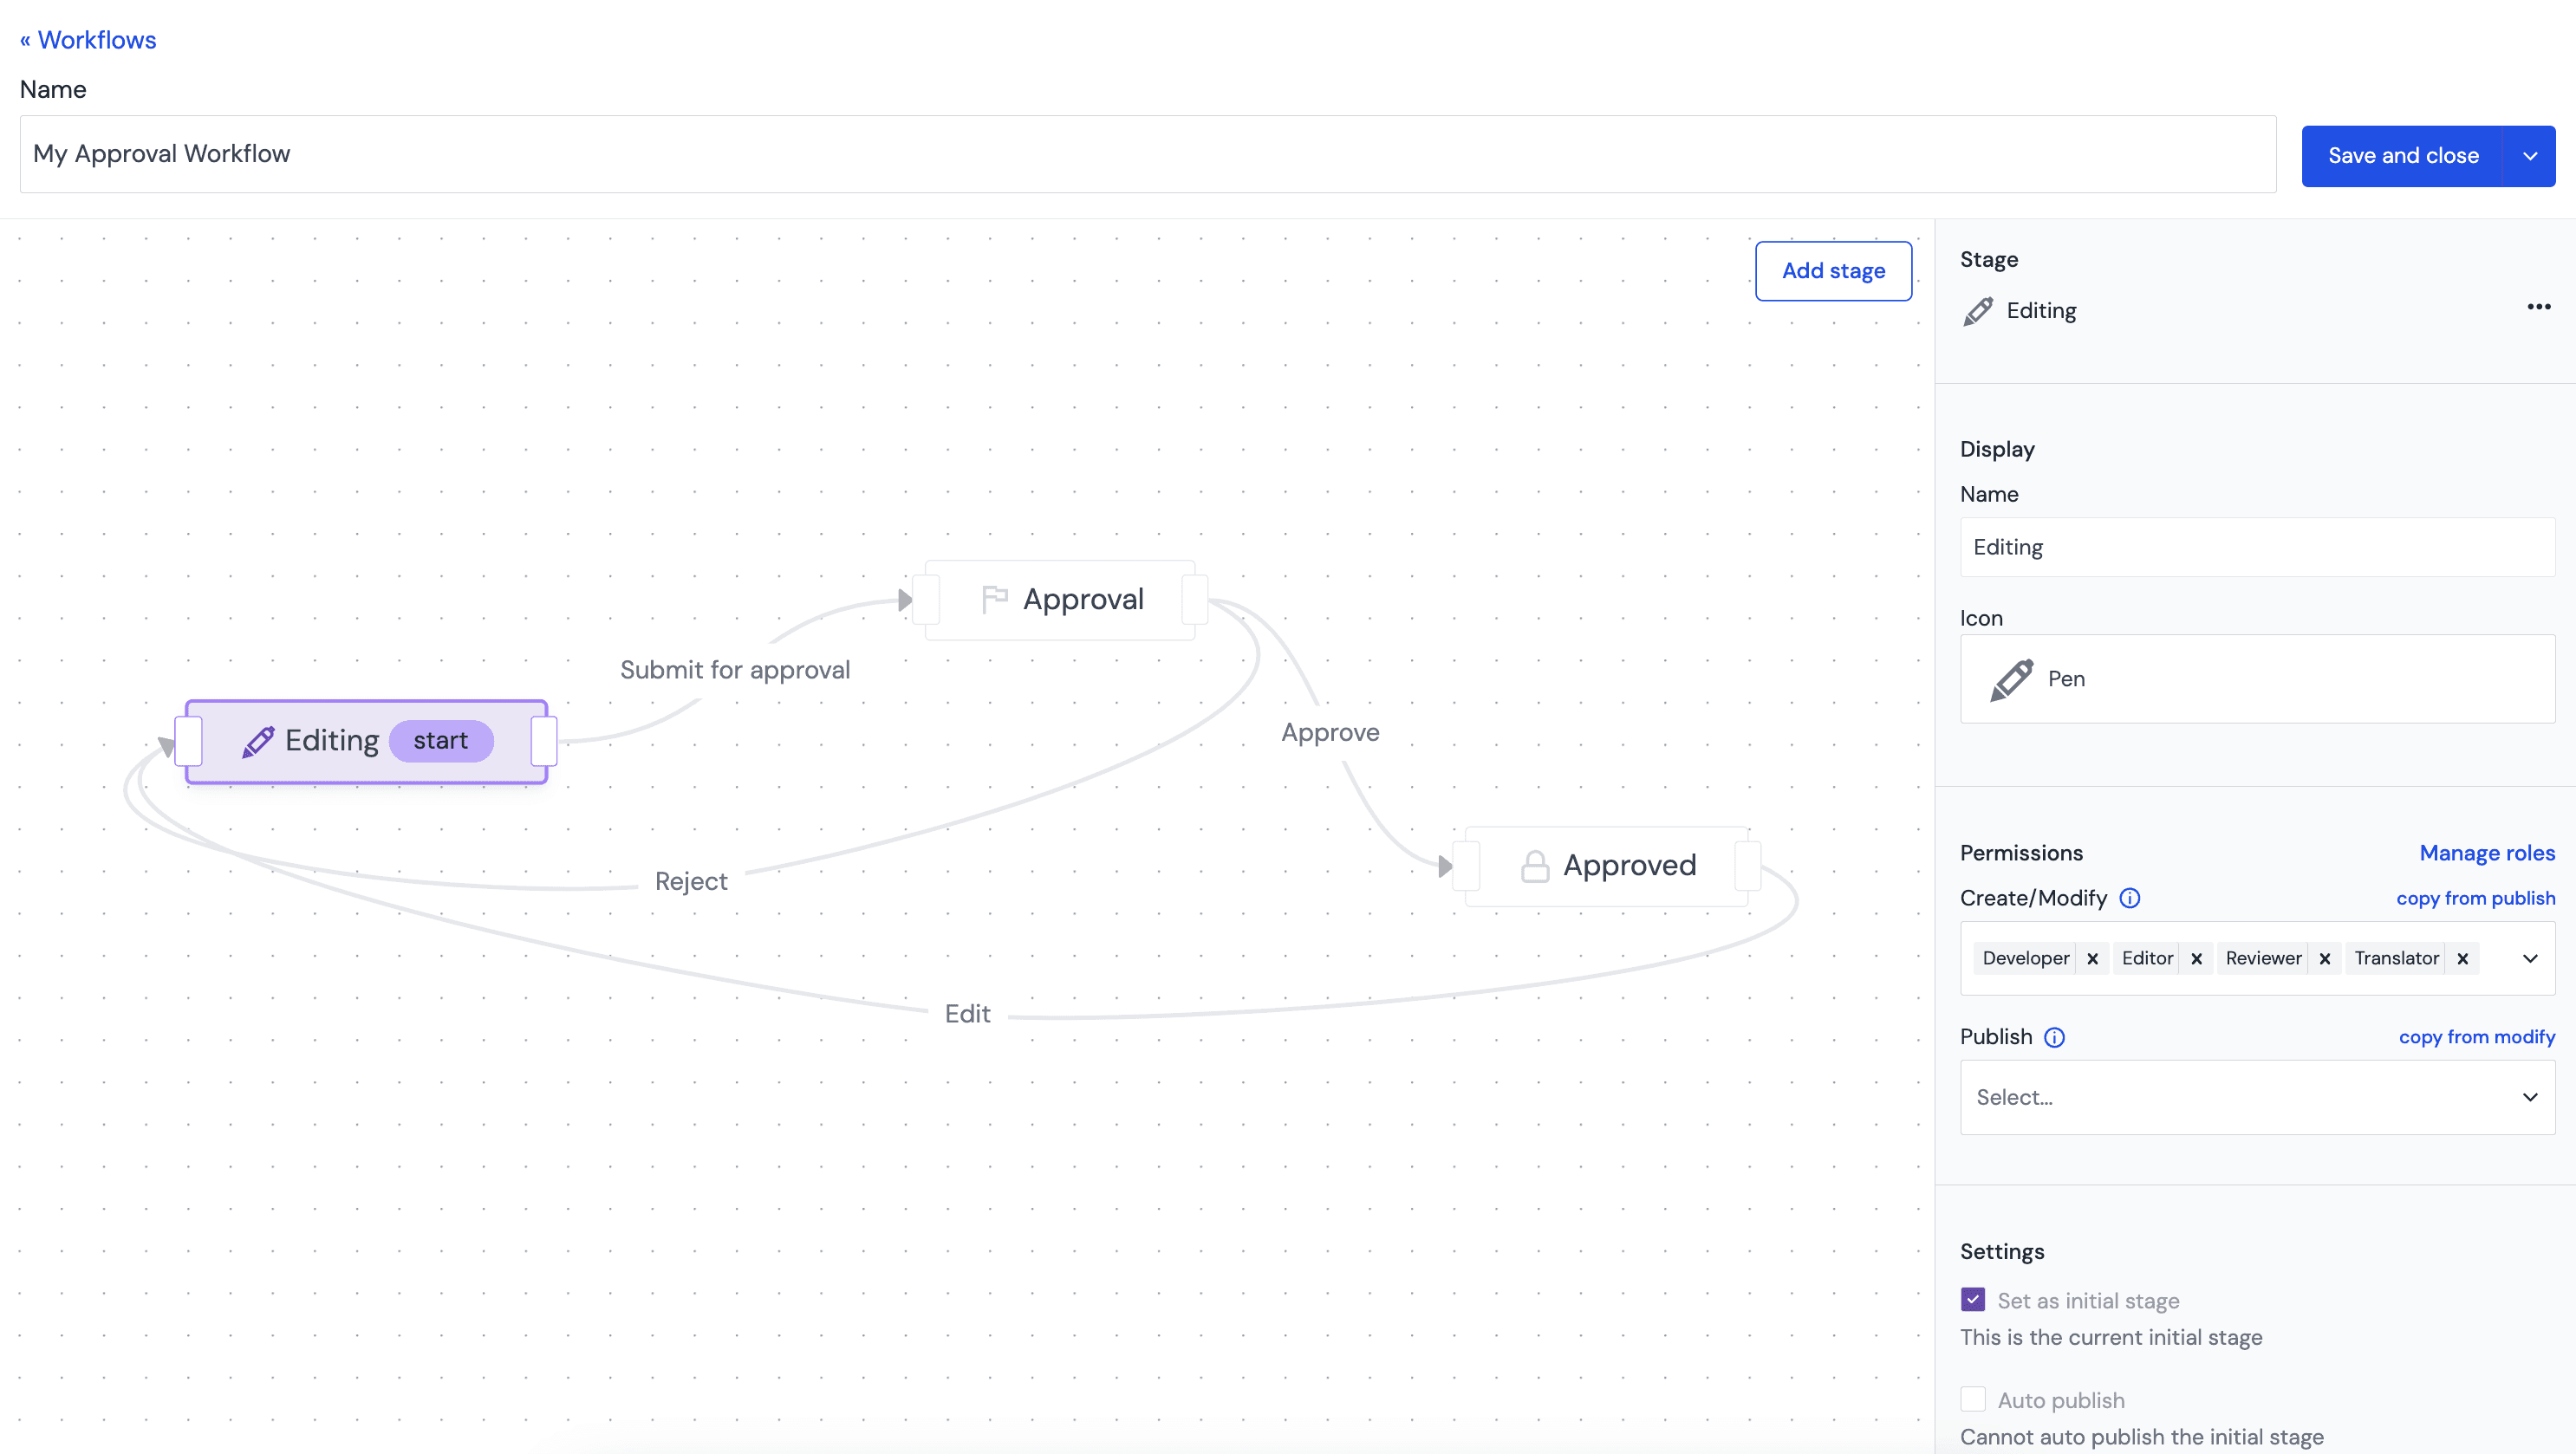
Workflow stages have the following properties;
- Name – the name that is shown in the UI when a piece of content is set to this workflow stage.
- Icon – an appropriate icon can be set to help editors notice which stage content is in at-a-glace.
- Permissions – for controlling what actions can be taken on the content entity when set to the stage.
- Create/modify – this property determines which roles users must be assigned to in order to make edits to the draft state of the content entity. This is useful to enable for stages where users are required to edit the composition, pattern or entry.
- Publish –this property determines which roles users must be assigned to in order to publish the content entity. For many workflows, this may not be enabled until the last step in order to prevent publishing without finalising all workflows stages.
- Settings – toggle-able setting to change the behaviour of the stage.
- Initial stage – Each workflow must have one initial stage, which is the stage that content will begin with by default. When a workflow is assigned to a component/content type or a new instance of a component or entry is created, it is the initial stage that will be assigned.
- Auto-publish – If this option is enabled, an automatic publish action will be taken on an entity that reaches this stage. This is useful in the event that content should be published immediately after a specific transition (i.e. “approve & publish”)
- Requires validity – Adding this flag to a stage will mean that content transitioning into the stage must first pass a validity check to ensure that publishing will be possible. This is helpful when moving content into review, so that the record can be locked for editing and published later without any potential validity issues.
Unpublished content mode condition
When using the combination of Auto-publish and Requires validity settings, when outside of a release, progressing to this stage will require content authors switching off unpublished content mode to ensure that actual live content is validated.
Workflow transitions#
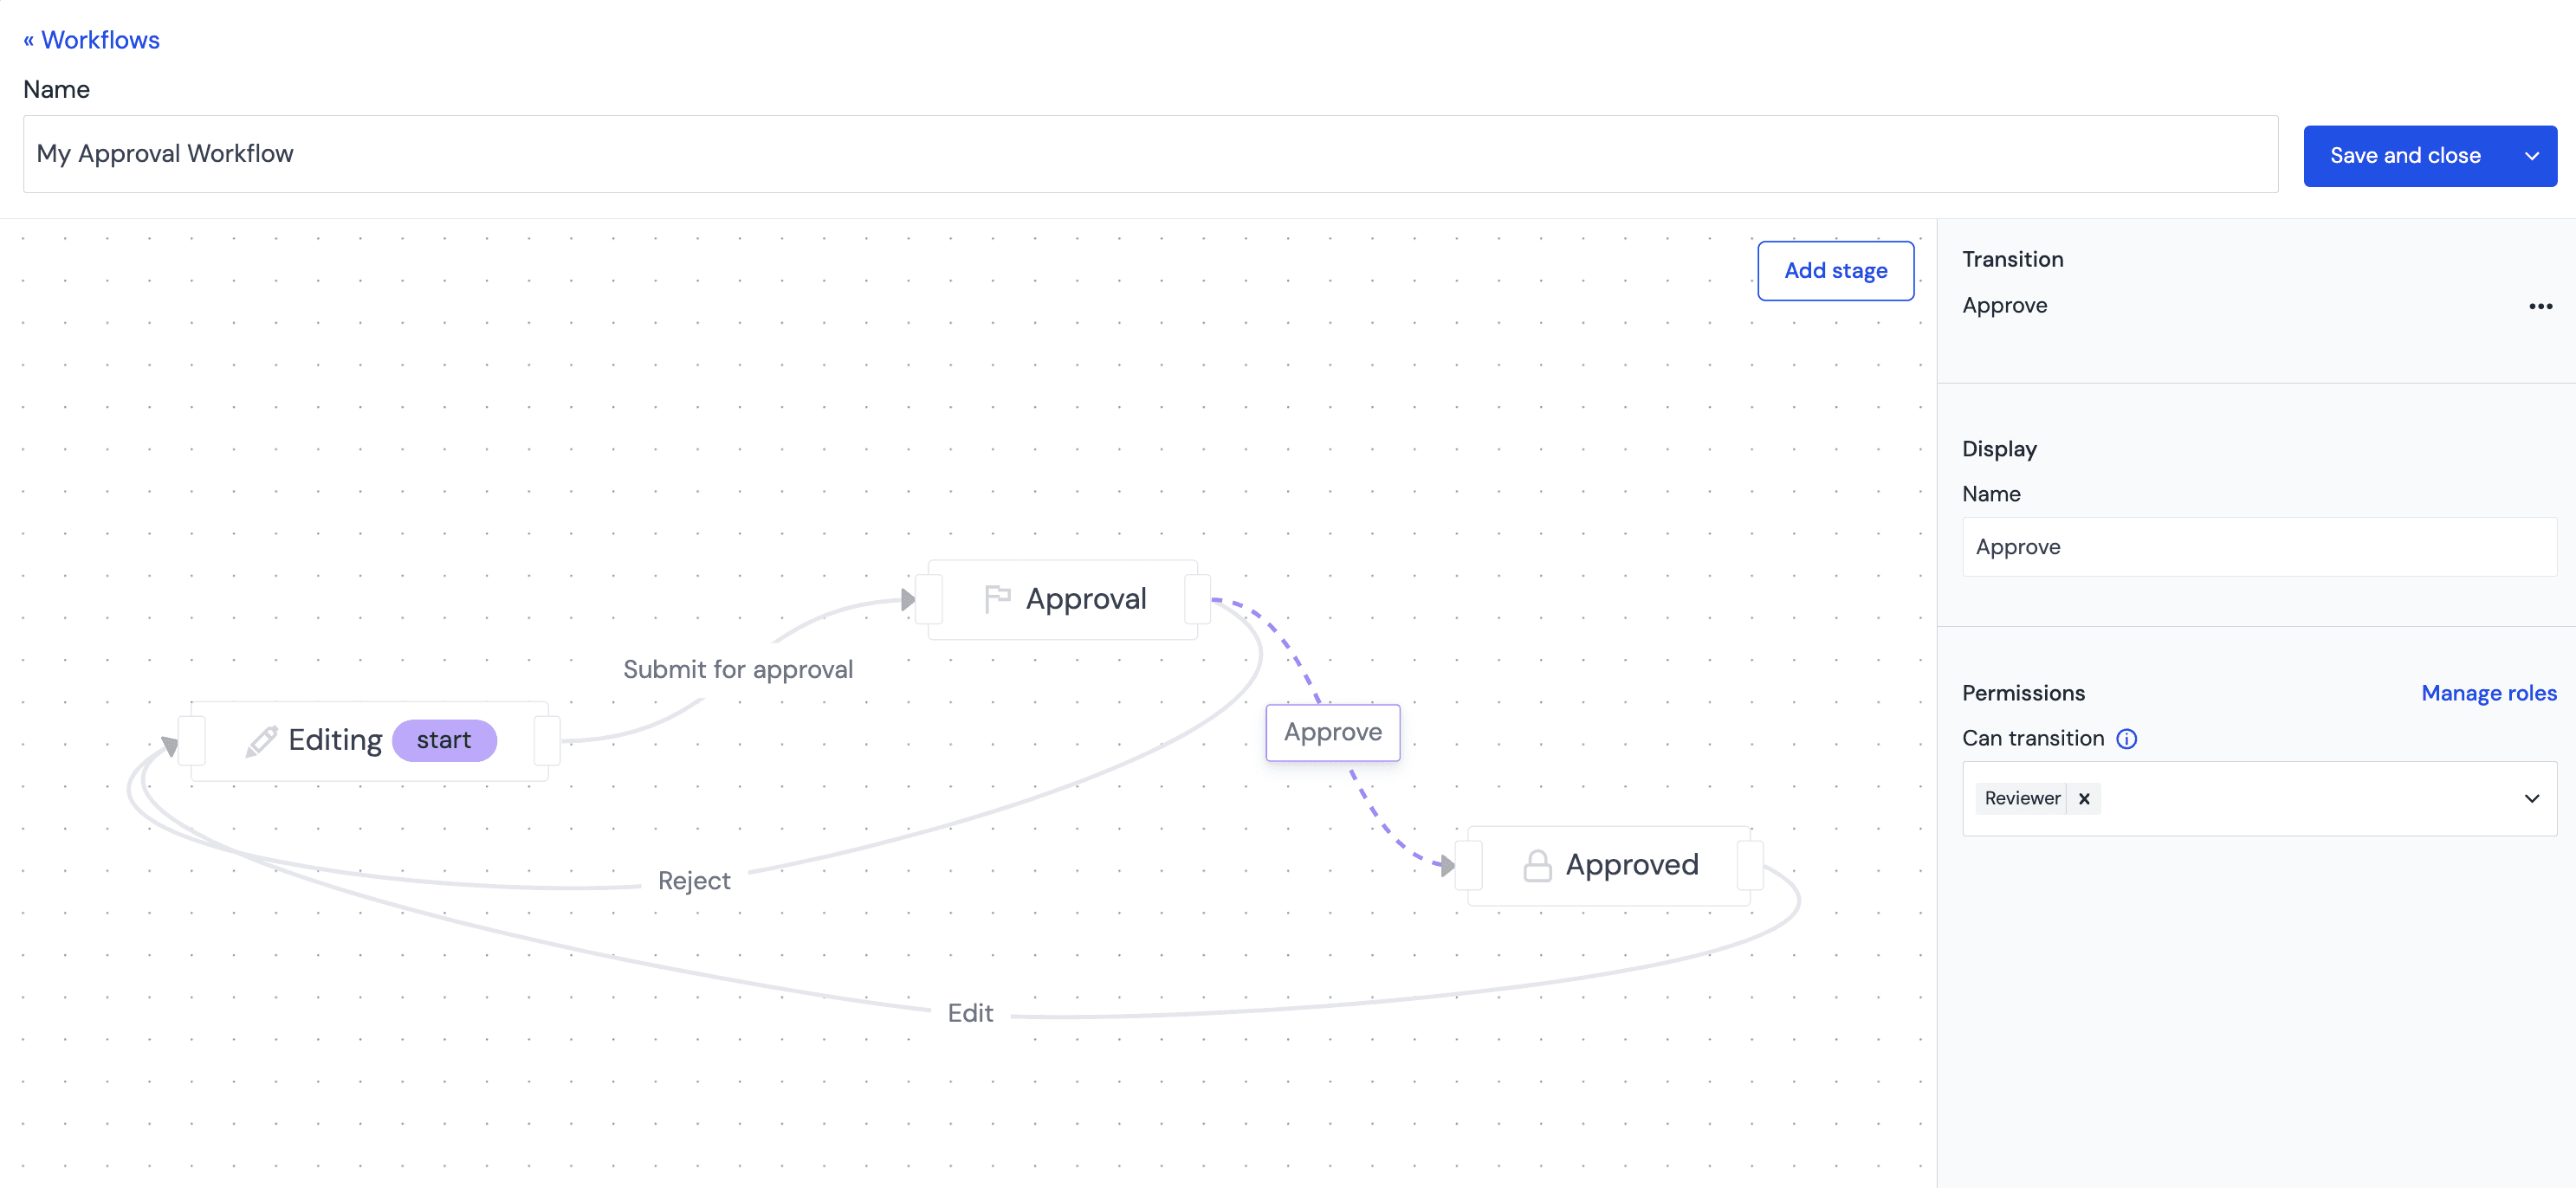
The workflow transitions determine the paths in which content can flow between workflow stages. A workflow transition provides the ability to define which stages are accessible from the current stage, and which users are able to perform that specific transition (for example, an approval workflow such as the one seen below may only allow users with the role “reviewer” to perform an “approve” transition).
Workflow transitions have the following properities;
- Name – the name of the transition between stages (i.e. submit for approval)
- Permissions
- Can transition – this property determines which roles users must be assigned to in order to activate this transition to move from the source stage to the target stage.
Creating a workflow#
Workflows can only be managed by Team Admins
Creating and managing the configuration of workflows in Uniform is only available to users that are assigned the role of a Team Admin for the team in which the project is within.
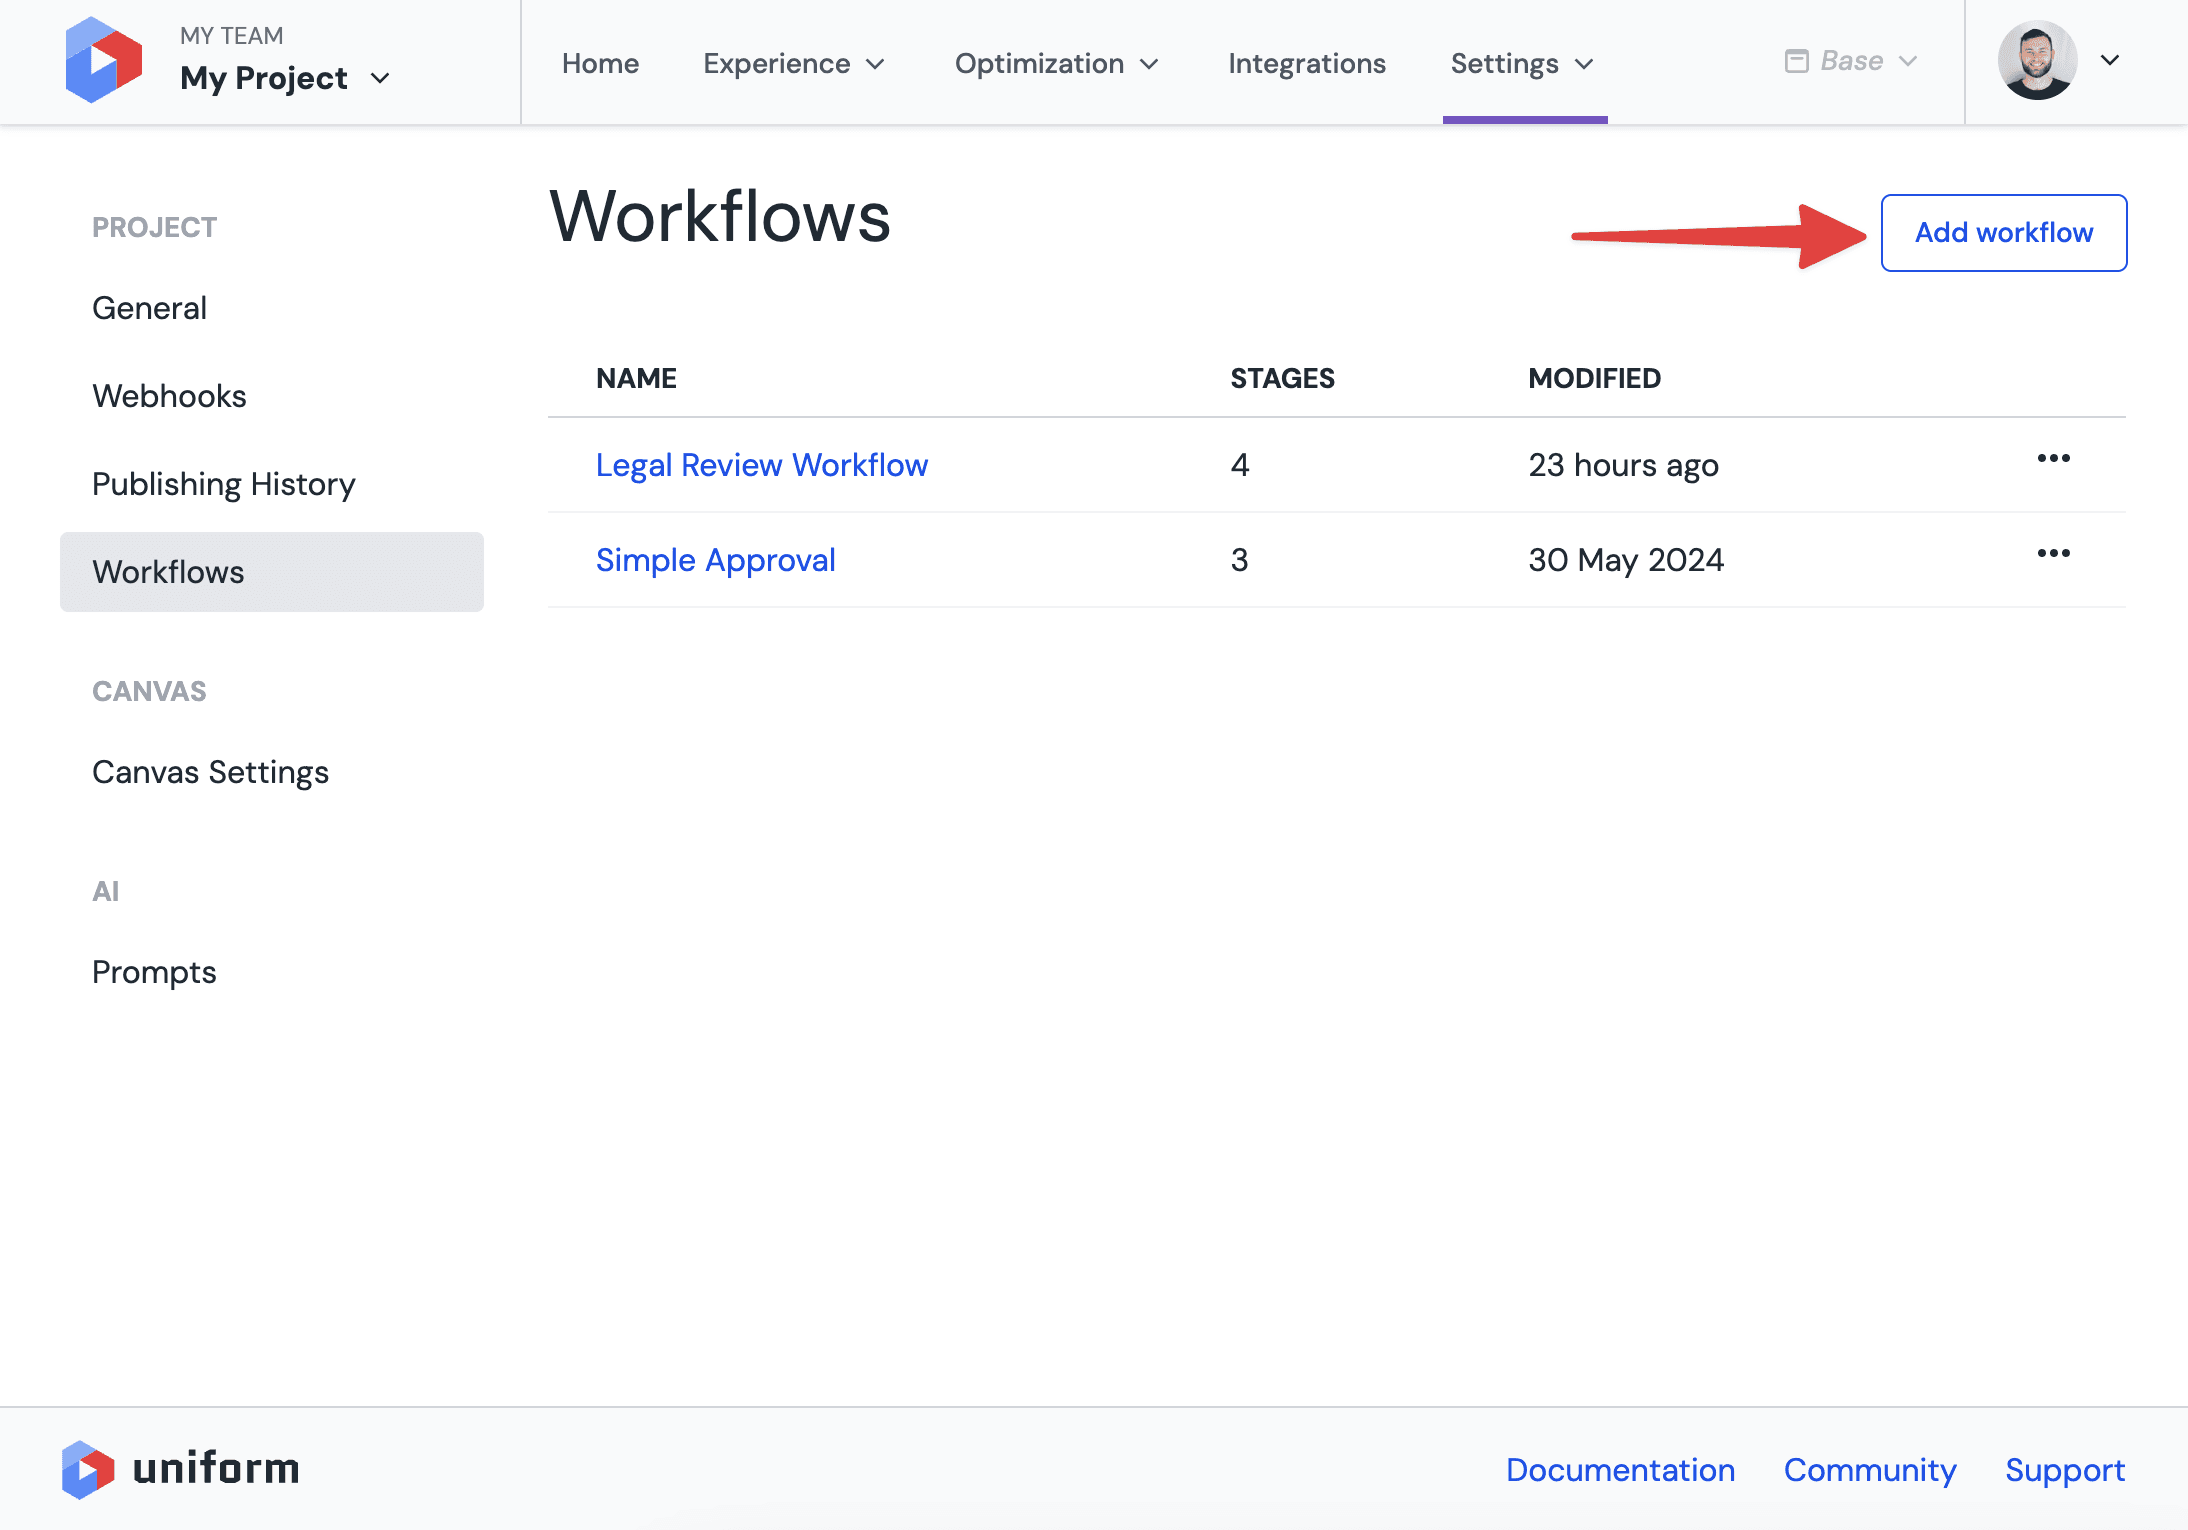
In order to create a workflow, first navigate to the project in which you would like to create the workflow and use the navigation bar at the top of the page to navigate to Settings > Workflows.
From this page, you can create a new workflow by clicking the “Add Workflow” button;
When creating a new workflow, a sample template will be provided with stages for a simple approval workflow. You can choose to start with this template, or from scratch by deleting any stages that are not required for your specific workflow;
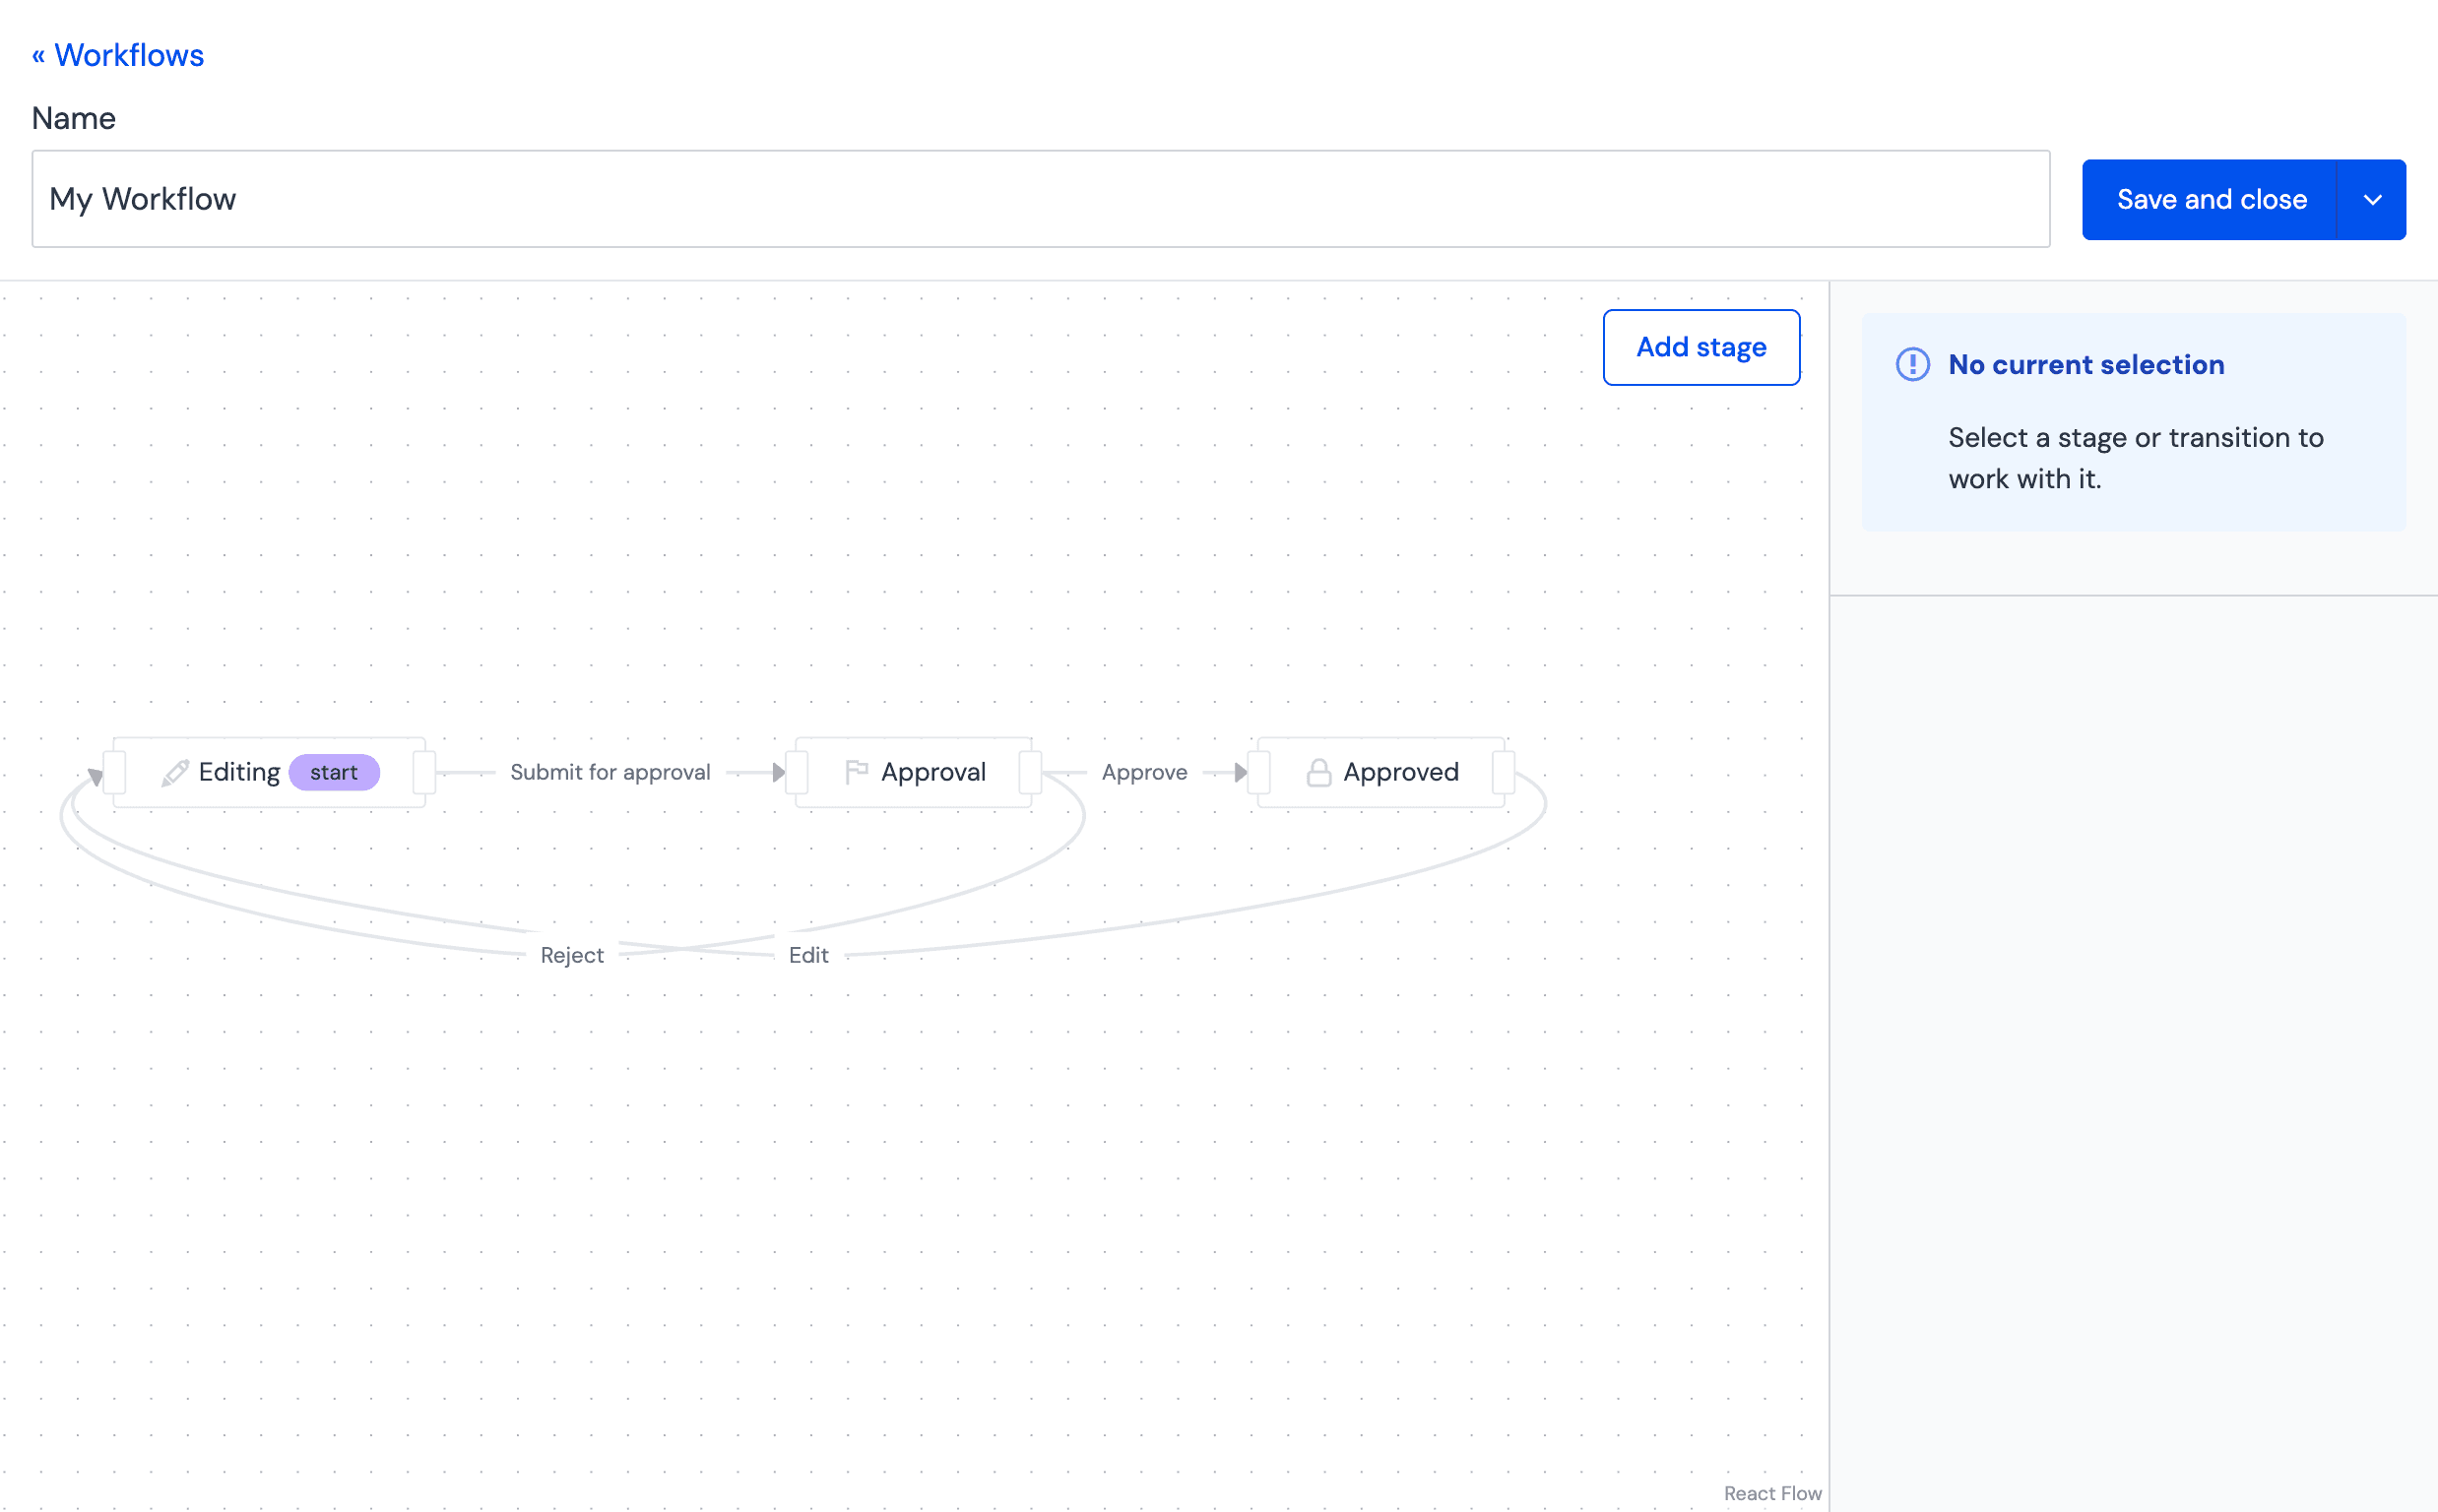
To build a workflow;
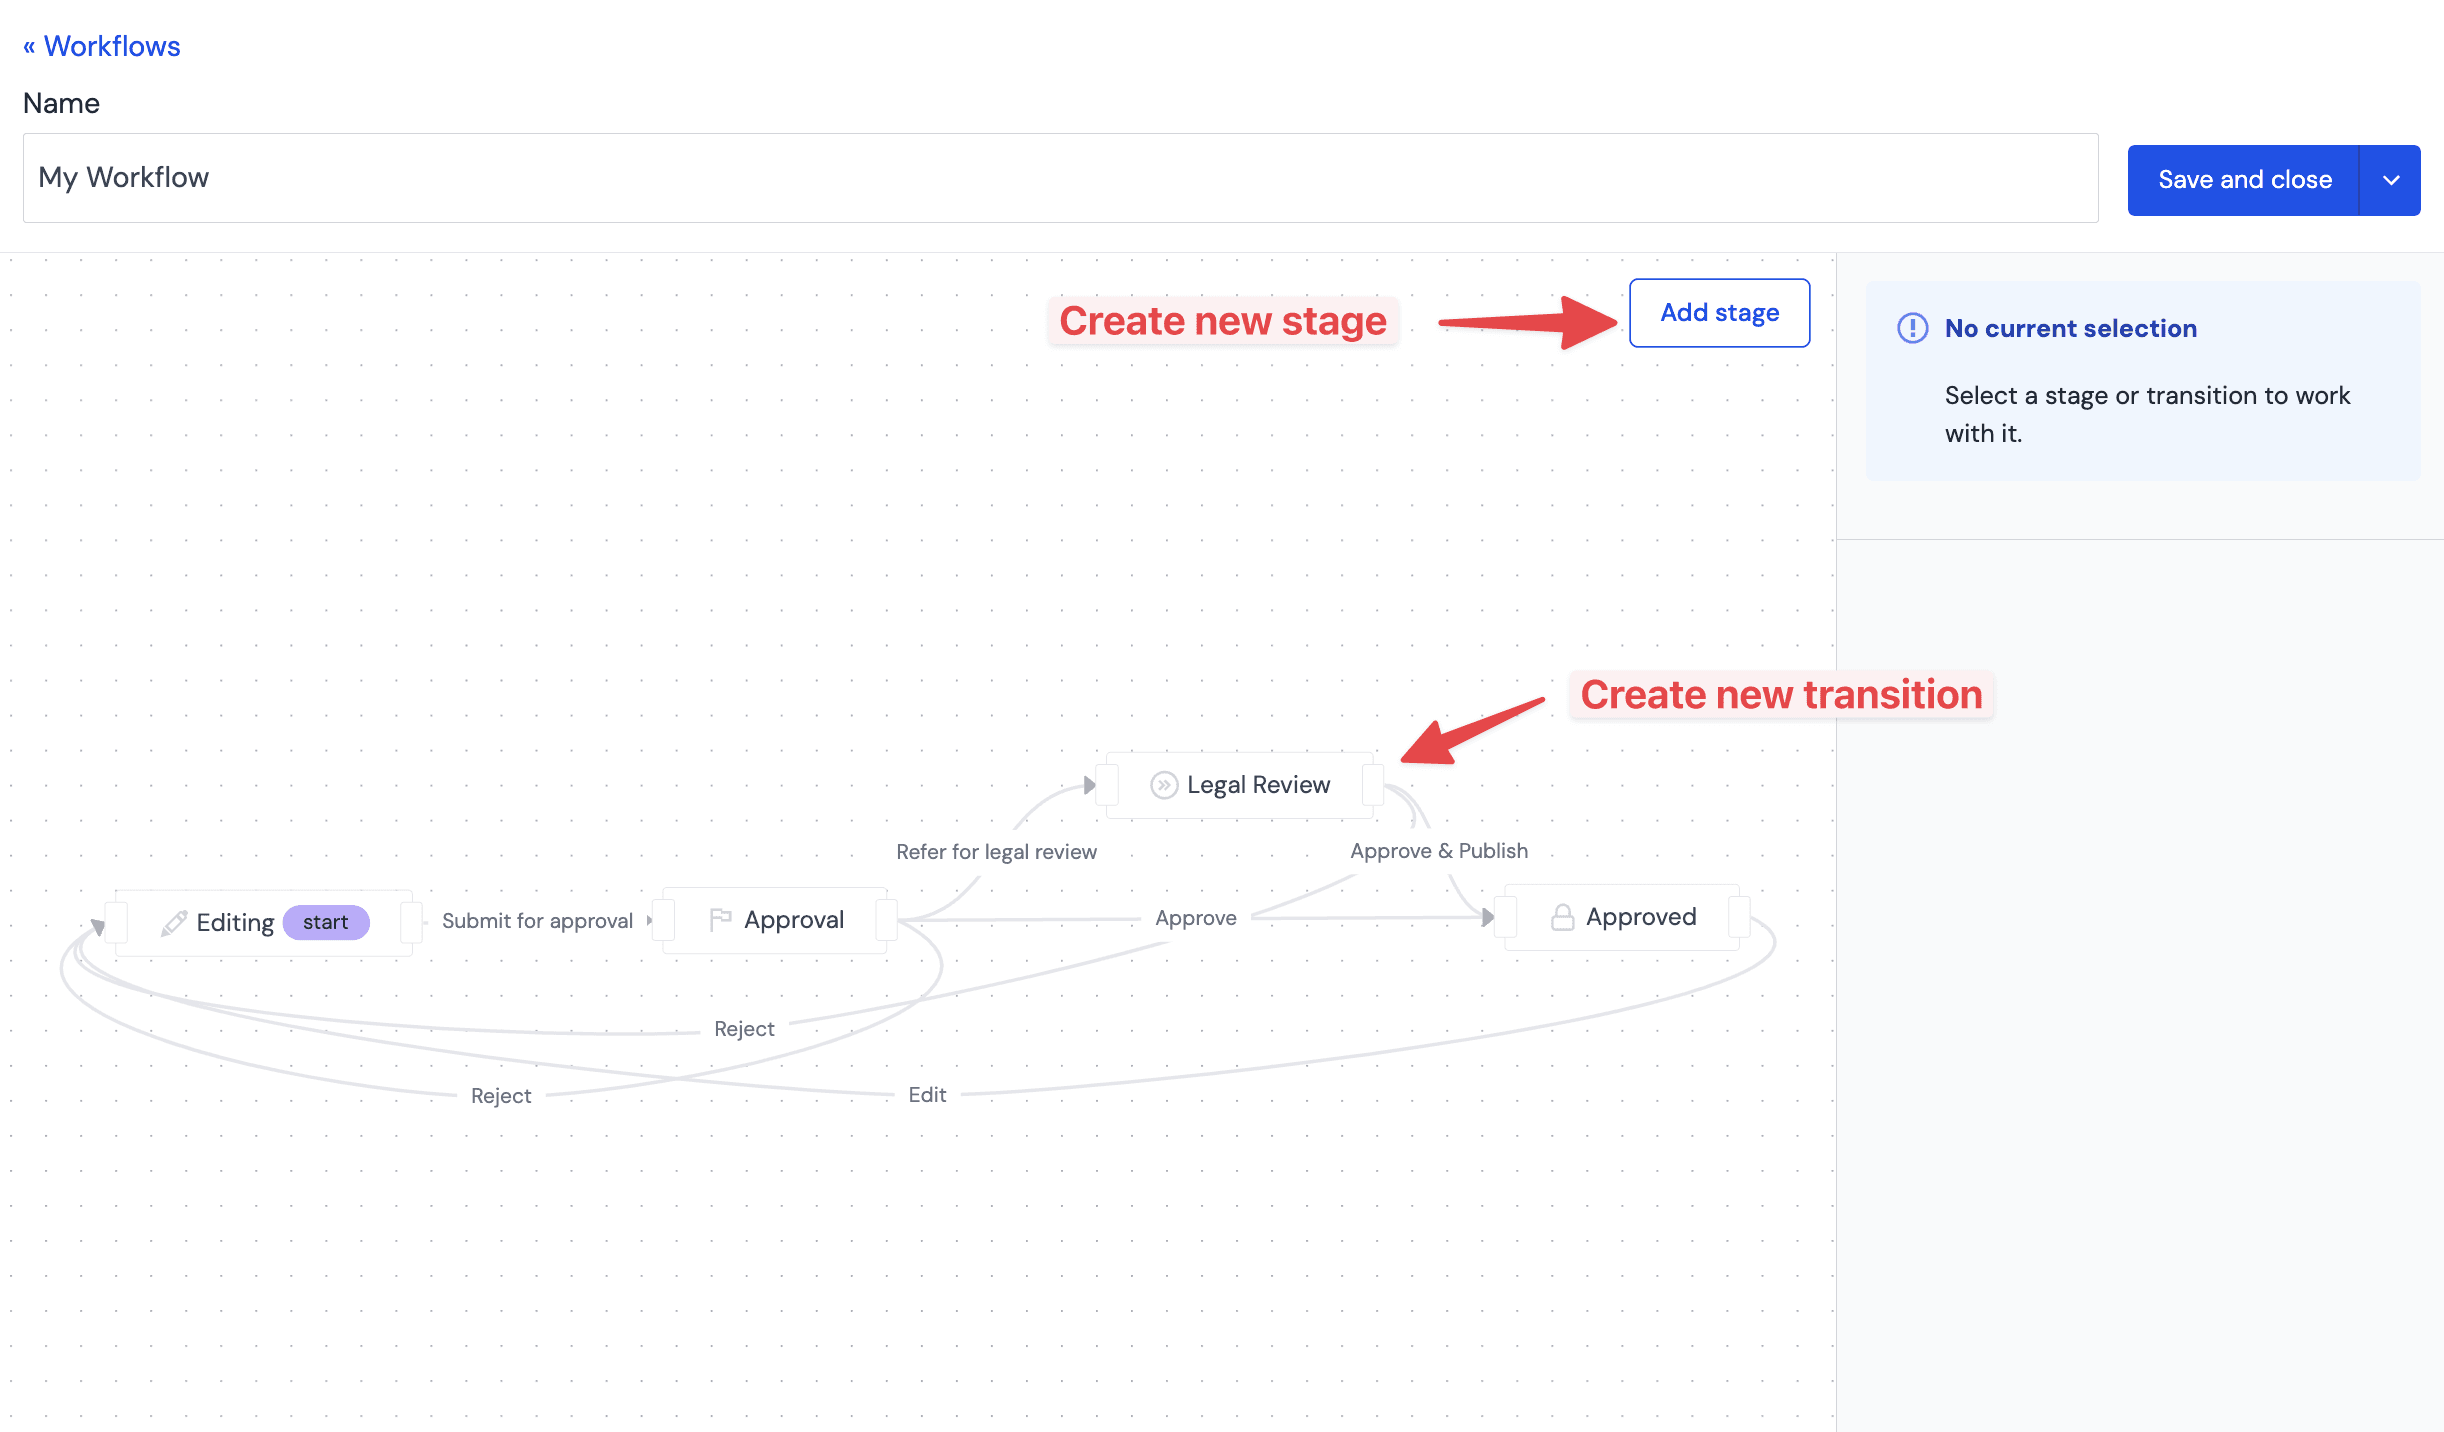
- New stages can be added with the “Add stage” button in the top left corner.
- Stages can be edited by clicking on the stage name in the workflow editor.
- New transitions can be created by clicking on the right rectangles on either side of the stage and dragging to another existing stage, or into free space to create a new stage.
- Transitions can be edited by clicking on the links between stages.
Assigning a workflow to content objects#
Once a workflow has been created, you can then activate it by assigning the workflow to specific component definitions or content types. The following entity types are supported;
- Component definitions
- Composition components – the workflow will be present in the Canvas editor when editing composition instances and composition patterns with this component type.
- Non-composition components – the workflow will only be present in the pattern editor when a new pattern for the component is created or edited.
- Content types – a workflow assigned to a content type will apply inside of the Uniform Content entry editor for entries and entry patterns of this content type.
To assign a workflow to a component definition or content type;
First, navigate to the configuration page for component or content type you would like to add a workflow to, and find the “assign workflow” button under the “General” tab in the settings;

After clicking the button, you can choose which workflow to assign to the entity, and hit “accept” to confirm the change. Remember to also “save” the component definition or content type before closing in order for the change to take effect.

Creating/updating content with workflows#
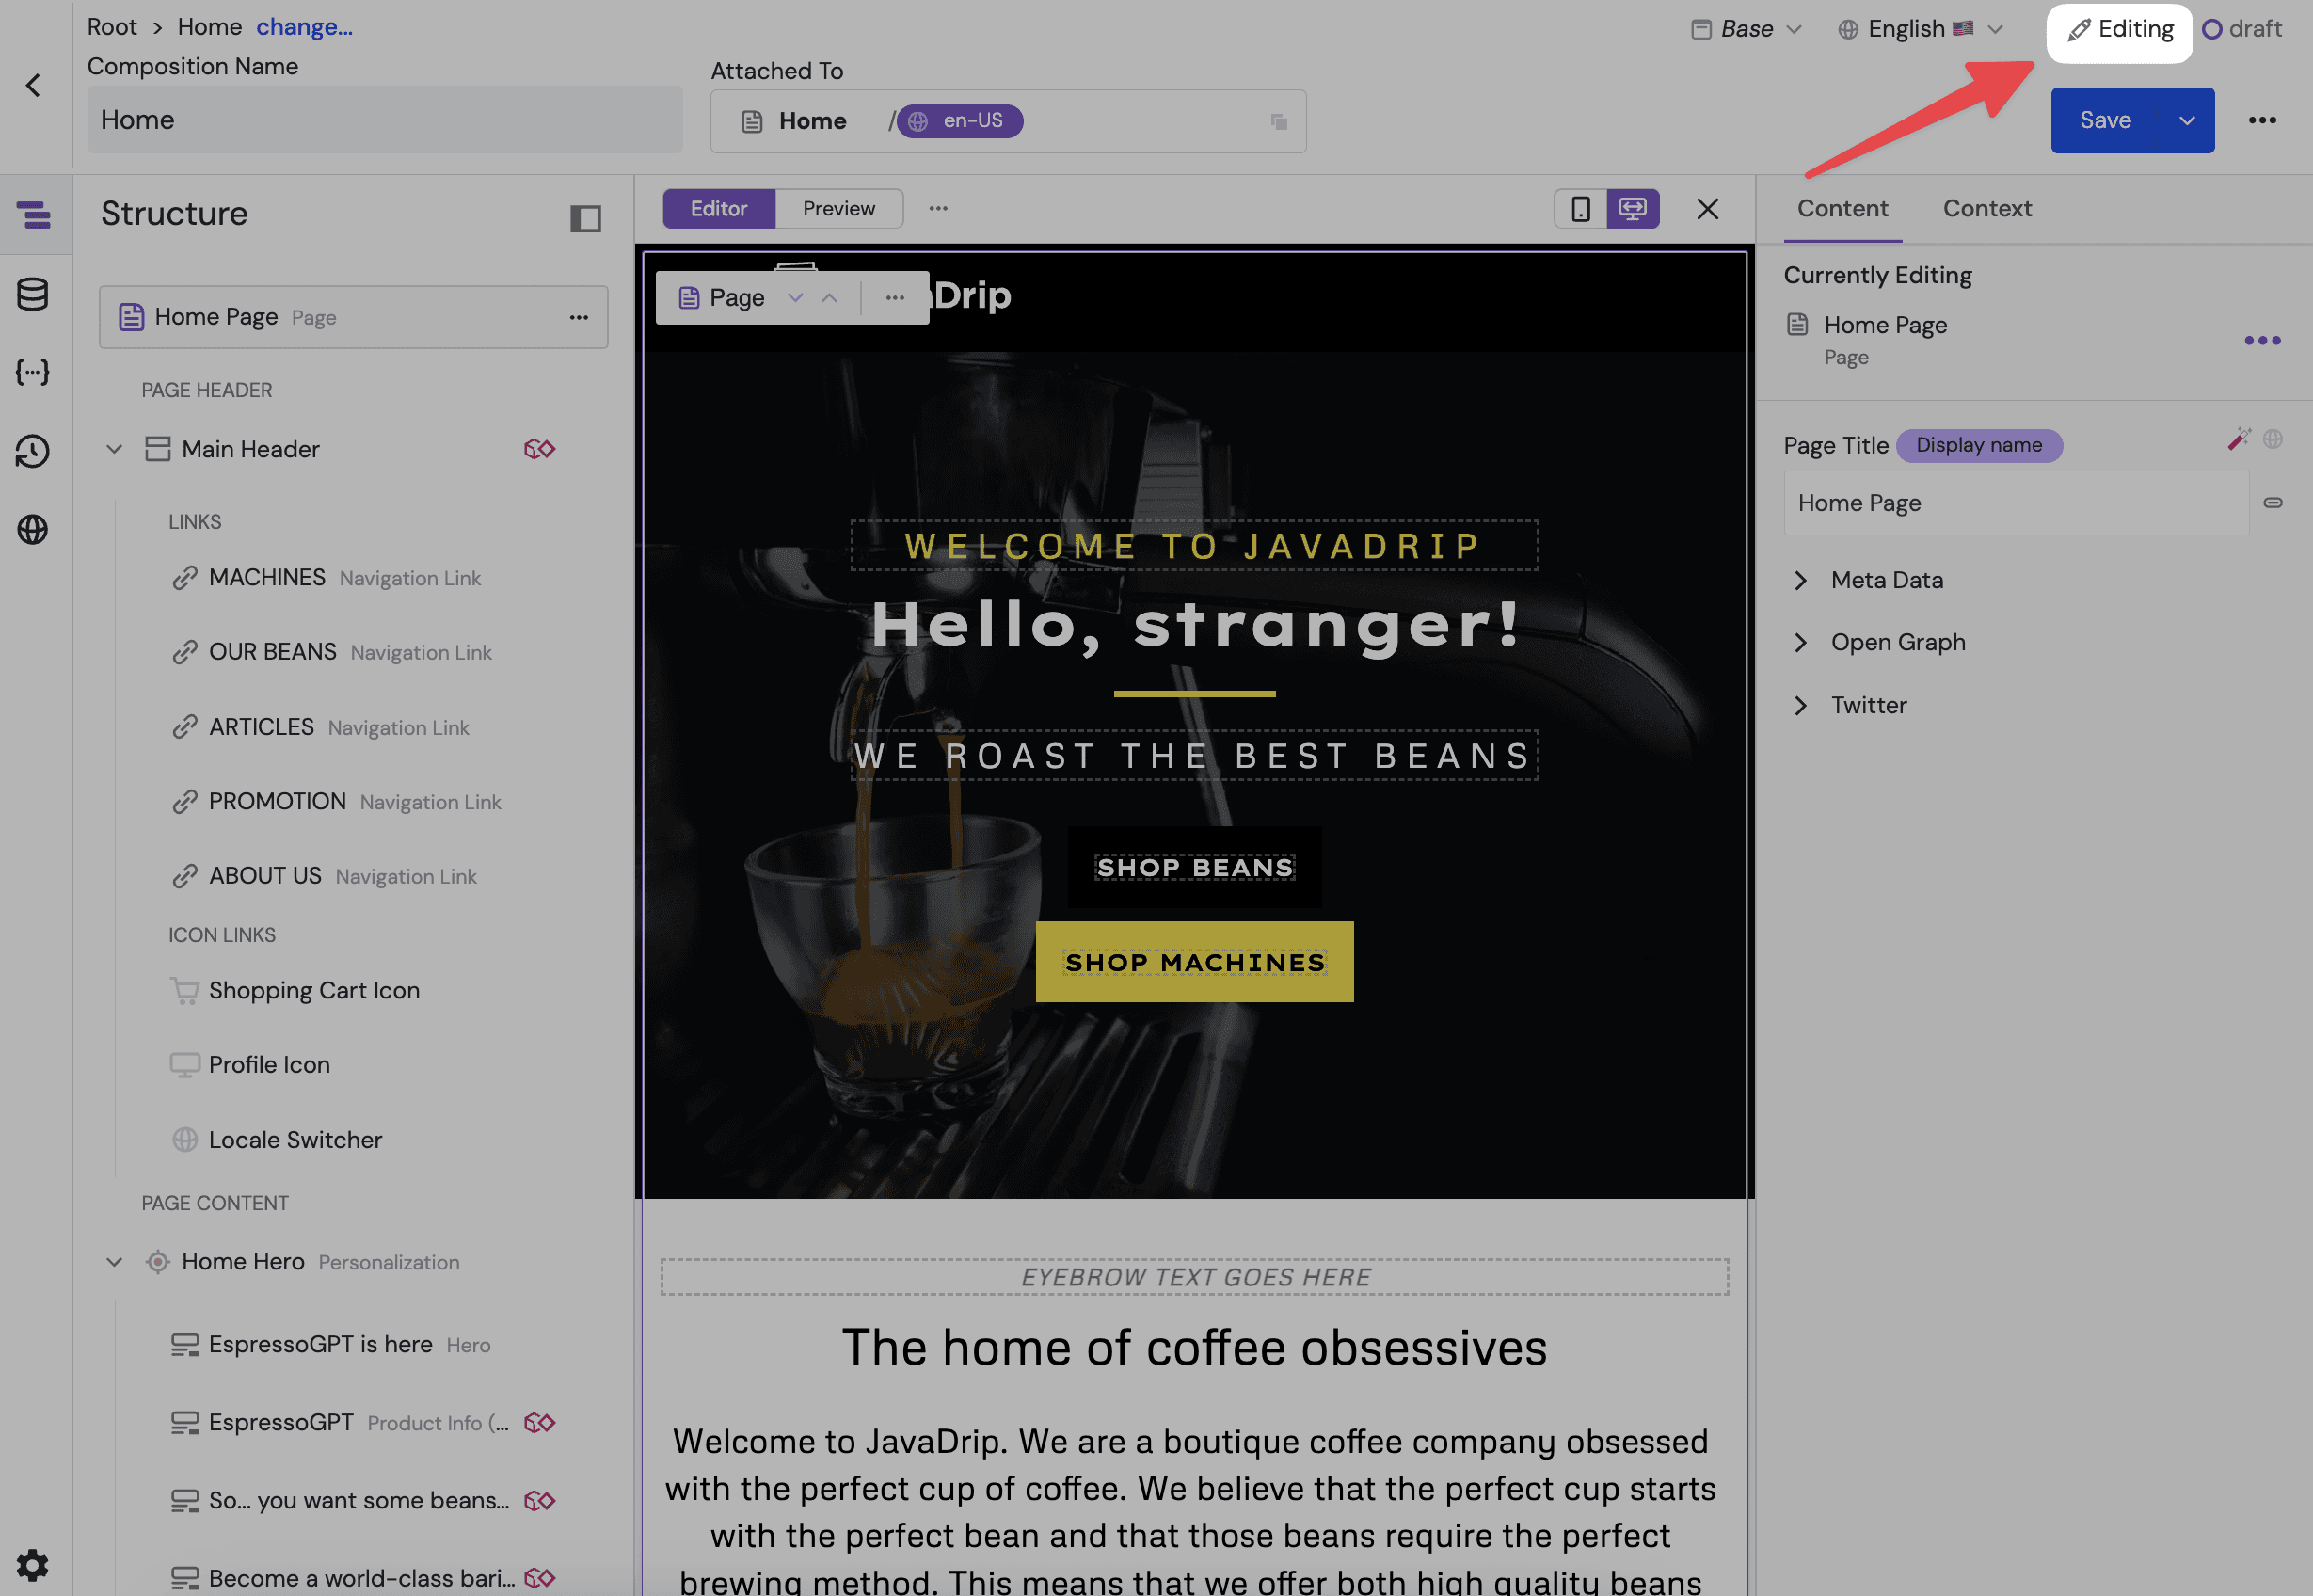
Once a workflow has been applied to a component or a content type, you will notice workflow stages appear when a composition, pattern or entry instance is open. You can quickly determine which stage the piece of content is in by looking at the top-right corner;
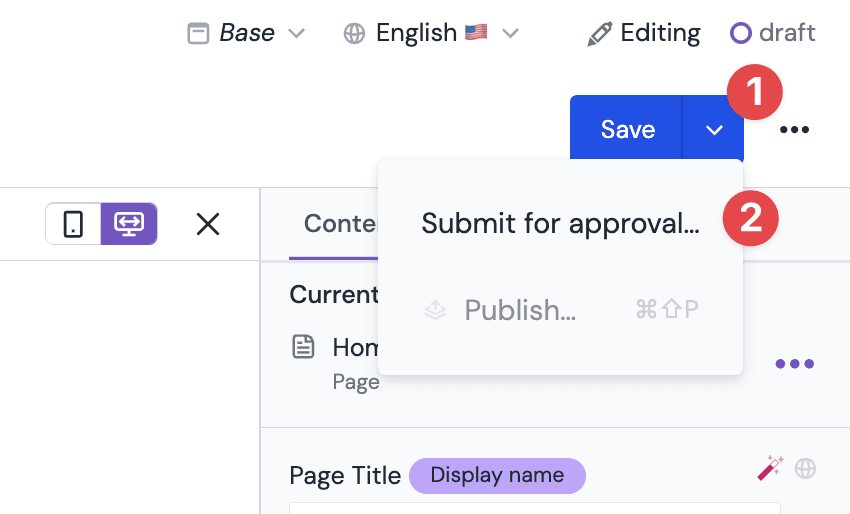
To trigger a workflow transition to move between the current stage and one of the next available stages, simply;
- Click on the dropdown located next to the save button in the top-right corner
- Select the stage transition which you would like to activate
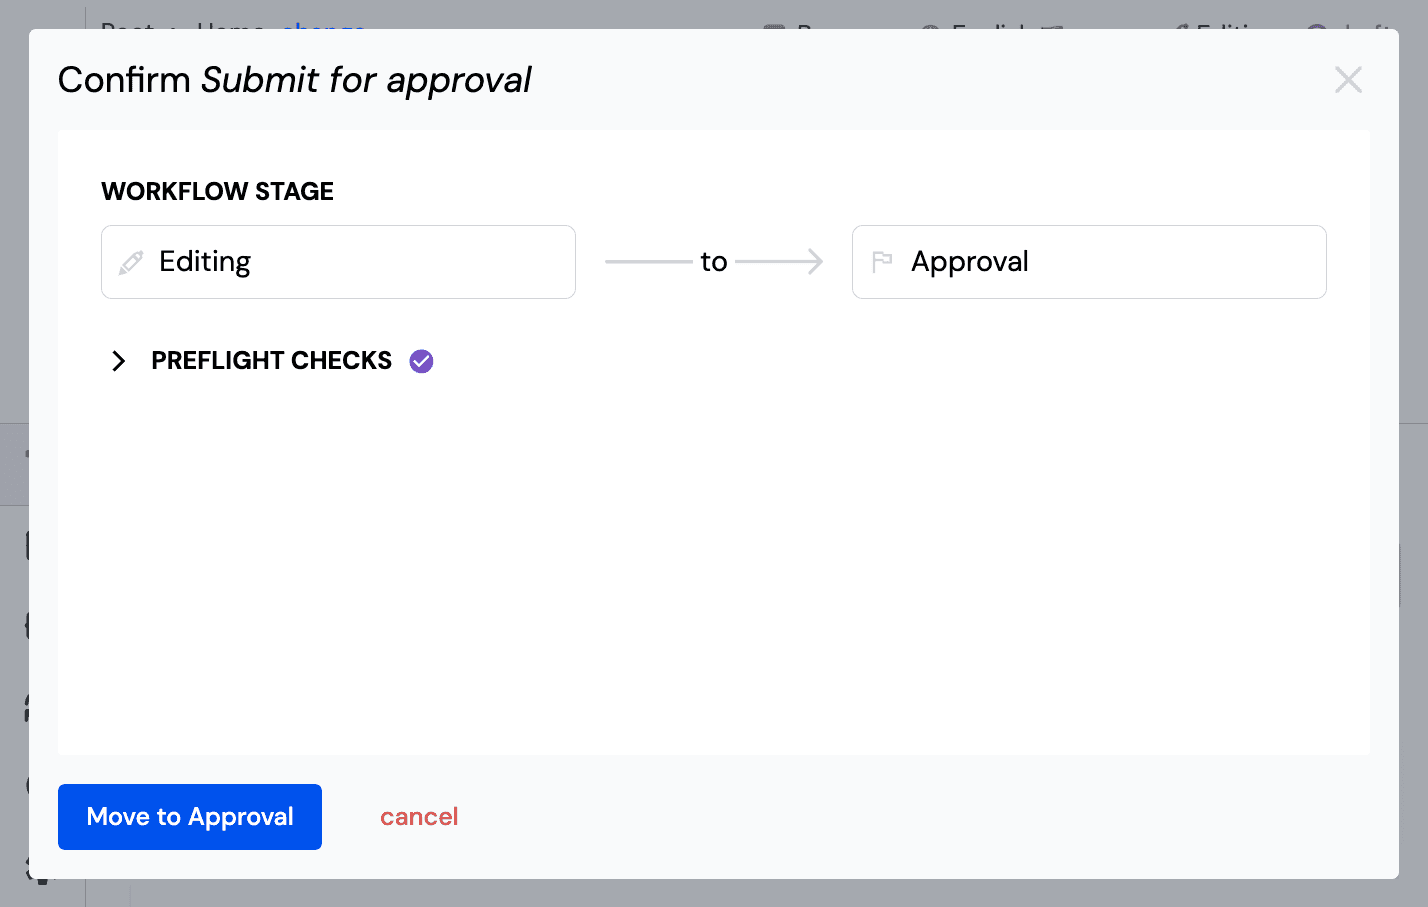
When a stage transition is activated, the following modal will appear to confirm the transition and enforcer validity checks, if required by the target stage;
Editing or deleting a workflow#
Editing workflows#
Workflows are able to be edited even if the workflow is currently in use and assigned to components or content types. If a stage is deleted during the editing of a workflow, then all compositions, patterns and entries that were currently assigned to that stage in the workflow will fallback to the initial stage of the workflow.
Deleting workflows#
When deleting a workflow, any compositions, patterns or entries that were assigned a stage as part of that workflow will no longer show any stage and will return to a state where no workflow is present. Deleting a workflow is a one-way operation, as such it is recommended to review which components and content types are assigned to a workflow before proceeding with the deletion.
To delete a workflow, open the three dot "•••" menu next to the workflow you would like to delete, and click “Delete workflow”;

Limitations#
- Max. 1,000 workflows/project
- For customers that are not subscribed to an enterprise plan, this limit is reduced to 1 workflow/project.
- Max. 100 workflow stages/workflow
- For customers that are not subscribed to an enterprise plan, this limit is reduced to 3 workflow stages/workflow.