Configure preview
Visual editing is essential for creating engaging digital experiences efficiently. Content authors want to see exactly how their changes will appear to end users before they go live.
This usually also includes previewing how content will adapt to different viewport sizes or other dynamic preview values such as locales, dynamic input values or quirks that are evaluated using conditional logic.
Using the preview panel in Uniform's visual editor authors have a real-time visualization of compositions as they're being built and ensure that the final published result matches their intention.
This guide explains how you can configure preview settings for your project which include preview URLs and preview viewports for previewing responsive designs.
Configure project preview settings#
- In Uniform, open your project.
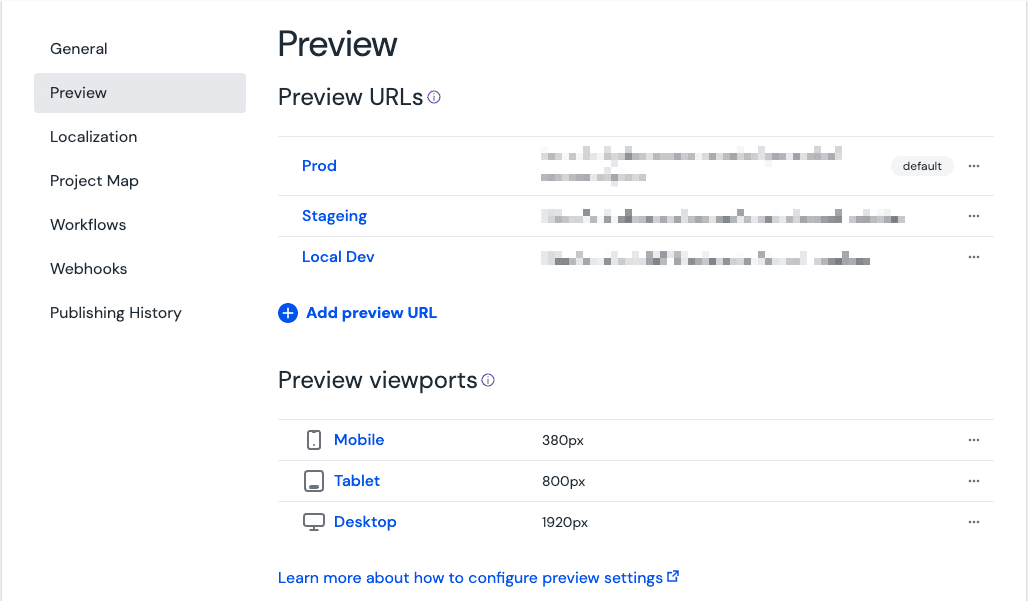
- Navigate to Settings > Preview.
- Configure preview URLs
- Configure preview viewports
tip
You can also quickly access the preview settings from the preview panel in the visual editor by clicking on the menu in the preview panel and selecting Manage preview settings.

Configure preview URLs#
Each project can have up to five preview URLs configured that can be used to preview content in different environments. These preview URLs are shared across all users of the project, but the currently selected preview URL can be different for each user which is persisted in the browser.

Add a preview URL#
To add a preview URL for your project follow these steps:
In the Preview URLs section you will see a list of preview URLs that have been configured for the project.
Click Add preview URL to add a new preview URL or duplicate an existing preview URL by clicking the Duplicate option in the menu.
About this step
You can only have up to five preview URLs configured for a project. If the link is not available, you need to remove one of the existing preview URLs before you can add a new one.
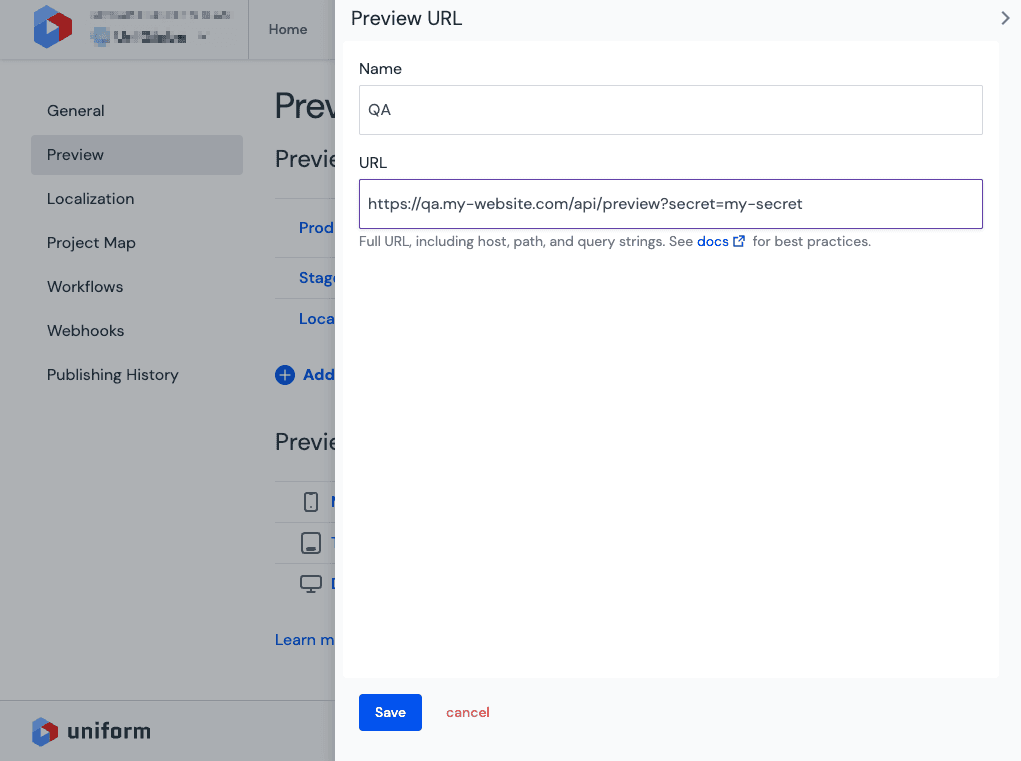
Provide a name for the new preview URL.
Enter the preview URL according to the instructions below:
Use HTTPS for preview URLs
Preview only works if your front-end application is using "
https://" URLs due to standard browser security policies.http://will only work withlocalhost(for example,http://localhost:3000), but this requires any user who wants to use visual editing to have the front-end application running locally. This is only recommended for Uniform projects when the project is still under active development and the developer is the only person using the project.The structure of the preview URL usually depends on the application framework the frontend is using:
https://<APP_HOSTNAME>/api/preview?secret=<PREVIEW_SECRET>Token Value <APP_HOSTNAME>The host name where the Next.js application is running. Any user who wants to use the preview feature must be able to access this host from their browser. <PREVIEW_SECRET>The value you specified for the preview secret in the .envfile. This environment variable is usually calledUNIFORM_PREVIEW_SECRET.info
Read the Next.js documentation to learn more about how preview mode works in Next.js and why the preview URL needs this particular URL format.
The Uniform Canvas SDK provides a default implementation out of the box to simplify the process of getting content previews working for your project.https://<APP_HOSTNAME>/?preview=trueToken Value <APP_HOSTNAME>The host name where the Nuxt application is running. Any user who wants to use the preview feature must be able to access this host from their browser. Click Save.
Optional: Move the new preview URL to the desired position by clicking the Move up or Move down options in the menu.
Now when you open a composition in Canvas you should see your website inside of the preview panel.

Configure preview viewports#
Preview viewports allow content authors to test how their compositions appear across common screen sizes that match breakpoints in their designs. This is essential for ensuring responsive design works correctly and content displays appropriately on everything from mobile phones to desktop monitors.

To manage preview viewports:
- In the Preview viewports section, you'll see a list of configured viewport sizes.
- Click Add preview viewport to create a new viewport configuration.
About this step
You can only have up to three preview viewports configured for a project. If the link is not available, you need to remove one of the existing preview viewports before you can add a new one.
- Choose an icon for the viewport.
- Provide a name for the viewport (e.g., "Mobile", "Tablet", "Desktop").
- Enter the width in pixels.
- Click Save.
The order in which preview viewports are displayed is predefined: from smallest to largest. Authors can switch between these viewports while editing in Canvas using the viewport selector in the preview panel's toolbar.
Enable preview support in code#
Once you have configured the preview settings for your project, you need to enable preview support in your code. Refer to the activate visual editing guide for more information.
Troubleshoot preview#
Consult the troubleshooting guide you have any issues with enabling preview mode.