Uniform conference tutorial (Next.js)
This tutorial guides you through adding personalization to the UniformConf site built using Next.js. By the end of this tutorial you will have a personalized Next.js application with content and personalization configured by content authors in Contentful using the Uniform app from the Contentful marketplace:
- Content authors can assign enrichments to entries to identify the visitor's interests.
- Content authors can define the conditions that must be met in order for each hero component to be displayed on the home page.
- When the visitor's interests are identified, the home page displays personalized content.
Prerequisites#
Before you get started, be sure you have the following:
Prerequisites
You must have access to a Uniform team with the ability to create new projects. If you are an active customer or a partner, please get in touch with your Uniform team administrator colleague and ask for an invite.
If you are not sure or your company does not have a Uniform team, you can request a sandbox here.
- Administrator access to Contentful - to import content and add the Uniform app to your Contentful space.
- Administrator access to Uniform - to configure the personalization settings that are available in Contentful.
- Node.js (version 14 or greater) - installed on your machine to work with the Next.js app.
- Uniform Context browser extension - to facilitate development and testing personalization on the Next.js app. You can get the extension here. This isn't required to use Uniform Context, but it makes development and testing much easier.
Create Uniform project#
In Uniform, a project is the basic unit of organization. A project is where you will define the criteria you want to use to configure personalization.
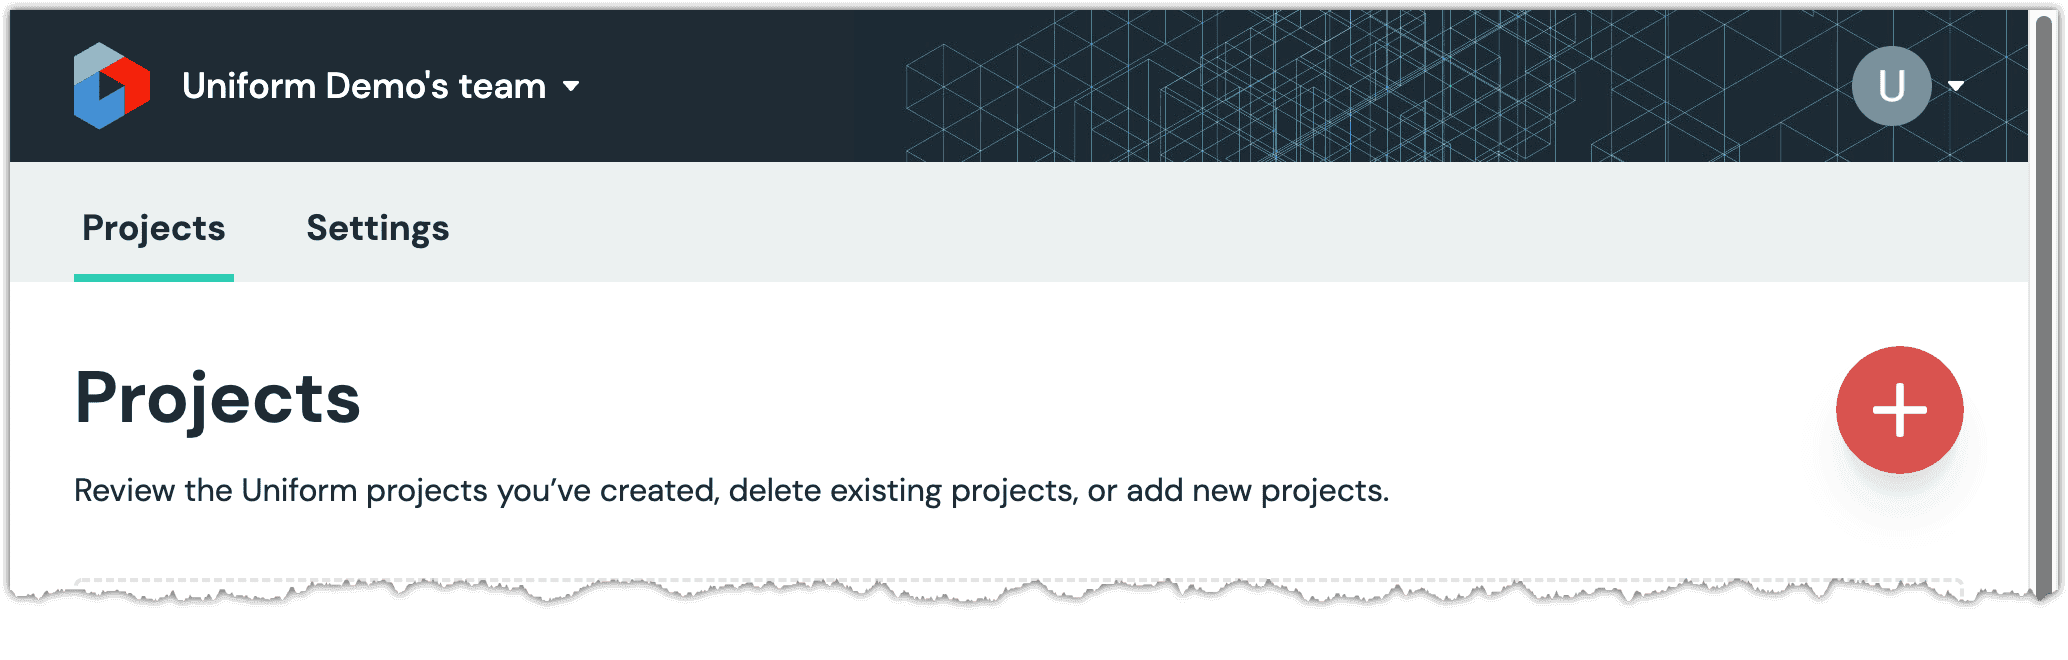
Log into Uniform.
On the Projects page, click (+) to create a new project.
Enter the following for the project name:
UniformConf for ContentfulScroll down and click Empty project.
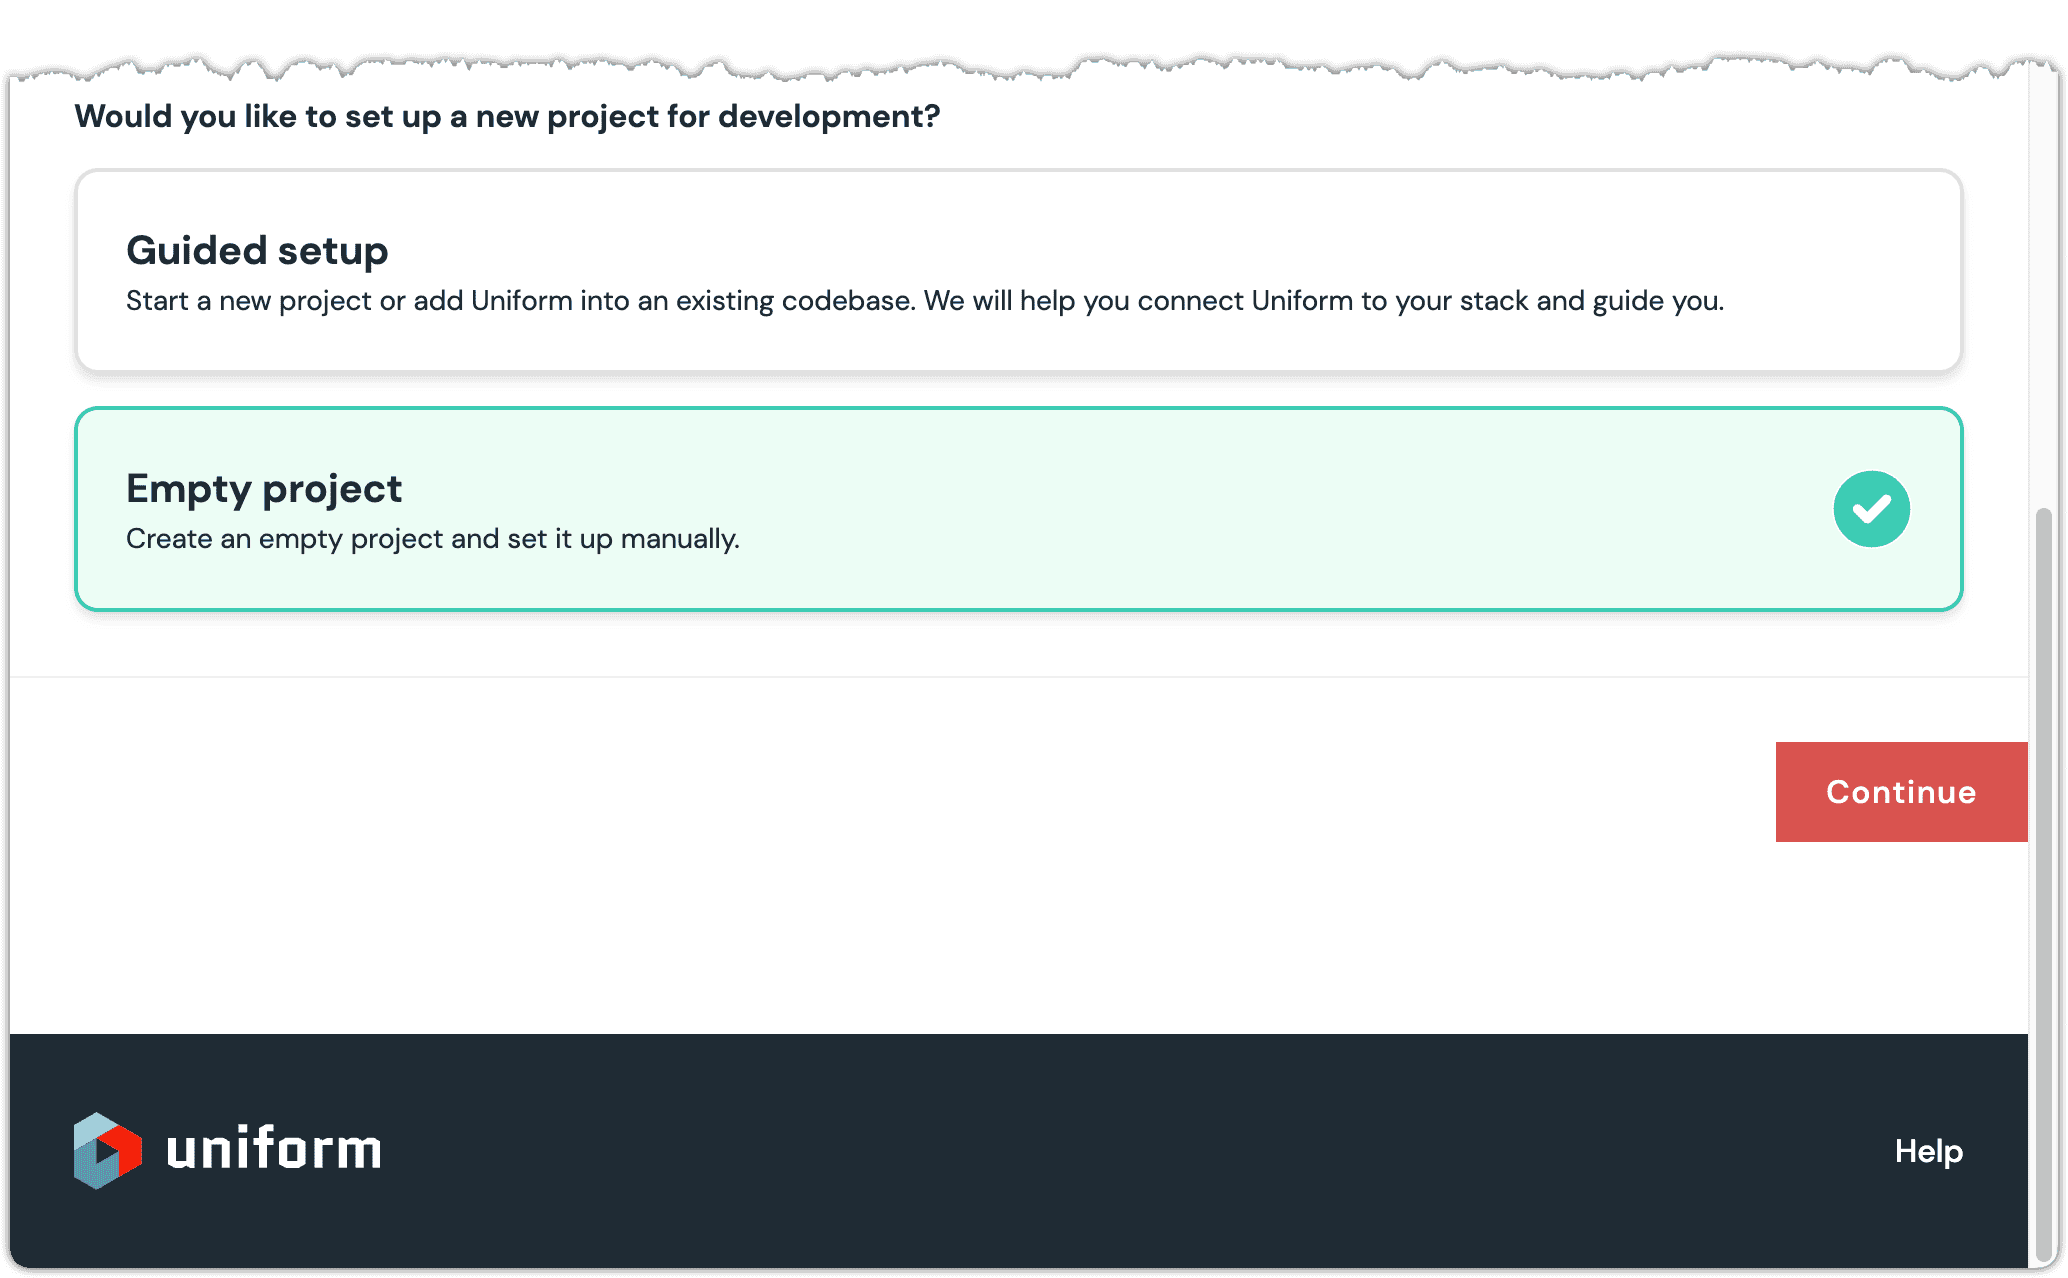
Click Continue.
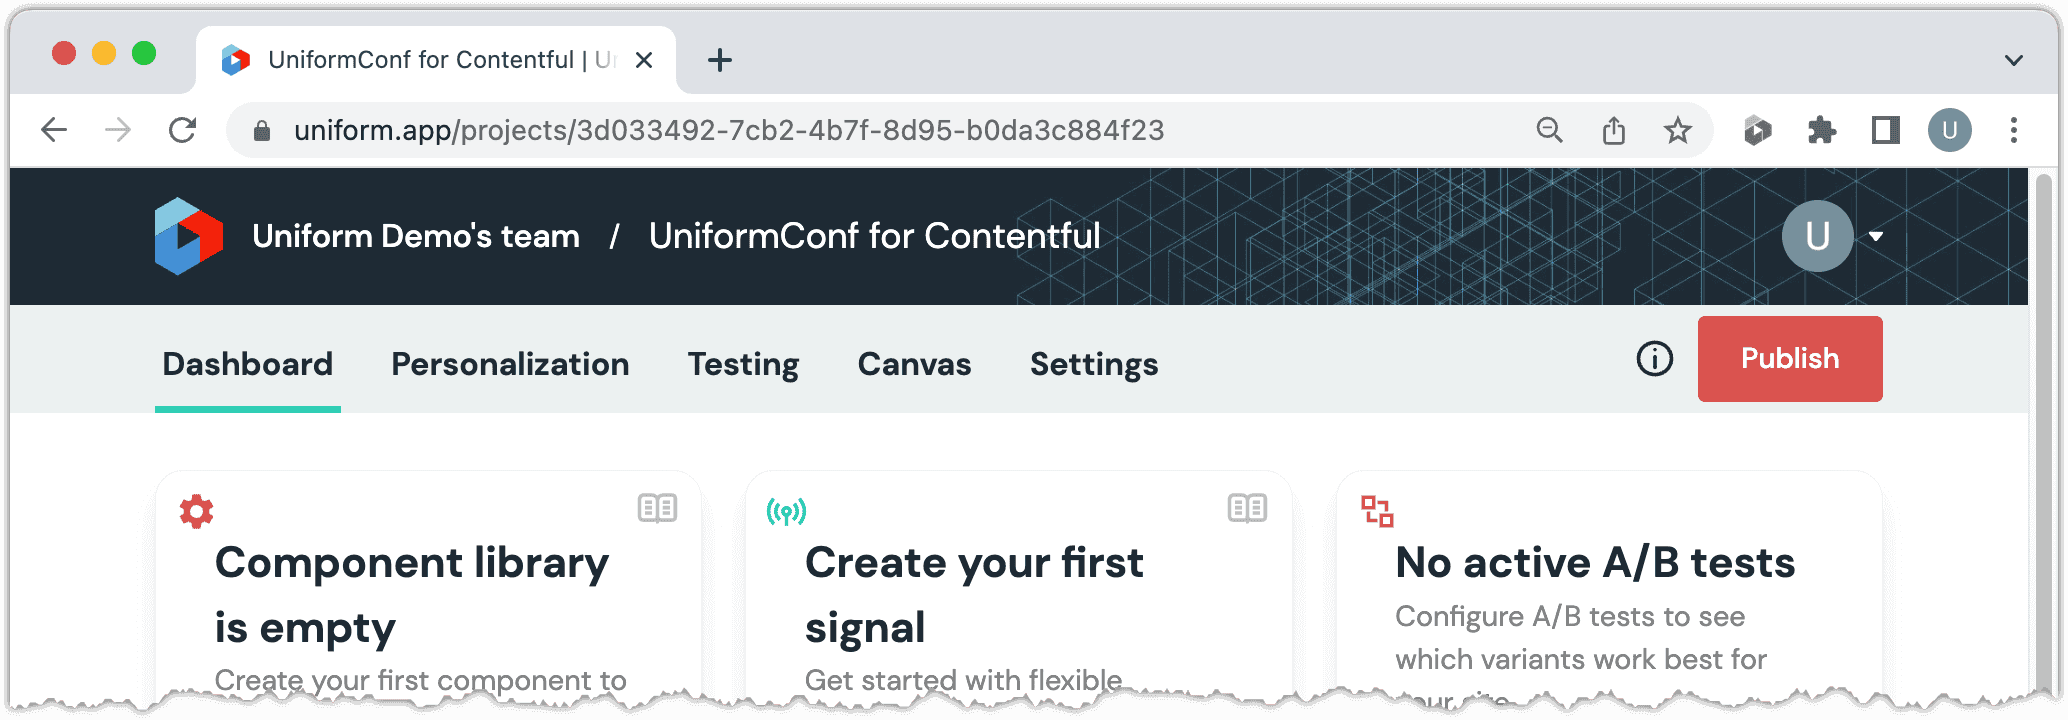
Your project is created and you are taken to the project home page.
Configure Contentful#
Load sample content into Contentful#
In Contentful, create a content management token.
About this step
This token is needed to load data into your Contentful space. Note this value because you will need to add it to your
.envfile later.In Contentful, create a content delivery access token.
About this step
This access token is needed to read content from your Contentful space. Note this value because you will need to add it to your
.envfile later.Clone the following repository:
https://github.com/uniformdev/uniform-docs-examplesCheck out the following branch:
apps/contentful/nextjs/no-uniformAdd the following file:
NEXT_PUBLIC_CONTENTFUL_SPACE_ID=<YOUR CF SPACE ID> NEXT_PUBLIC_CONTENTFUL_ACCESS_TOKEN=<YOUR CF CONTENT DELIVERY ACCESS TOKEN> CONTENTFUL_MANAGEMENT_TOKEN=<YOUR CF MANAGEMENT TOKEN>Open a terminal in the root of the repository.
Enter the following commands:
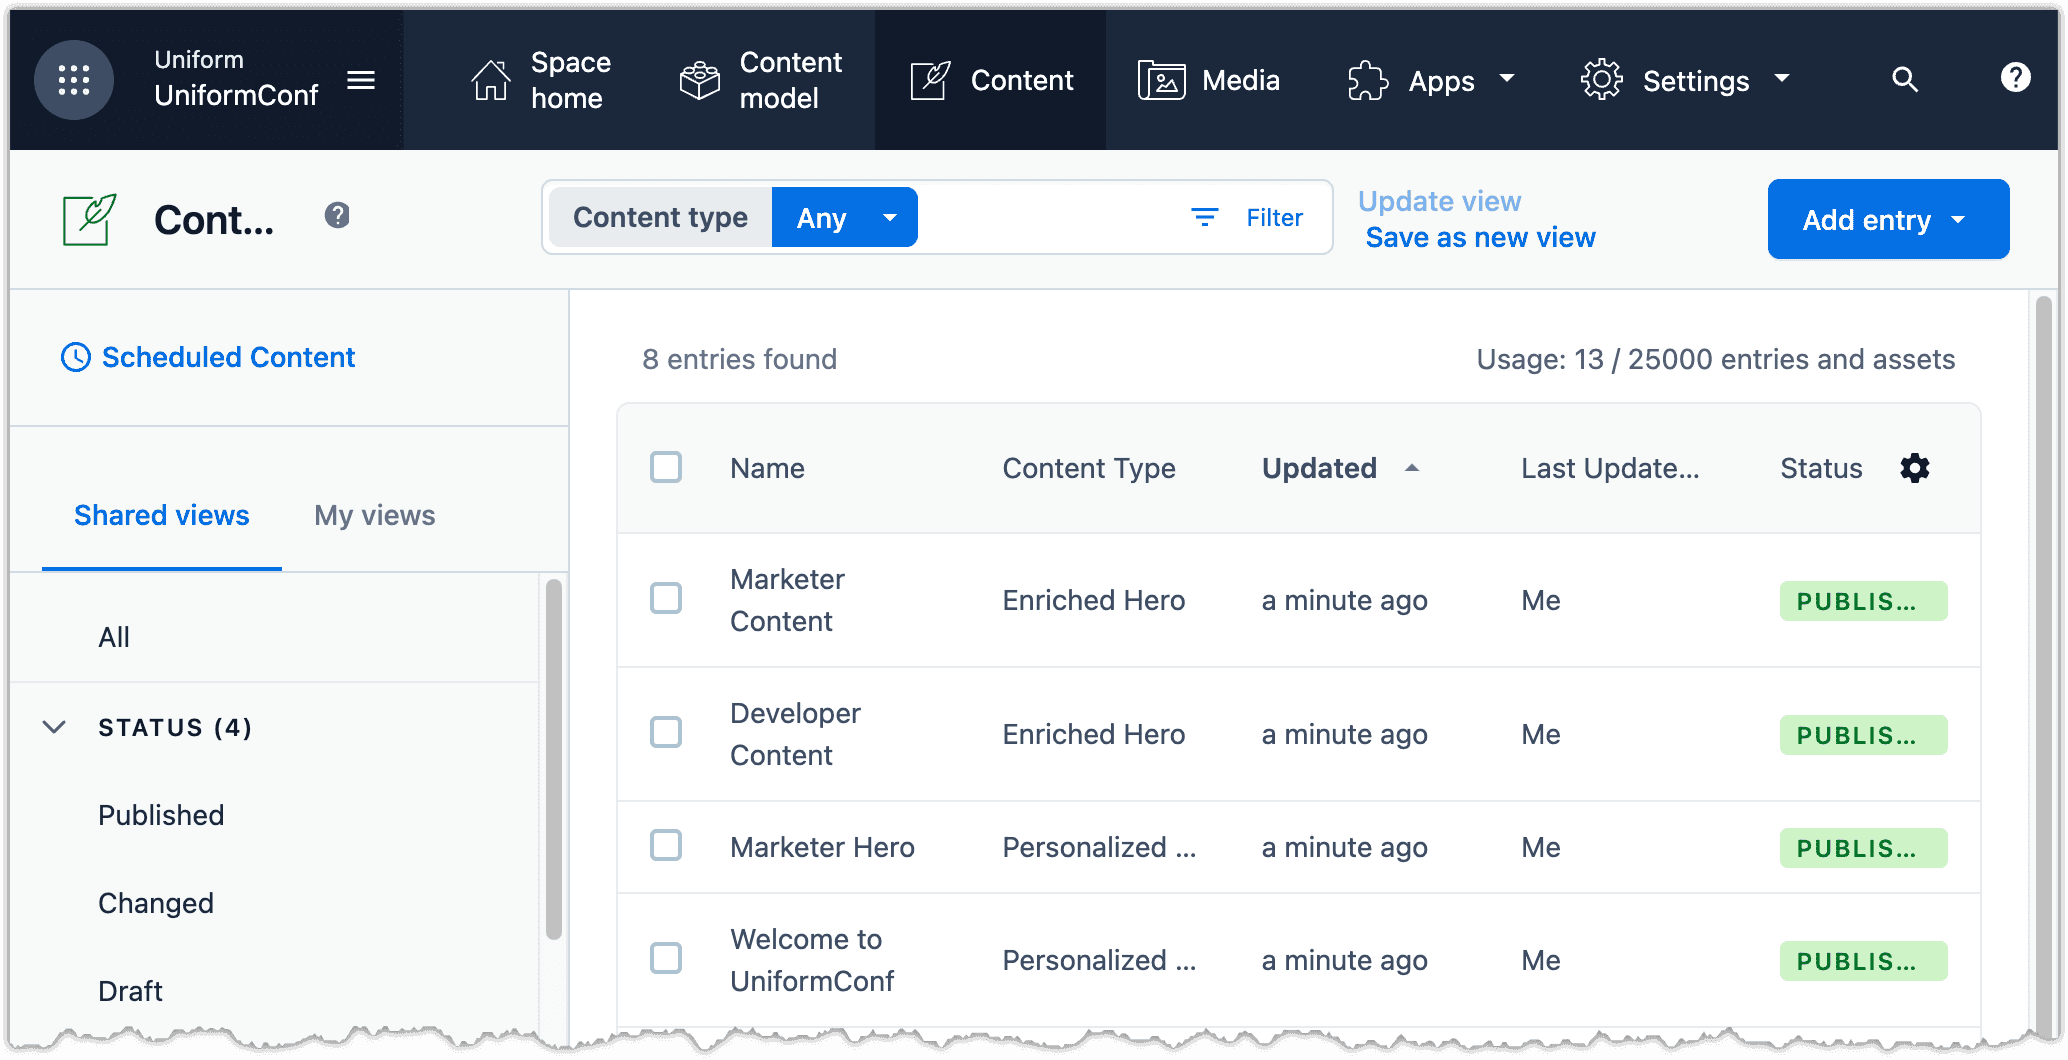
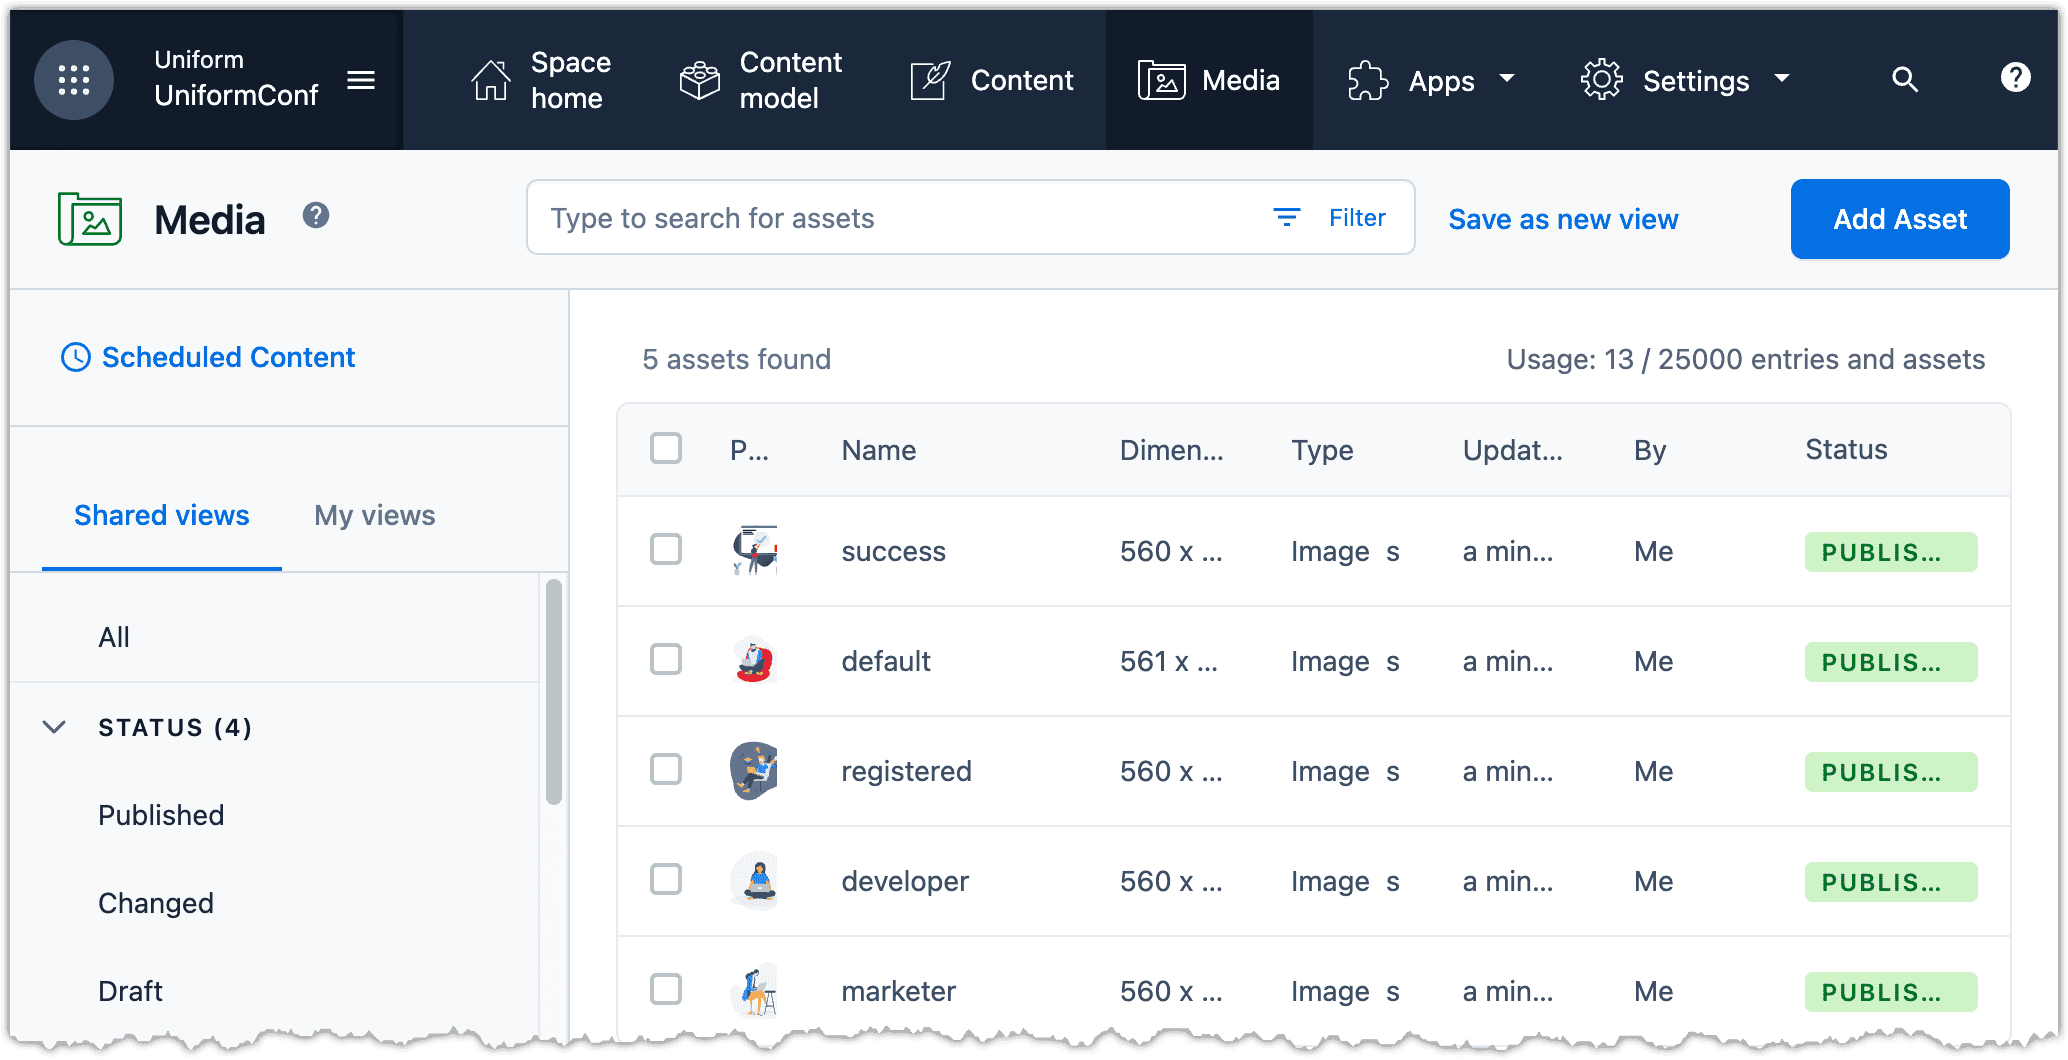
npm install npm run cf:importIn Contentful, confirm you have a entries in the content model, content, and media sections.
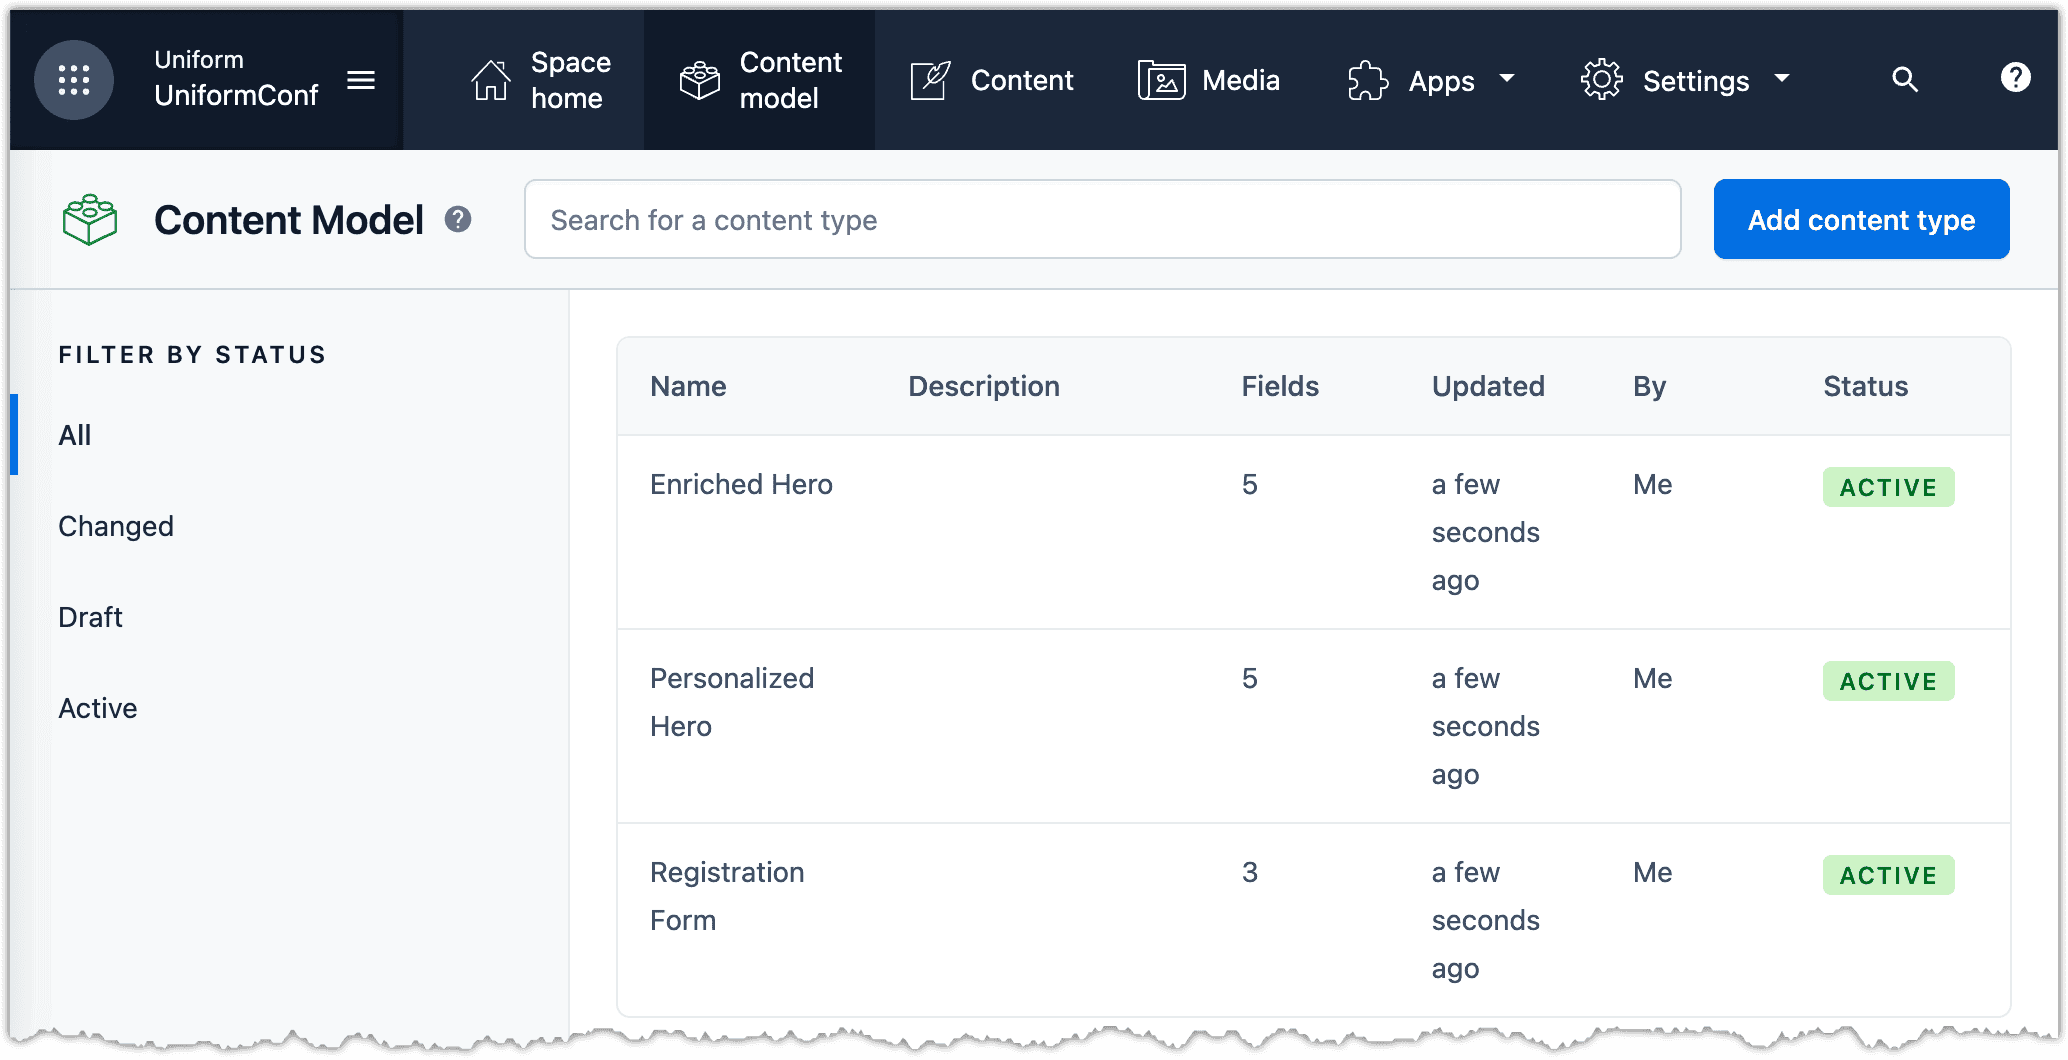
About this step
You might notice there are two hero content types: Enriched Hero and Personalized Hero. There is nothing special about these content types - yet. You will assign enrichment tags to the former and personalization criteria to the latter.
Install Marketplace app#
You must install and configure the Uniform app from the Contentful Marketplace to your space.
Install the Marketplace app.
info
Be sure to note the Uniform API key you create. You will need this value in a later step.
Configure space#
Now you need to add classification and personalization settings to Contentful. This involves the following:
- Add enrichment tagging to the content type Enriched Hero.
- Assign enrichment tags to Enriched Hero content entries.
- Add personalization criteria to the content type Personalized Hero.
- Assign personalization criteria to Personalized Hero content entries.
- Create a content type to define a list of Personalized Hero entries.
- Configure a content entry for the list of Personalized Hero entries for the home page.
tip
If you prefer to get Contentful configured and import the finished configuration into your Contentful space, you can skip to the finished configuration section.
Configure Enriched Hero entries#
Uniform personalization depends on the Uniform tracker. This is a client-side component that captures visitor activity. When the visitor views a page with an enriched hero, you want the Uniform tracker to keep track of the persona associated with the hero. This enables you to understand the personas the visitor's activity matches.
In Contentful, navigate to Apps > Manage apps.
Open the Uniform app.
In the ENRICHMENT TAGGING section, from the dropdown select Enriched Hero.
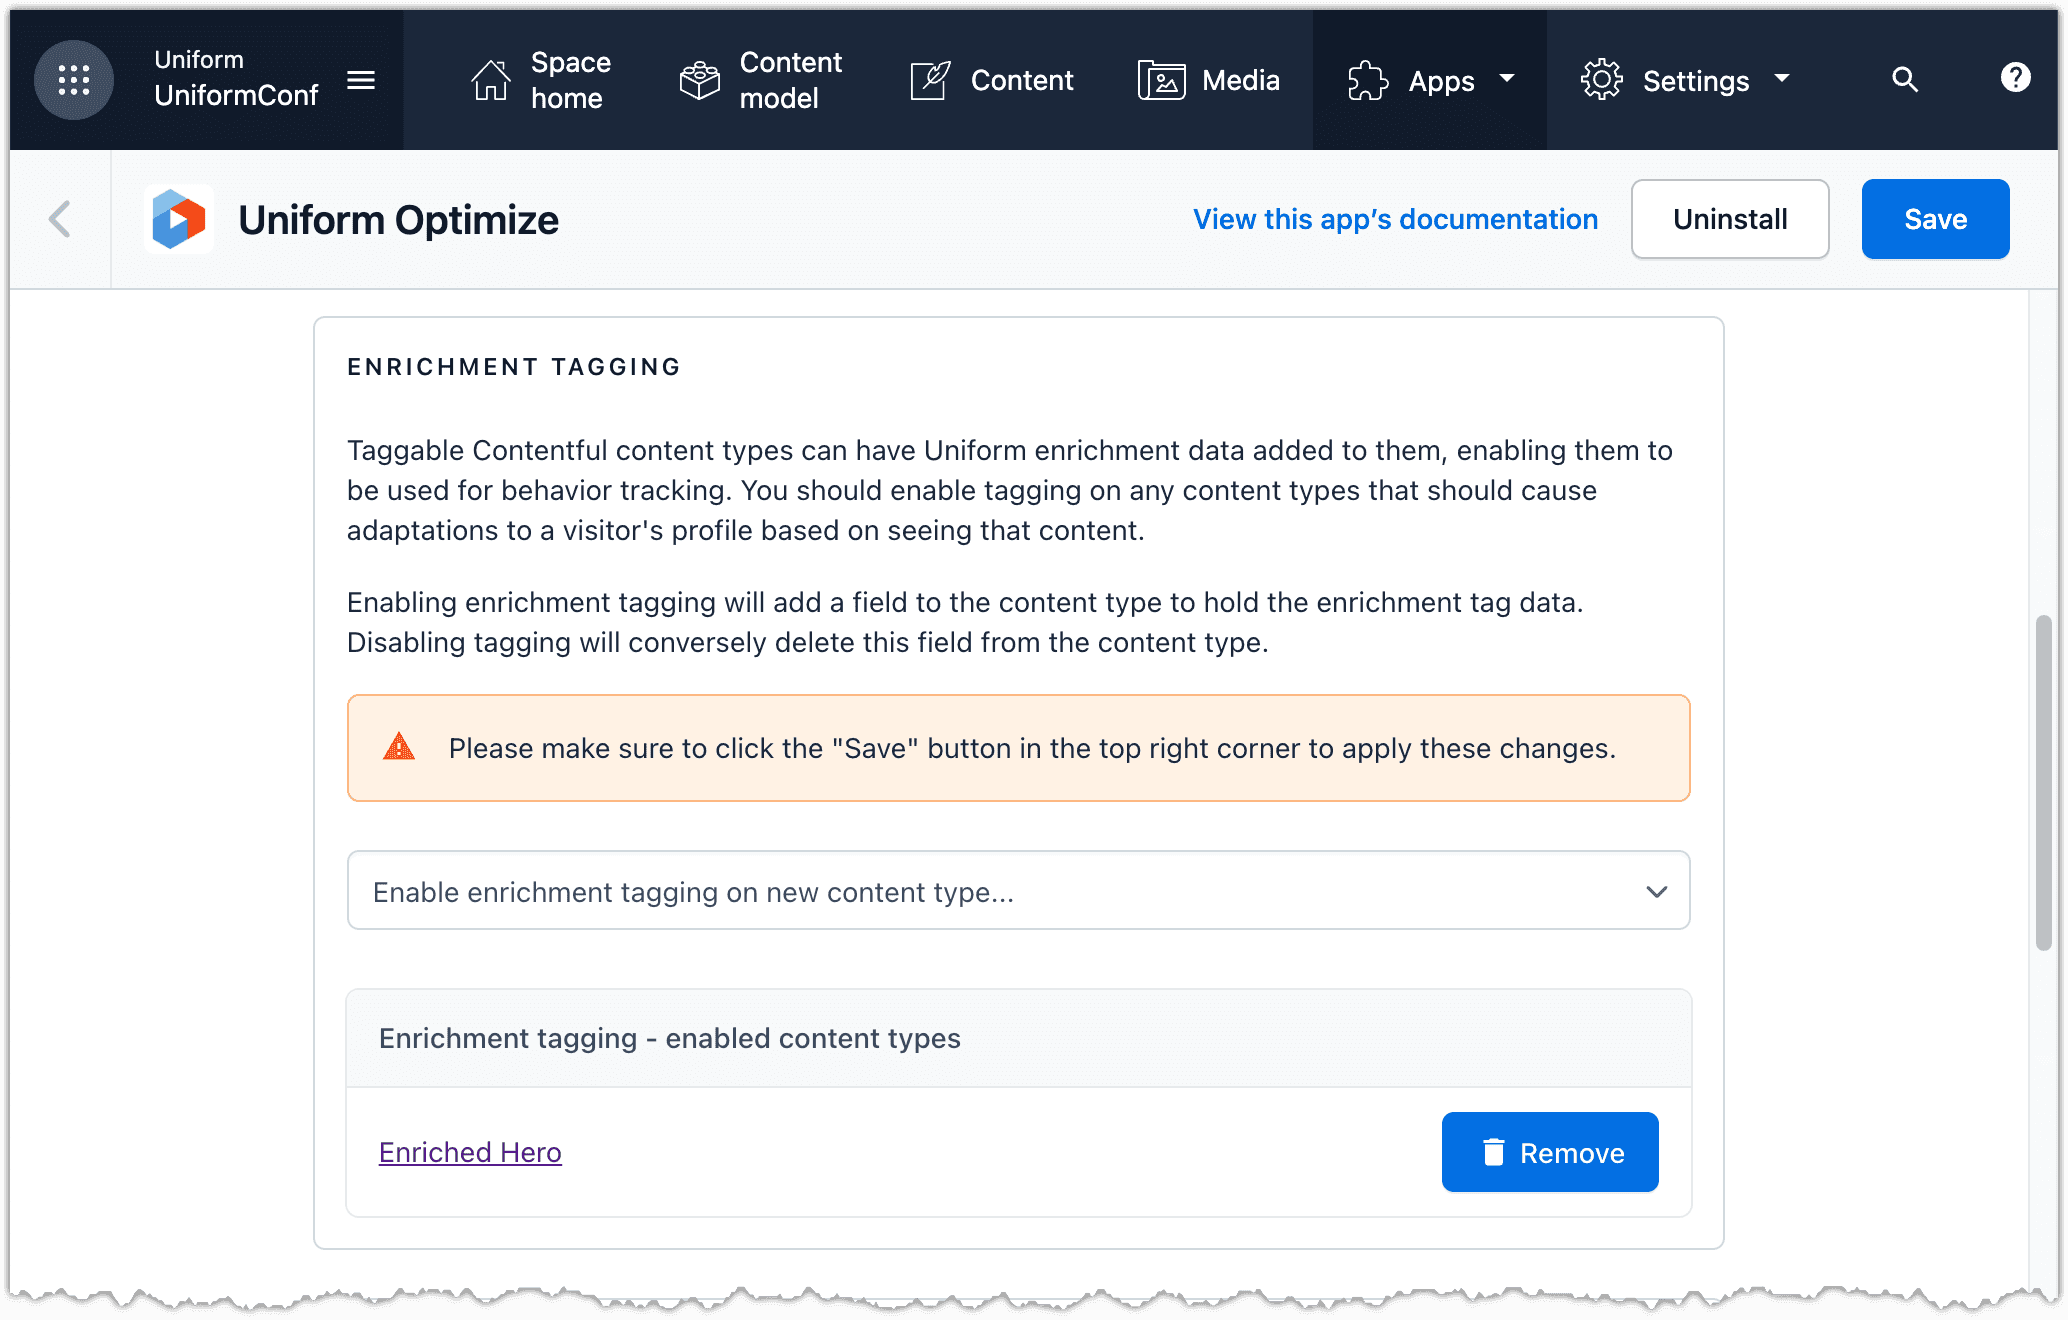
About this step
This adds a new field to the content type Enriched Hero.
Click Save.
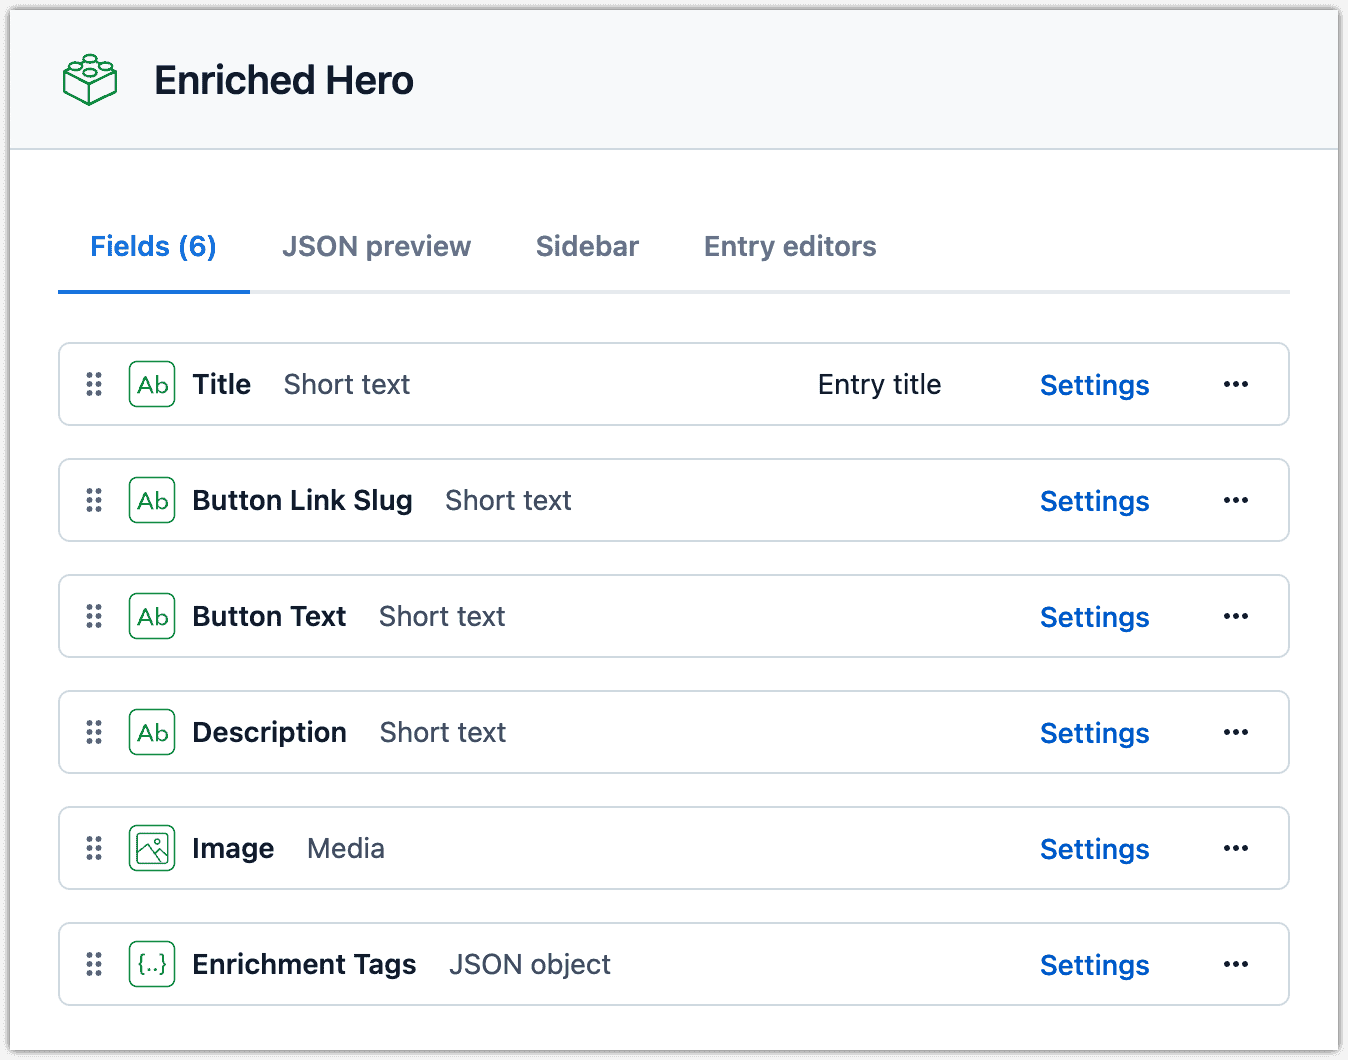
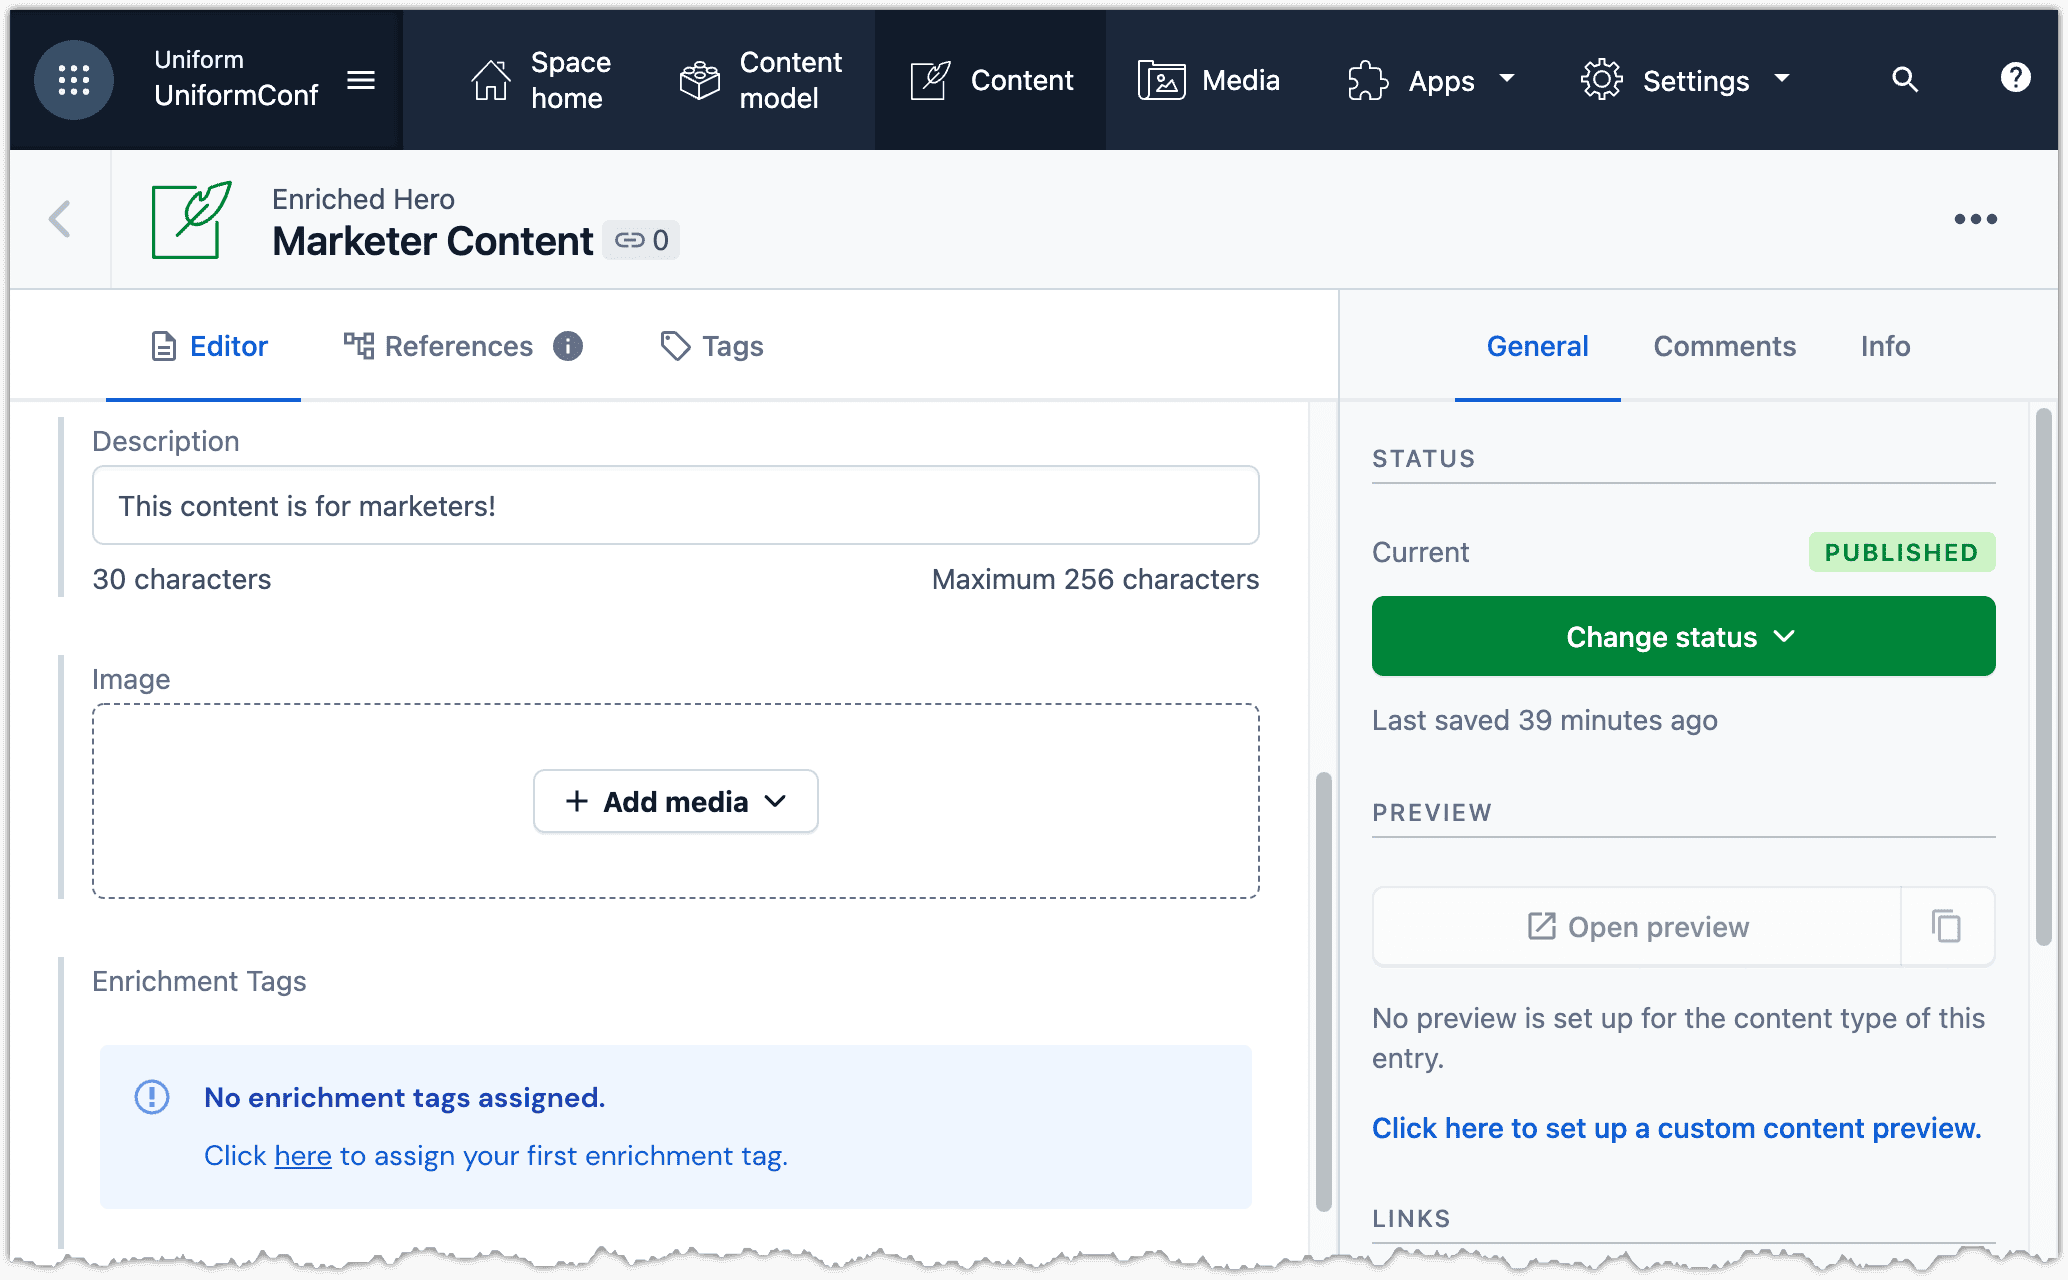
Open the content type Enriched Hero. Notice the field Enrichment Tags.
Open the entry Marketer Content.
Scroll down to the field Enrichment Tags.
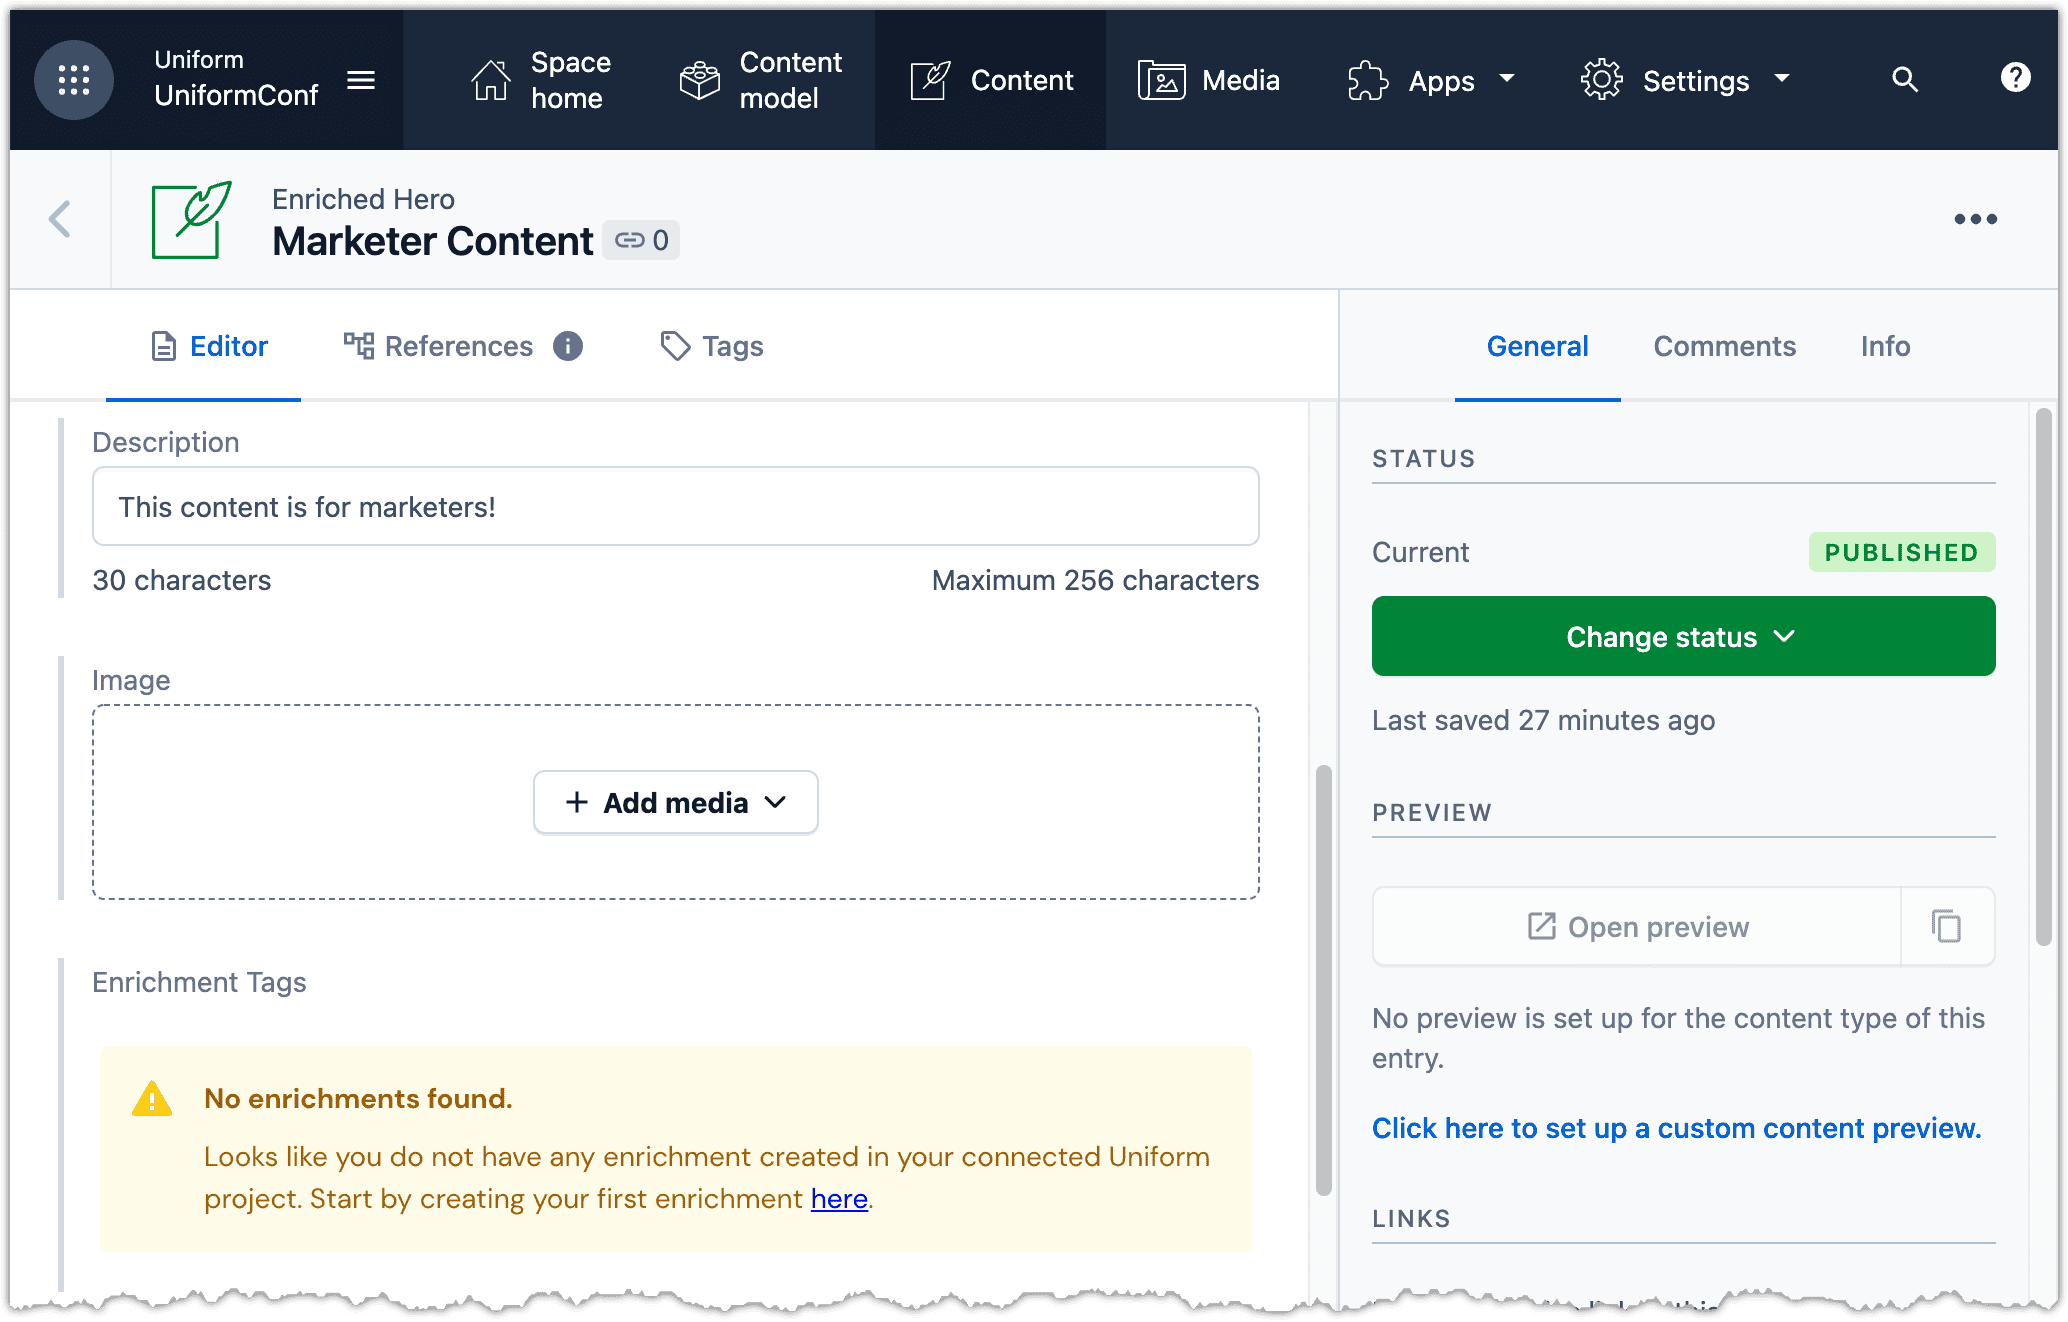
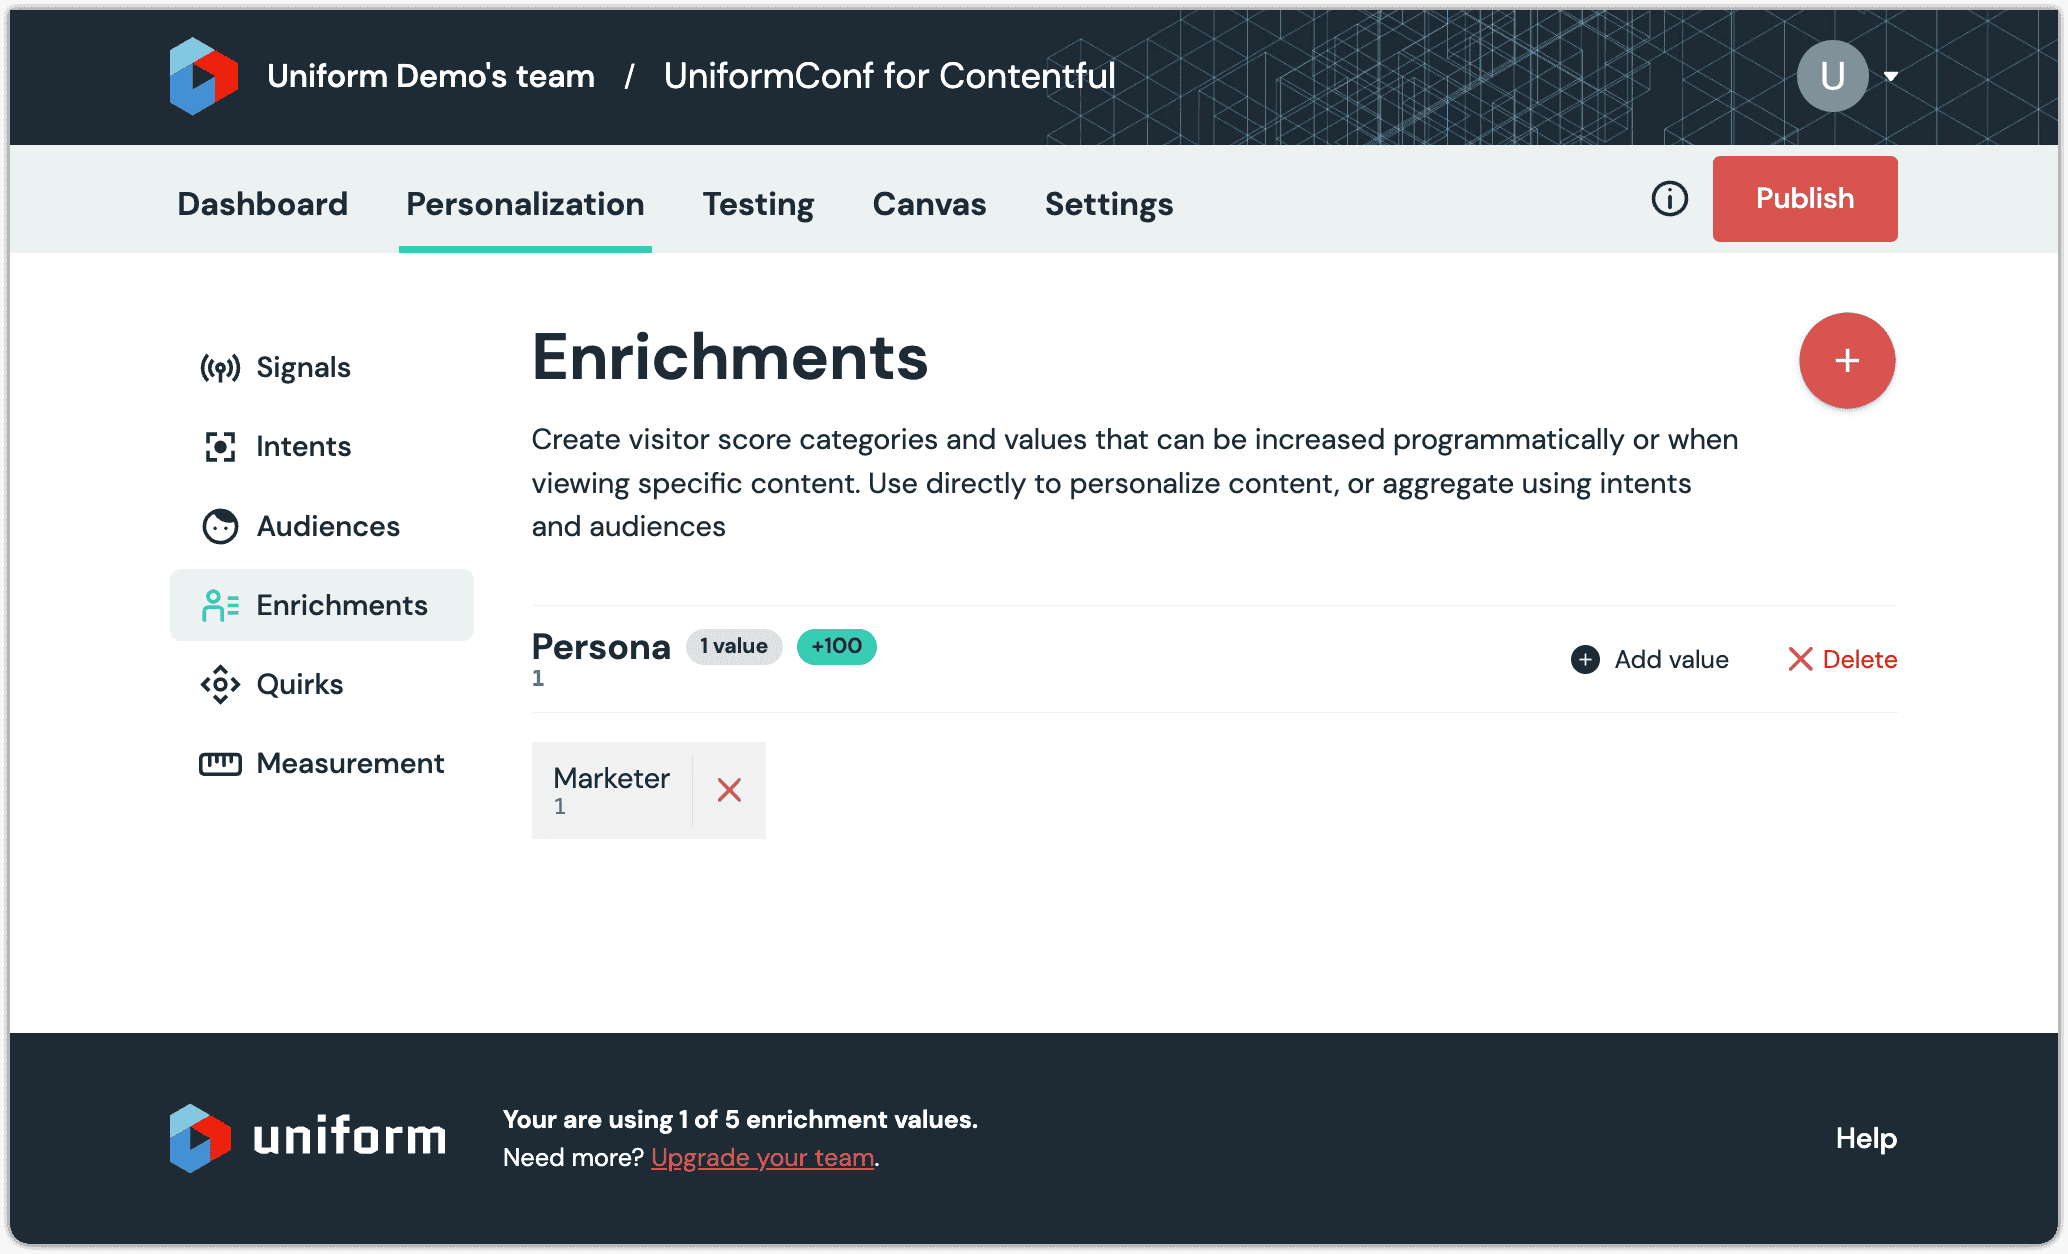
Click on the word here to open a new tab with the Uniform Enrichments page.

Click (+) to create a new enrichment.
Enter the following values:
- Name:
Persona - Public ID:
1
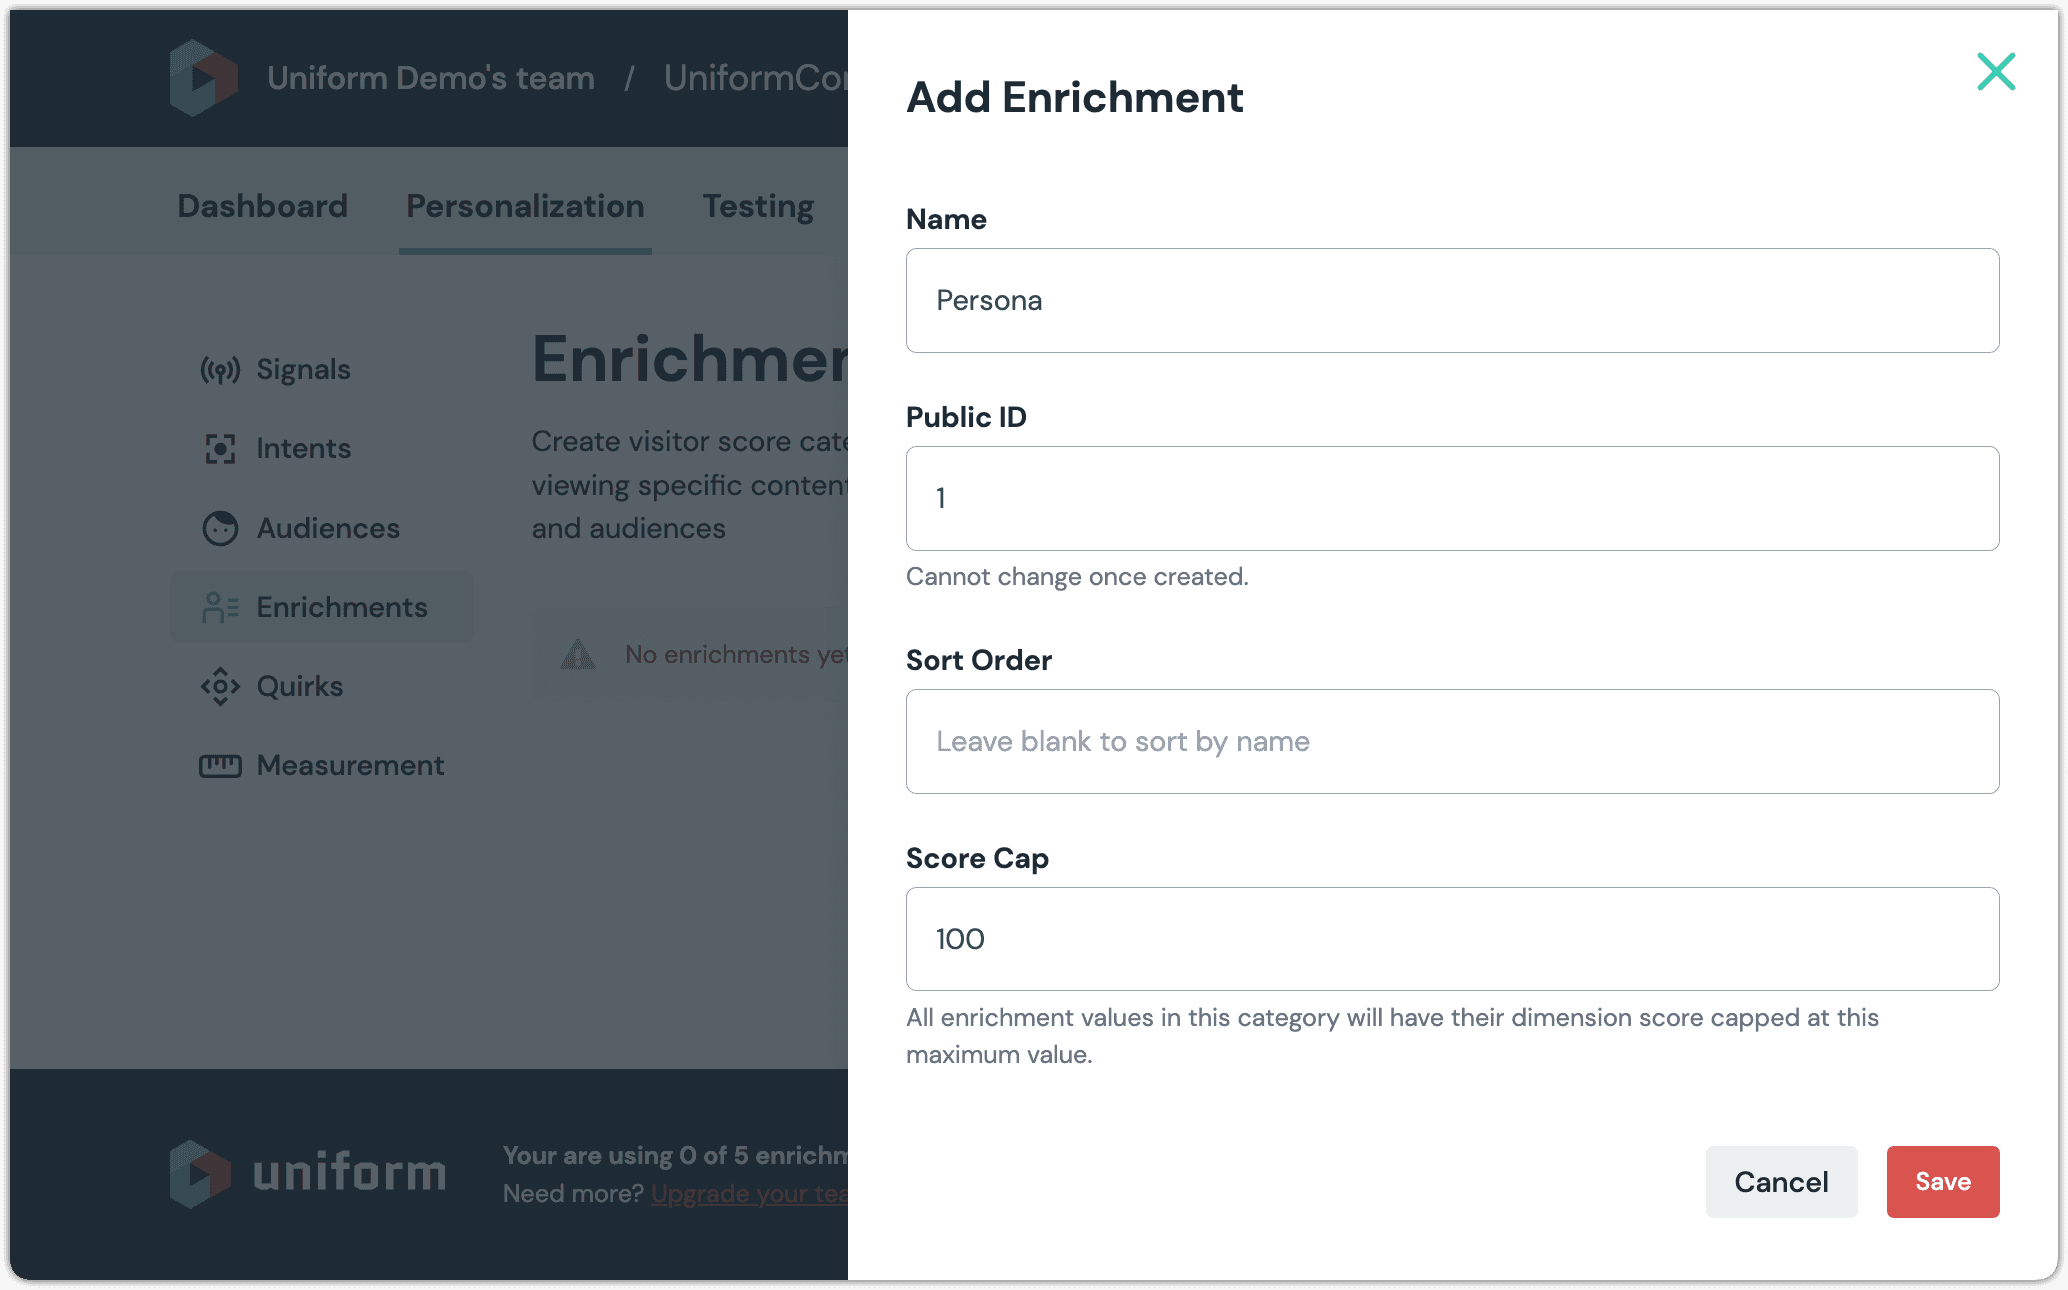
- Name:
Click Save.
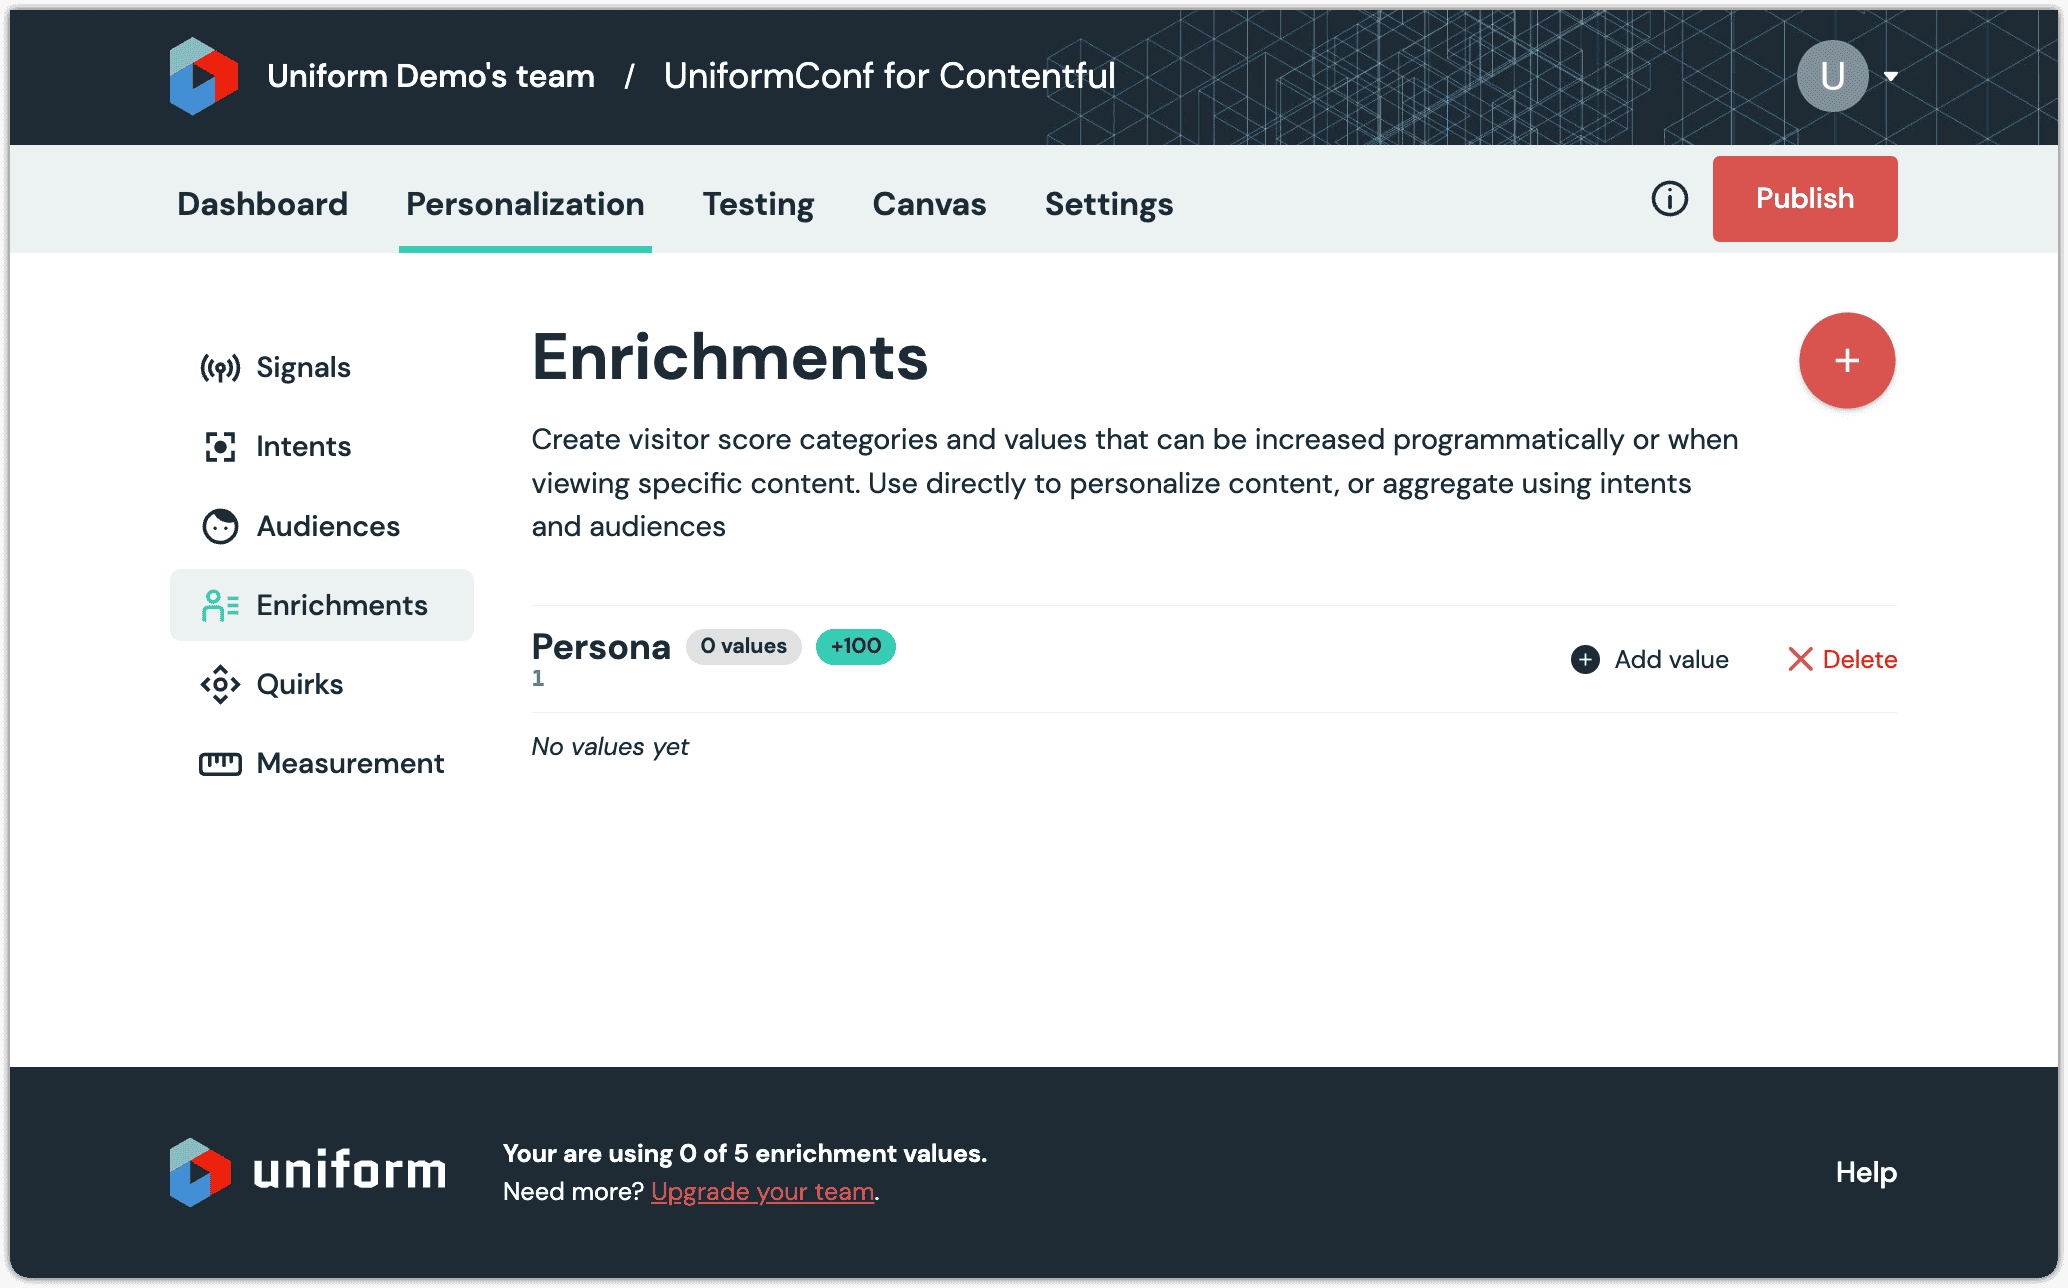
Click Add value.
Enter the following values:
- Name:
Marketer - Public ID:
1
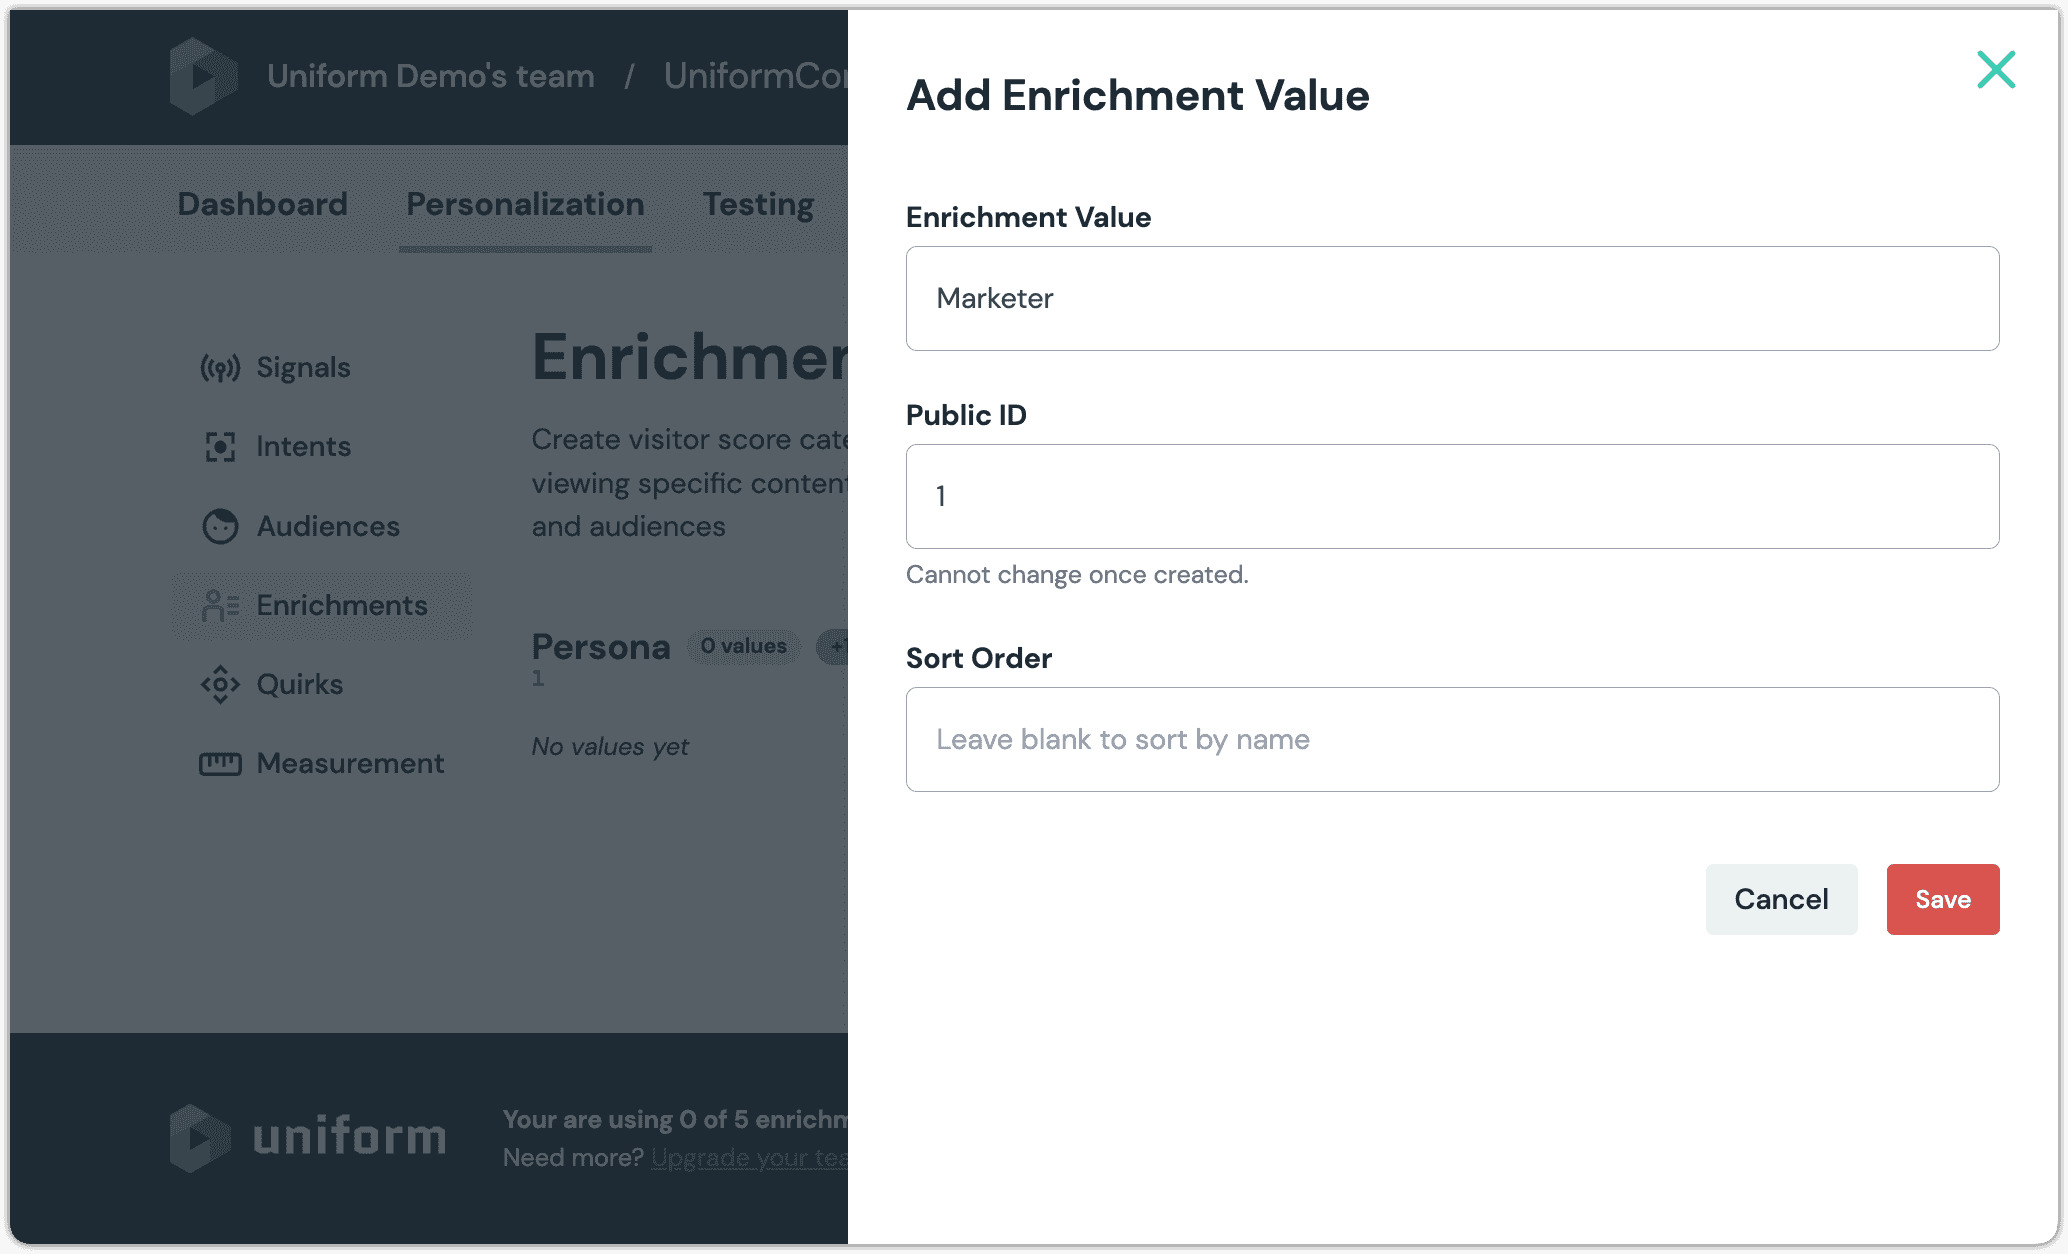
- Name:
Click Save.
In Contentful, refresh the entry page.
Click on the word here.
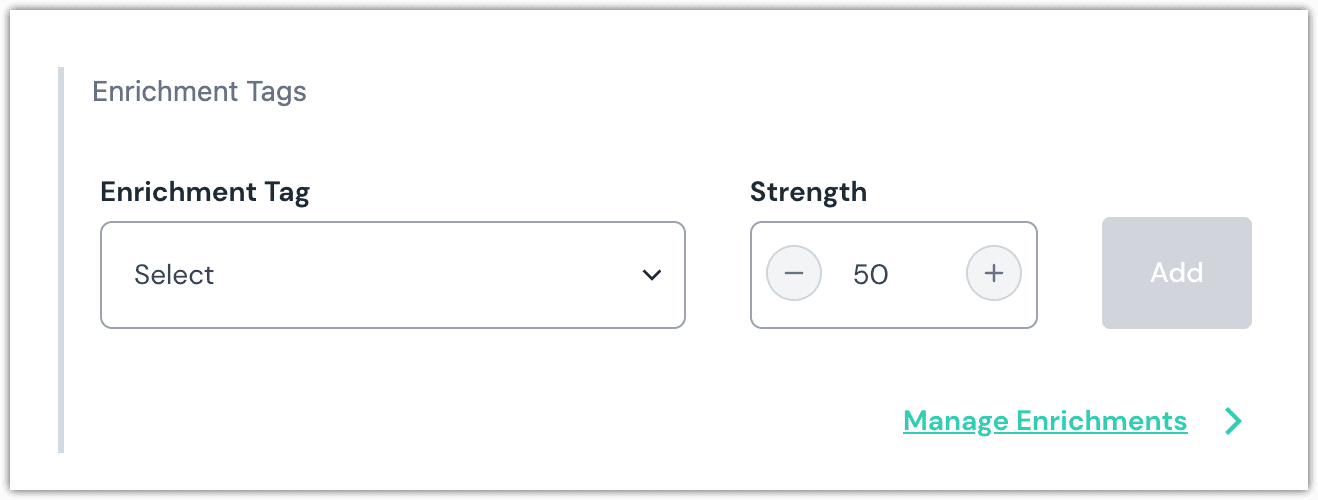
Click Select > Enrichment: Marketer.
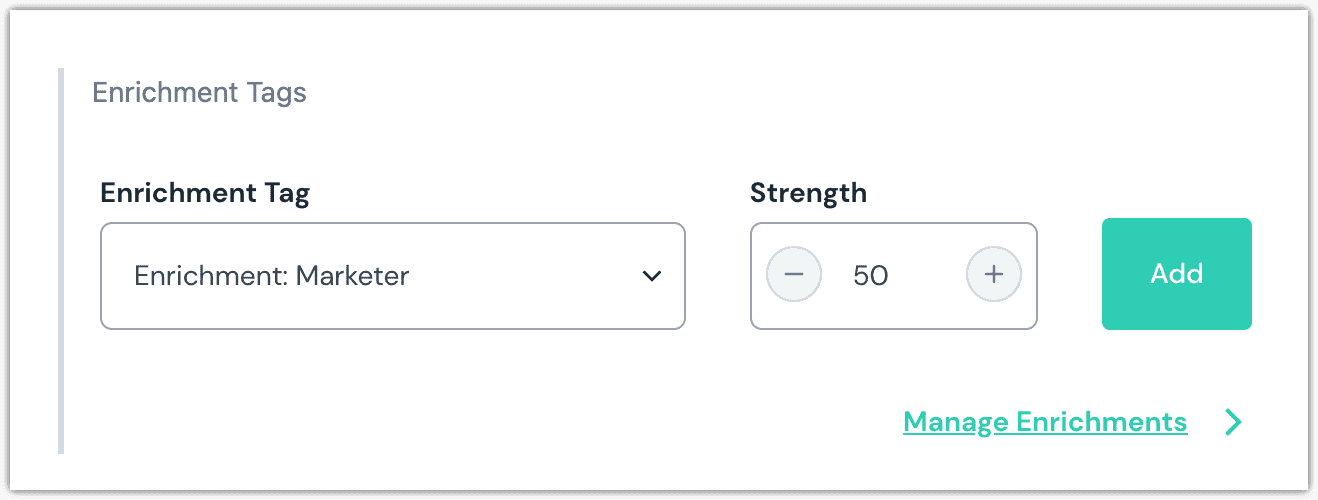
Click Add.
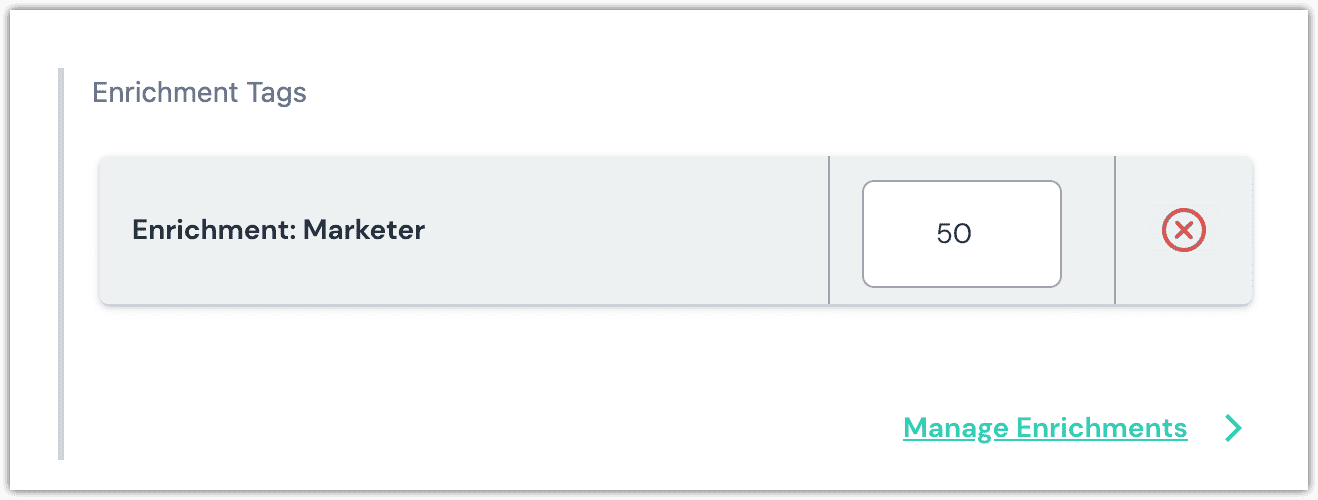
Click Publish.
In Uniform, add another value to the enrichment Persona:
- Name:
Developer - Public ID:
2

- Name:
Click Publish.
About this step
When settings are configured under personalization, they're not available to be used in an application until they're published.
In Contentful, set the value on the field Enrichment Tags on the following Enriched Hero entries:
Title Enrichment Tags Developer Content Enrichment: Developer Publish the entries.
Configure Personalized Hero entries#
Personalized Hero entries provide the personalized content that will be displayed on the home page. The specific entry that's used when a visitor views the home page depends on the visitor's activity.
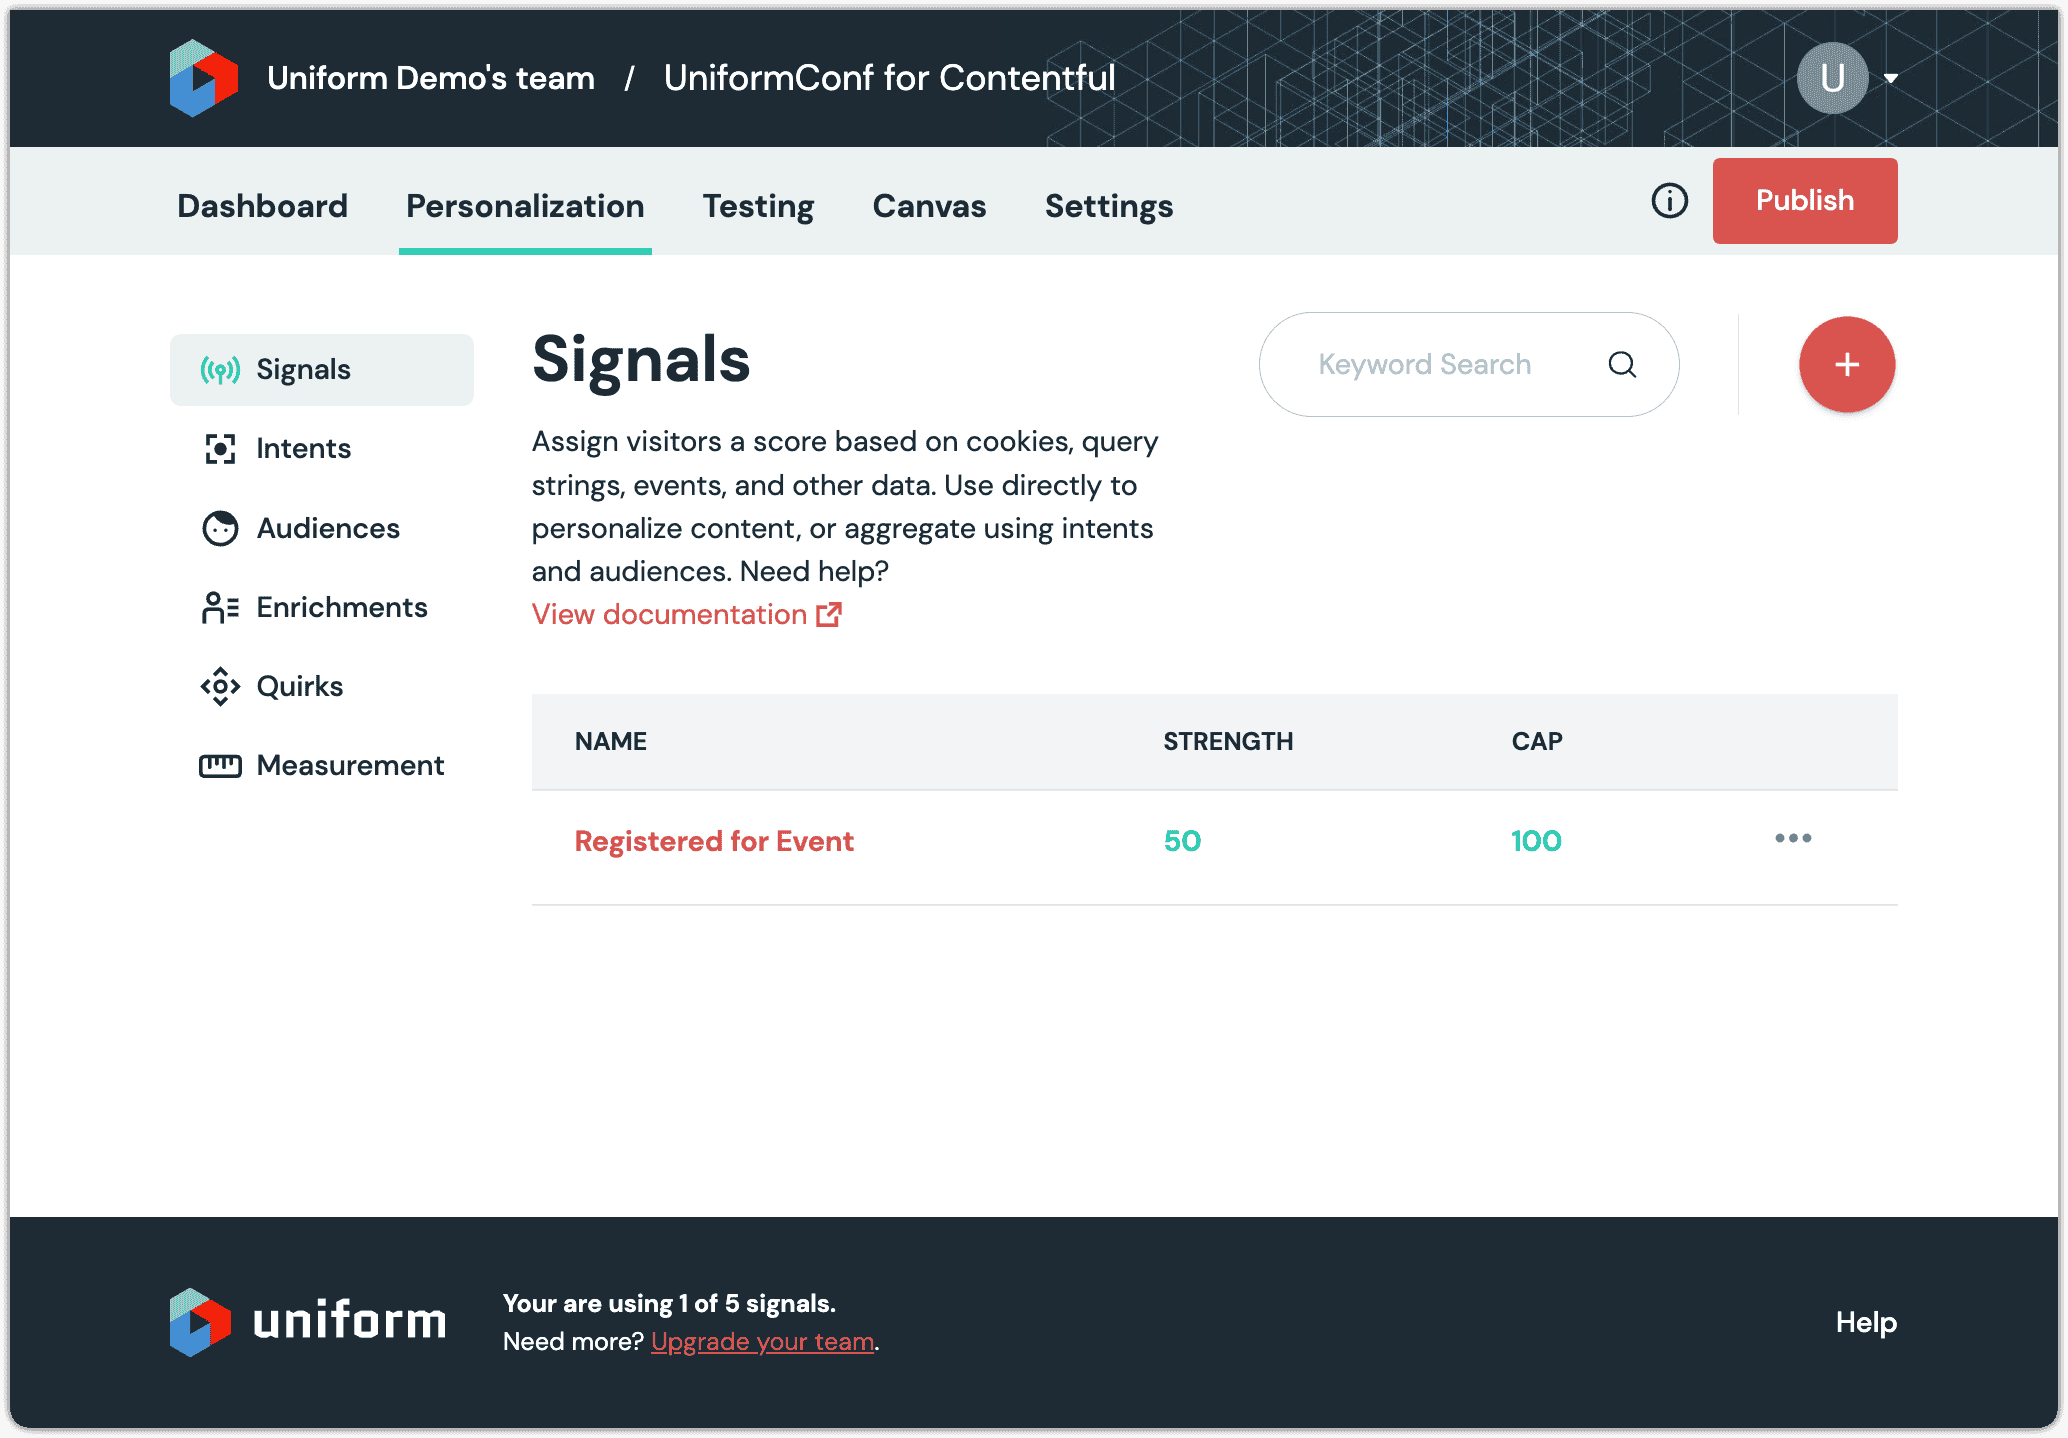
In Uniform, navigate to Personalization > Signals.
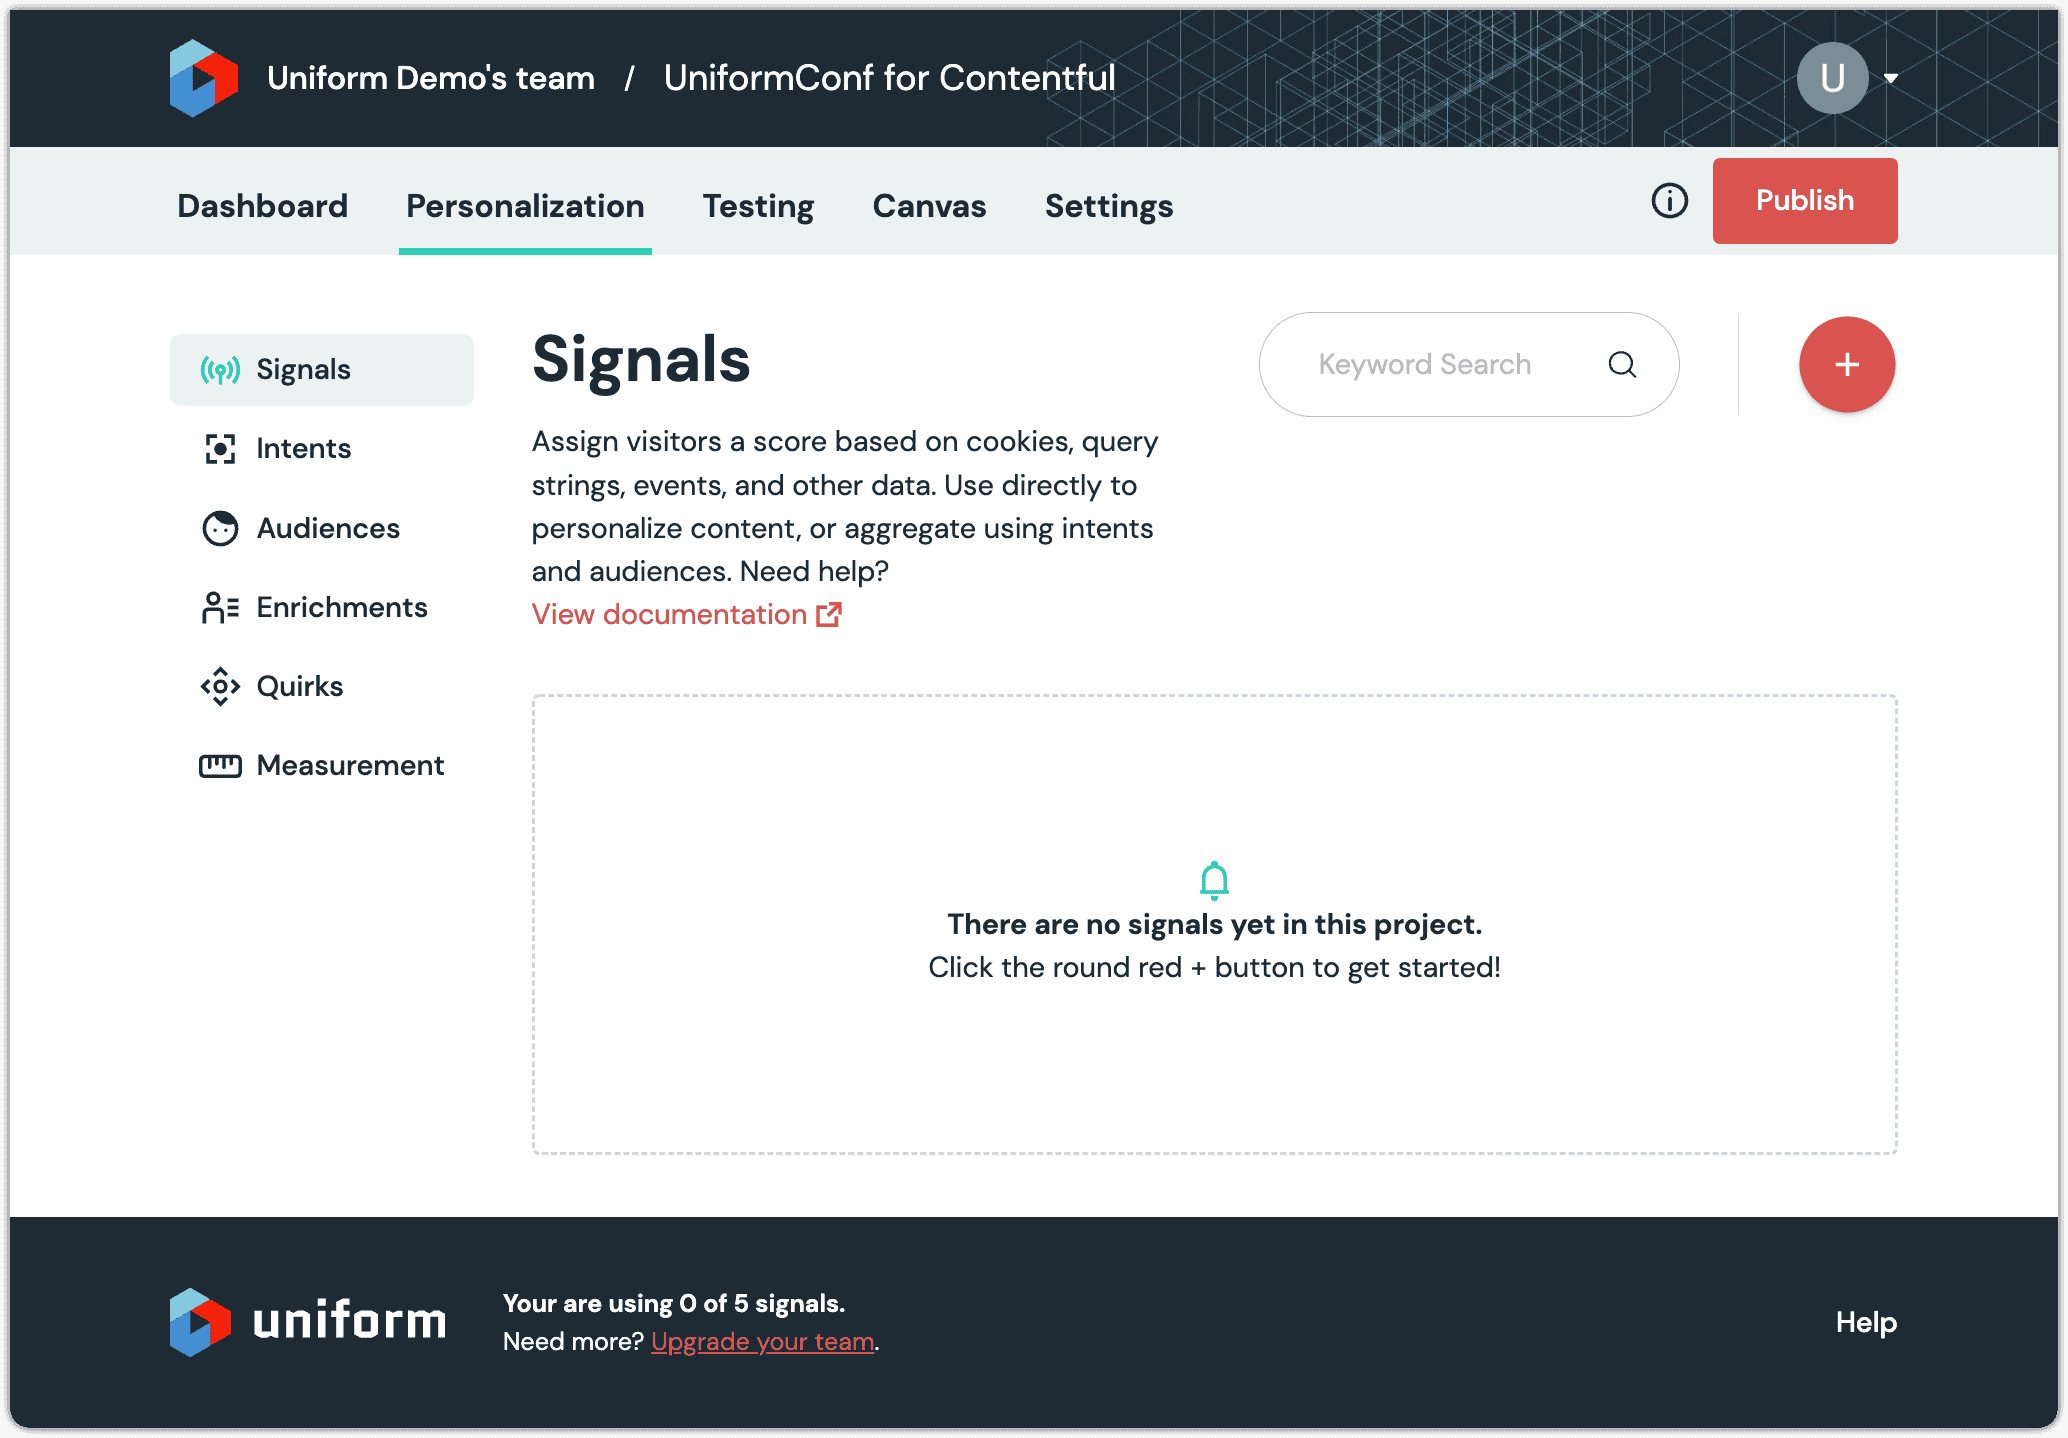
Click the red (+) button.
Enter the following values:
- Name:
Registered for Event - Public ID:
registeredForEvent
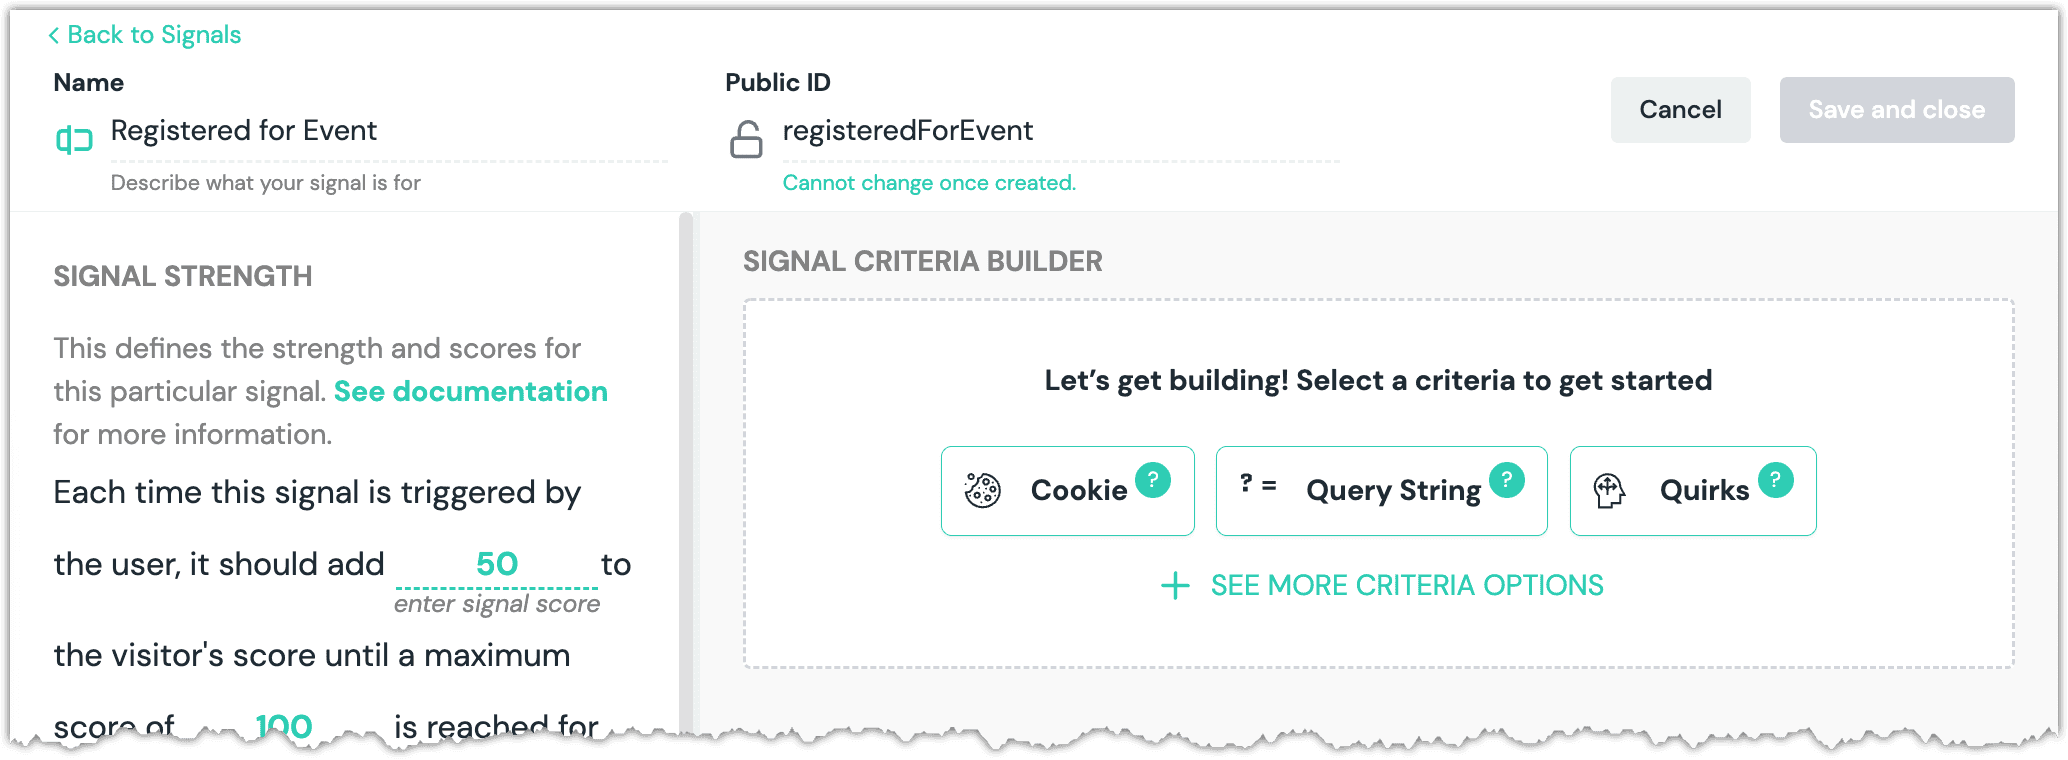
- Name:
Click Cookie.
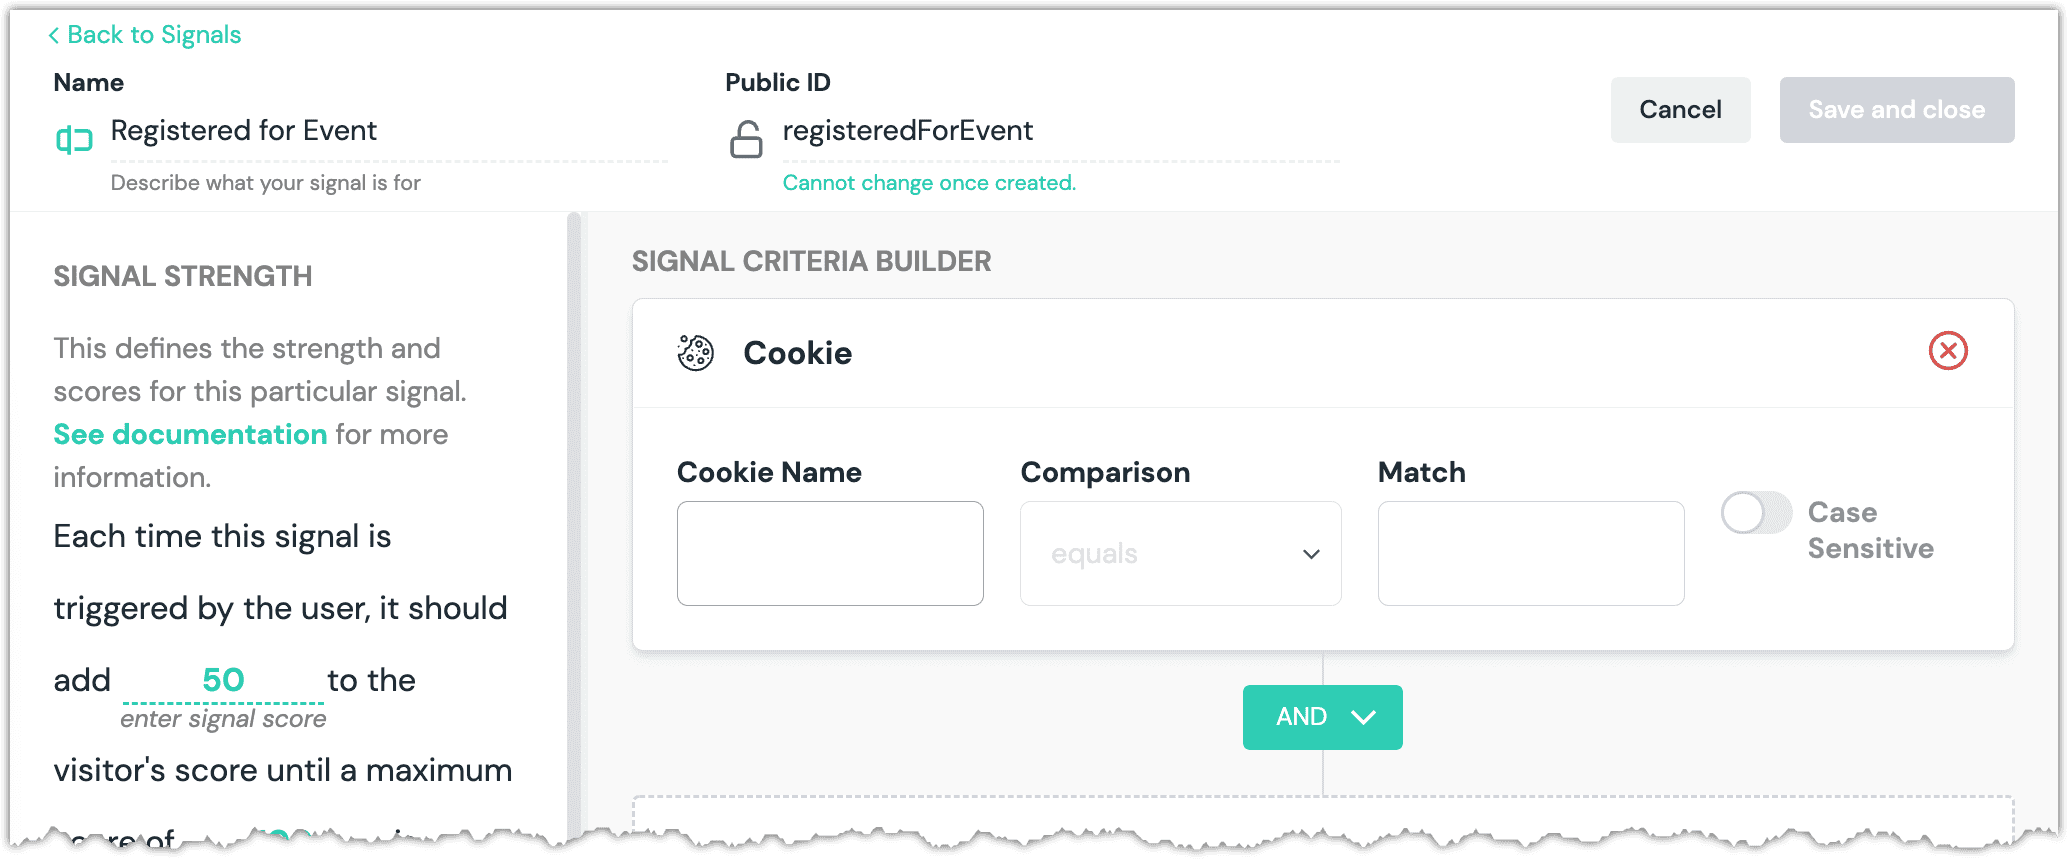
Enter the following values:
- Cookie Name:
unfrmconf_registered - Comparison: equals
- Match:
true
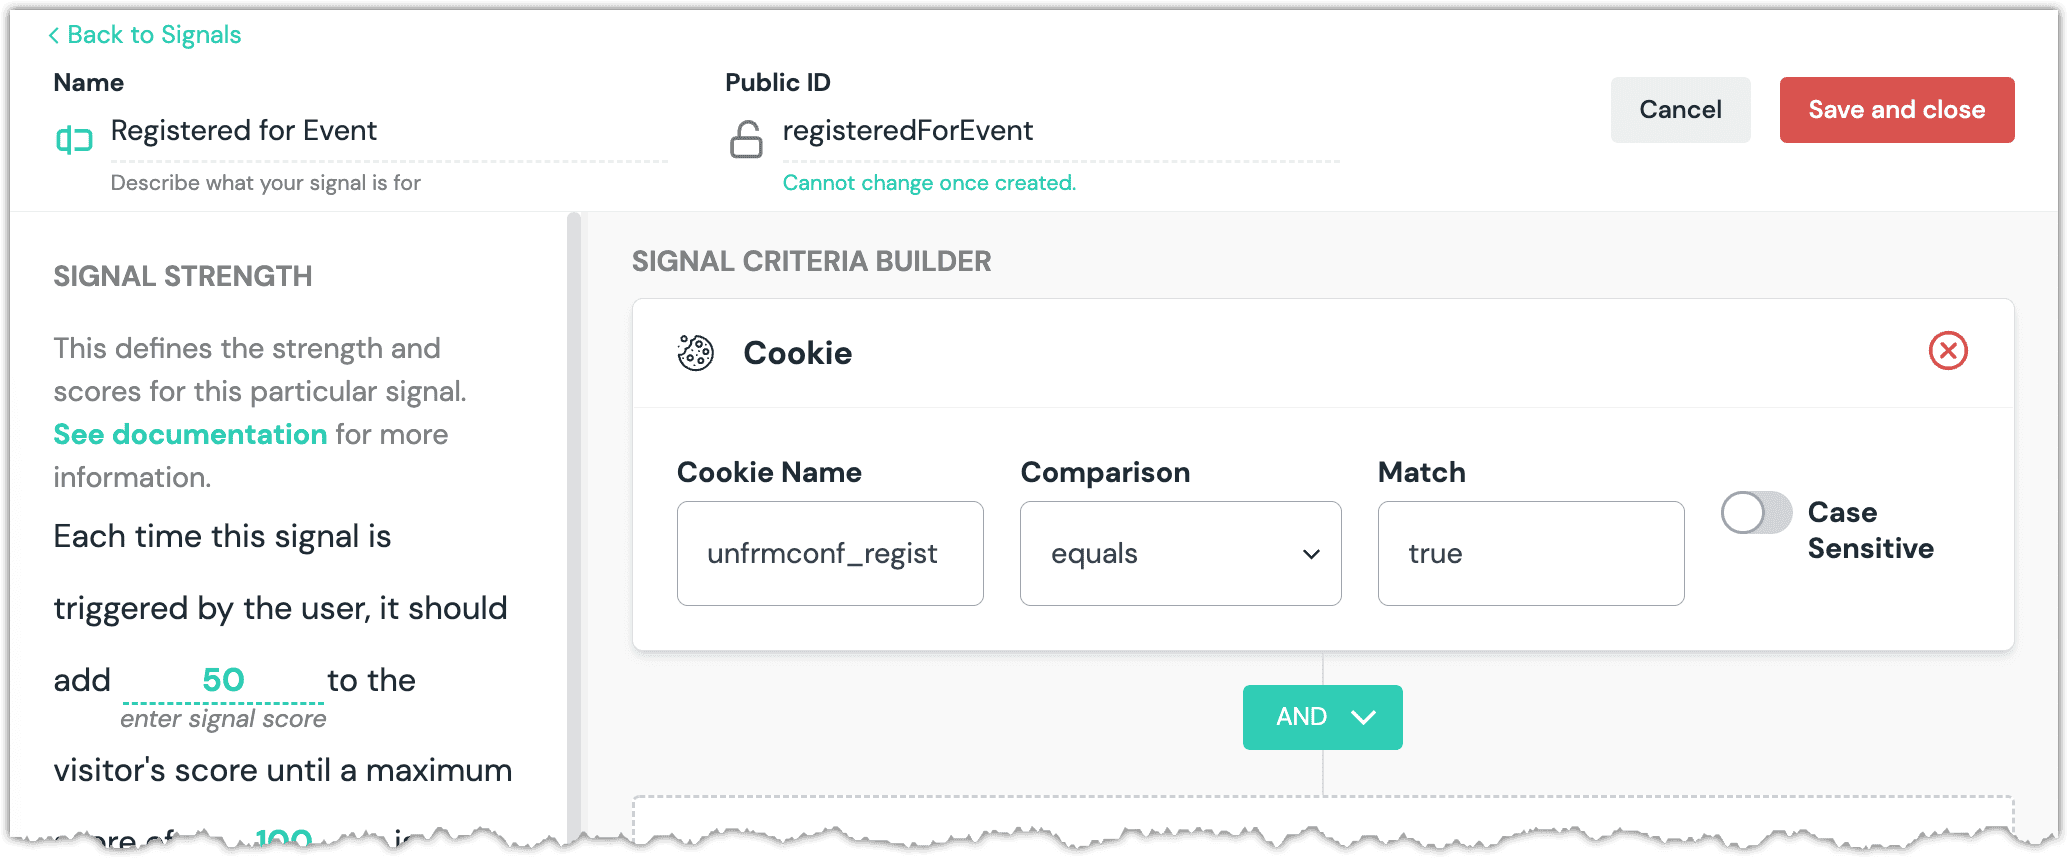
- Cookie Name:
Click Save and close.
In Uniform, add another signal using the following settings:
- Name:
UniformConf Campaign - Public ID:
uniformconfCampaign - Criteria: Query String
- Query String Name:
utm_campaign - Comparison: equals
- Match:
unfrmconf
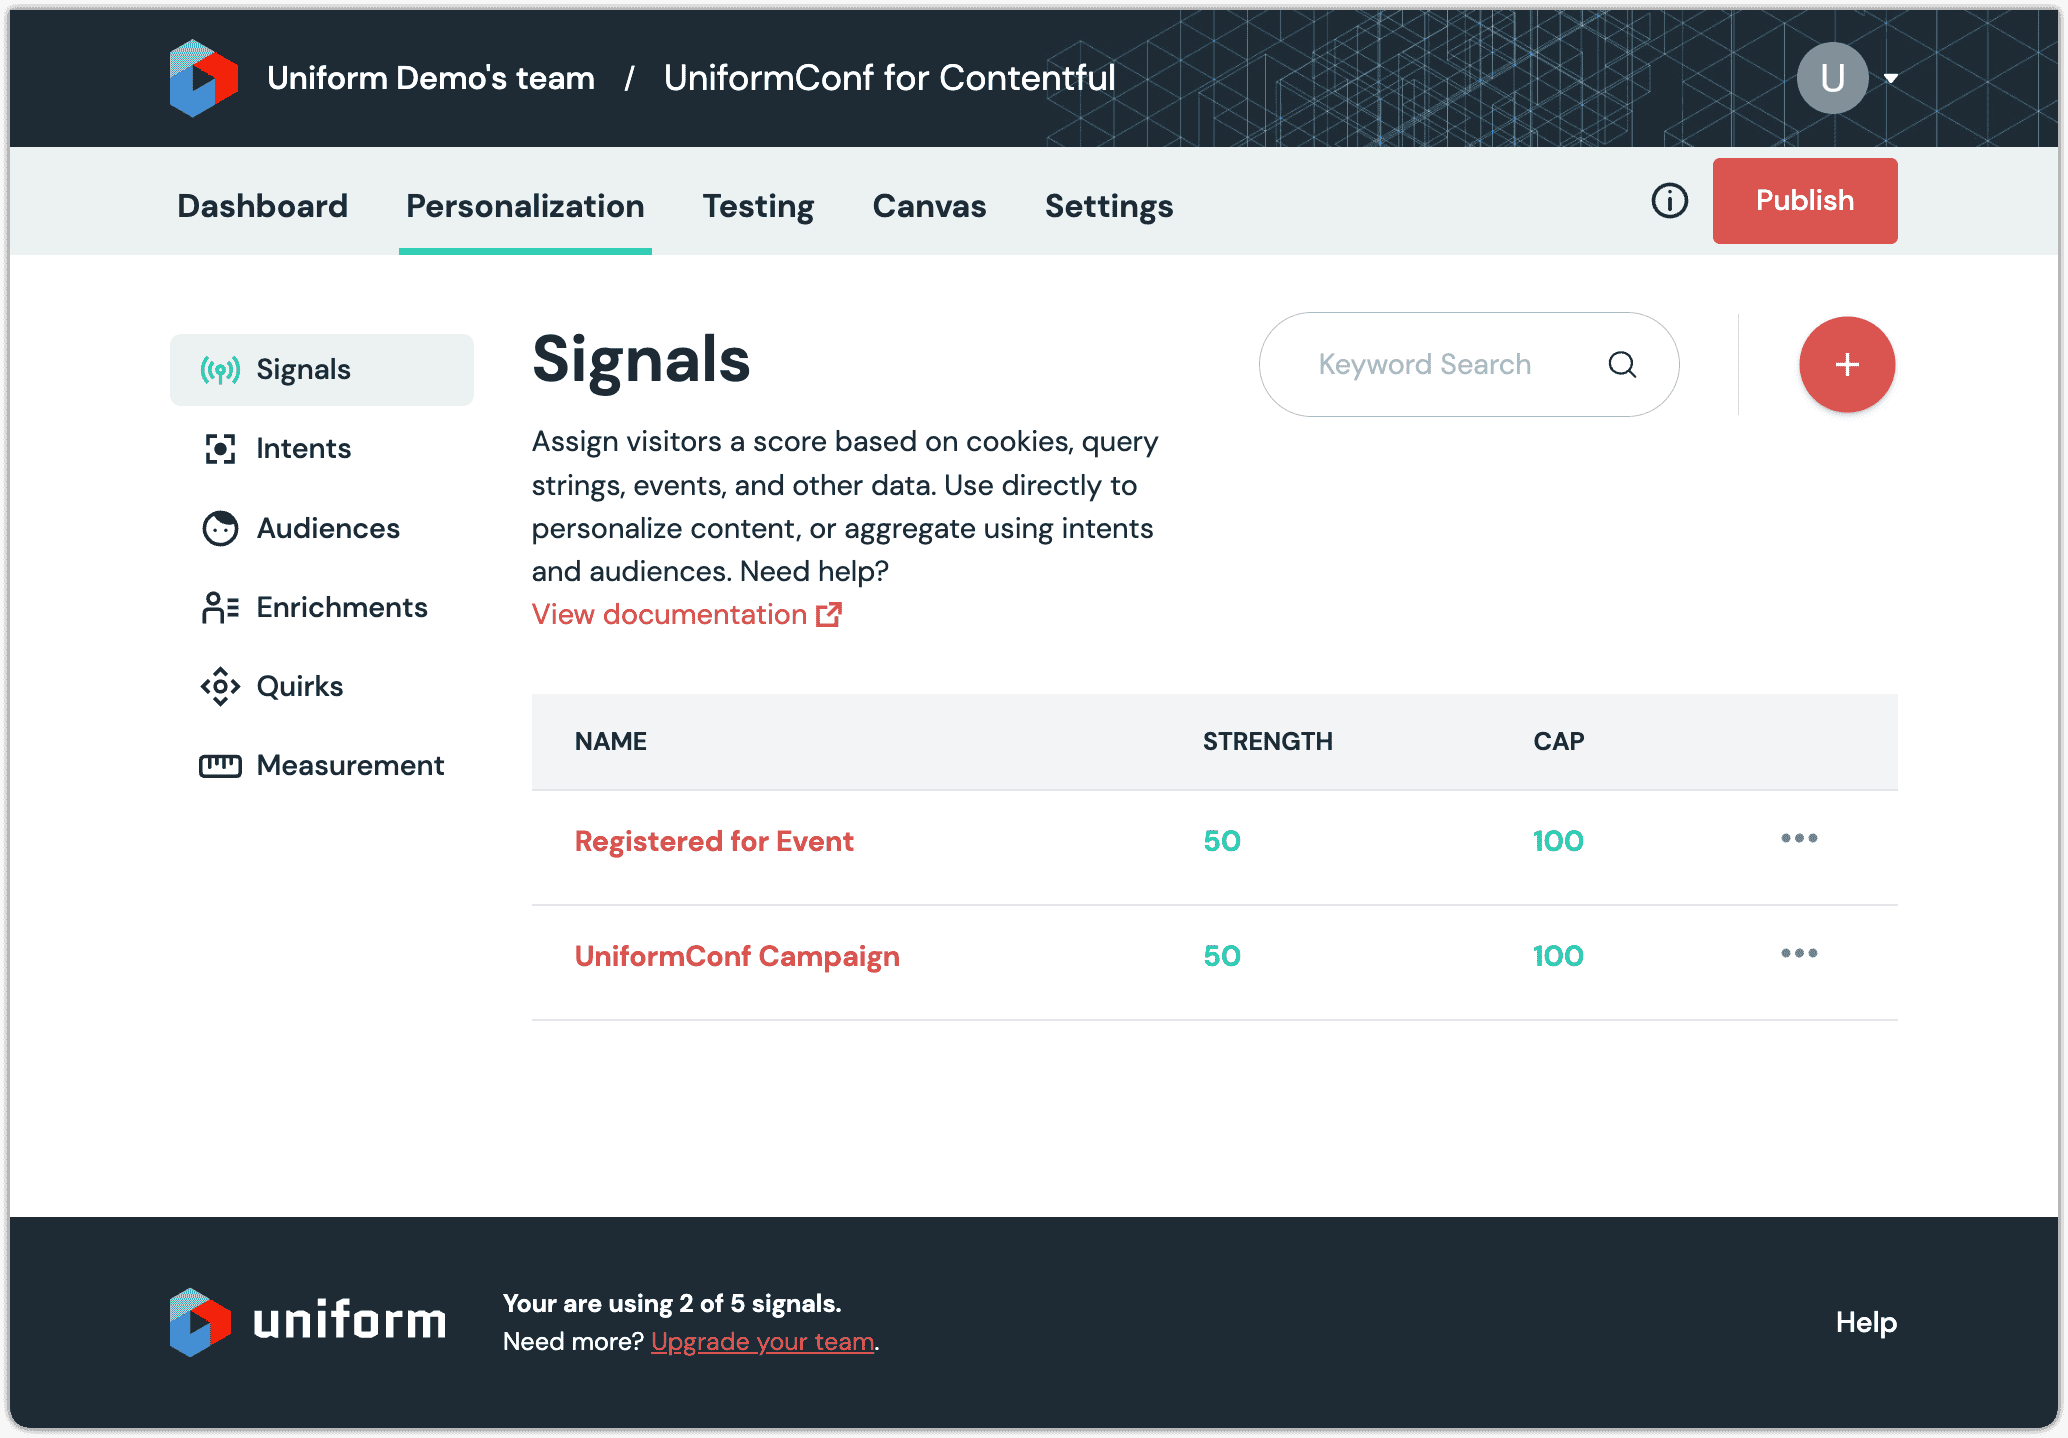
- Name:
Click Publish.
About this step
When settings are configured under personalization, they're not available to be used in an application until they're published.
In Contentful, navigate to Apps > Manage apps.
Open the Uniform app.
In the PERSONALIZATION CRITERIA section, from the dropdown select Personalized Hero.
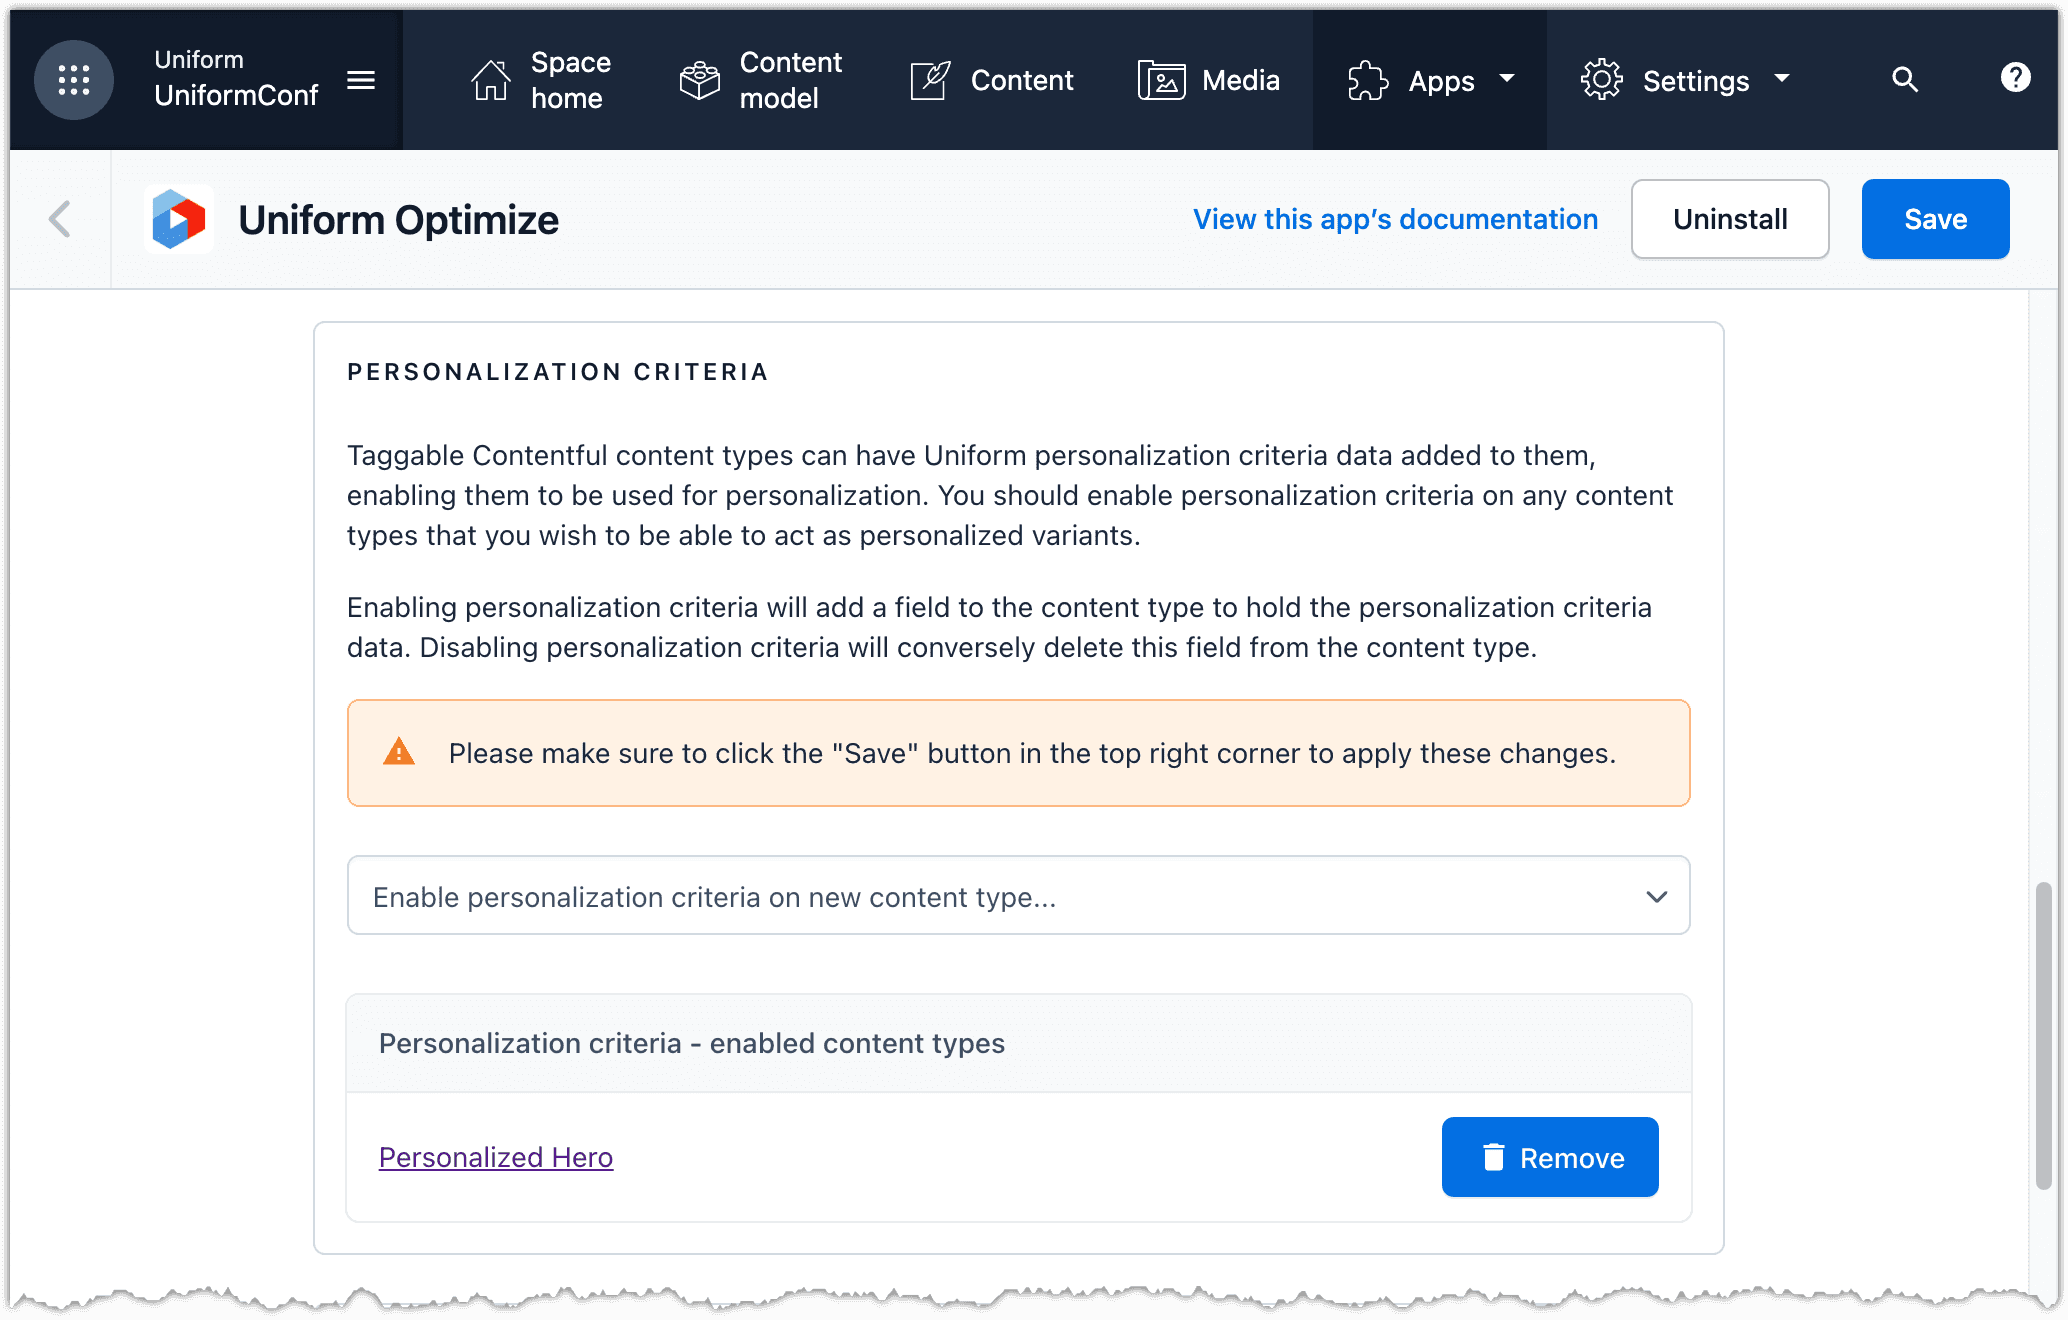
About this step
This adds a new field to the content type Personalized Hero.
Click Save.
Open the content type Personalized Hero. Notice the field Personalization Criteria.
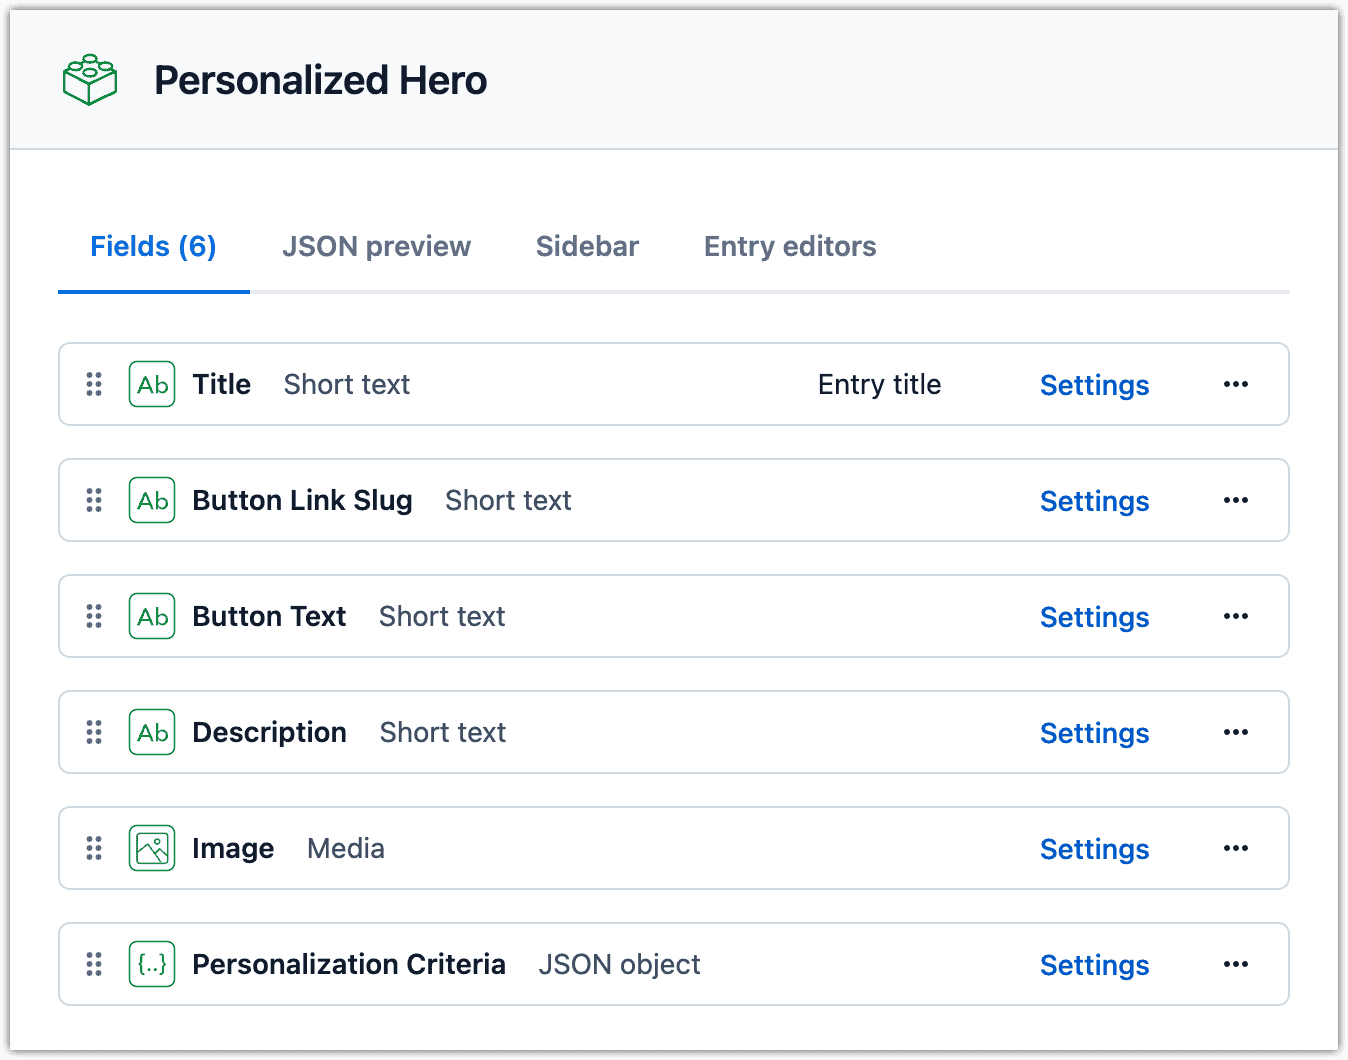
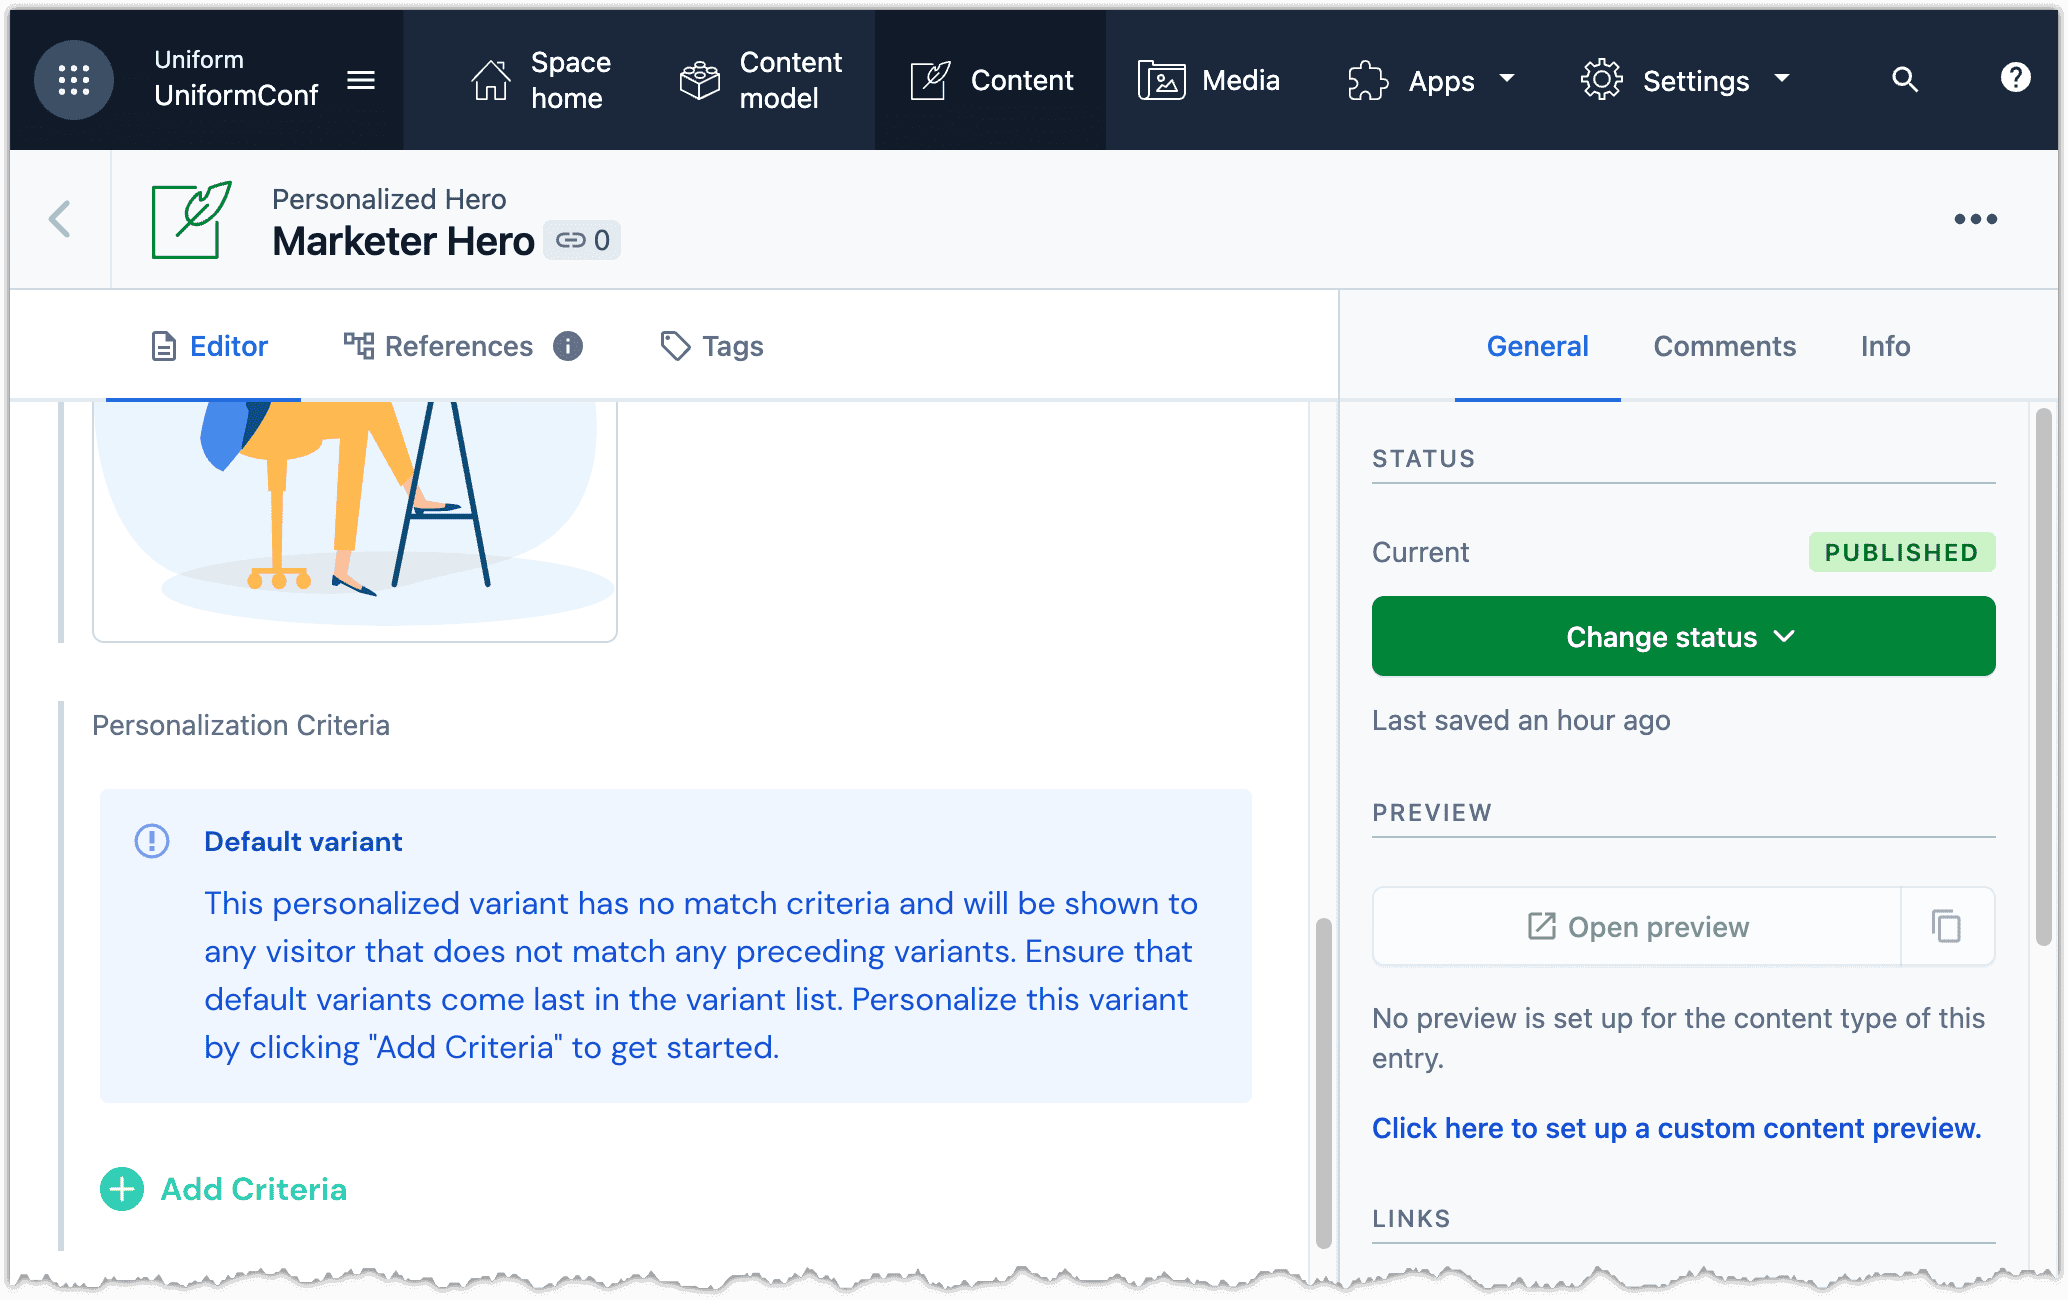
Open the entry Marketering Hero.
Scroll down to the field Personalization Criteria.
Click Add Criteria.
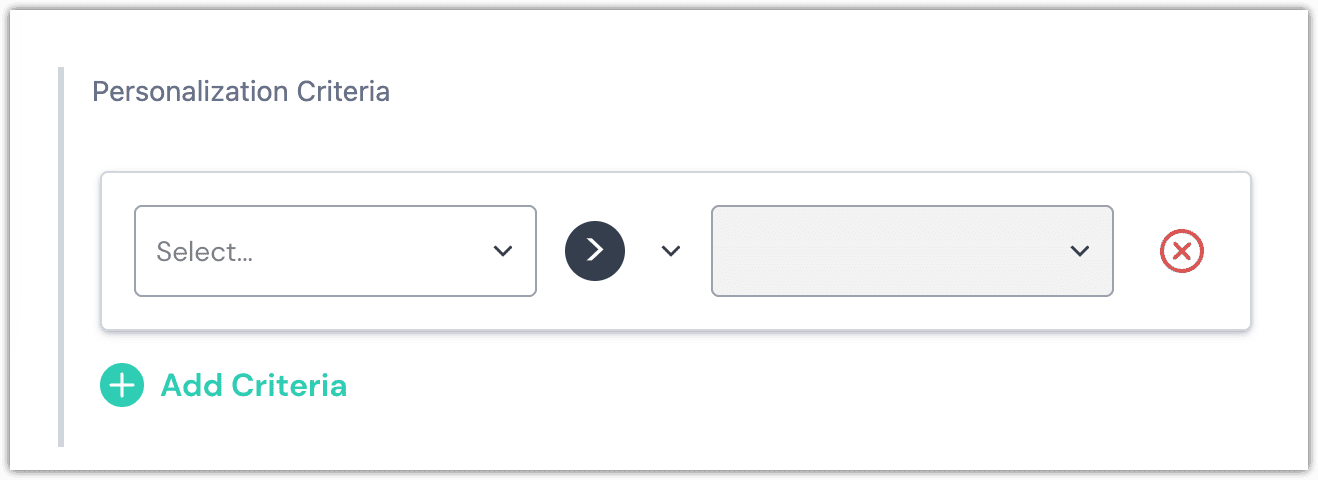
Click Select > Enrichment: Marketer.
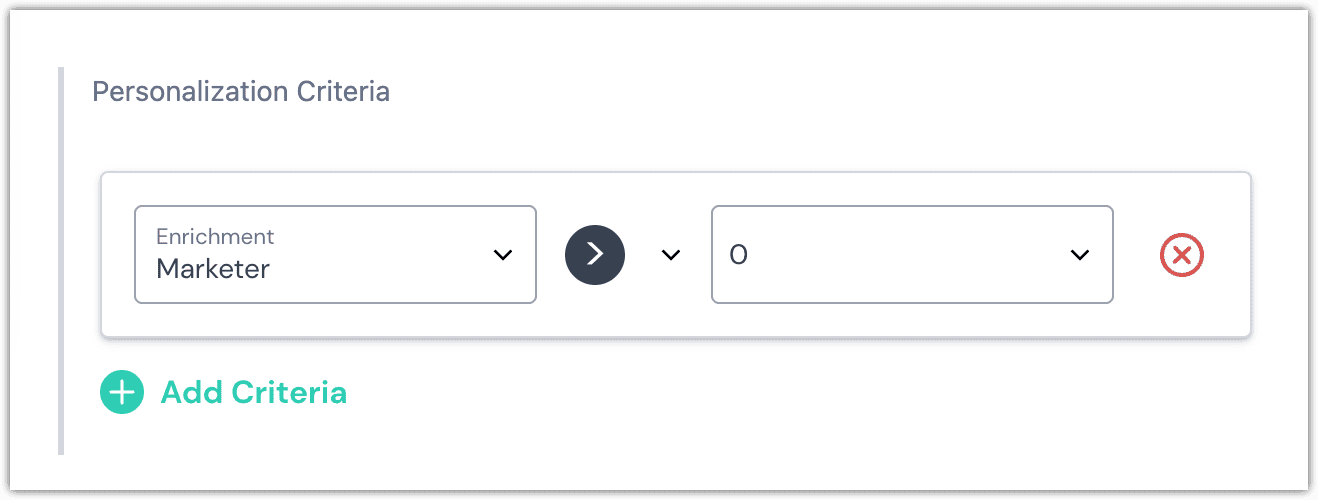
About this step
By default, the criteria is set to match when the enrichment score is greater than 0. The enrichment score is set to 50 when a page with the Enriched Hero on it's viewed. This means the criteria will match if the page is viewed at least one time.
Click Publish.
Edit the following Personalized Hero entries:
Title Personalization criteria Call for papers open now! Signal: UniformConf Campaign Can't wait to see you soon at UniformConf! Signal: Registered for Event Developer Hero Enrichment: Developer Publish the entries.
Configure list of Personalized Heroes#
You want to select the Personalized Hero entries that can appear on the home page. This is done by creating a new entry that you can use to select and order the heroes.
In Contentful, navigate to Apps > Manage apps.
Open the Uniform app.
In the PERSONALIZATION LISTS section, click + Create New.

Enter the following value and click Confirm:
Personalized Hero List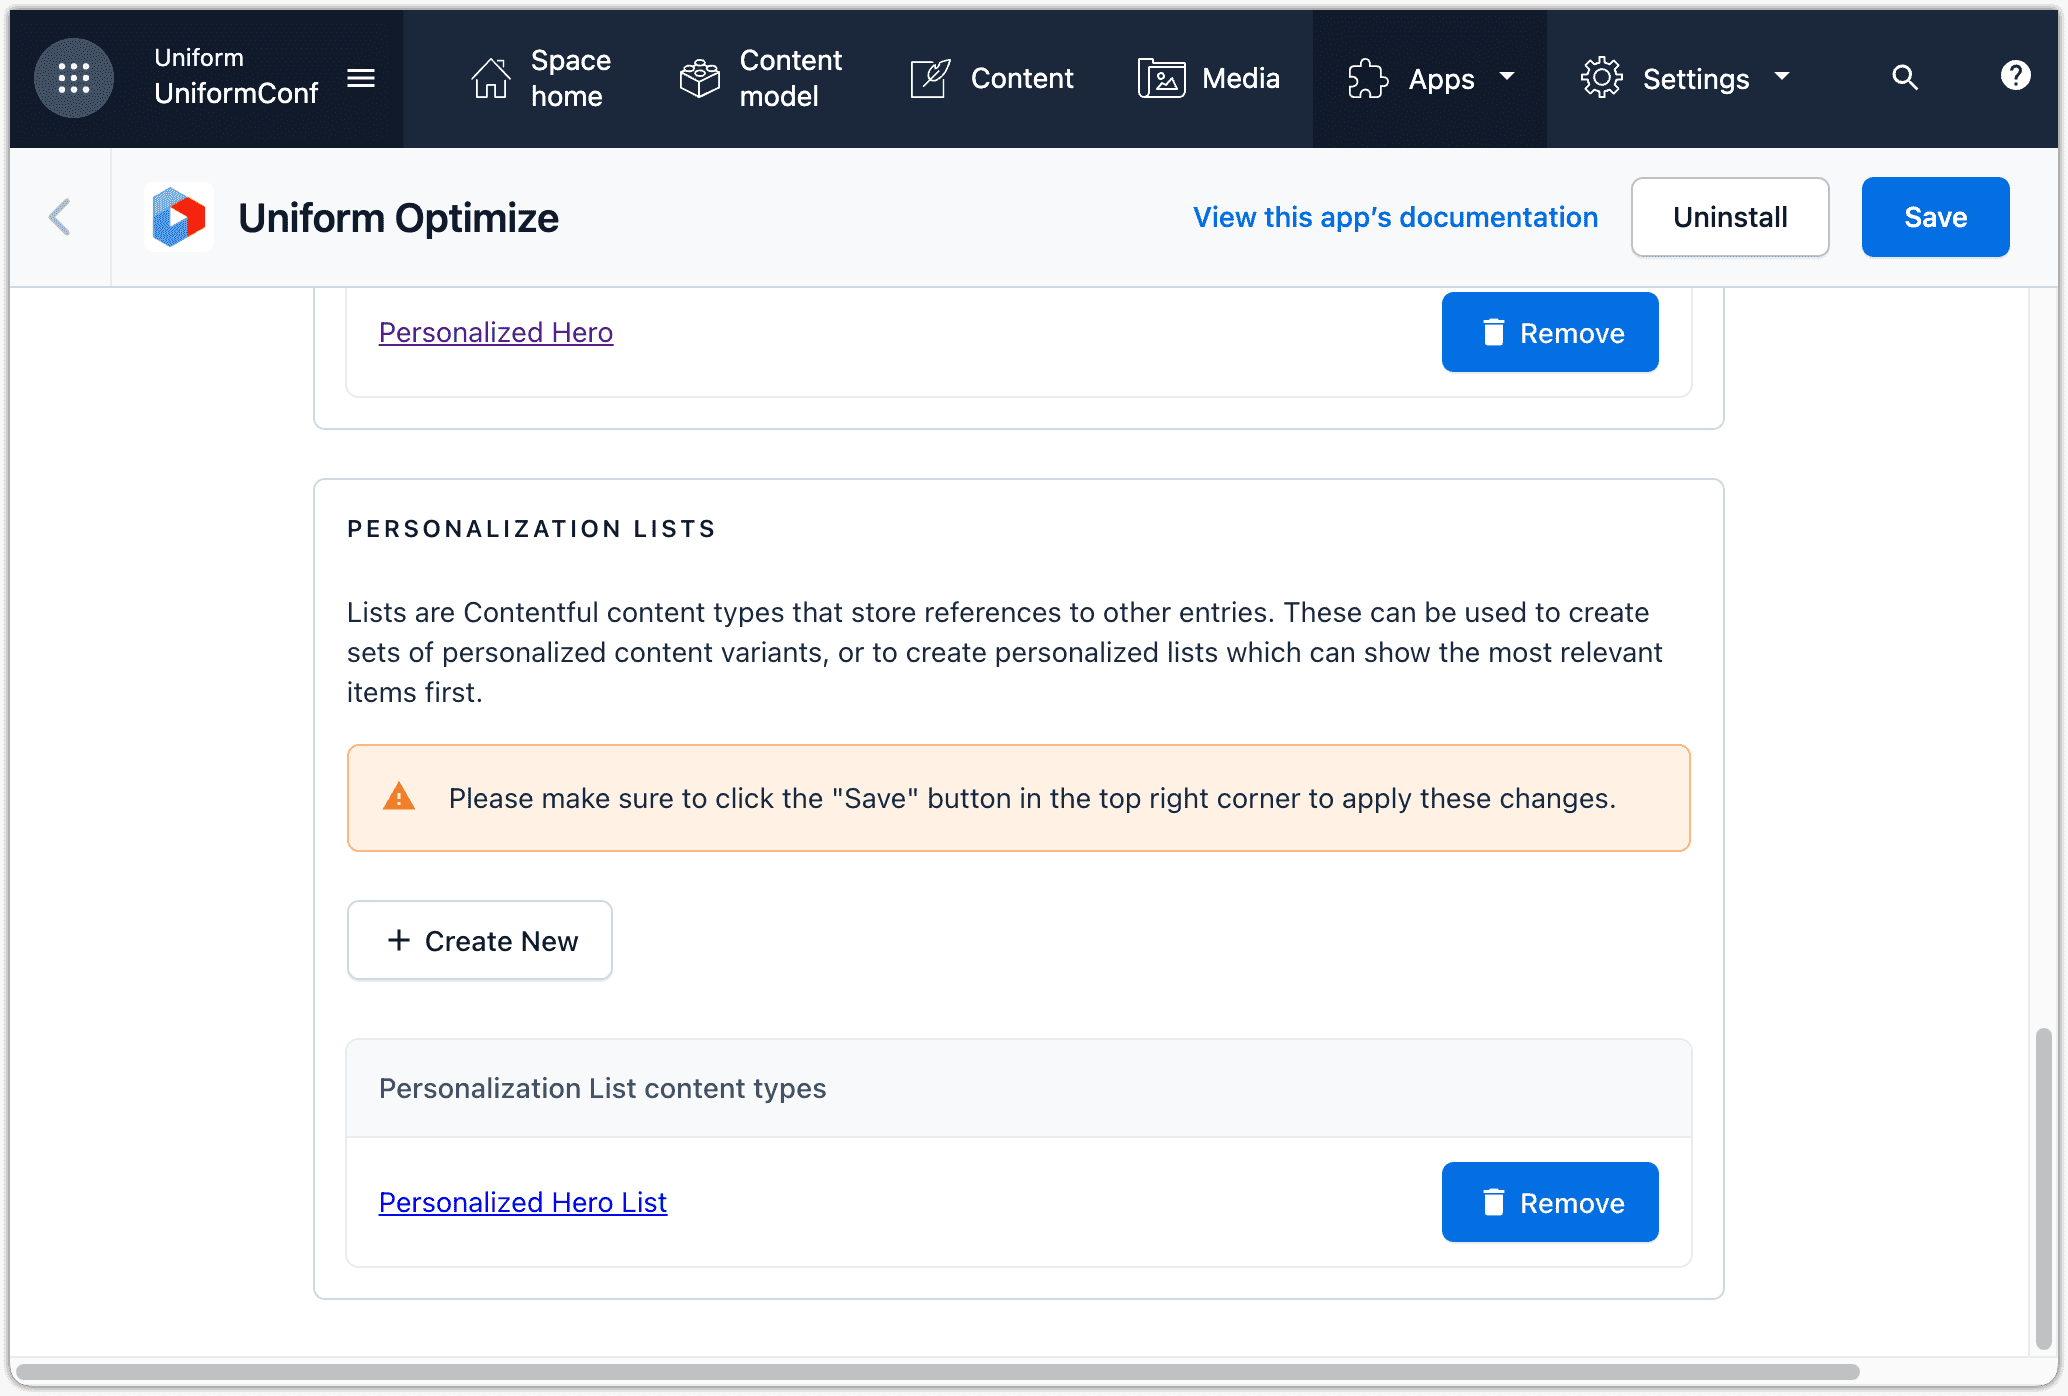
Click Save.
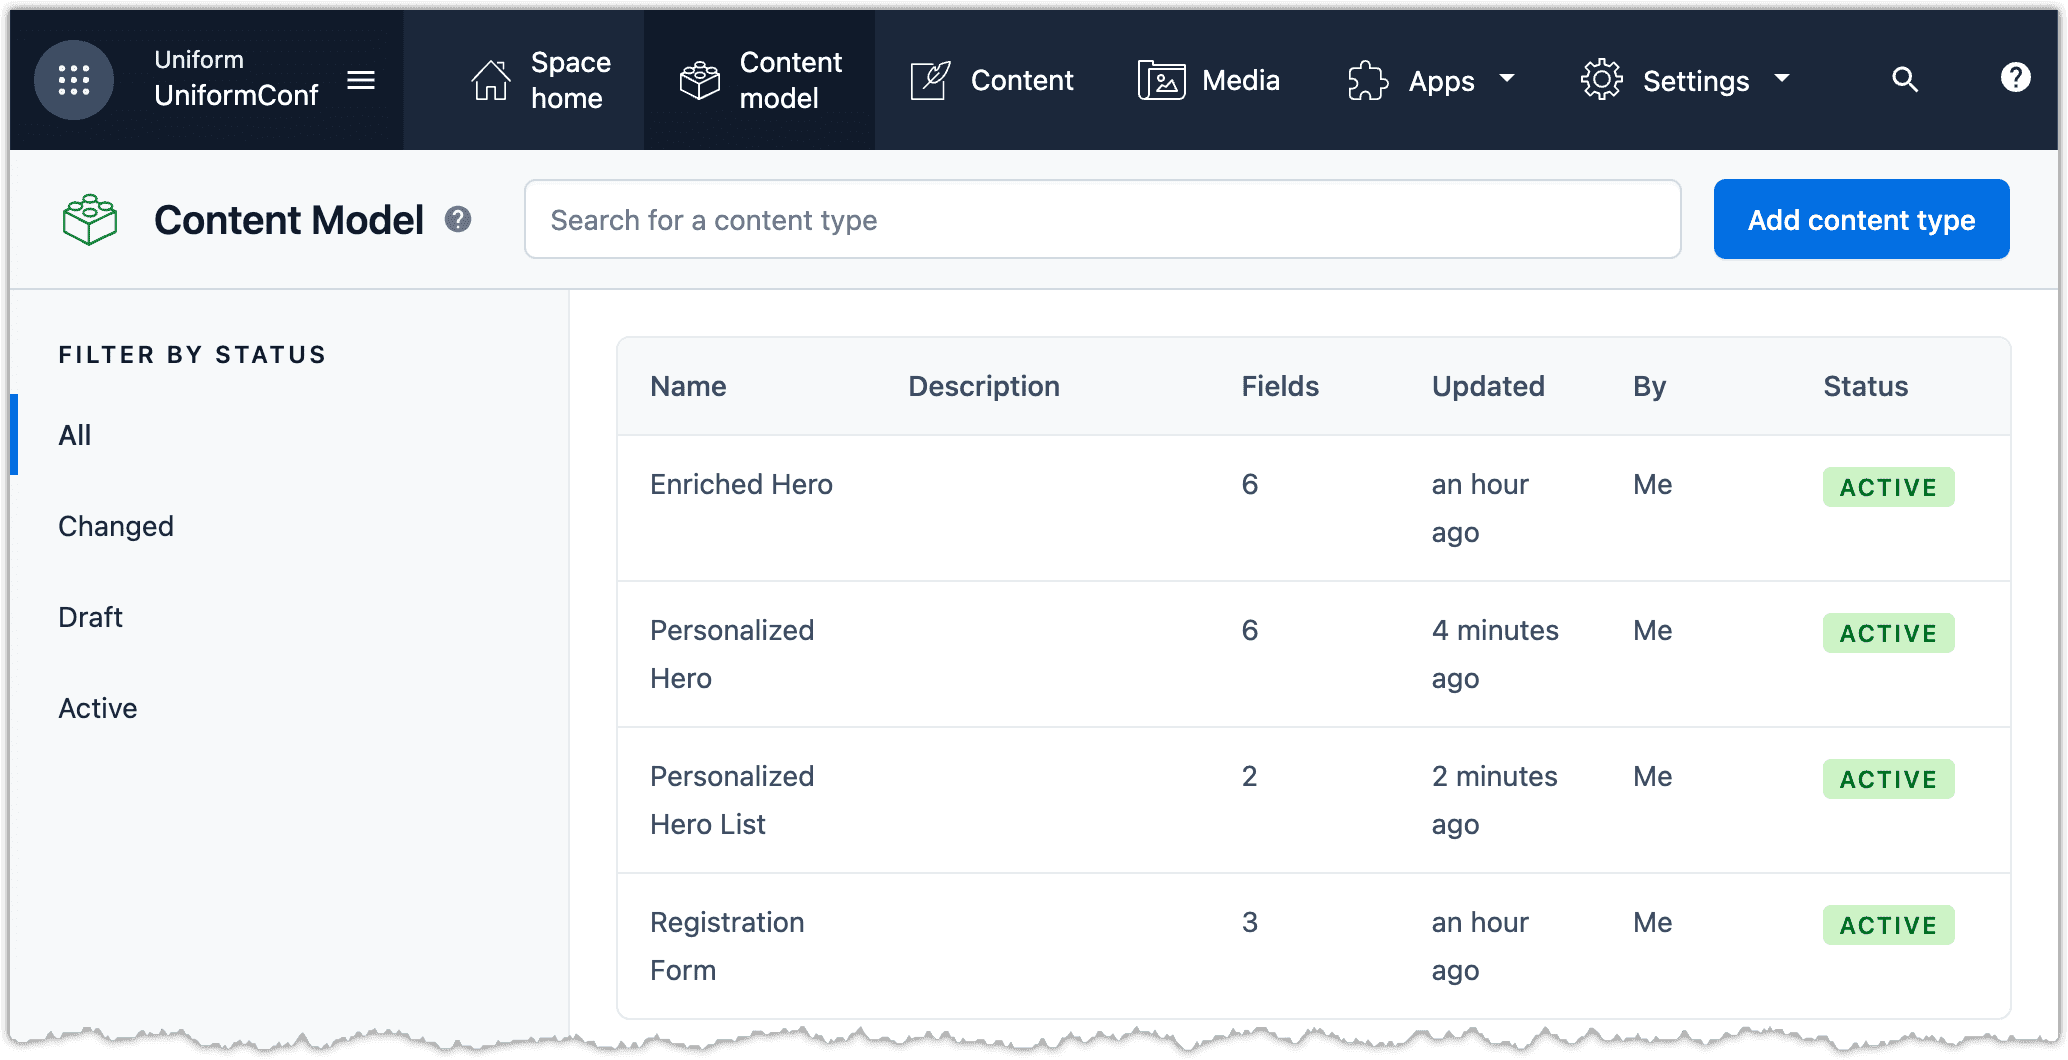
Navigate to Content model. Notice a new content type Personalized Hero List.
Add a new entry using the content type Personalized Hero List.
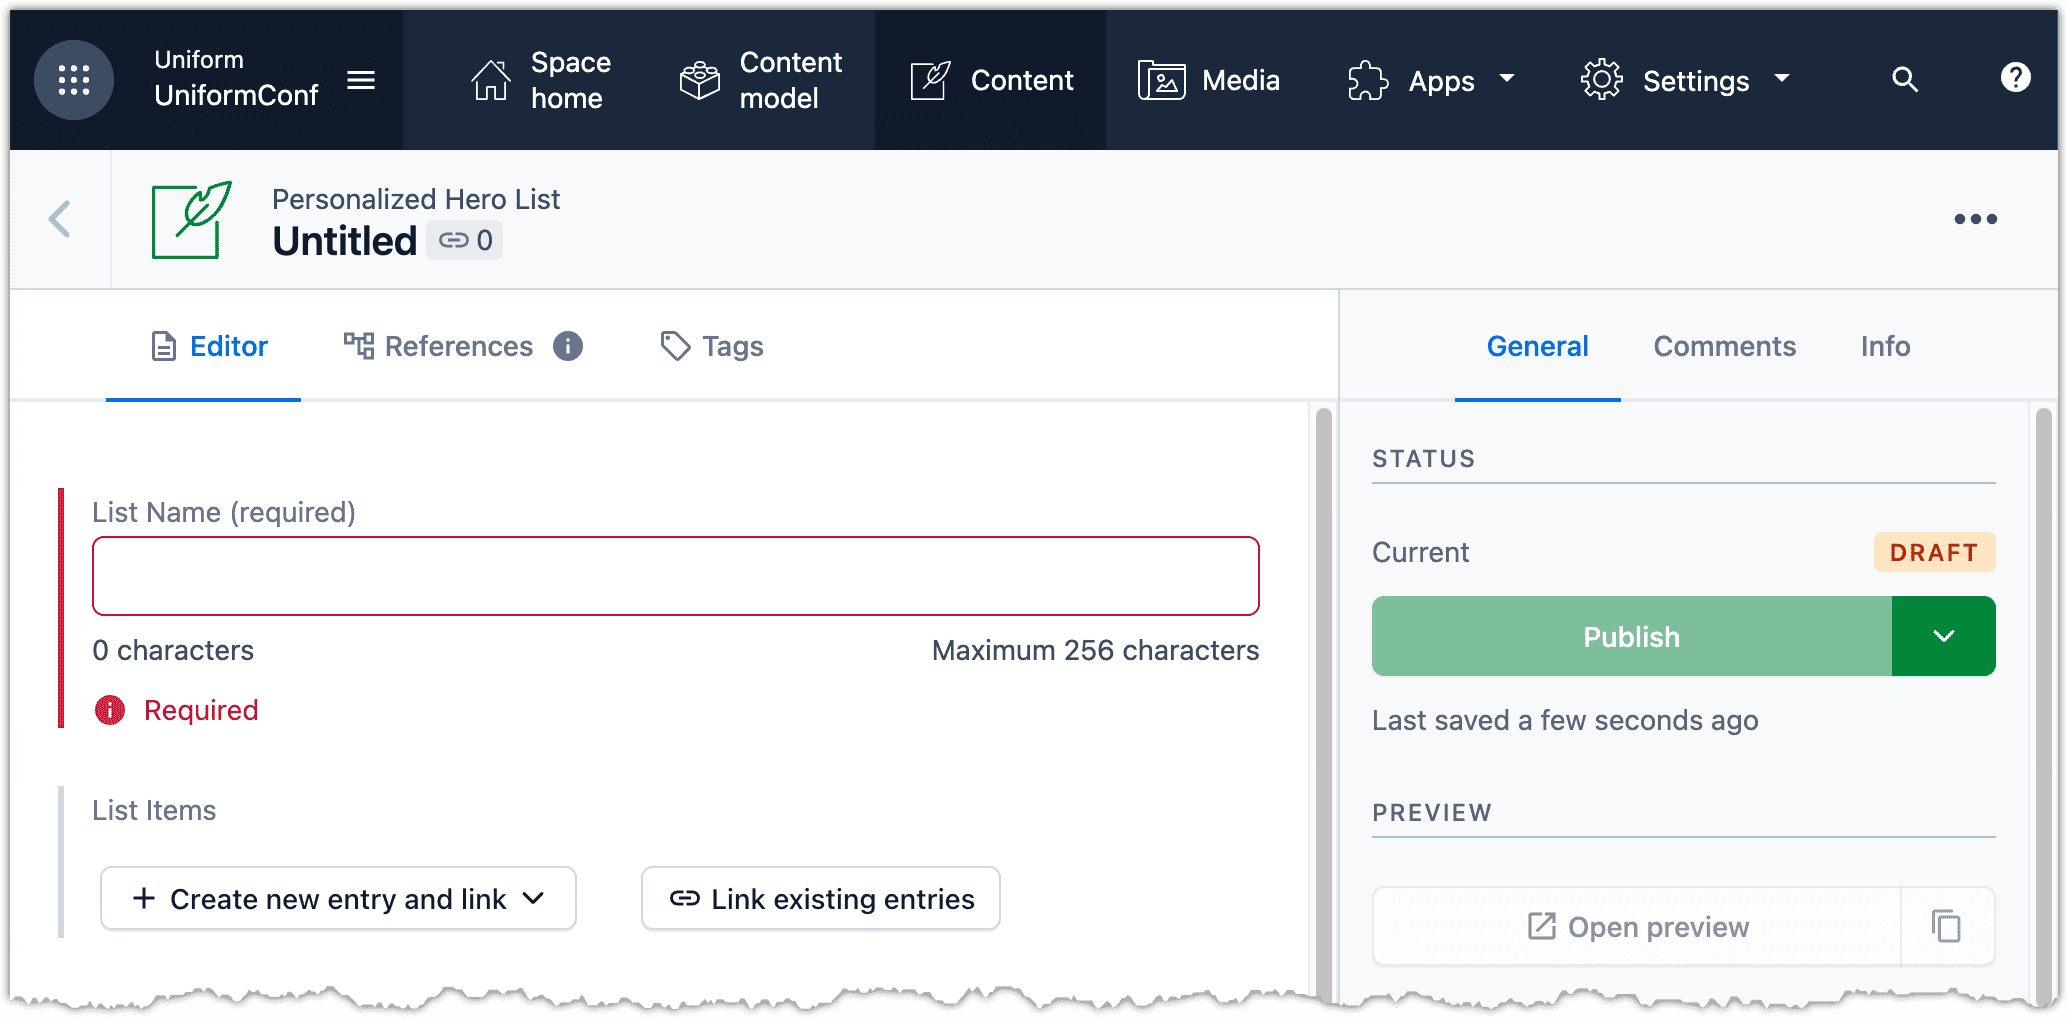
For the field List Name, enter the following:
Home Page HerosClick Link existing entries.
Filter the search by the content type Personalized Hero and select the following entries:
- Call for papers open now!
- Can't wait to see you soon at UniformConf!
- Developer Hero
- Marketer Hero
- Welcome to UniformConf
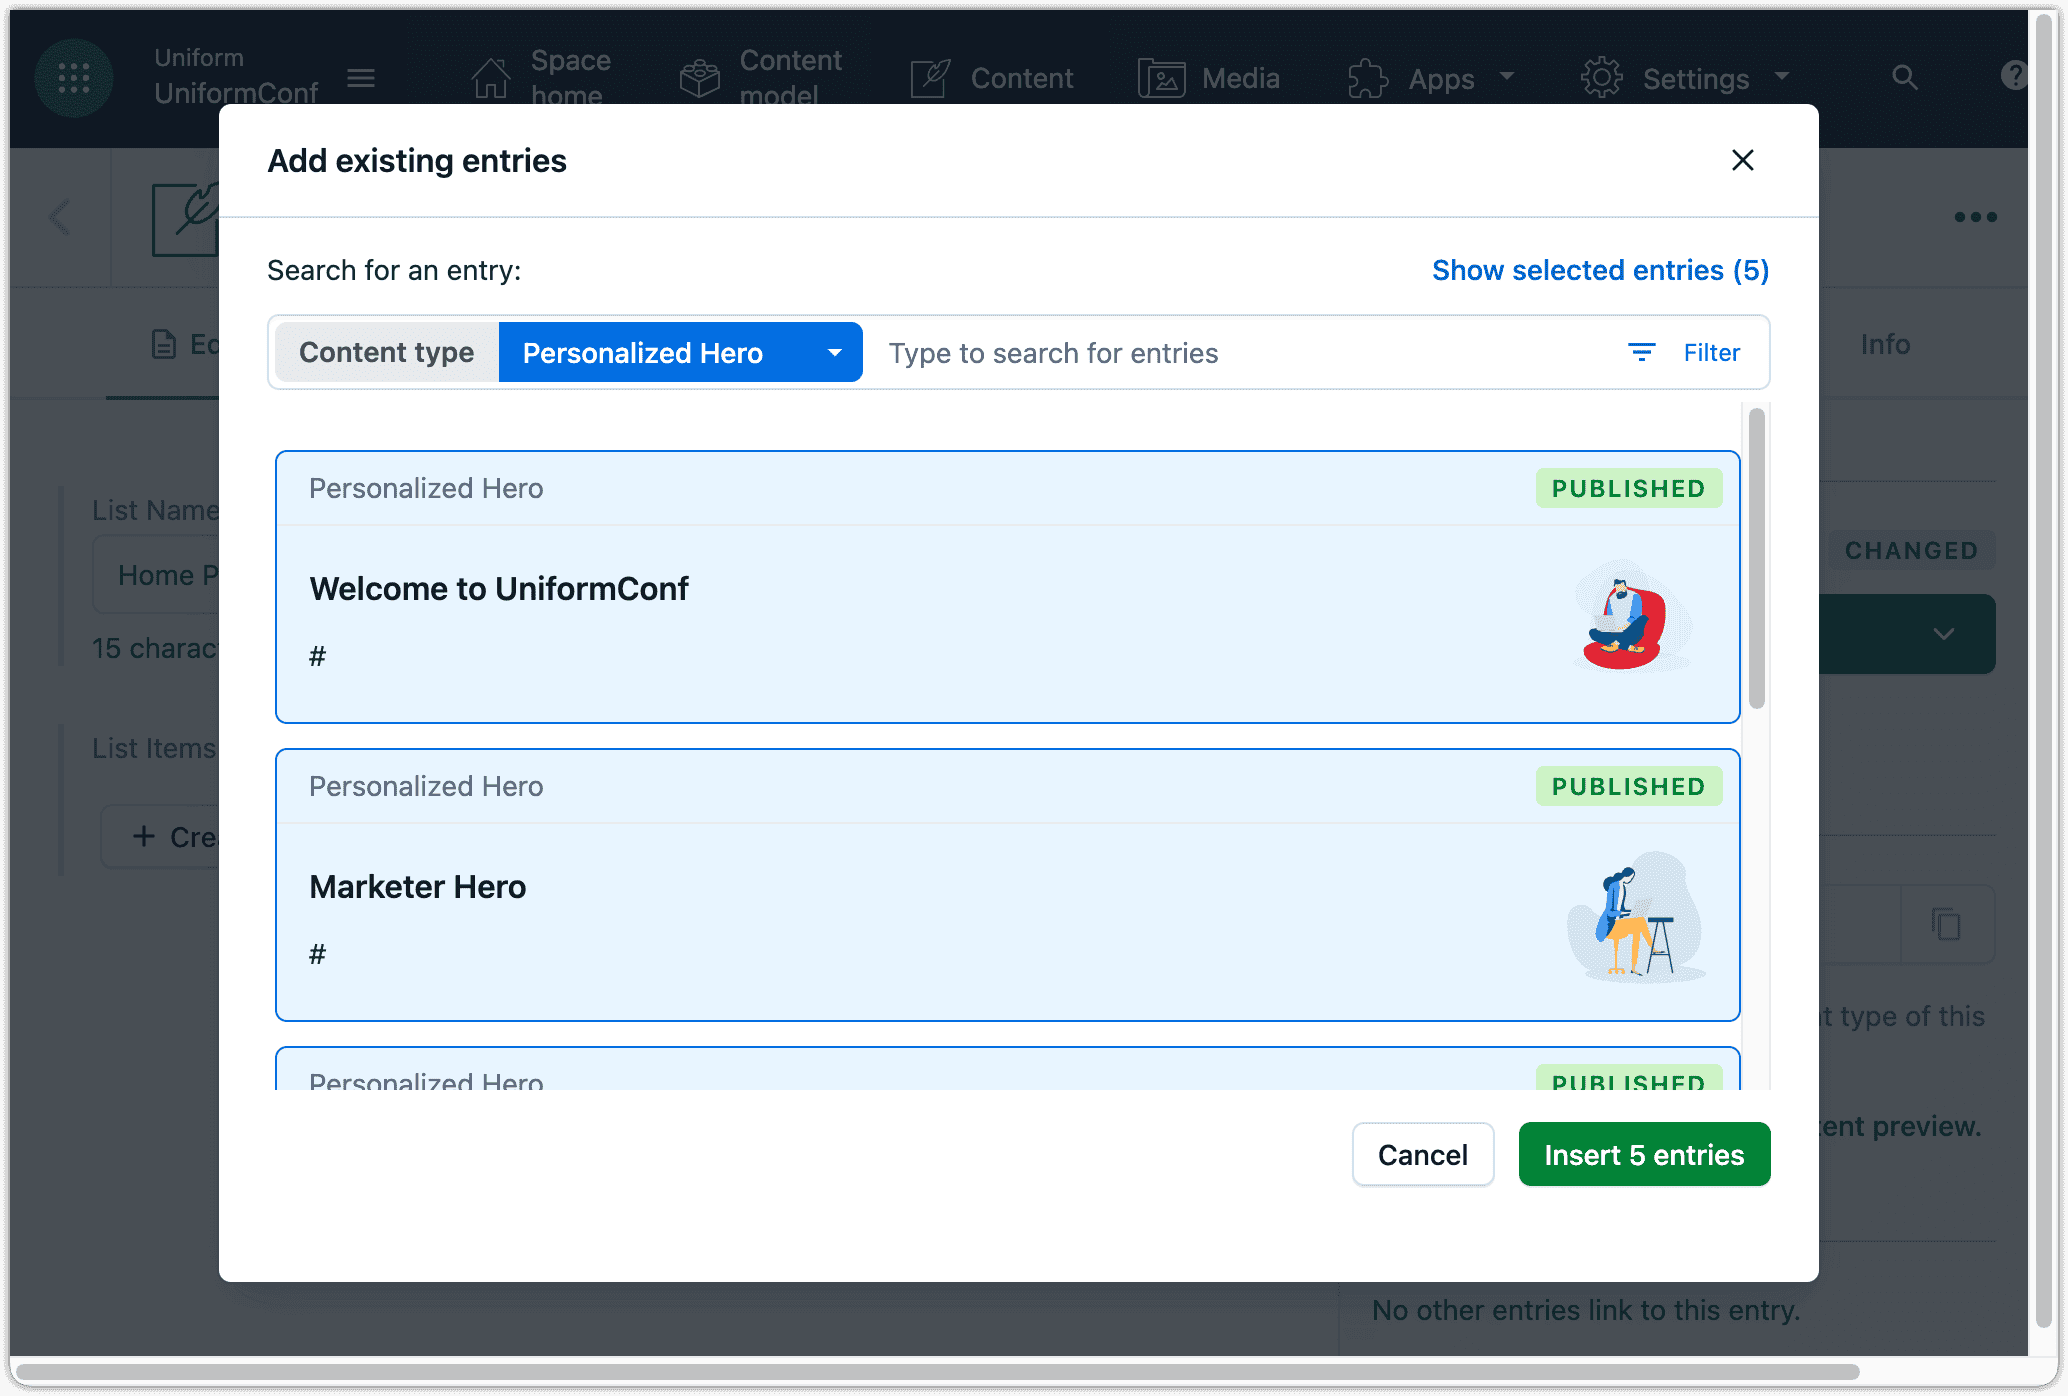
Click Insert 5 entries.
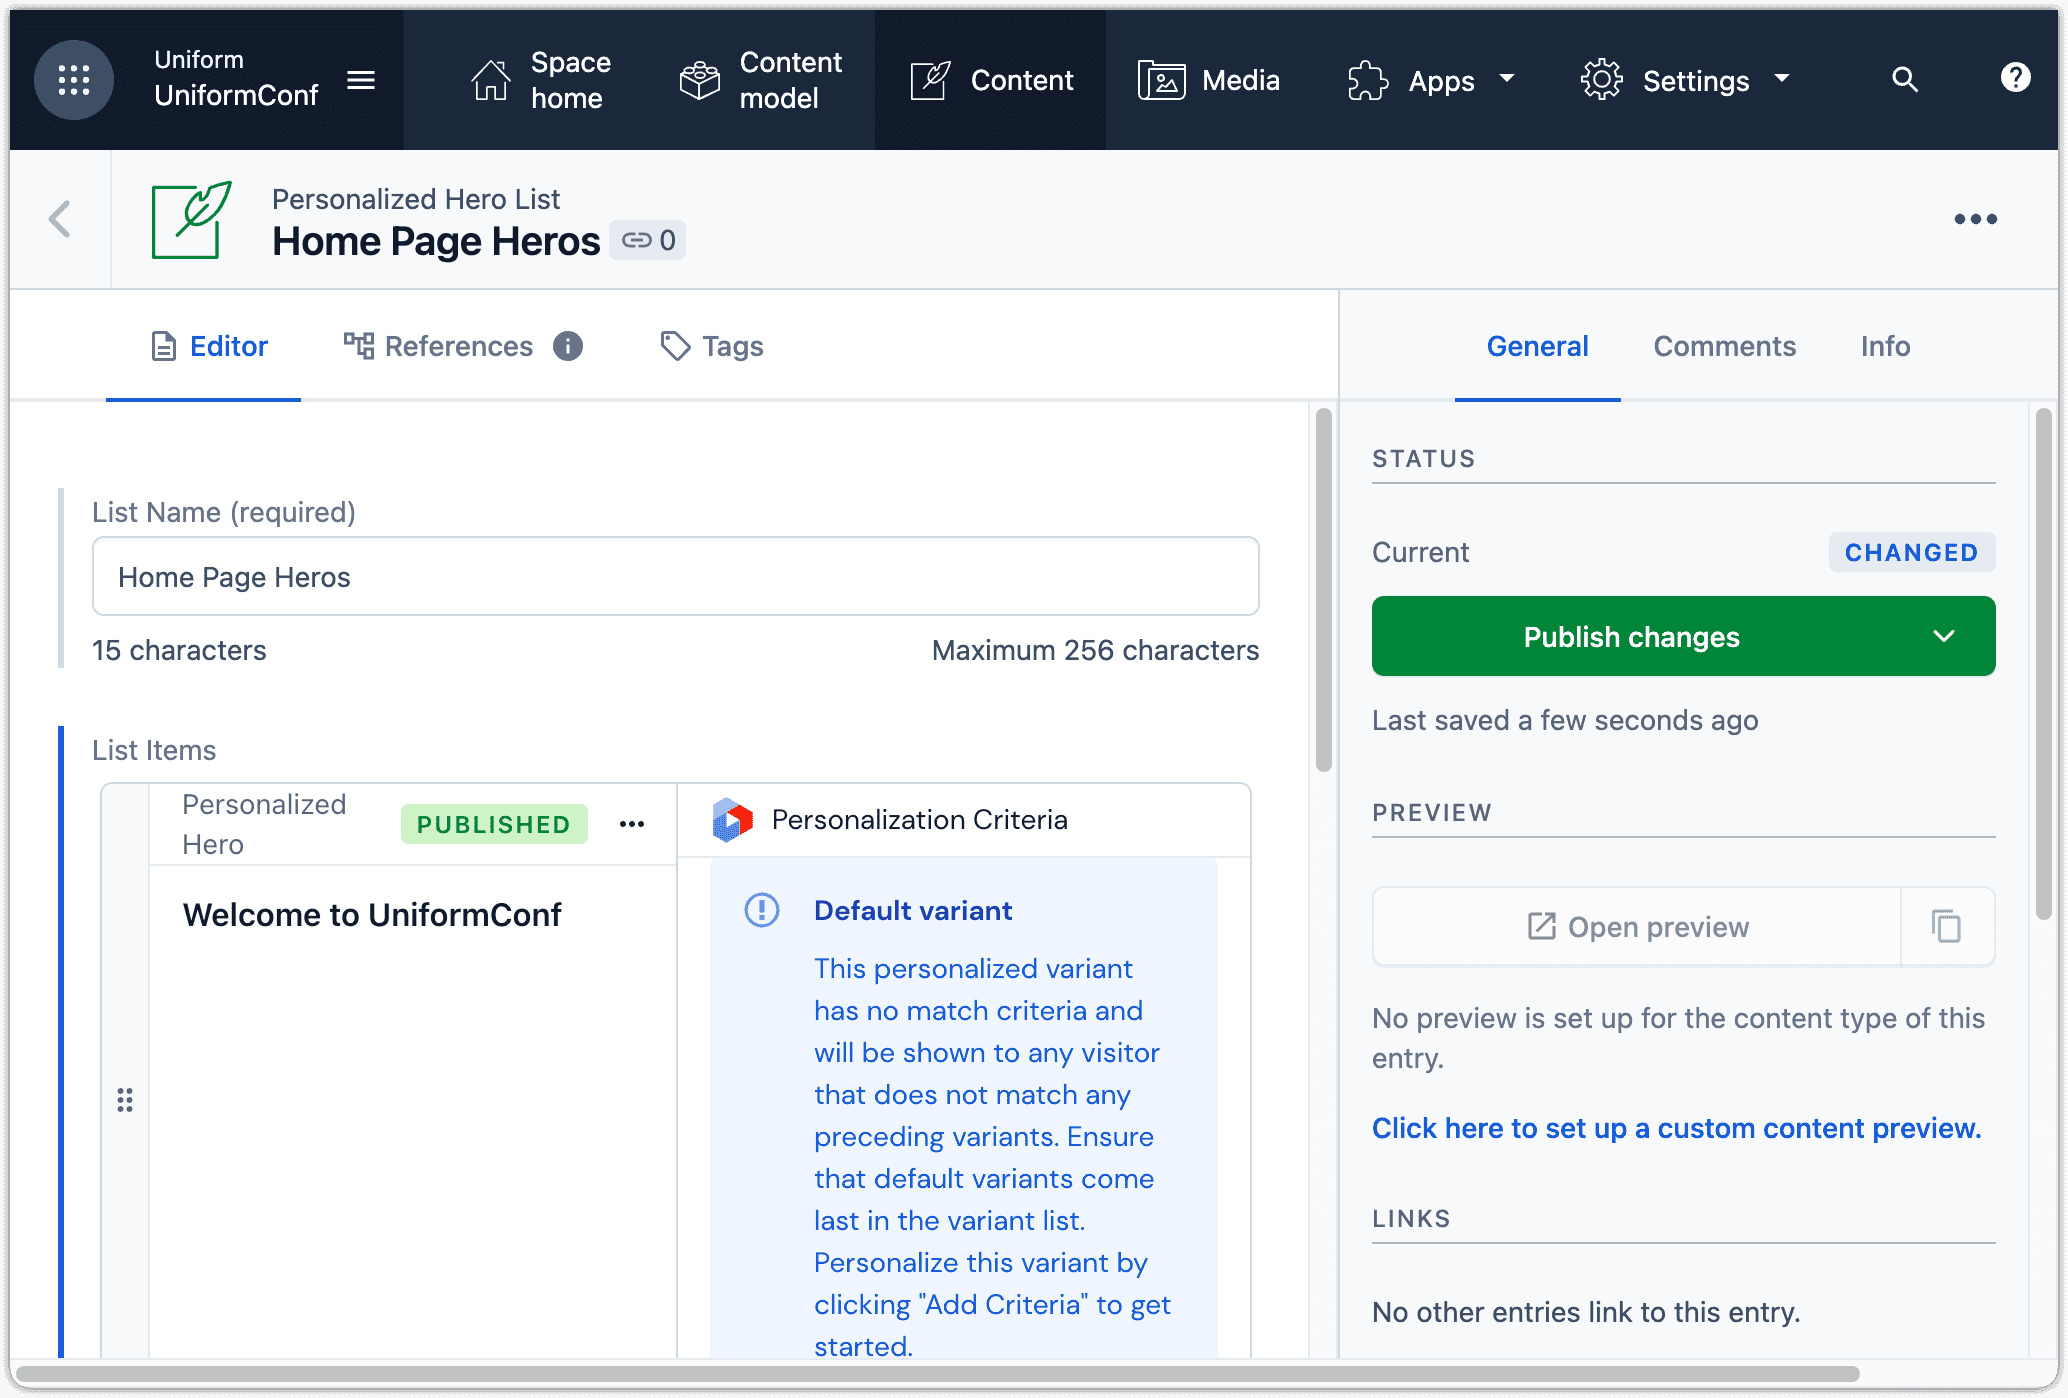
Drag the entries into the following order:
- Can't wait to see you soon at UniformConf!
- Call for papers open now!
- Developer Hero
- Marketer Hero
- Welcome to UniformConf

About this step
The order of the entries in the list is significant because the personalization criteria is evaluated in order. The first match is the entry that's displayed. This creates a priority for the personalization instructions. This is important because it's possible a visitor matches multiple criteria. It also affects the way you should go about testing that personalization works.
Click Publish.
Finished configuration#
This section guides you through the process of importing the finished configuration into your Contentful space.
tip
If you followed the steps above, you can skip this section.
In Uniform, add the following permissions to your Uniform API key:
Uniform Context > Enrichments > Create Uniform Context > Enrichments > Update Uniform Context > Signals > Create Uniform Context > Signals > Updatewarning
You should always assign the minimal permissions required to meet your requirements. Since this you are going to load configuration from a code repository into Uniform, you need permissions to write to Uniform.
For more details on permissions, see the administrator guide.
Open a terminal in the root of the repository.
Enter the following command:
npm run uniform:pushAbout this step
This imports the finished versions of the enrichments and signals.
In Uniform, navigate to Personalization > Enrichments.
About this step
You will see the Persona enrichment with two values.
Navigate to Signals.
About this step
You will see two signals.
In the terminal, enter the following command:
npm run cf:import-finishedAbout this step
This imports the finished versions of the content types, content entries, and media.
In Contentful, open the content type Enriched Hero.
For the field Enrichment Tags, click Settings.
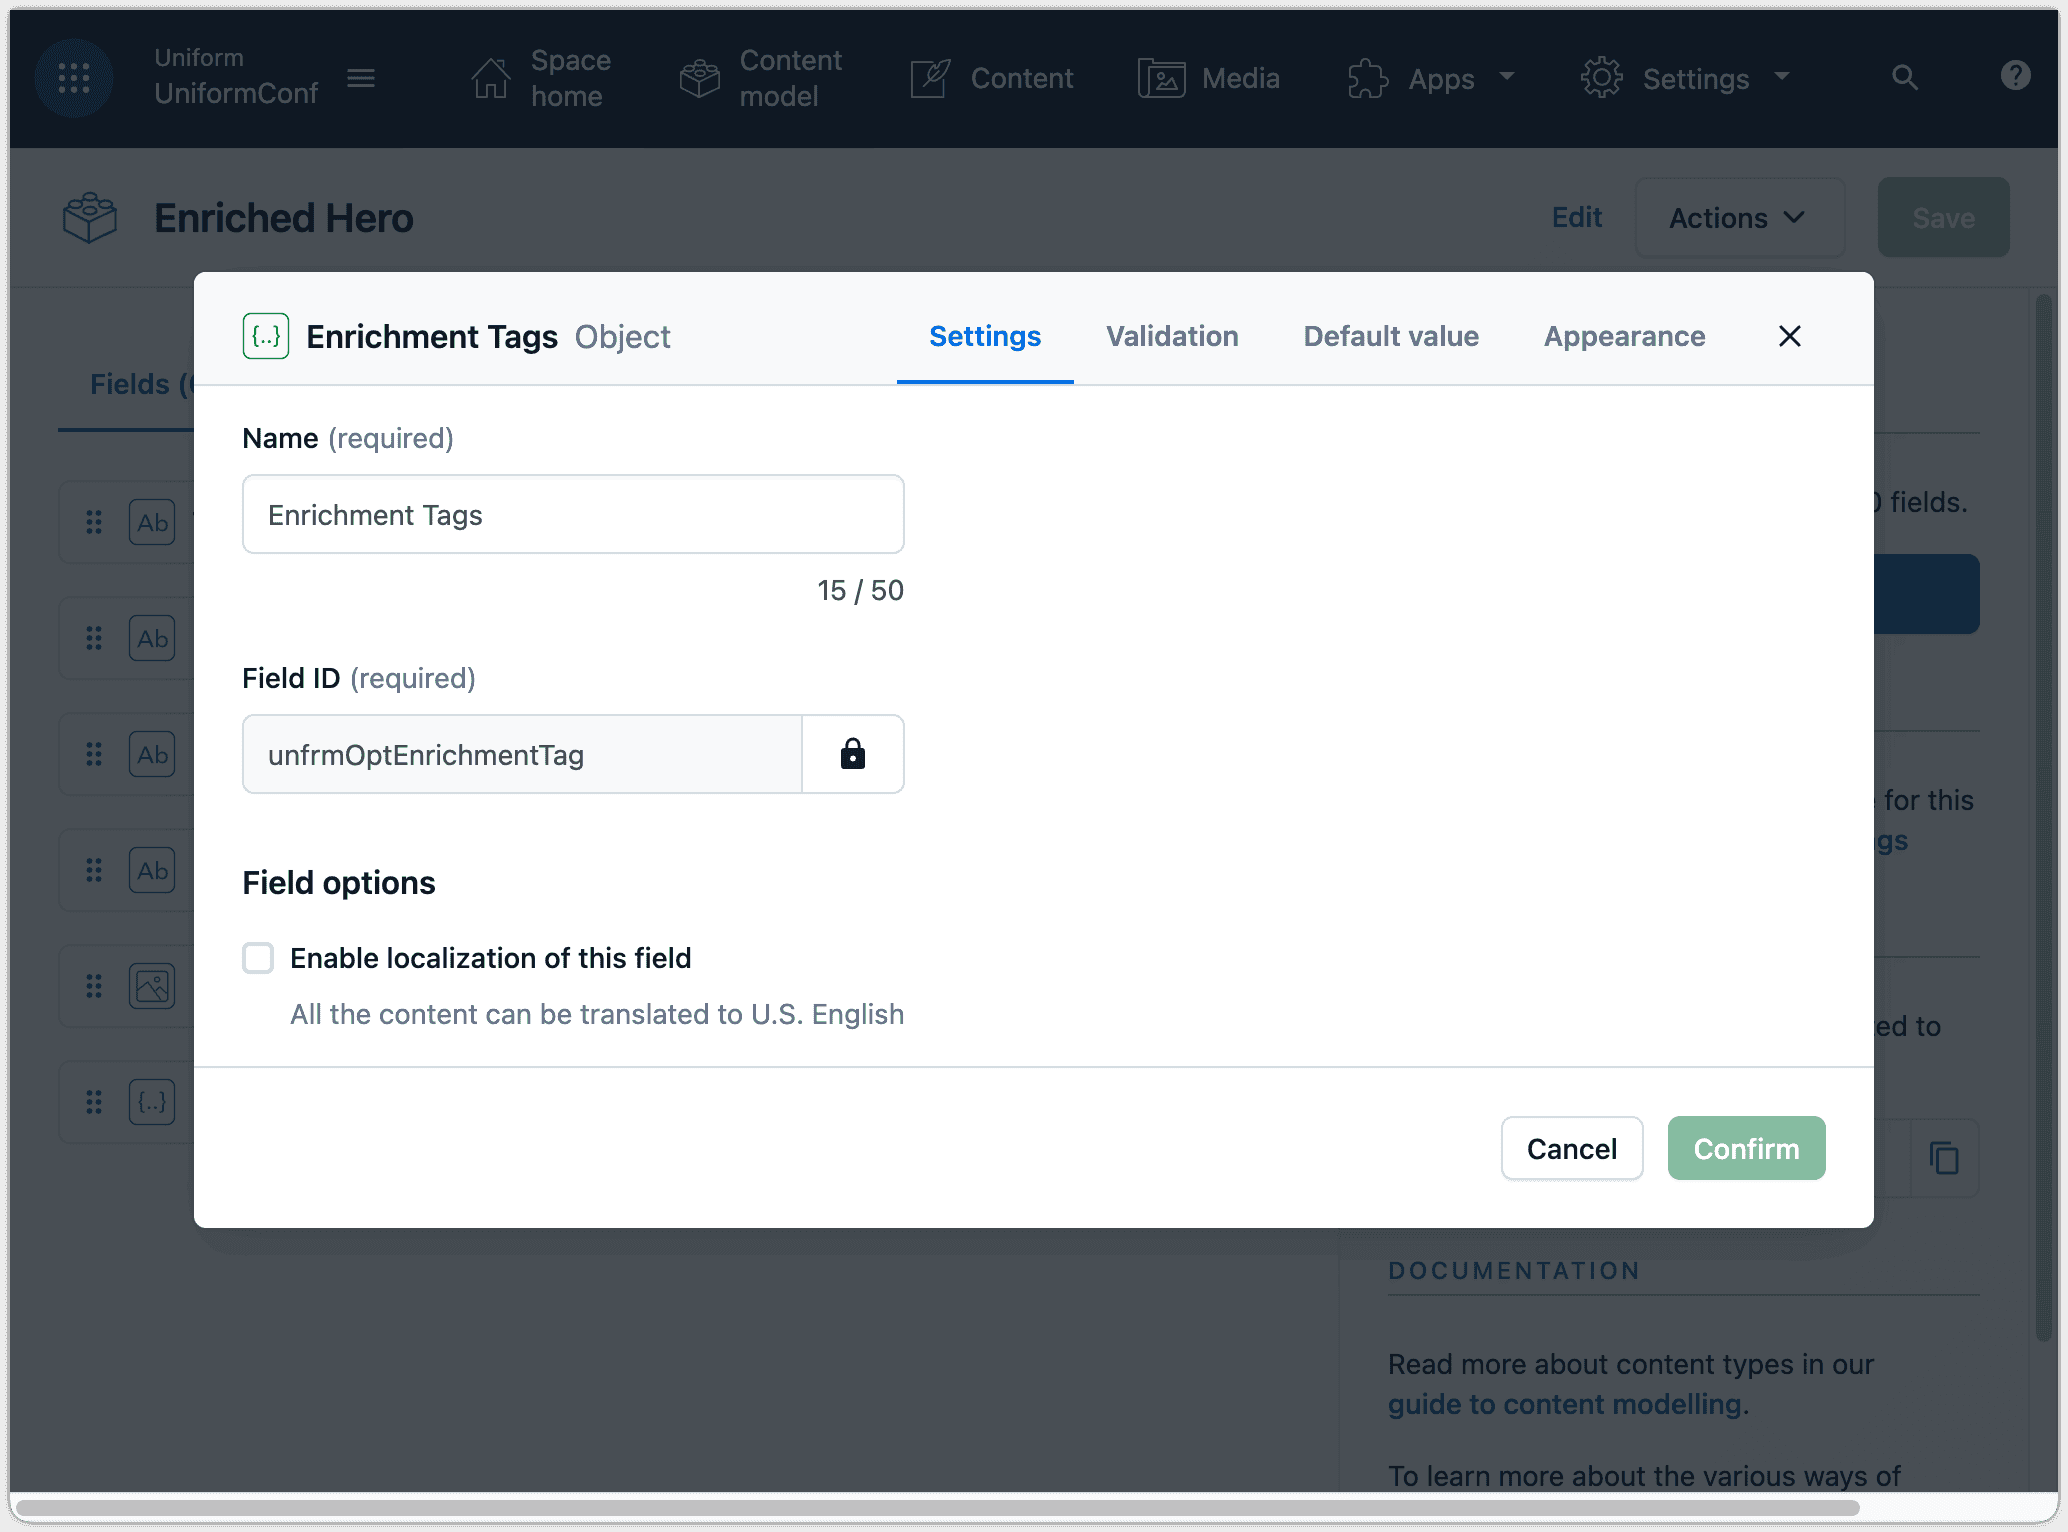
Click Appearance.
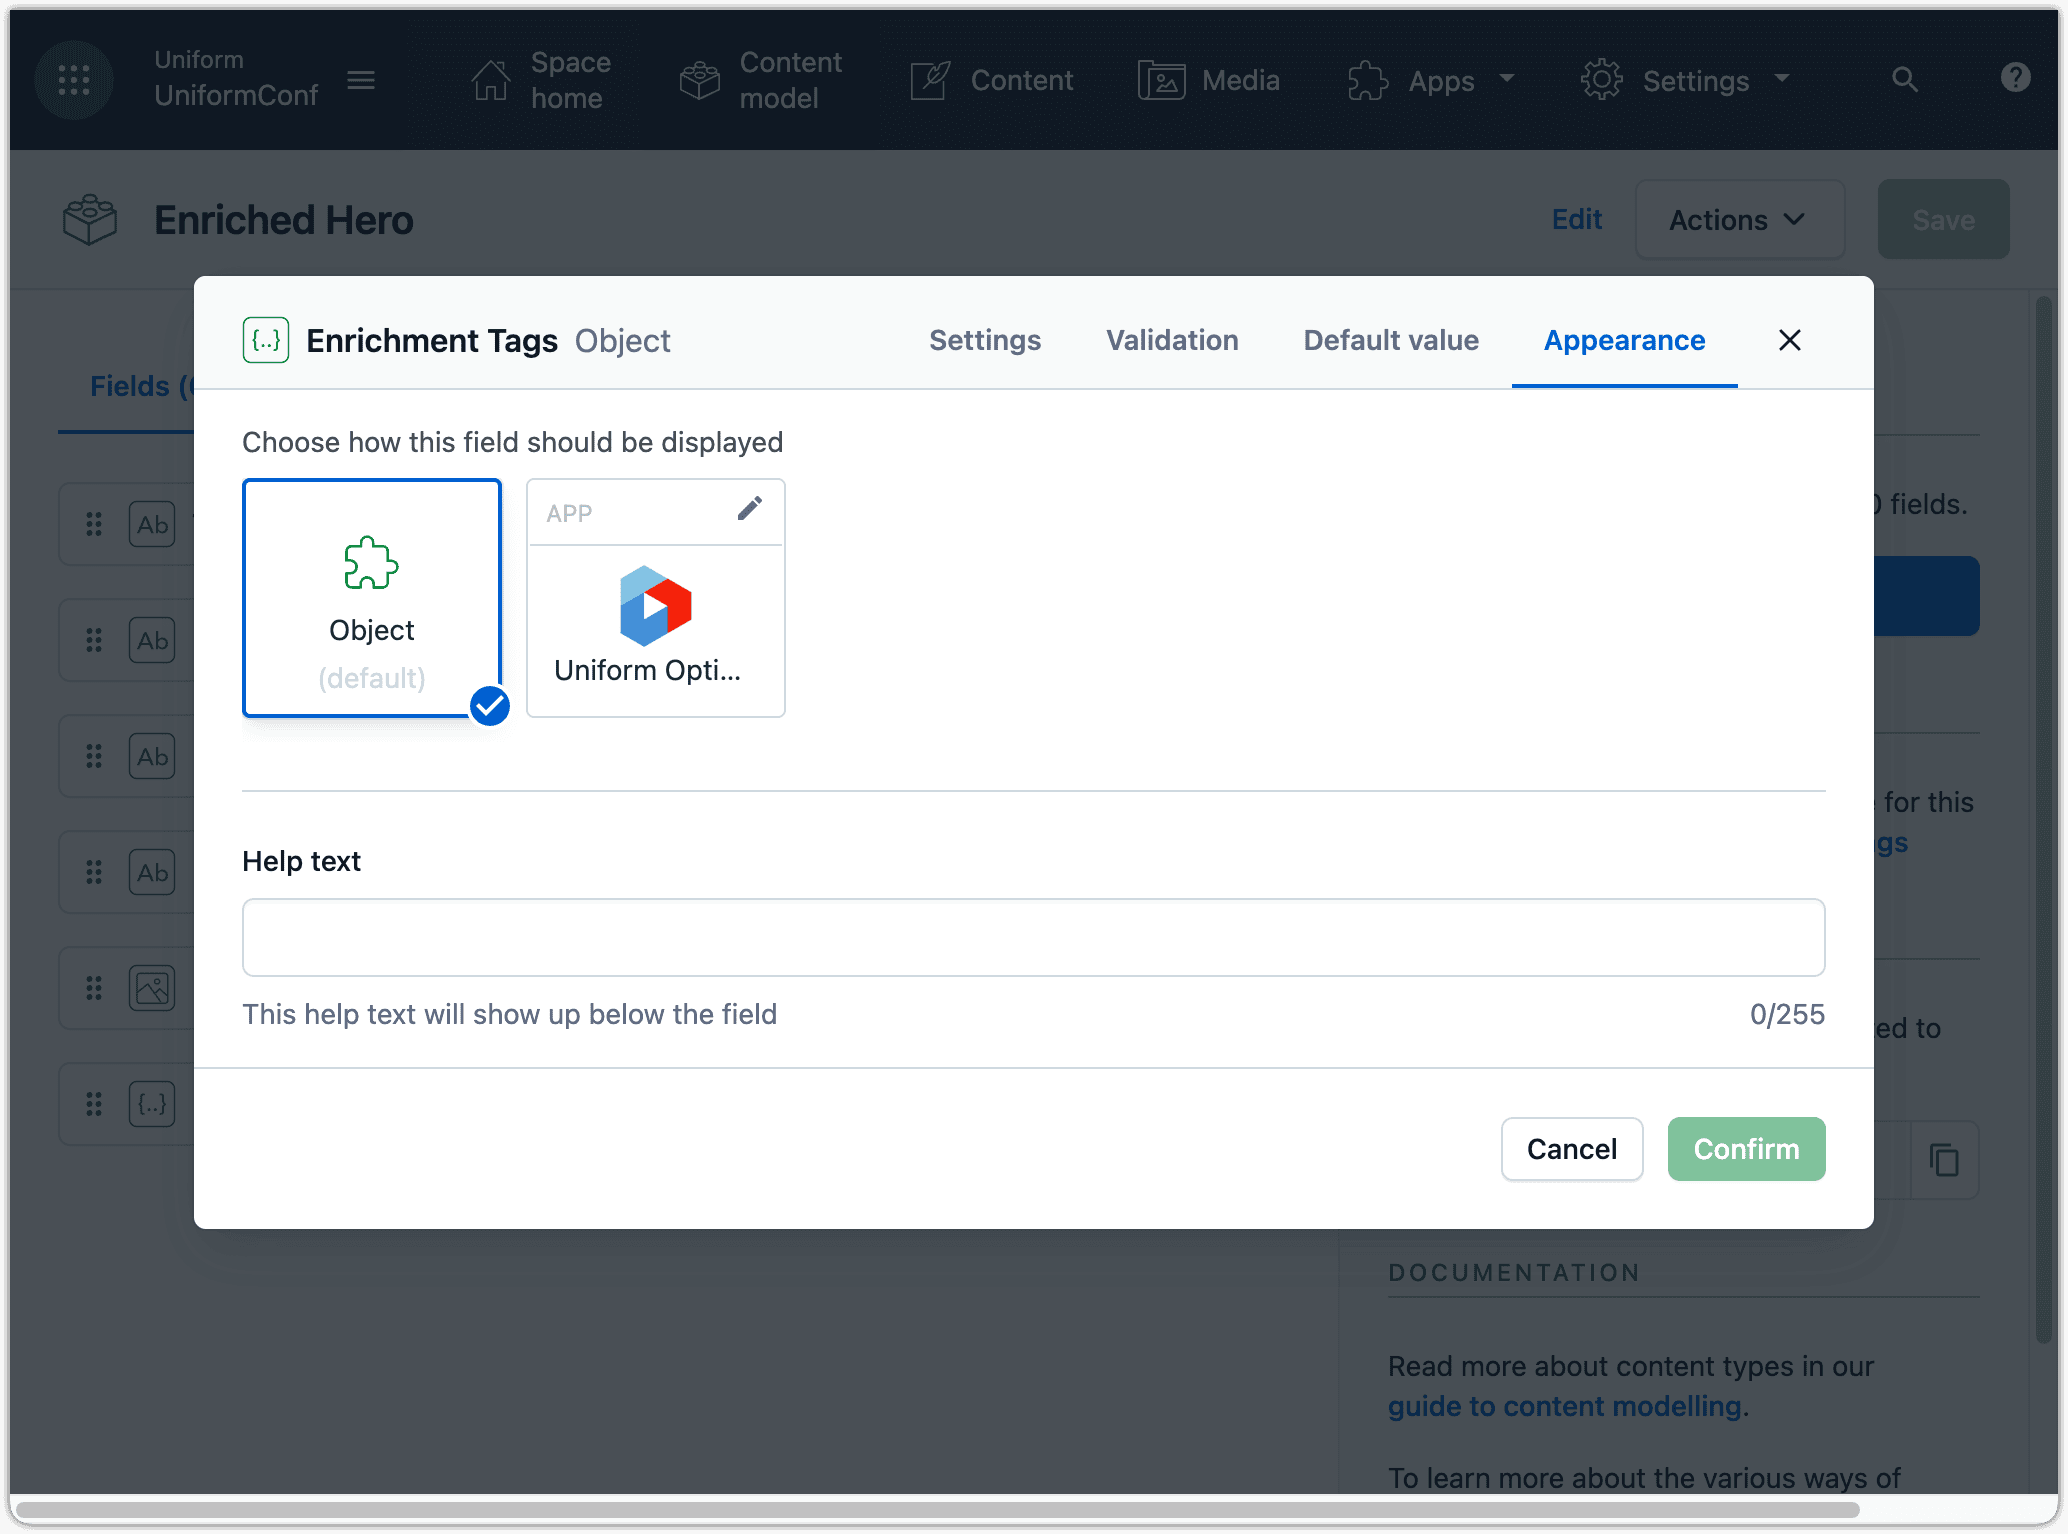
Click the Uniform logo.
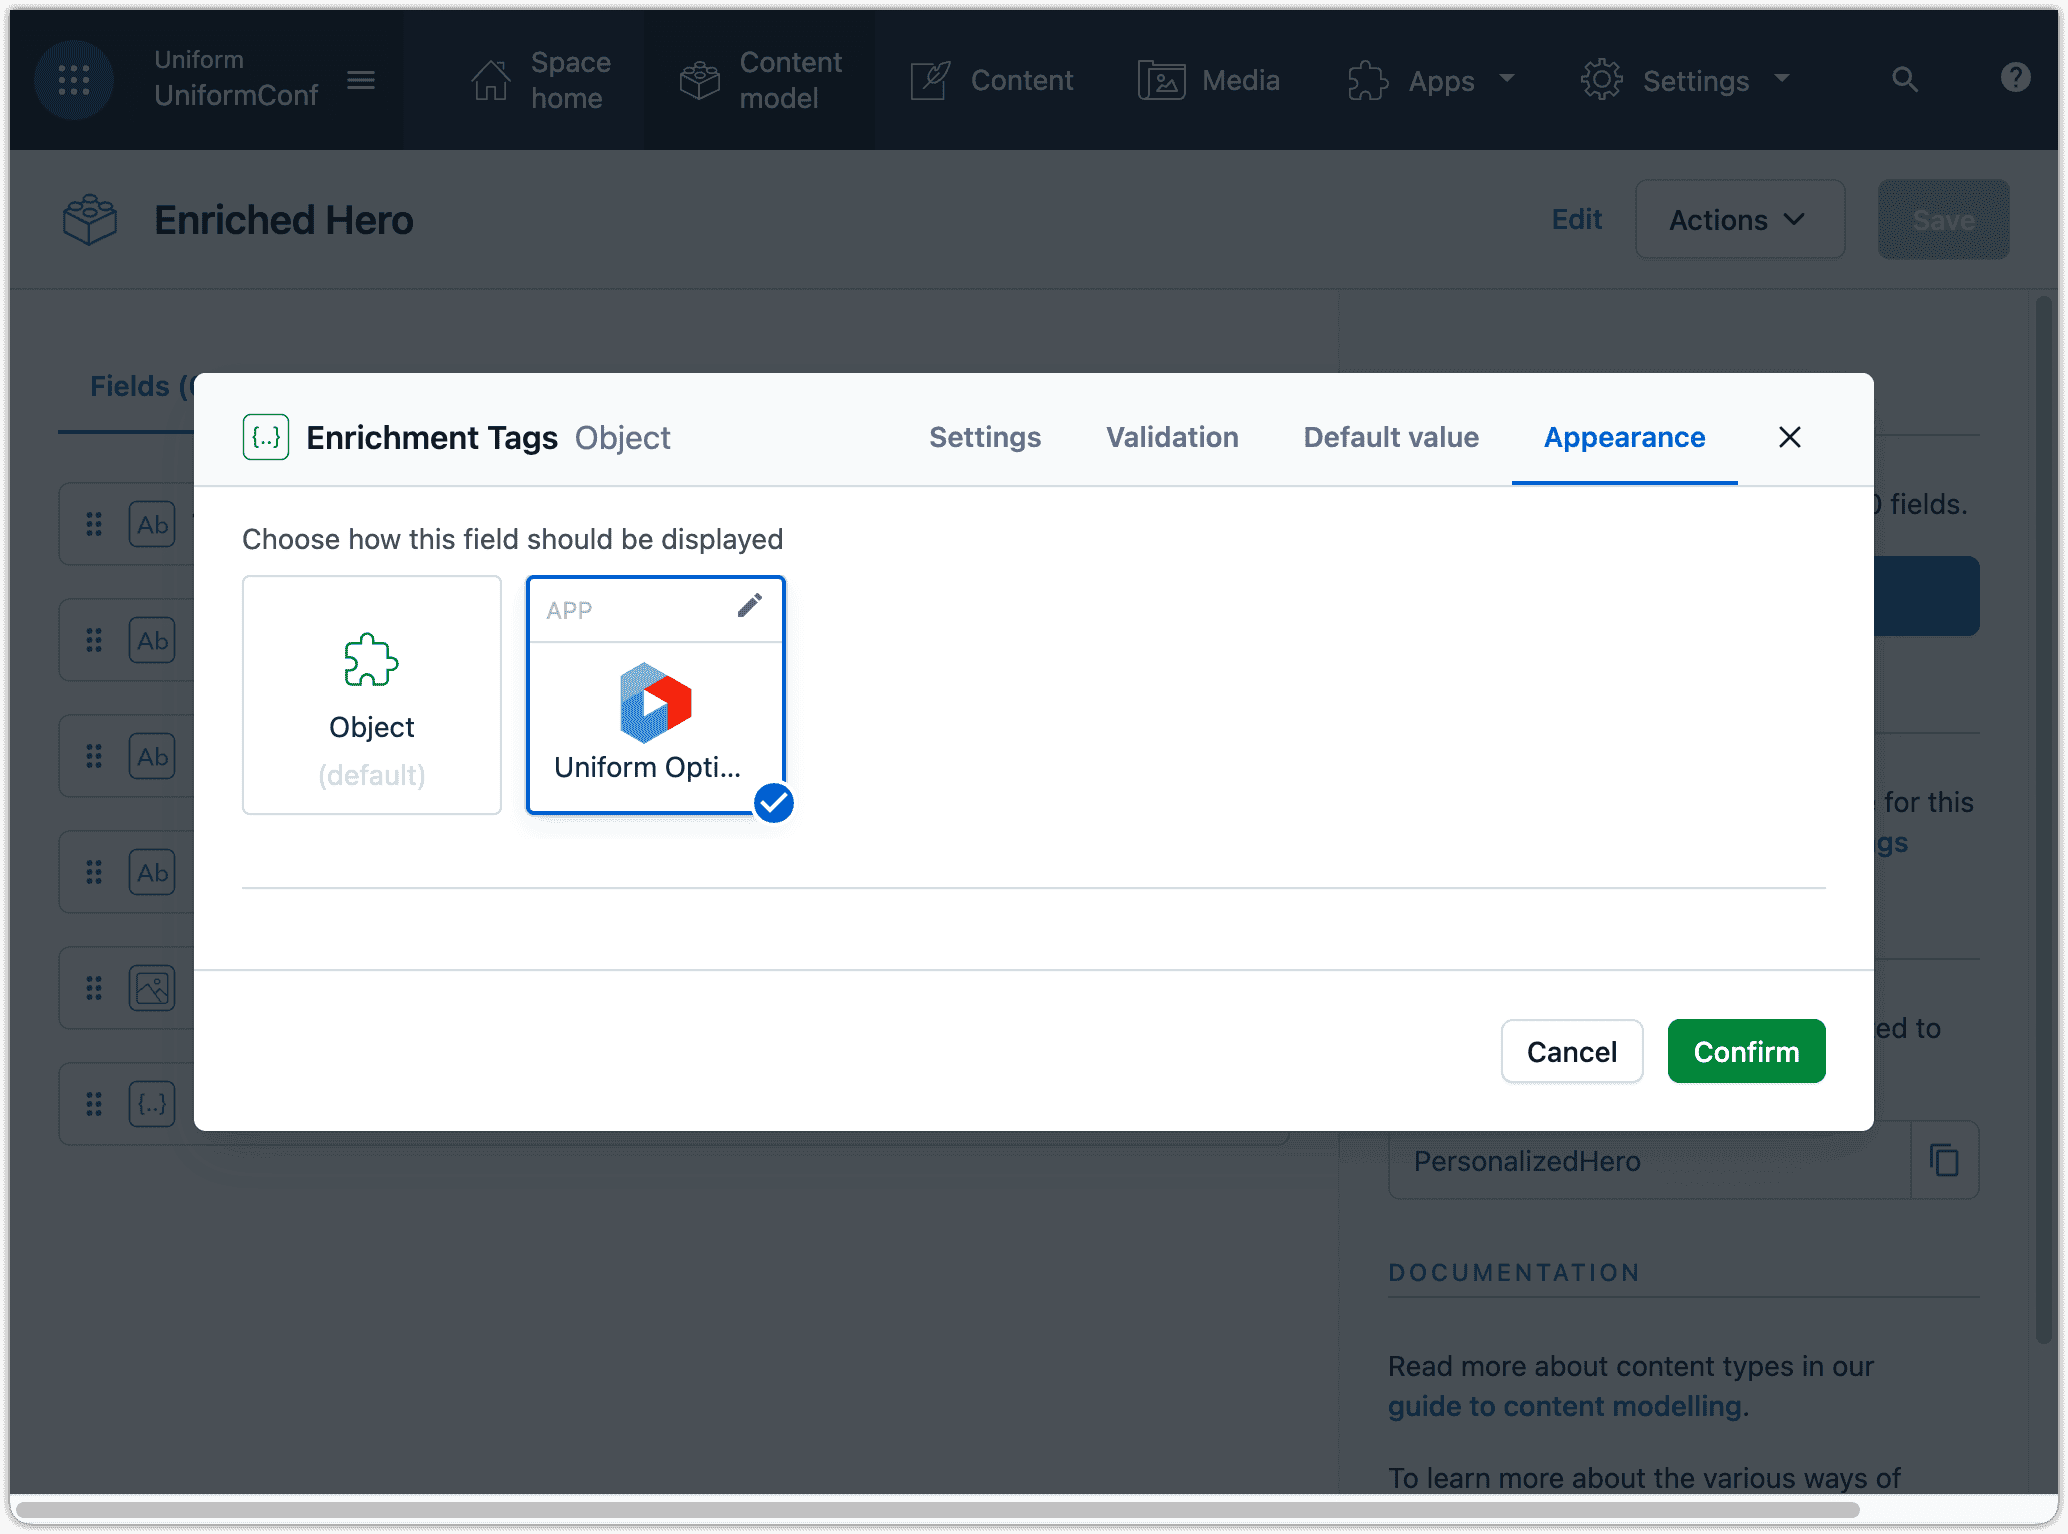
Click Confirm.
Click Save to save the changes to the content type.
Repeat these steps for the following content types:
Content type Field Personalized Hero Personalization Criteria Personalized Hero List List Items
Update Next.js app#
Uniform is designed to require minimal Uniform-specific product knowledge so developers can incorporate it into their apps as easily as possible. This section guides you through the process of adding personalization to the Next.js app.
tip
If you learn better by studying a fully implemented, working example, see the finished code section.
Add Uniform environment variables#
Add the following values to your .env file. You collected these values when you created the Uniform API key:
| Uniform value | Environment variable |
|---|---|
| API Key | UNIFORM_API_KEY |
| Project ID | UNIFORM_PROJECT_ID |
About this step
These environment variables are needed in order for the npm build script to communicate with Uniform.
Download manifest#
The Next.js application needs to have access to the personalization settings from Uniform. Uniform can generate a manifest that contains this information so you can use the settings in your application.
tip
In most cases, when using Uniform in an application that uses static site generation, you should generate the manifest before building the application. This ensures the latest manifest is available to the application.
Open a terminal in the root of the repository.
Enter the following command:
npm install -D @uniformdev/cli npm install @uniformdev/contextAbout this step
This adds a reference to the package with the Uniform CLI, which is a tool that enables you to interact with Uniform from a command-line interface. It also adds a reference to the package that includes a Uniform CLI extension for interacting with Uniform Context from a CLI.
Add the following to
package.json:{ "name": "contentful-uniformconf-nextjs", "description": "UniformConf for Contentful", "version": "0.1.0", "private": true, "scripts": { "cf:export": "node ./content/cf/export.cjs", "cf:import": "node ./content/cf/import.cjs", "start": "next start", "download:manifest": "uniform context manifest download --output ./contextManifest.json", "dev": "run-s download:manifest dev:next", "dev:next": "next dev", "build": "run-s download:manifest build:next", "build:next": "next build", "export": "next export", "ci:build": "next build && next export", "lint": "next lint" }, "dependencies": { ...About this step
This adds a new script that downloads the manifest from Uniform, saves it to a file named
contextManifest.json, and incorporates it into the scripts that start and build the application.Add the following to your
.gitignorefile:# uniform contextManifest.jsonAbout this step
This ensures the manifest file doesn't get added to your source code repository.
Add Context to app#
Adding Uniform Context to your application involves two primary tasks. One is making the manifest available to the application. This is required because it establishes the parameters for tracking and personalization. Two is creating a "context" object that's maintains state for Uniform Context within the app.
Open a terminal in the root of the repository.
Enter the following command:
npm install @uniformdev/context-react cookieAbout this step
This adds a reference to the package that enables you to add Uniform Context into applications build using React.
Open the file
./pages/_app.jsxin your text editor.Add the following code:
import Navbar from "../components/Navbar"; import Footer from "../components/Footer"; import "../styles/style.css"; import { Context, } from "@uniformdev/context"; const context = new Context({ }); ...Add the following code:
import Navbar from "../components/Navbar"; import Footer from "../components/Footer"; import "../styles/style.css"; import { Context, } from "@uniformdev/context"; import manifest from "../contextManifest.json"; const context = new Context({ manifest, }); function MyApp({ Component, pageProps, }) { return ( <> <Navbar /%} <Component {...pageProps} /%} <Footer /%} <> ); } export default MyApp;Add the following code:
... const context = new Context({ defaultConsent: true, manifest, }); ...Add the following code:
import Navbar from "../components/Navbar"; import Footer from "../components/Footer"; import "../styles/style.css"; import { Context, } from "@uniformdev/context"; import { UniformContext } from "@uniformdev/context-react"; import manifest from "../contextManifest.json"; const context = new Context({ defaultConsent: true, manifest, }); function MyApp({ Component, pageProps, }) { return ( <UniformContext context={context}> <Navbar /%} <Component {...pageProps} /%} <Footer /%} </UniformContext> ); } export default MyApp;Add the following code:
import Navbar from "../components/Navbar"; import Footer from "../components/Footer"; import "../styles/style.css"; import { Context, enableContextDevTools, } from "@uniformdev/context"; import { UniformContext } from "@uniformdev/context-react"; import manifest from "../contextManifest.json"; const context = new Context({ defaultConsent: true, manifest, plugins: [ enableContextDevTools(), ], }); function MyApp({ Component, pageProps, }) { return ( <UniformContext context={context}> <Navbar /%} <Component {...pageProps} /%} <Footer /%} </UniformContext> ); } export default MyApp;About this step
This enables the Uniform browser extension. Production sites usually don't have this enabled, but it can be very helpful during development and testing.
Start app#
In the terminal, enter the following command:
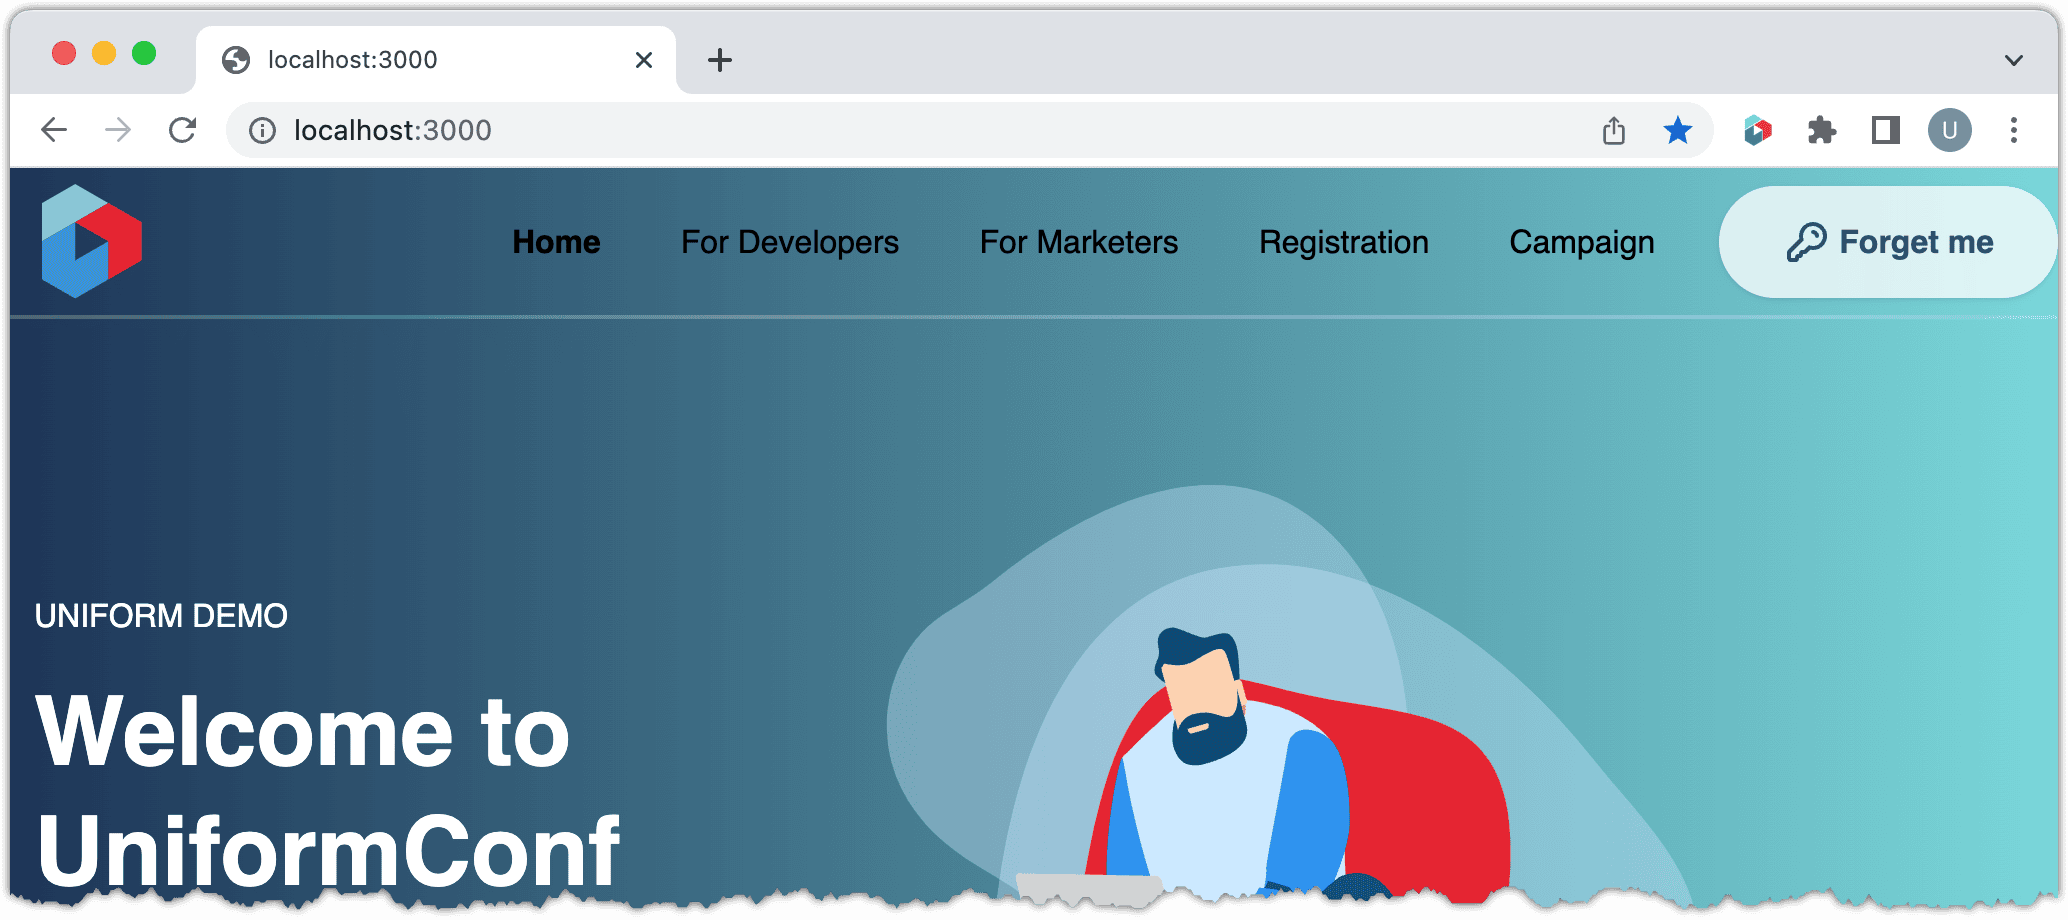
npm run devOpen a browser window to
http://localhost:3000to view the UniformConf application.
If you have the Chrome extension installed, you should see that the Uniform logo is now in full color (previously it was black and white). This means that Uniform Context was detected on the site.
Activate tracking#
In Contentful you assigned enrichment tags to entries based on the Enriched Hero content type. The Uniform tracker is able to use these enrichment tags to track the visitor. The tracker can do this automatically, as long as the enrichment tags are included in the props for the page.
Open the file
./lib/cf/fetch.jsin your text editor.Add the following code:
function getFields(entry) { const { fields } = entry; if (fields?.image) { fields.image = fields.image.fields.file.url; } if (!fields.id && entry.sys?.id) { fields.id = entry.sys?.id; } if (fields.unfrmOptEnrichmentTag) { fields.enrichments = fields.unfrmOptEnrichmentTag; delete fields.unfrmOptEnrichmentTag; } return fields; }Open the file
./components/Hero.jsxin your text editor.Add the following code:
export const Hero = ({ title, description, buttonText, image, buttonLinkSlug, enrichments, }) => {Add the following code:
import Link from "next/link"; import Splitter from "./Splitter"; import { Track } from "@uniformdev/context-react"; export const Hero = ({ title, description, buttonText, image, buttonLinkSlug, enrichments, }) => { return ( <Track behavior={enrichments}> <div className="pt-24"> ... </div> <Splitter /> </Track> ); };Open the file
./components/Navbar.jsxin your text editor.Add the following code:
import React, { useState, useEffect } from "react"; import Link from "next/link"; import { useRouter } from "next/router"; import { useScrollPosition } from "@n8tb1t/use-scroll-position"; import NavMenu from "./NavMenu"; import Logo from "./Logo"; import { useUniformContext } from "@uniformdev/context-react"; ... const Nav = () => { const [submenuVisible, setSubmenuVisible] = useState(false); const [isScrolled, setScrolled] = useState(false); const { context } = useUniformContext(); const router = useRouter(); ...Add the following code:
... <ActionLink isScrolled={isScrolled} onClick={async () => { setSubmenuVisible(false); await context.forget(true); document.cookie = "unfrmconf_registered=; Path=/; samesite=lax; Expires=Thu, 01 Jan 1970 00:00:01 GMT;"; } } label="Forget me" icon={<LockIcon /%}} /> ...In the terminal, enter the following command:
npm install cookieOpen the file
./components/RegistrationForm.jsxin your text editor.Add the following code:
import { useUniformContext } from '@uniformdev/context-react'; import React from 'react'; import { useState } from 'react'; import Splitter from './Splitter'; export const RegisterForm = (fields) => { const [registered, setRegistered] = useState( typeof document !== 'undefined' ? !!document.cookie.match(/unfrmconf_registered/) : false ); const { context } = useUniformContext(); const onRegister = () => { document.cookie = 'unfrmconf_registered=true; path=/; samesite=lax'; setRegistered(true); }; ...Add the following code:
import { useUniformContext } from '@uniformdev/context-react'; import { parse } from 'cookie'; import React from 'react'; import { useState } from 'react'; import Splitter from './Splitter'; export const RegisterForm = (fields) => { const [registered, setRegistered] = useState( typeof document !== 'undefined' ? !!document.cookie.match(/unfrmconf_registered/) : false ); const { context } = useUniformContext(); const onRegister = () => { document.cookie = 'unfrmconf_registered=true; path=/; samesite=lax'; context.update({ cookies: parse(document.cookie) }); setRegistered(true); }; ...Open a browser window to
http://localhost:3000/developersto view a page with an enrichment tag assigned.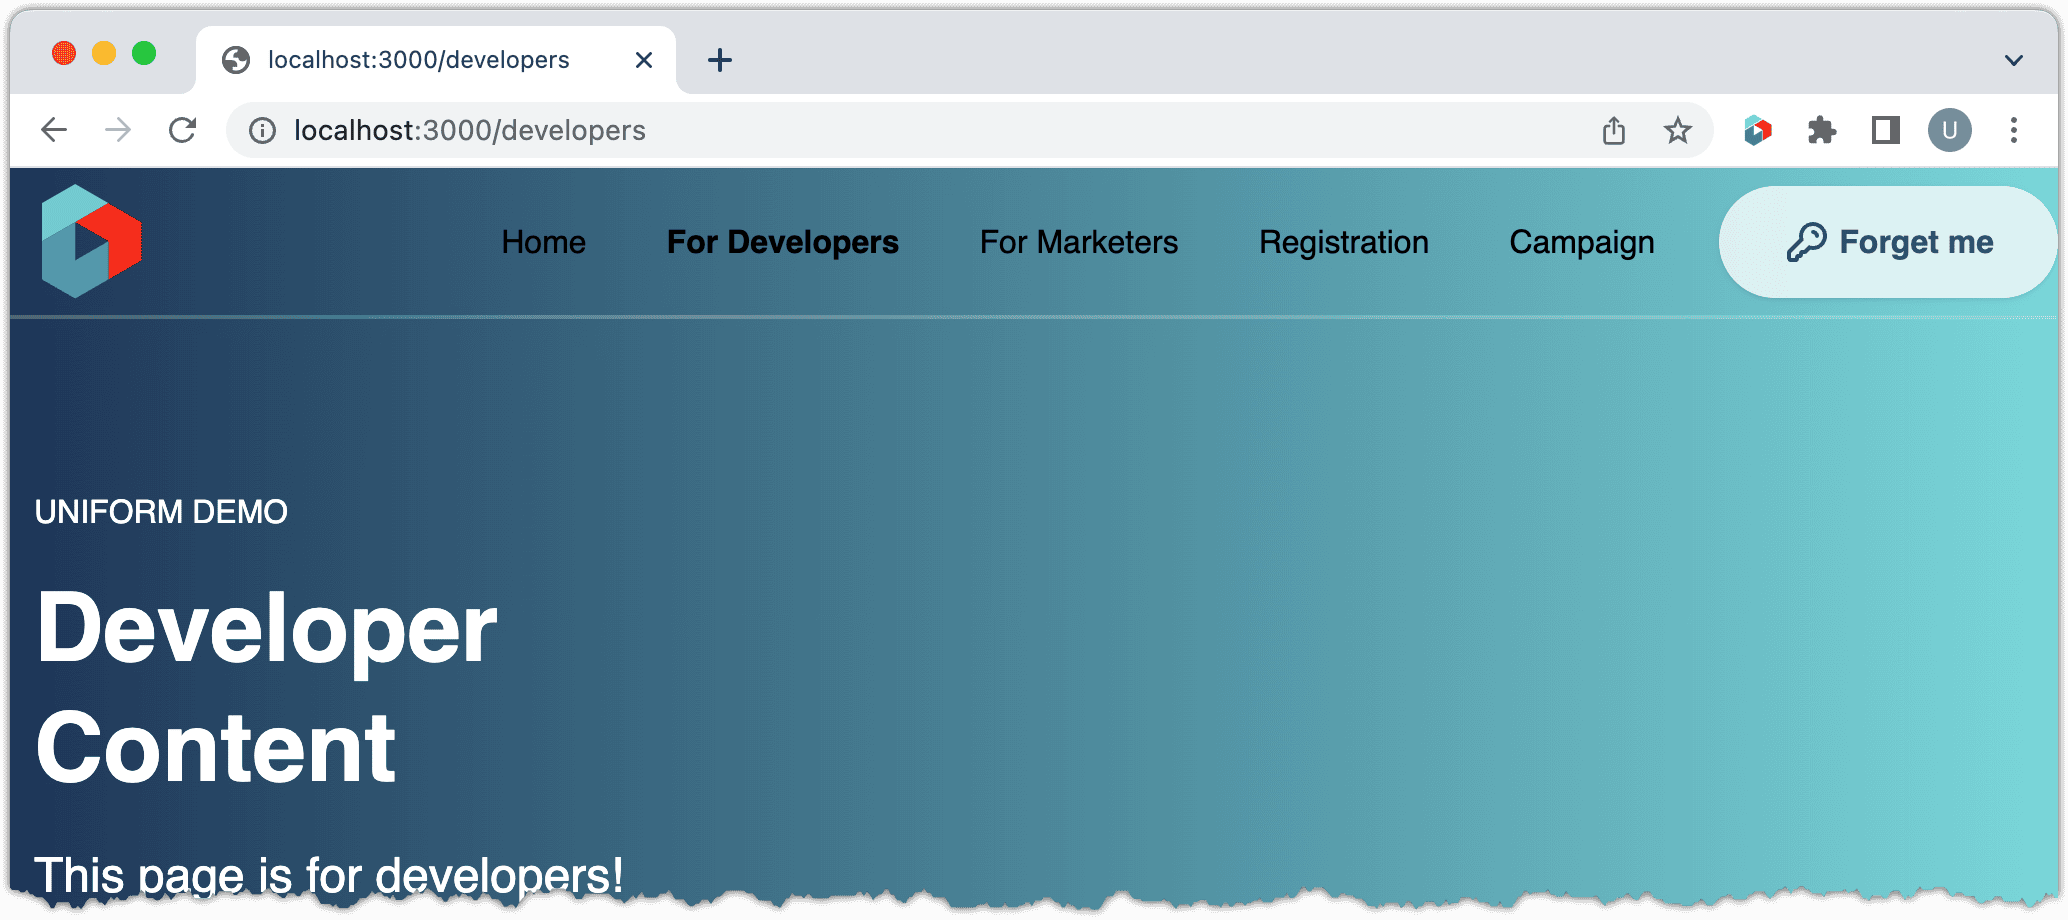
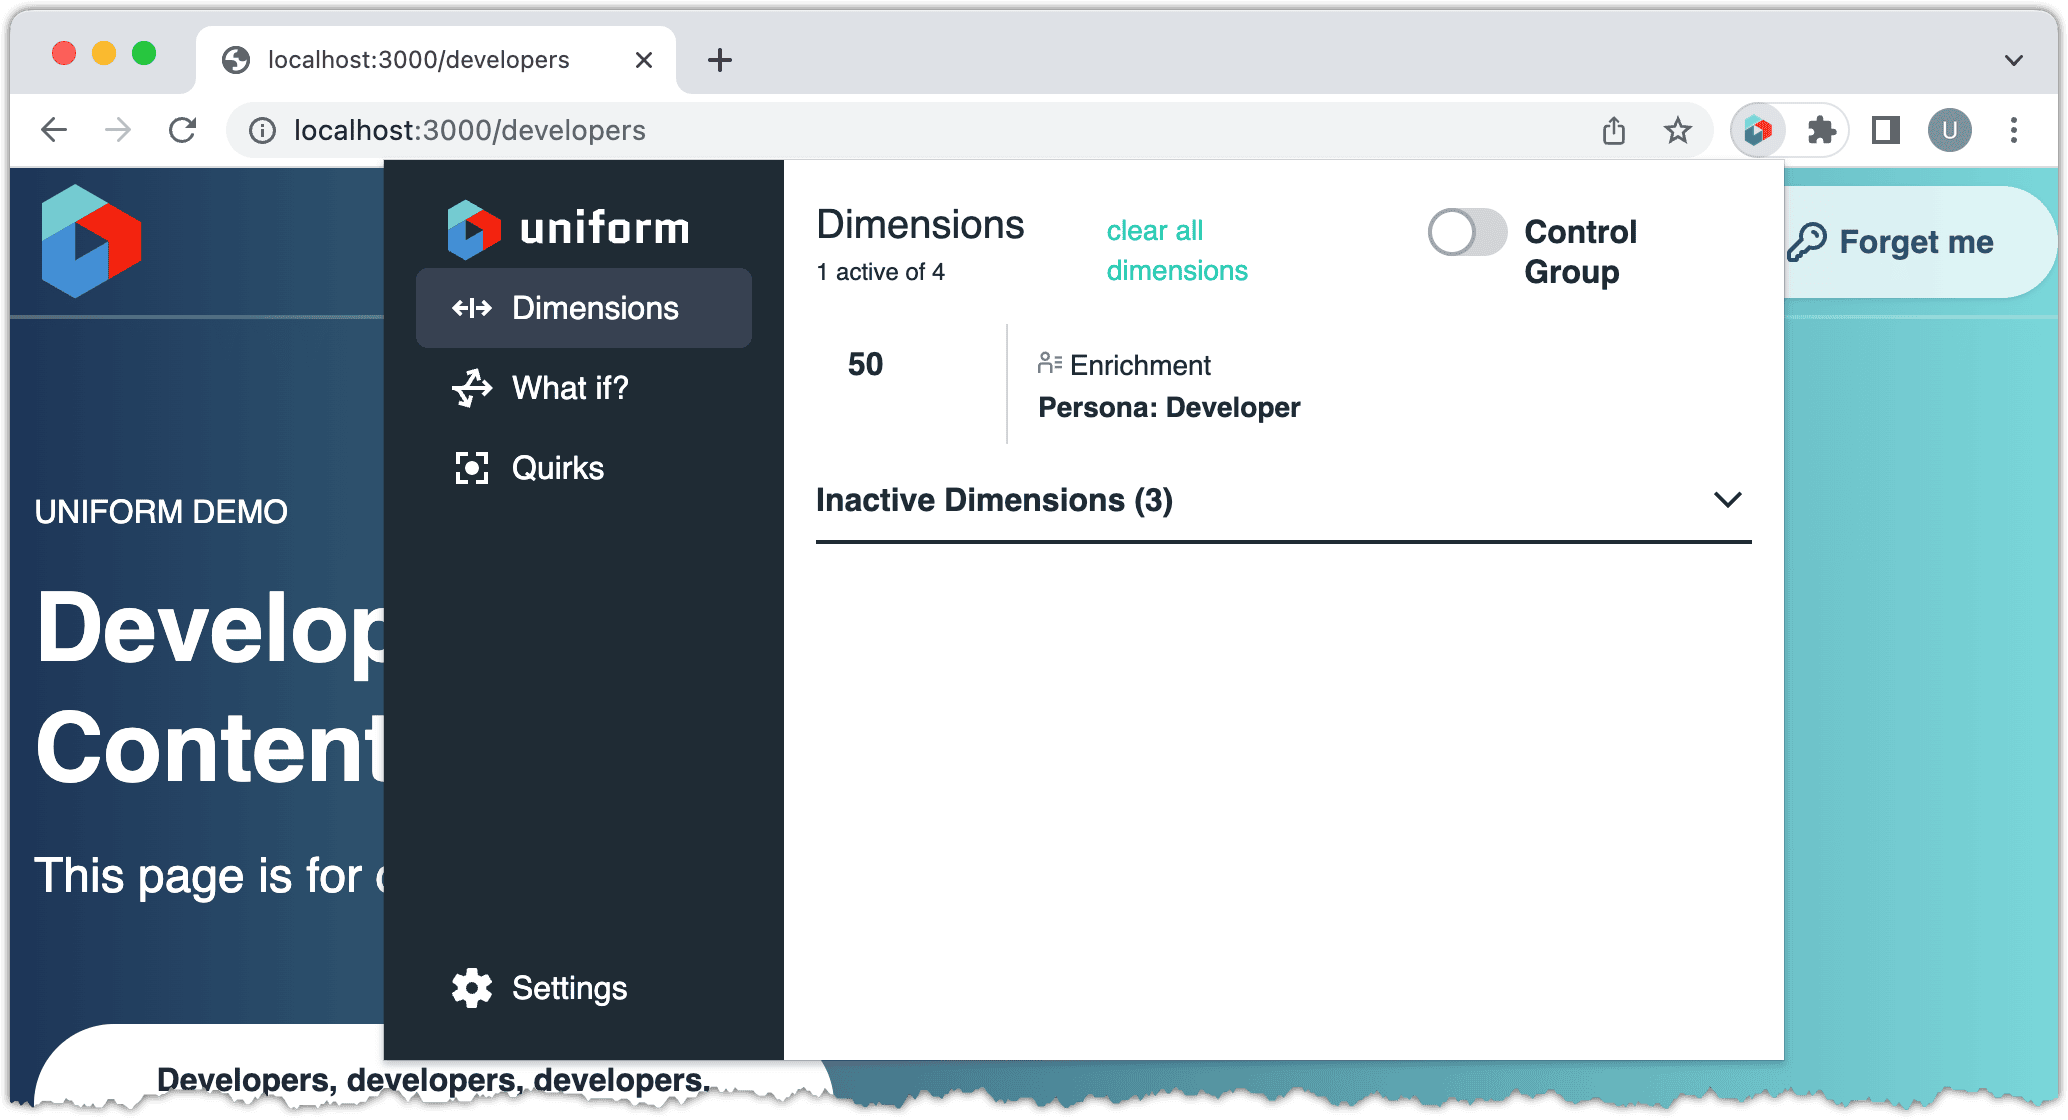
Open the browser extension and navigate to Dimensions.
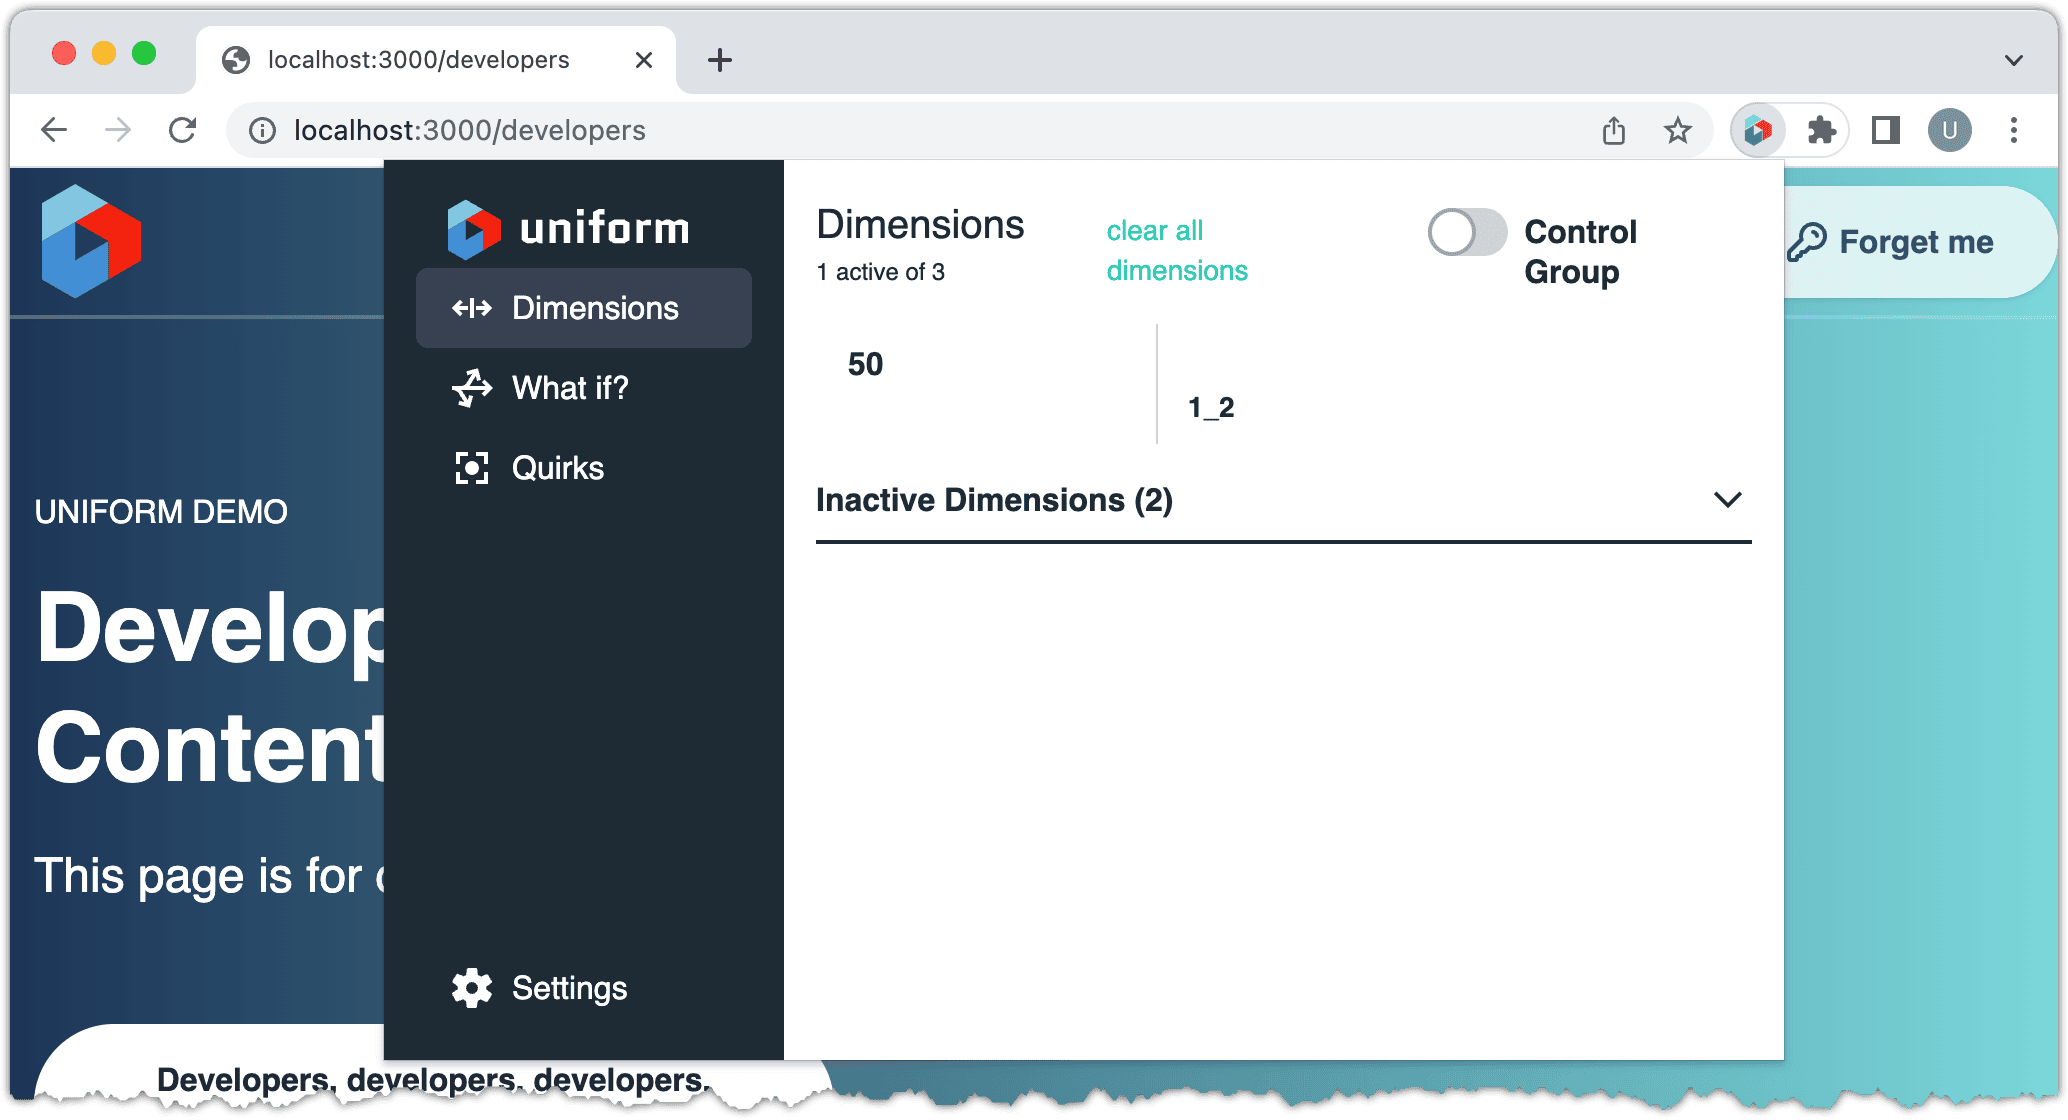
About this step
This shows that the tracker collected data, but it's not very intuitive. It says that the dimension "1_2" has a score of "50." The "1_2" is a combination of the public IDs for the enrichment Persona and the enrichment value Developer.
In the extension, click Settings.
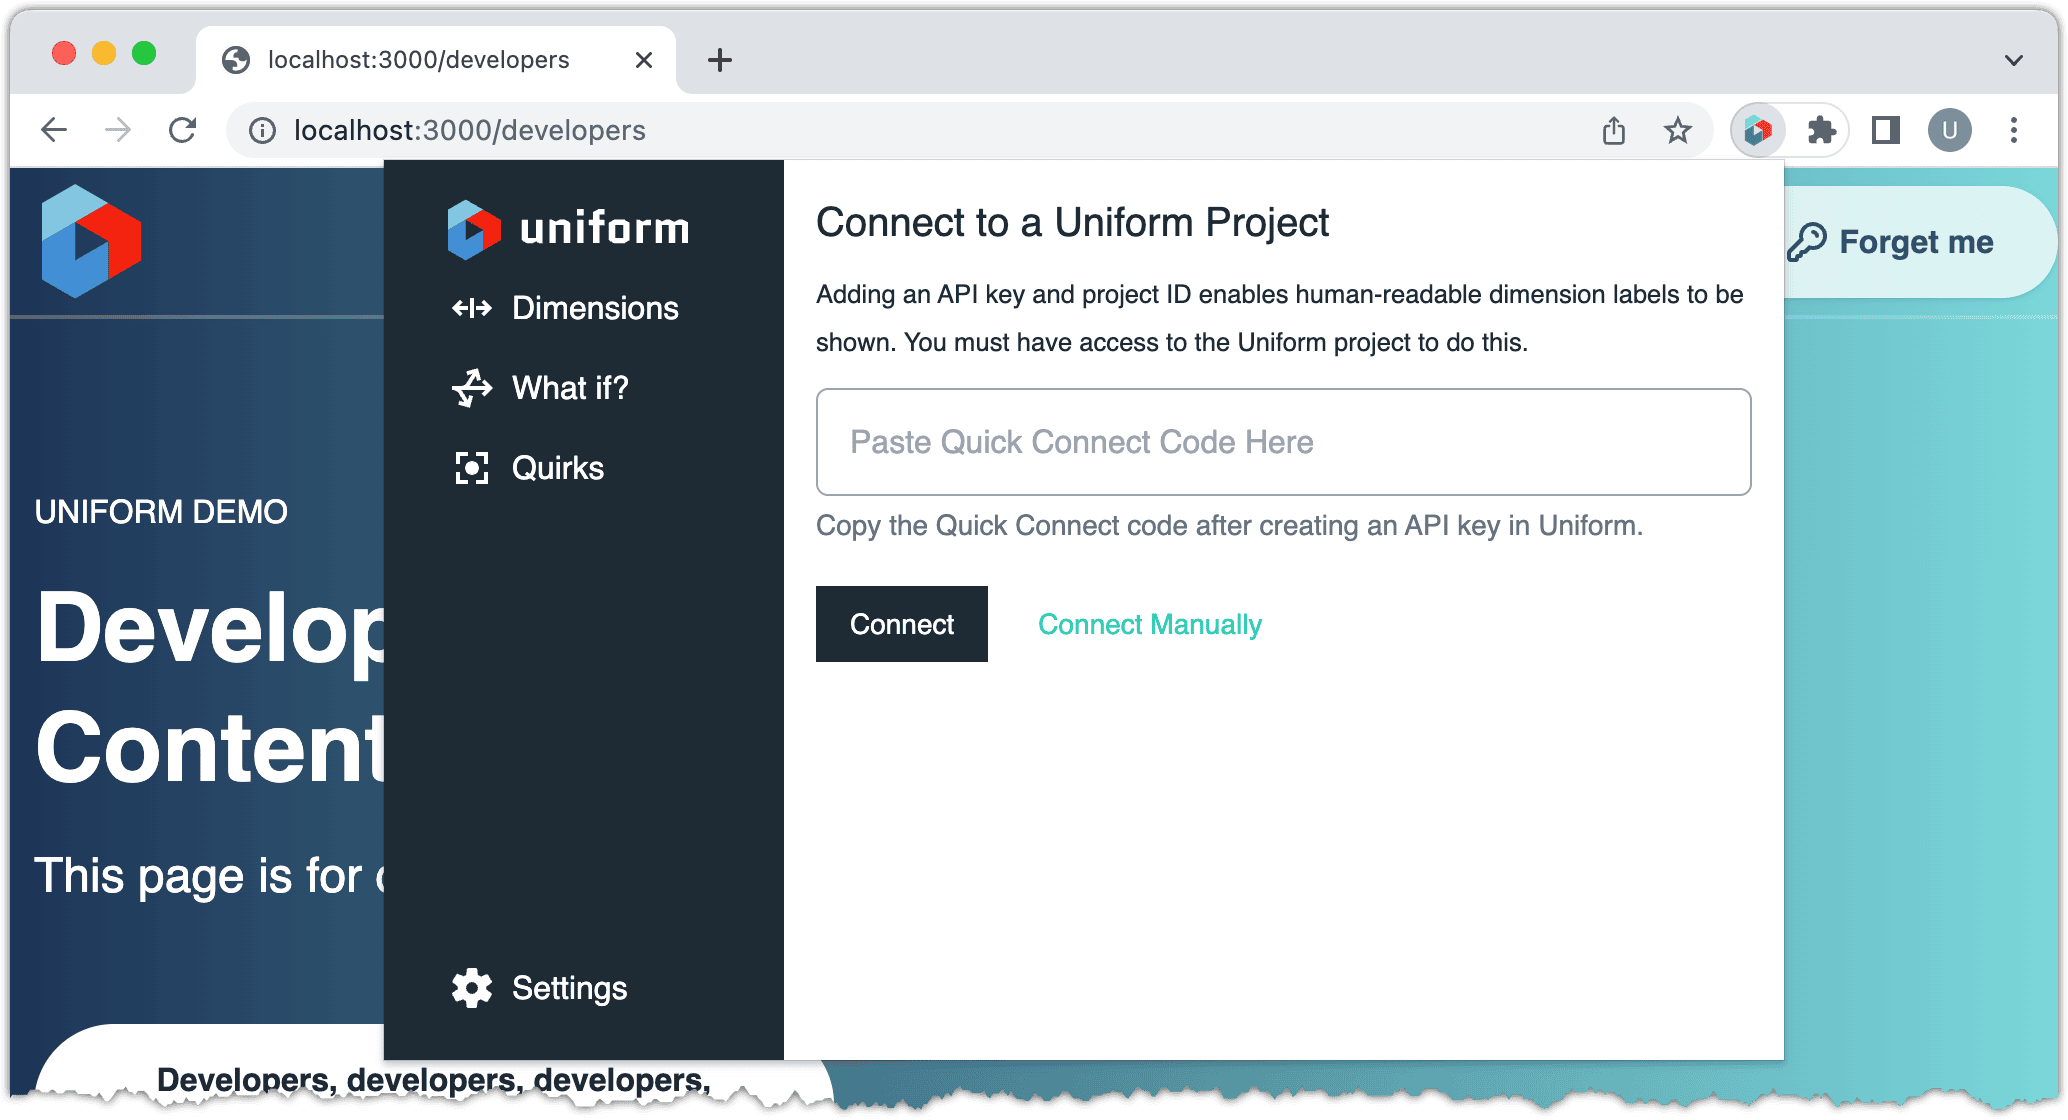
Click Manage Connection to Uniform.
Enter the Quick Connect Code you used to configure the app in Contentful.
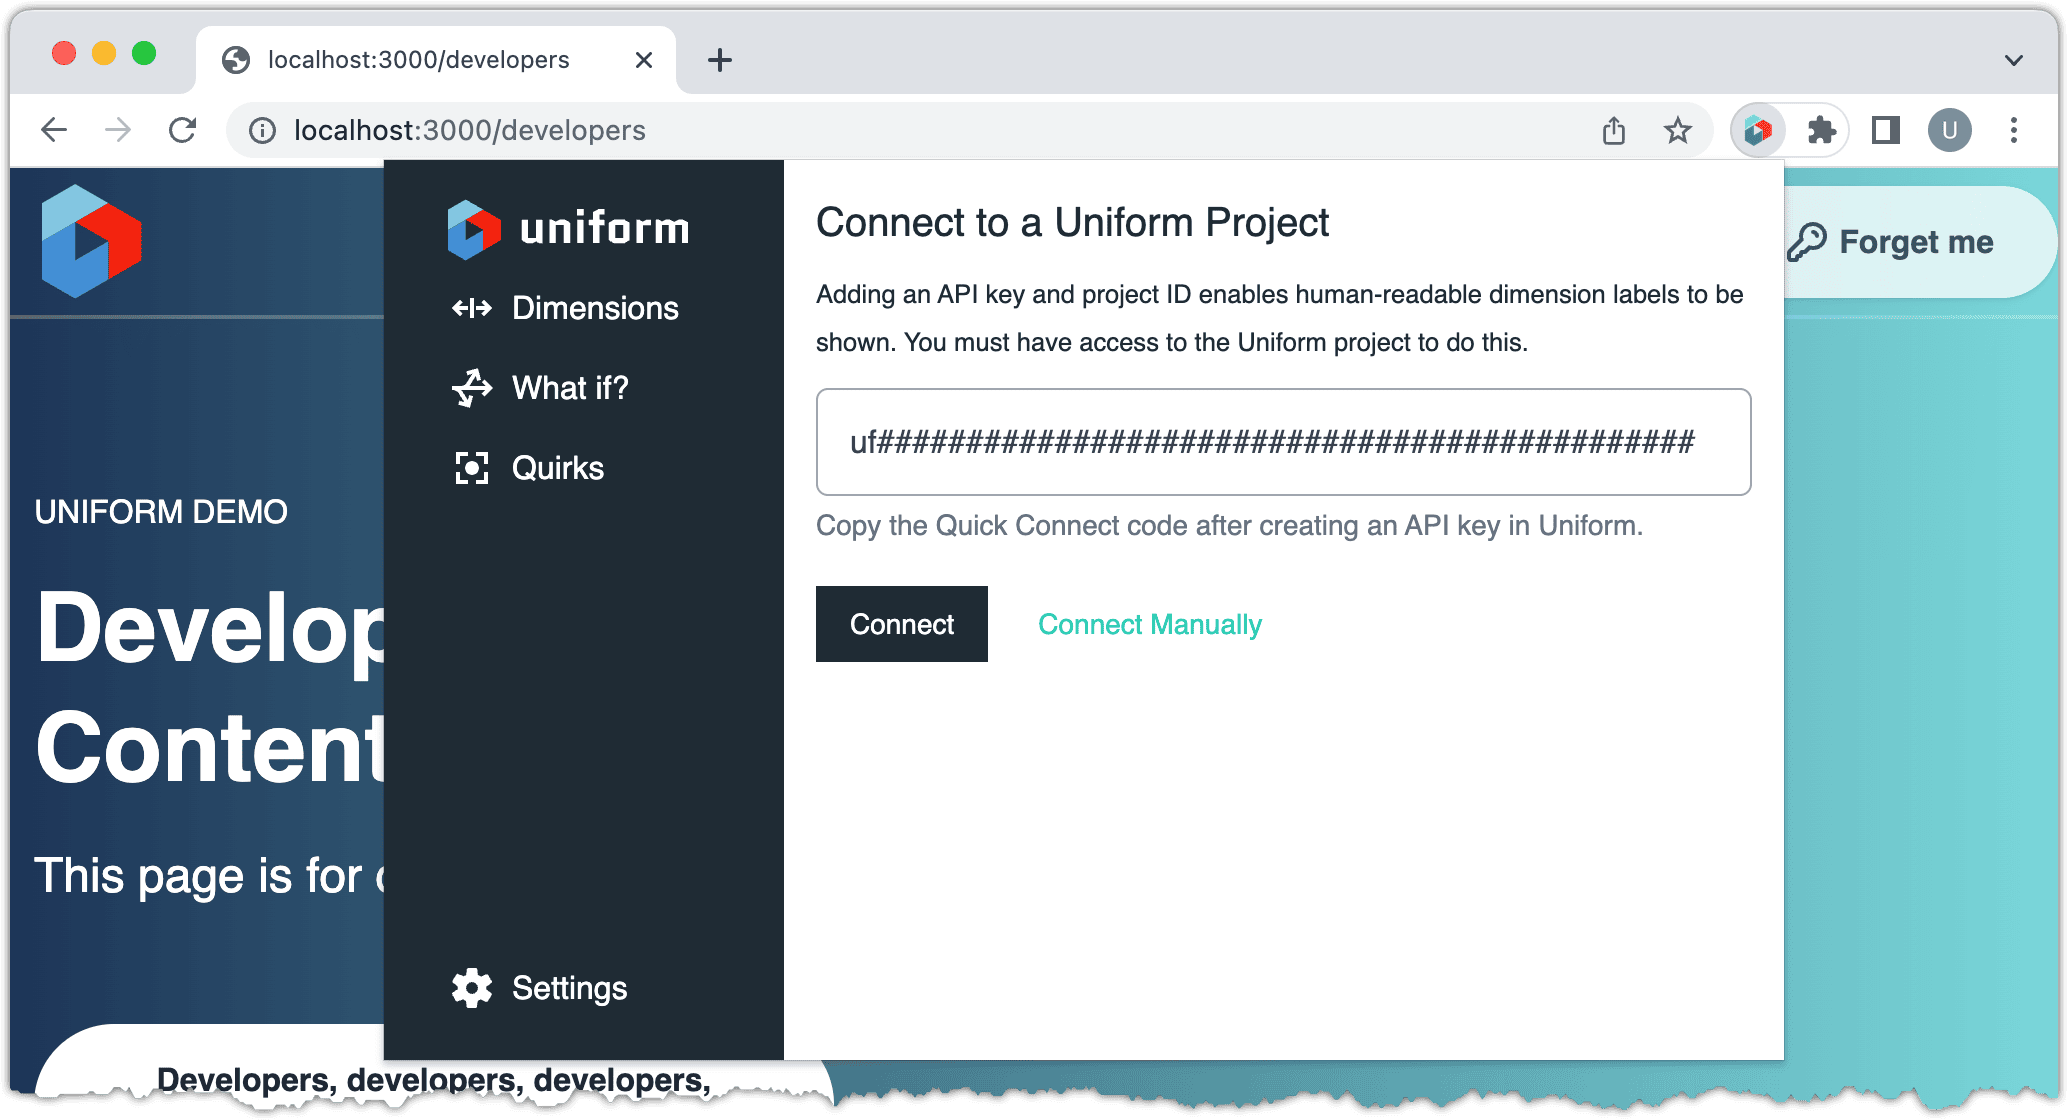
About this step
These settings give the browser extension the ability to read metadata directly from Uniform. This makes it possible to translate "1_2" into something meaningful.
Click Save.
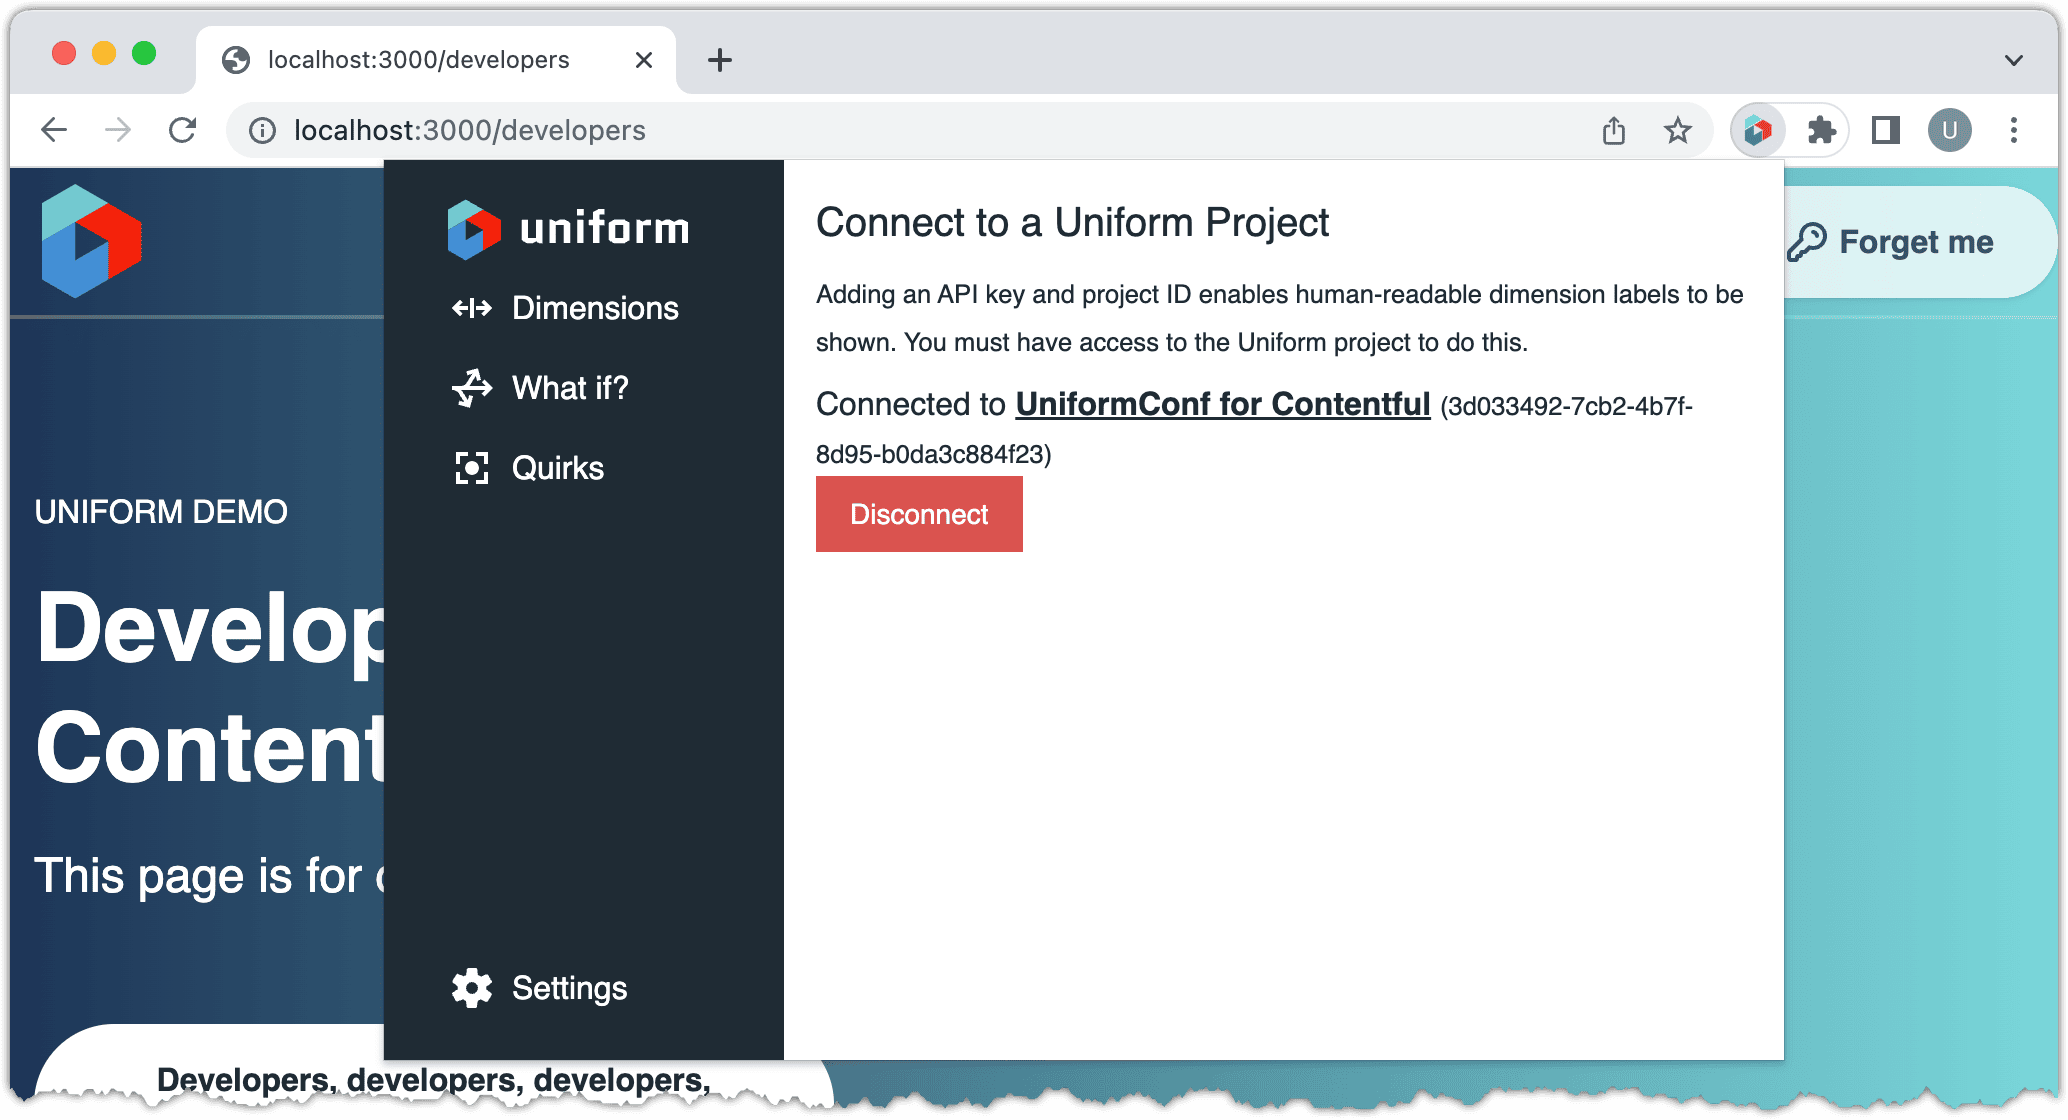
In the extension, click Dimensions. Now you will see more meaningful descriptions of what the tracker has collected.
In your browser, navigate to
http://localhost:3000/marketers.Open the browser extension. Now you will see that you have scores for 2 enrichments.
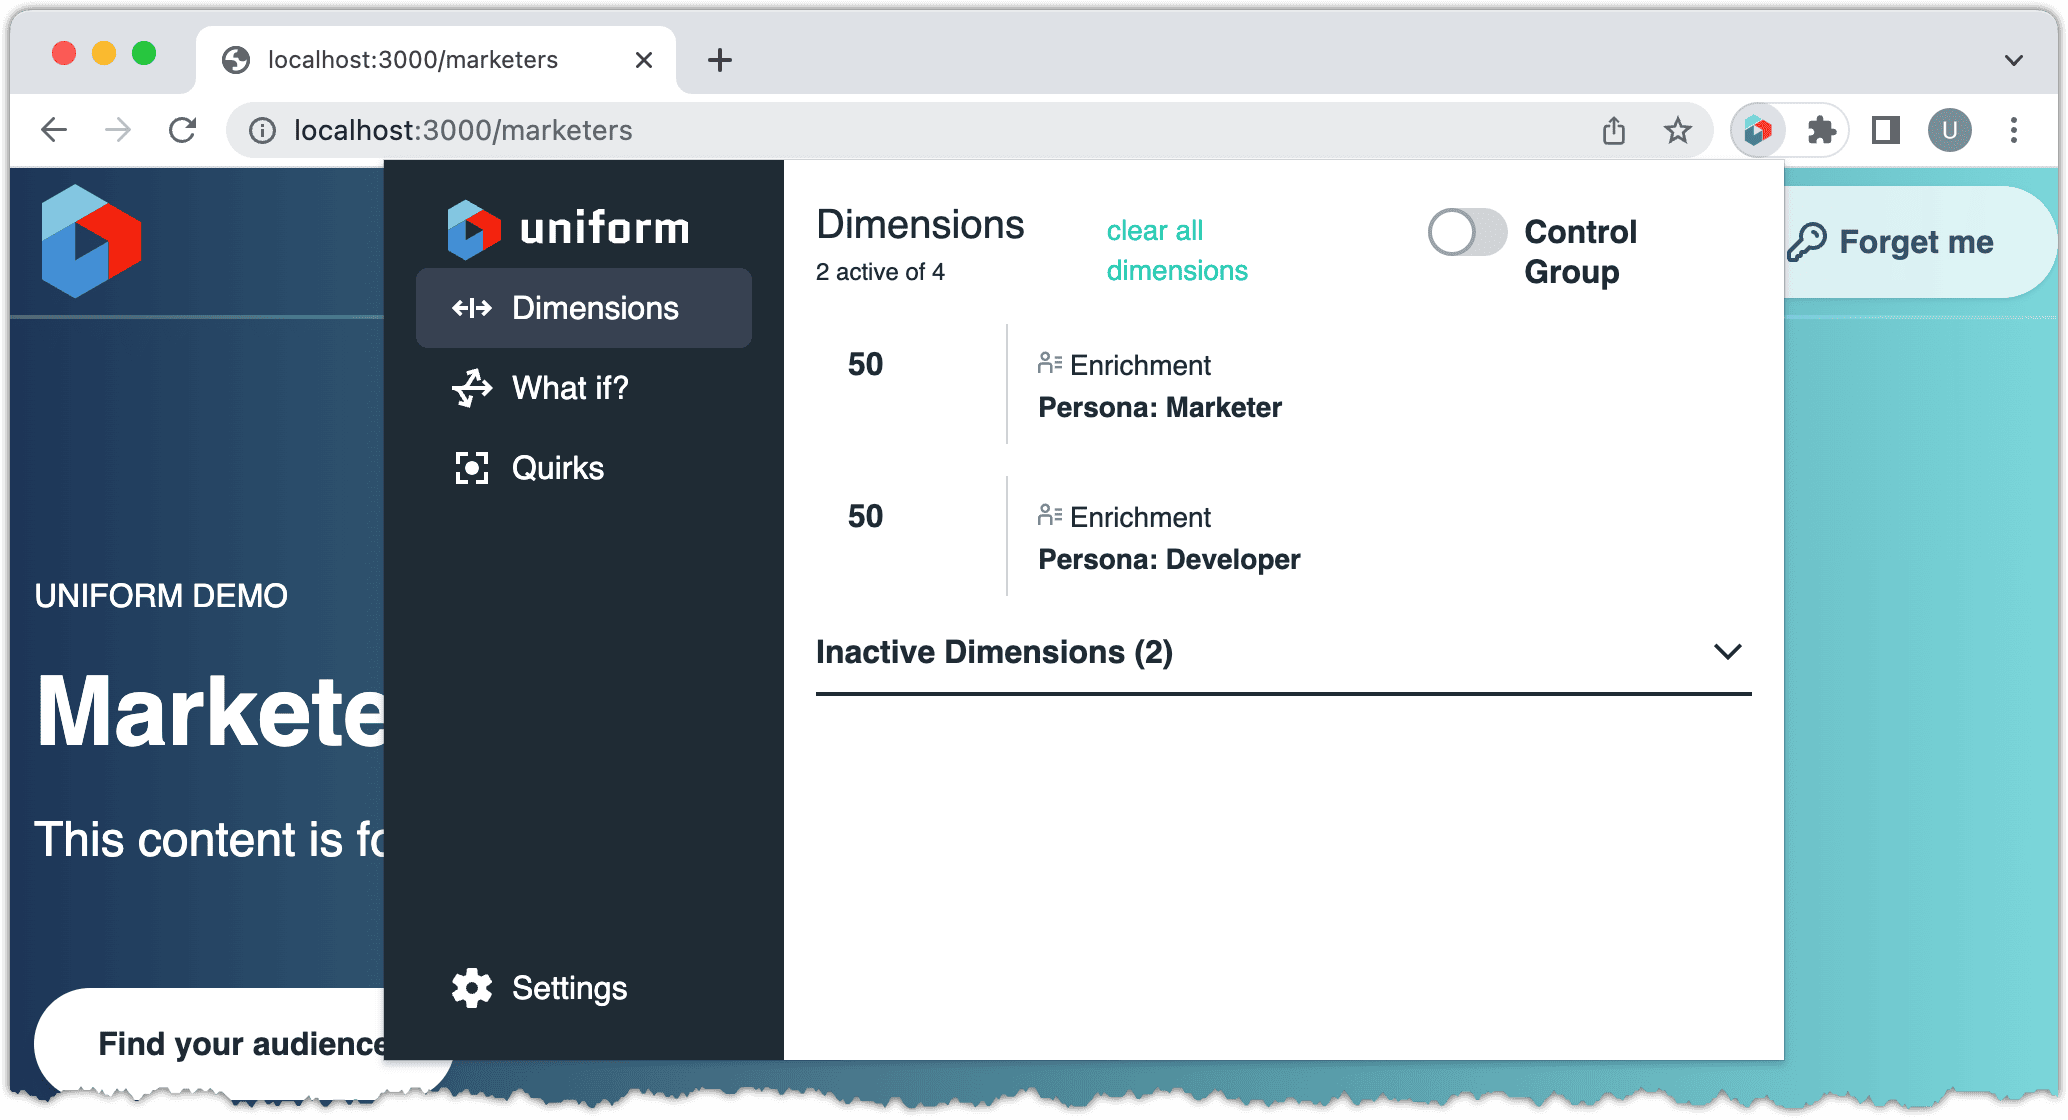
About this step
You can see that tracking is working. The next step is to personalize the visitor's experience based on this information that has been tracked.
Activate personalization#
In Contentful you configured a content entry that represents a personalized list of hero entries for the home page. Uniform provides a React component that can execute the personalization settings configured in the list. This section describes how to add that component to the front-end application.
Open the file
./lib/cf/fetch.jsin your text editor.Add the following code:
function getFields(entry) { const { fields } = entry; if (fields?.image) { fields.image = fields.image.fields.file.url; } if (!fields.id && entry.sys?.id) { fields.id = entry.sys?.id; } if (fields.unfrmOptEnrichmentTag) { fields.enrichments = fields.unfrmOptEnrichmentTag; delete fields.unfrmOptEnrichmentTag; } if (fields.unfrmOptPersonalizationCriteria) { fields.pz = fields.unfrmOptPersonalizationCriteria; delete fields.unfrmOptPersonalizationCriteria; } return fields; }About this step
This code should look familiar because it's similar to the code you added to rename the field for the enrichment tags. In this case, the personalization criteria is stored in Contentful in a field
unfrmOptPersonalizationCriteria, where Uniform expects the fieldpz.Add the following code:
export async function fetchVariations(id) { const entry = await fetch(id); const { unfrmOptP13nList } = entry; return unfrmOptP13nList.map(getFields); }In Contentful, open the content entry Home Page Heroes.
Navigate to Info and note the ENTRY ID.
Open the file
./pages/index.jsx.Make the following changes:
import { Hero } from "../components/Hero"; import { fetchVariations } from "../lib/cf/fetch"; export async function getStaticProps() { const fields = await fetchVariations("29zgaRj1vU1idUq3ydCQeU"); return { props: { ...fields } } } export default function Home(props) { return <Hero {...props} />} };About this step
For the call to
fetchVariations, make sure you use the entry ID for the Home Page Heros entry.Make the following changes:
import { Hero } from "../components/Hero"; import { Personalize } from '@uniformdev/context-react'; import { fetchVariations } from "../lib/cf/fetch"; export async function getStaticProps() { const fields = await fetchVariations("29zgaRj1vU1idUq3ydCQeU"); return { props: { ...fields } } } export default function Home({ variations }) { return ( <Personalize variations={variations} name="heroPersonalized" component={Hero} />} ); };About this step
The Personalize component receives the collection of the possible variations that were configured in the personalized list in Contentful and is able to evaluate the personalization criteria to find a match.
Finished code#
We provide a finished version of the UniformConf application that you can get running in your preferred environment.
Clone the following repository:
https://github.com/uniformdev/uniform-docs-examplesCheck out the following branch:
apps/contentful/nextjs/context-activatedSet variables in
.envto match the settings that apply to your Contentful and Uniform environments.Enter the following command:
npm installEnter the following command:
npm run devAbout this step
This will start the Next.js app in develop mode on port 3000.
Next steps#
Now that you have a fully functional Next.js application powered with content from Contentful and personalized using Uniform Context, you can use this as a starting point for exploring everything Uniform has to offer, including:
- Presentation builder - Uniform Canvas offers a tool that gives content authors control over presentation within constraints defined by developers, in a way that fits into modern digital production processes.