Kontent.ai integration
Kontent.ai is an modern Headless CMS allowing to model and store structured content and use it across channels.
This integration brings your content items from Kontent.ai into the Uniform's visual experience composition layer. Team members can now leverage your Kontent.ai content along with content from any of your other sources, to create personalized experiences visually without core or relying on developers.
This integration comes with these archetypes to help connect your Kontent.ai items to your Uniform components:
- Query
- Single Item
- Multiple Items
- Items by element
Install the integration#
Before you start
You must have the following to complete this setup:
- Kontent.ai account with administrator access.
- A Delivery API key with permissions for content preview and also secure access if the project is configured to require it.
Prerequisites
You must have access to a Uniform team with the ability to create new projects. If you are an active customer or a partner, please get in touch with your Uniform team administrator colleague and ask for an invite.
If you are not sure or your company does not have a Uniform team, you can request a sandbox here.
In Uniform, open your project.
Navigate to Settings > Integrations.
Scroll to the section Browse integrations.
Click Kontent.ai.
 The screen to add the Kontent integration to your project.
Click Add to project.
Configure the data source#
Once you've installed the integration, the next step is to connect your Kontent.ai environment to your Uniform project by creating a new data source.
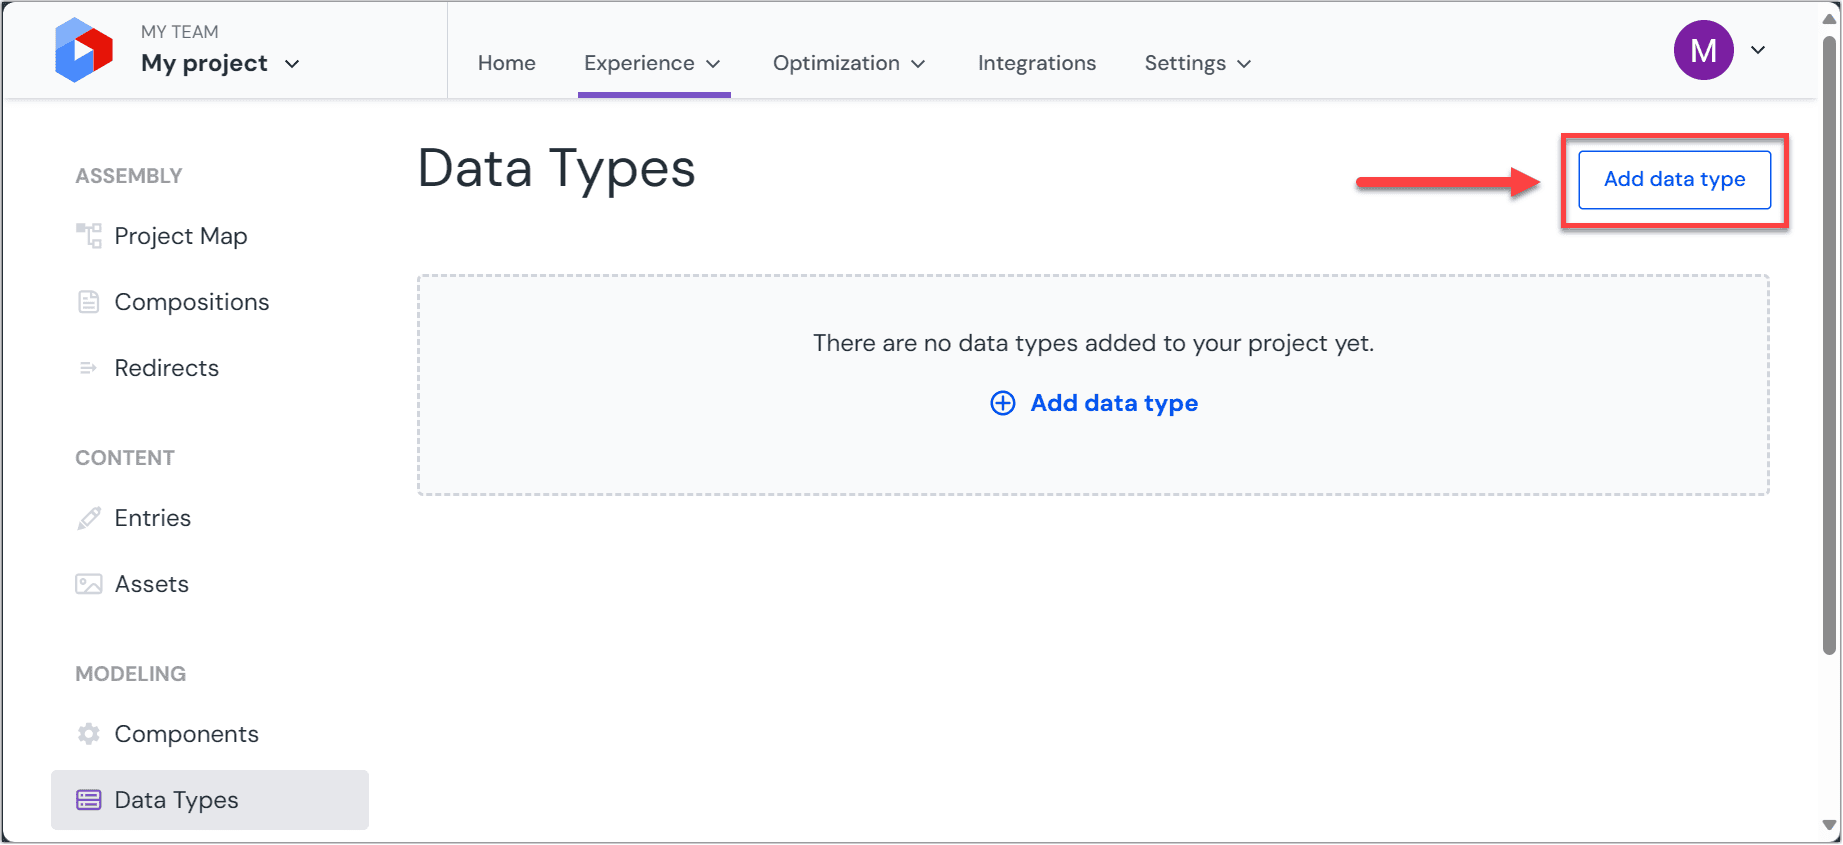
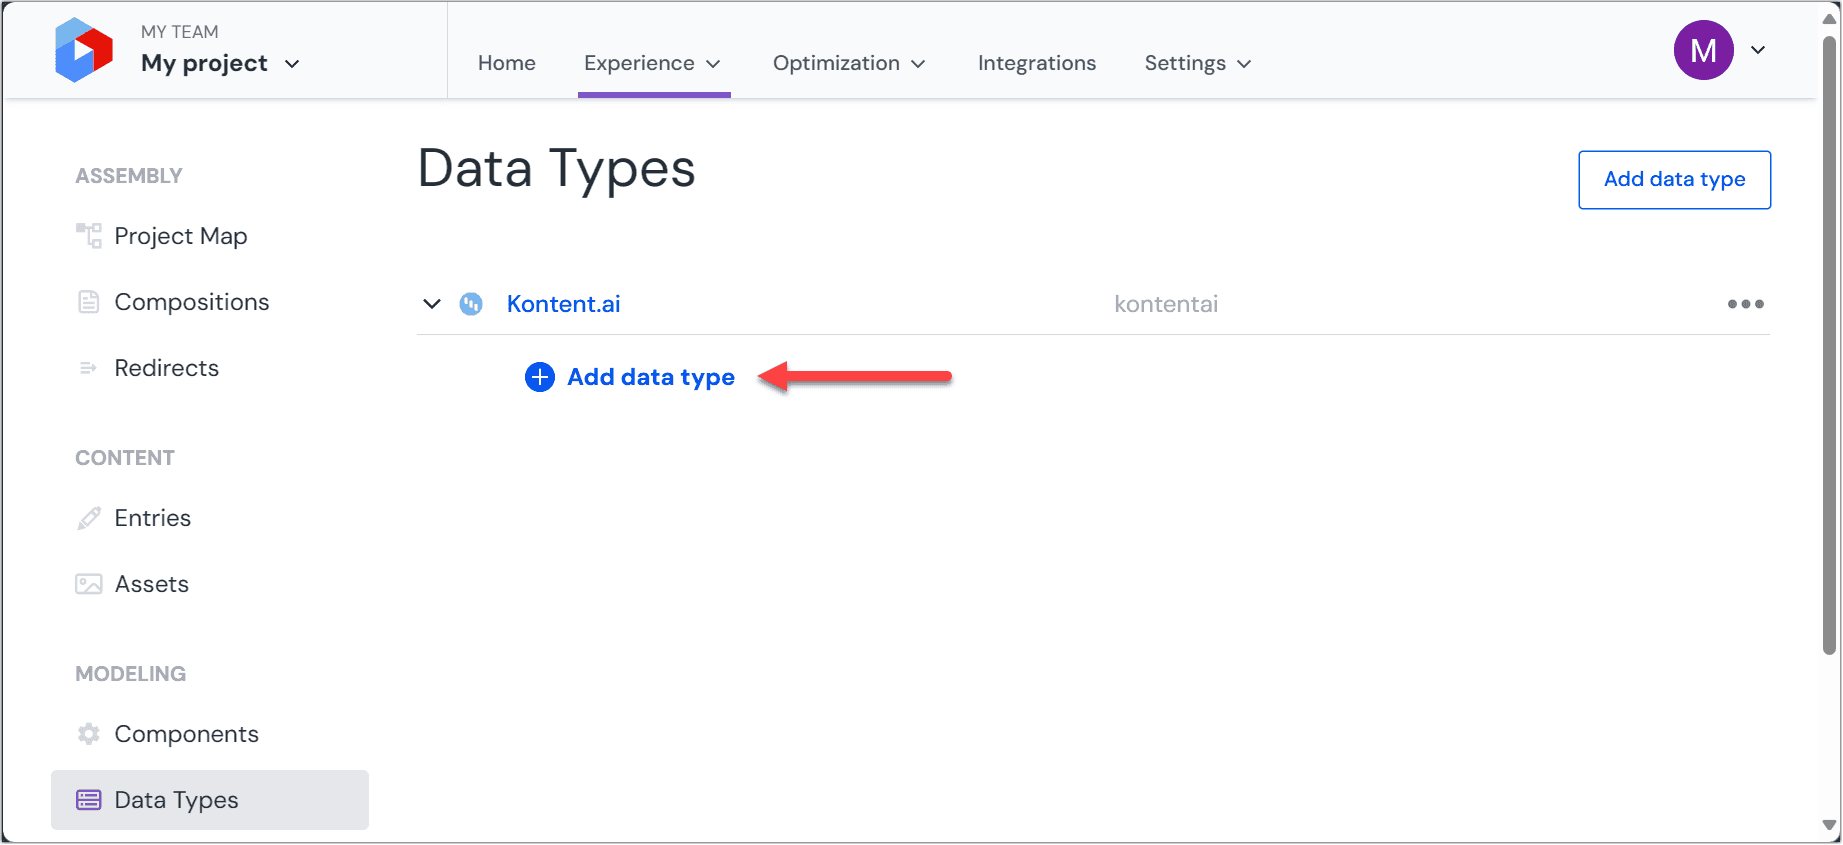
Navigate to Experience > Data Types. A data type is an element that can be retrieved from a data source, so the first step is to identify a data source.
Create a new data source by clicking the Add data type button and select the "Create new" option under the Kontent.ai label.
 Add a data type.
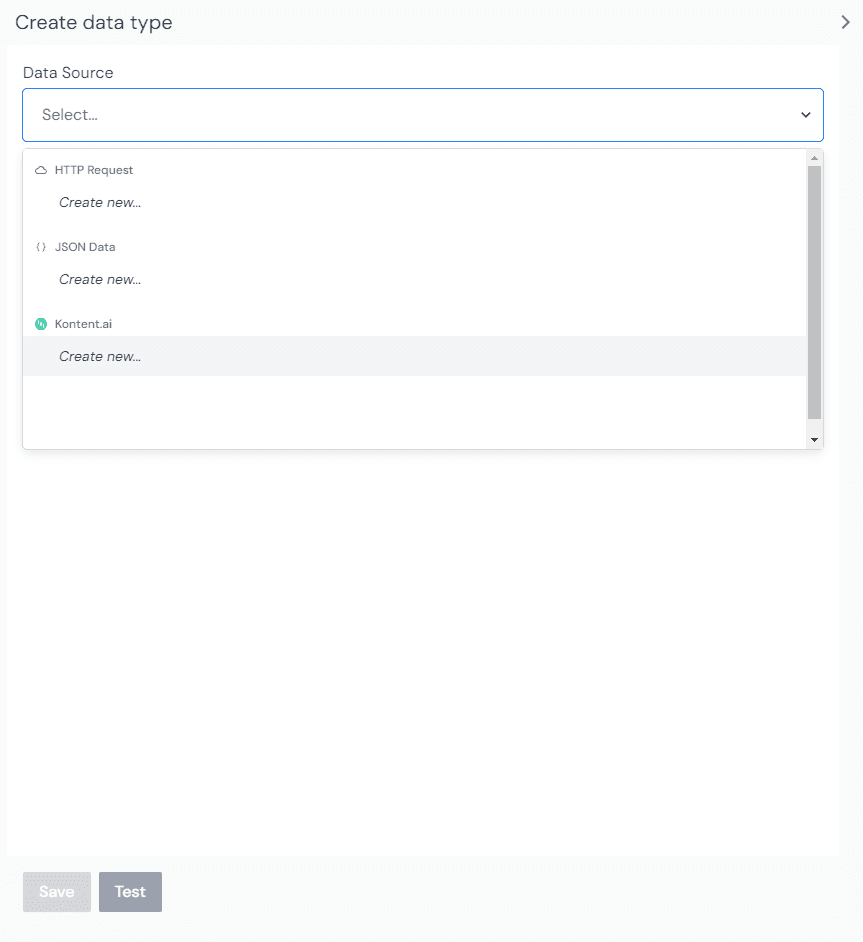 Where to create a new data type from the available data sources.
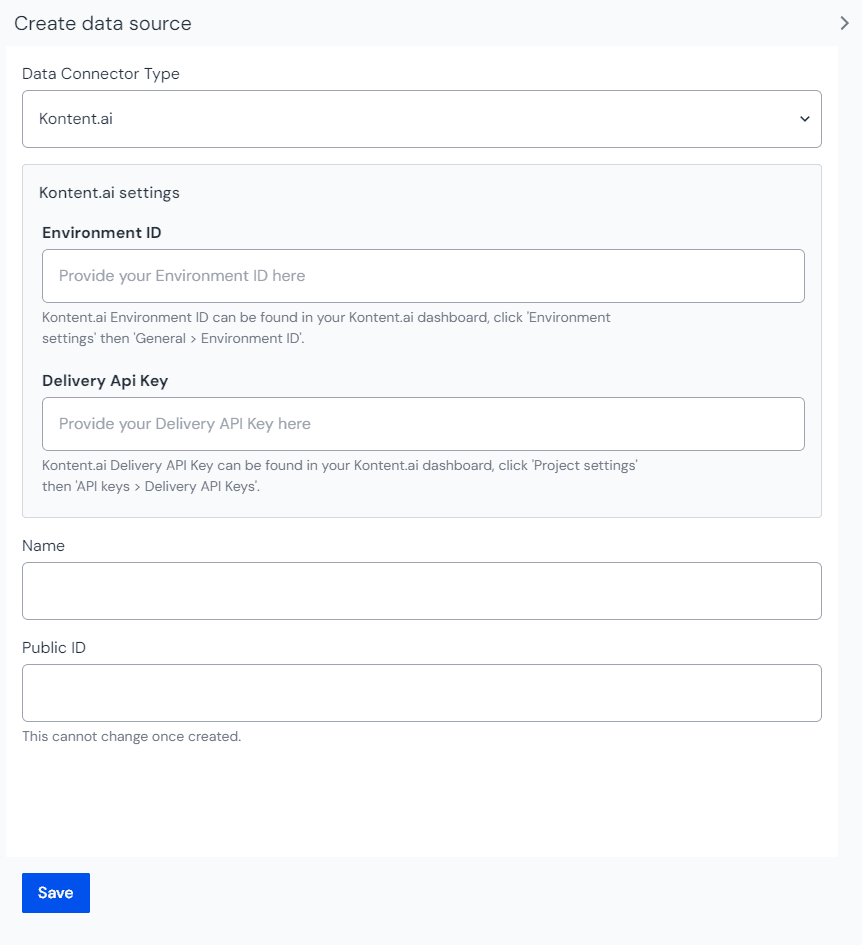
Enter the credentials.
 There is a drop down list of sources available to your project.
Name your data source. Choose a name that helps to inform your editorial users where the content is coming from. The name of the Kontent.ai environment is a good option here.
Kontent.ai data types#
Before you start connecting Kontent.ai data to your Uniform compositions, it's important to first create some data types. Data types define which types of Kontent.ai data editors can use. This could be simple, like allowing an editor to select a single "hero" entity, or more perhaps a more complex query such as "the five latest news article entries."
Go to Experience > Data Types and click the Add data type button from below the Kontent.ai data source that you set-up earlier.
 Add a data type after selecting the data source.
Next, you will want to select and configure an archetype from the options below.
Archetype: Query#
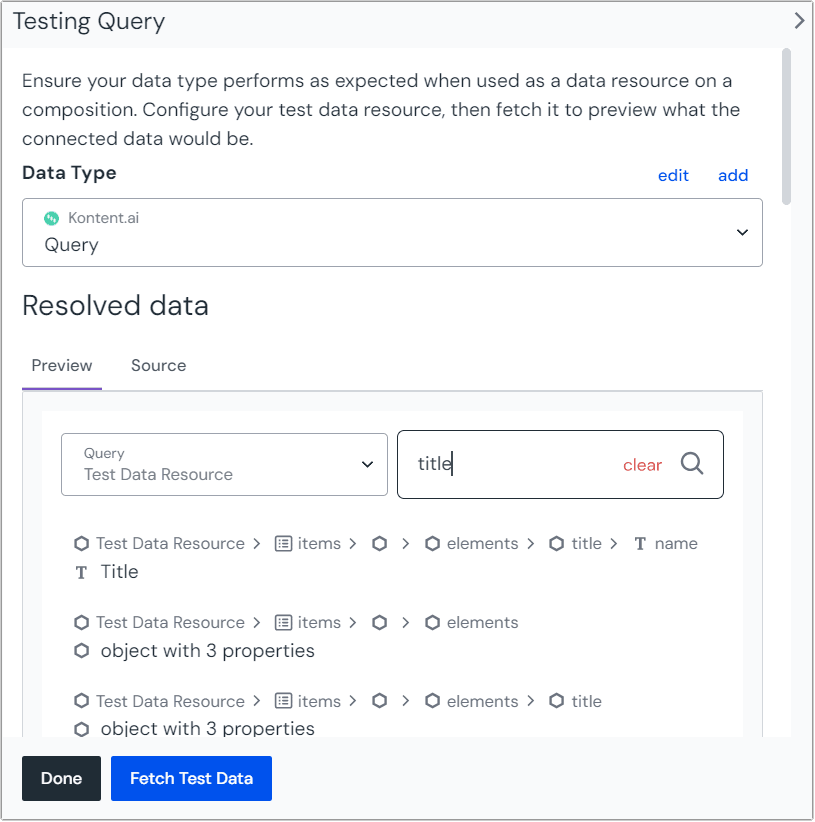
The query archetype will return a list of content entries containing the queried terms, up to the depth set by the editor in Uniform. This can be useful for dynamic queries where the most up-to-date information is needed, such as a "latest content" section.
Once you configure the archetype, you can test to see what JSON data would be returned when it's used in an experience.
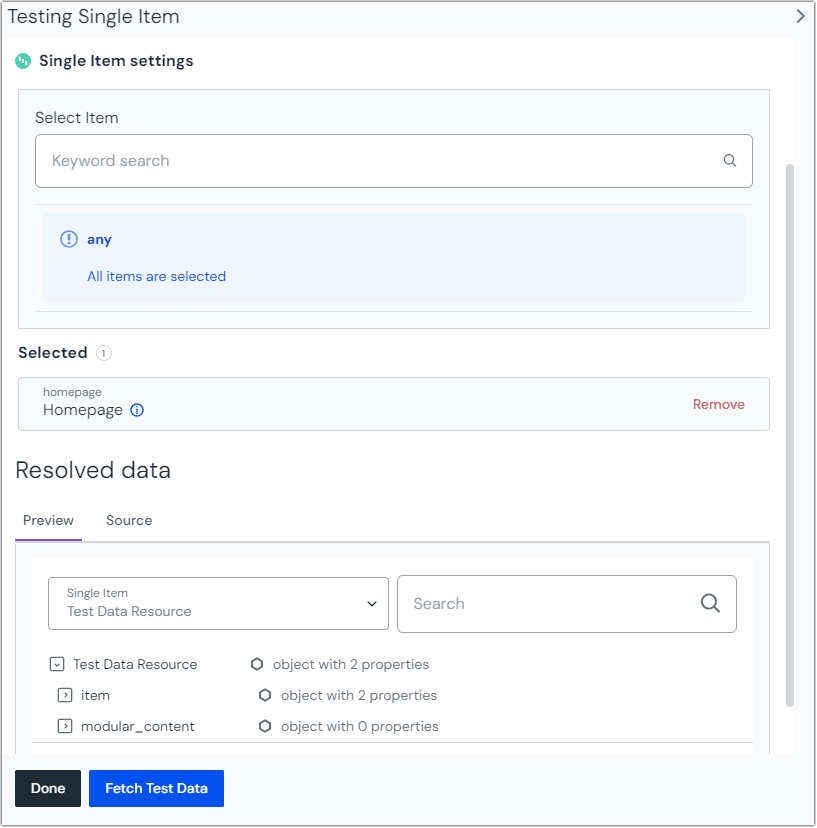
Archetype: Single Item#
The single item archetype will always return a single entry from Kontent.ai, based on a selection by the editor in Uniform. This is useful for non-list elements that render as an independent item, such as a single "hero" entry or "article" entry. It can accept a variable from a dynamic token (such as a slug) and retrieve the corresponding entry.
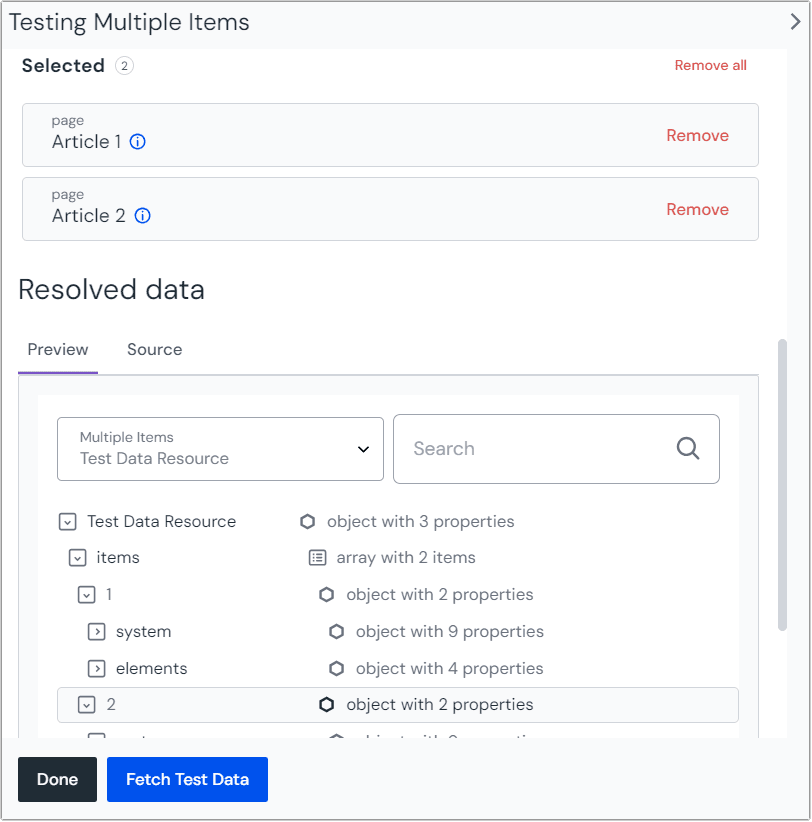
Archetype: Multiple Items#
The multiple items archetype lets an editor hand pick multiple entries to render as a list. This is useful when a small selection of specific entries is required, such as in a "featured articles" carousel.
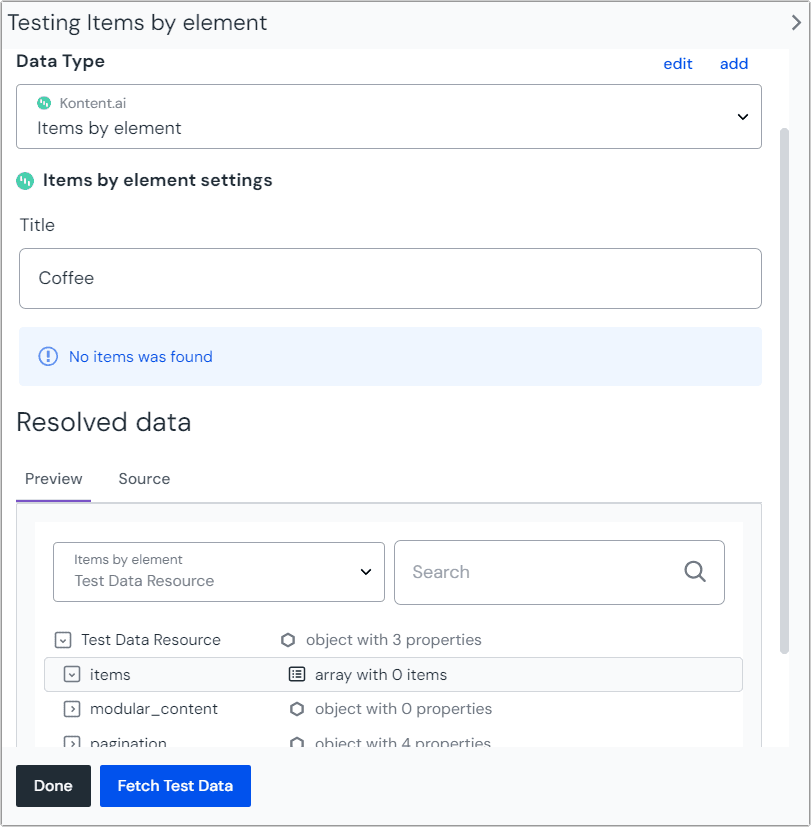
Archetype: Items by element#
The Items by element archetype will return a list of content entries containing the exact matches to queried terms. This can be useful for dynamic queries where the most up-to-date information is needed, such as a "latest content" section.
Next steps
Now you are ready to bring content directly into your components in Canvas:
- Open any composition
- Find component which parameter you want to connect to content from Kontent.ai
- Click on the connect icon next to the parameter.
- You will be prompted to create a new data resource using one of the data types you created.
Edge cache invalidation#
Uniform provides Edge Cache invalidation API for invalidating Uniform data type caches by surrogate keys. Surrogate keys enable Uniform to map the CMS items used in a Uniform data type the cached copy of the content in Uniform's edge cache.
The Kontent.ai integration collects surrogate keys for each data resource (i.e. Kontent.ai items, including linked content) used in a composition.
Endpoints#
Kontent.ai webhooks can be configured to notify Uniform about changed content and surgically invalidate affected Uniform data resources. Uniform provides the following endpoints that a Kontent.ai webhook can be configured to use:
Full invalidation#
| URL | https://kontentai.mesh.uniform.app/api/invalidation |
| Description | This endpoint invalidates all caches for the specified data type. No surrogate keys are used. |
| Parameter name | Description | Sample value |
|---|---|---|
projectId | Uniform project ID | 00000000-042b-47e3-95ed-2b0ac0200991 |
dataTypeId | Uniform data type ID | hero |
purgeKey | Uniform purge key | 00000000-ec0c-4fb2-8841-f4c87b8992bf |
The following is a sample URL to call the endpoint:
Incremental invalidation#
| URL | https://kontentai.mesh.uniform.app/api/incremental-invalidation |
| Description | This endpoint invalidates all caches for the specified data type, using the surrogate keys included in the payload. |
| Parameter name | Description | Sample value |
|---|---|---|
projectId | Uniform project ID | 00000000-042b-47e3-95ed-2b0ac0200991 |
dataTypeId | Uniform data type ID | hero |
purgeKey | Uniform purge key | 00000000-ec0c-4fb2-8841-f4c87b8992bf |
The following is a sample URL to call the endpoint:
The following table describes how each of the events that can be included in the payload are handled:
| Event type | How events are handled. |
|---|---|
| Content item | Invalidation by Content Item ID. |
| Content type | invalidation by Content Type codename. |
| Asset | Invalidation by Asset ID and Asset name. |
| Taxonomy | Invalidation by Taxonomy Group codename. |
| Language | All caches for the specified Uniform data type will be invalidated. |
info
You can find a list of Kontent.ai webhook events in the documentation.
Configure webhook in Kontent.ai#
- Register a new webhook as described in the Kontent.ai documentation. Use the URL for the appropriate Uniform endpoint in the field Webhook URL.
- In the Triggers section, select Published data.
- (optional) Configure Specific events for a data type, or keep All events.
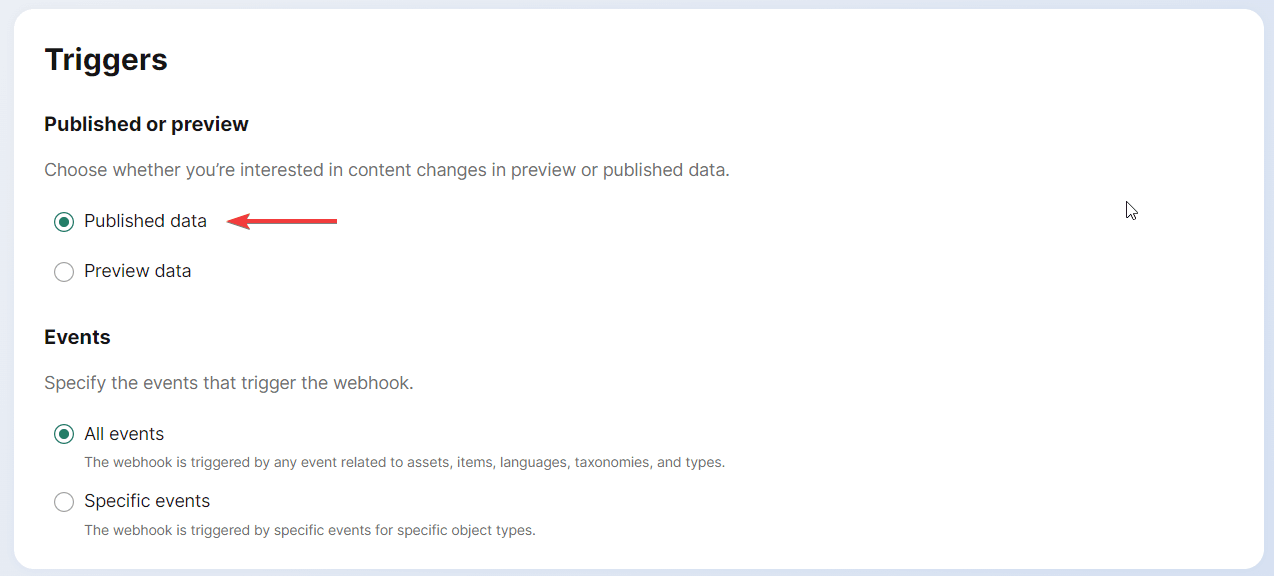
You should configure a separate webhook for each Uniform data type.
Handling stale content#
Uniform data type configuration#
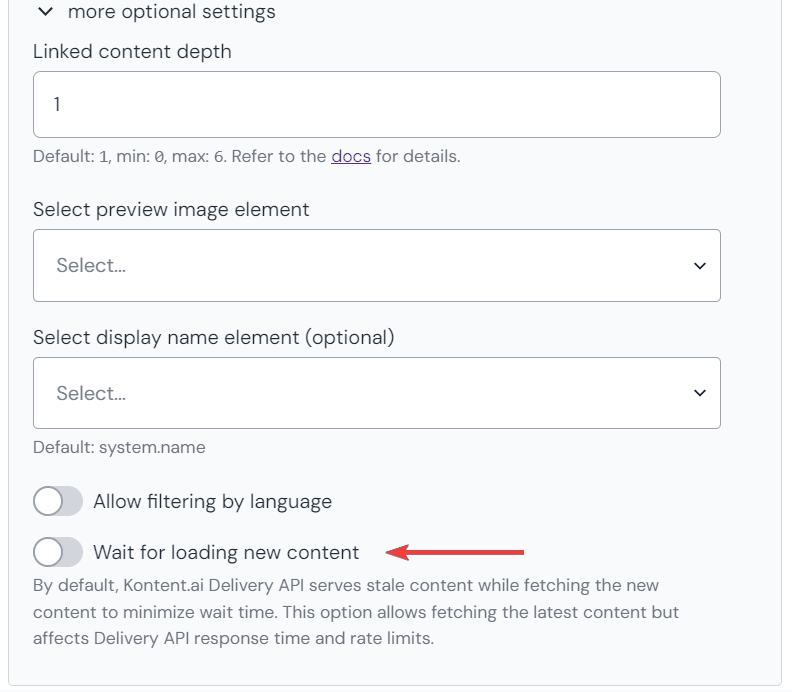
Kontent.ai Delivery API may serve stale content (if content has been cached by CDN) while fetching the new content. Delivery API provides Wait for loading new content option to bypass CDN cache.
Bypassing Kontent.ai CDN cache affects API response time and rate limits.
This option can be configured in Uniform UI per data type.
Uniform SDK configuration#
CanvasClient and RouteClient use stale-while-revalidate approach by default, so Uniform APIs may serve stale data resources content while revalidating in background. This behavior can be changed by specifying disableSWR: true option for the client.