Add the Uniform Marketplace app to Contentful
The Uniform app in the Contentful Marketplace enables content managers to use Uniform capabilities within the Contentful user interface.
- Classification - Assign enrichment tags to Contentful entries. These tags describe data you want to track on the visitor who views the entry. For example, you might want to track that a visitor is interested in making a purchase when the visitor views a specific entry.
- Personalization - Associate personalization conditions with Contentful entries. For example, you might have a hero entry that should only be shown to visitors coming from a specific geographic region. You can also configure personalized lists of content entries.
- A/B testing - Specify content entries that make up an A/B test. For example, you might want to try a variety of different hero components on your home page in order to determine which one is most effective.
Add Uniform to your space#
This section guides you through the process of adding the Uniform app from the Contentful Marketplace to your Contentful space.
Prerequisites
You must have access to a Uniform team with the ability to create new projects. If you are an active customer or a partner, please get in touch with your Uniform team administrator colleague and ask for an invite.
If you are not sure or your company does not have a Uniform team, you can request a sandbox here.
Before you start
You must have the following available to complete this setup:
- Contentful account with administrator access.
Create Uniform API key#
A Uniform API key is needed in order for the Marketplace app to read various settings involved with configuring personalization. You need an API key with the following permissions:
tip
For details on how to create an API key, see the instructions on how to create a Uniform API key.
Add Marketplace app#
The Uniform app in the Contentful Marketplace adds a number of custom field types that allow content authors to configure personalization during the content authoring process. You must add this app to your space.
In Contentful, open your space.
Navigate to Apps > Manage apps.
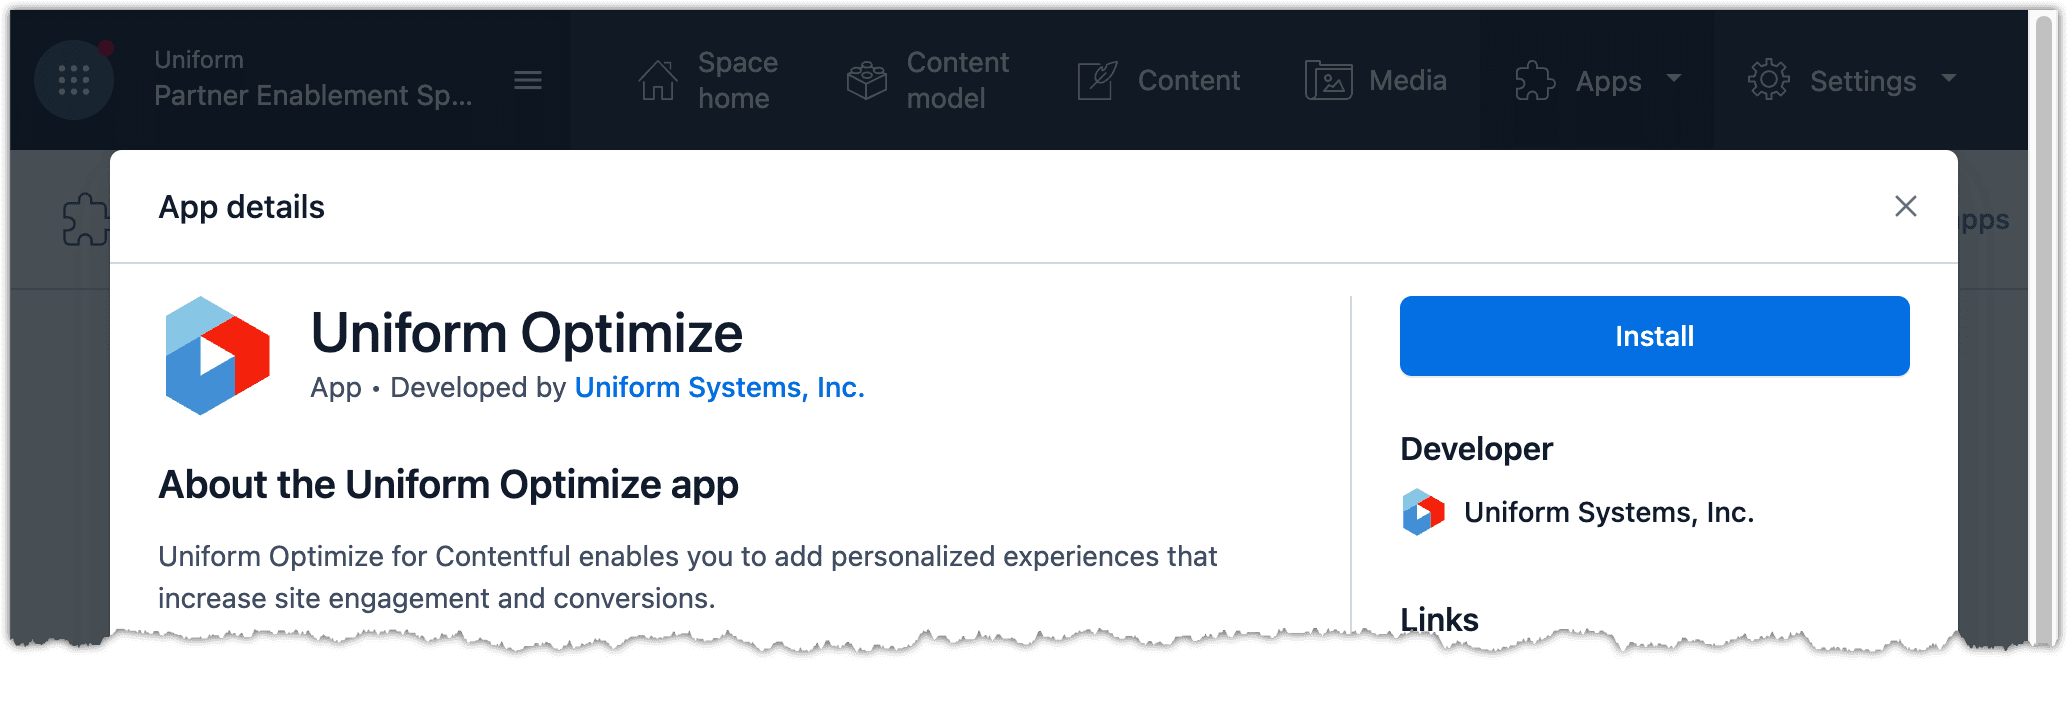
In the Available section, find the Uniform app and click Install App.

Click Install.
Click Authorize access.
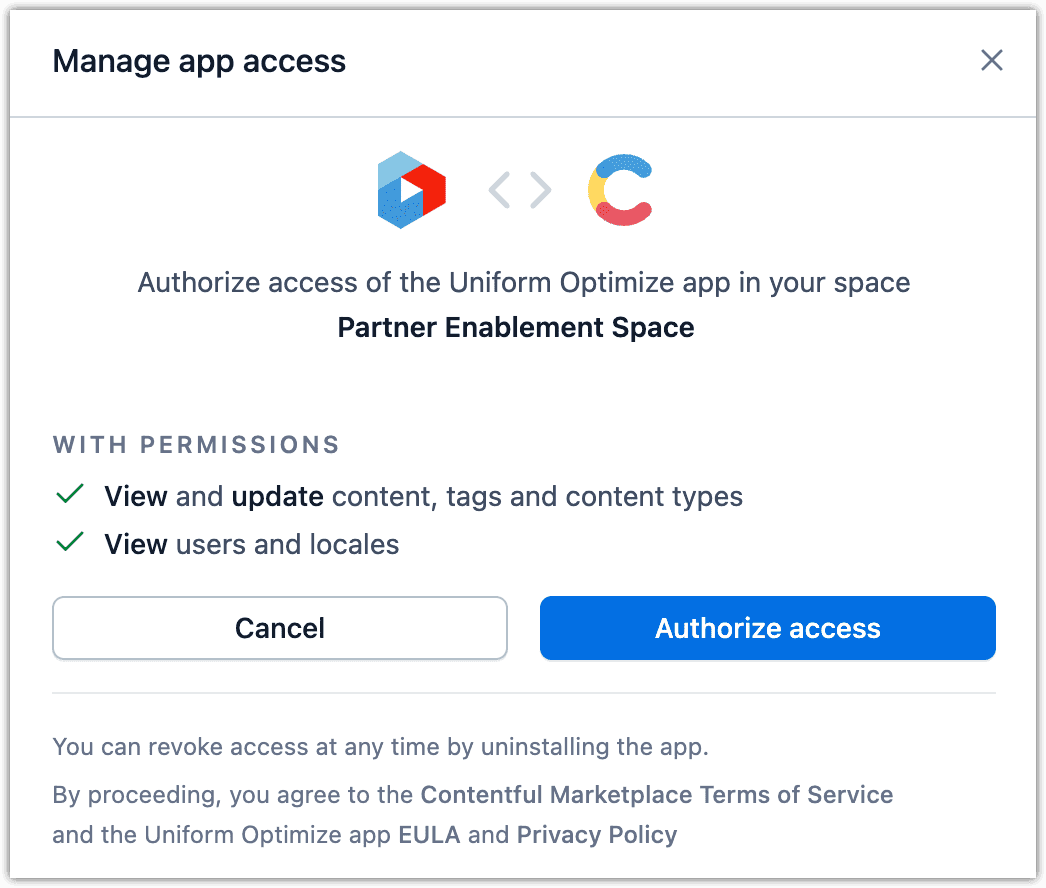
About this step
This gives the Uniform app the ability to make changes in Contentful.
Paste your Quick Connect API key in the field.
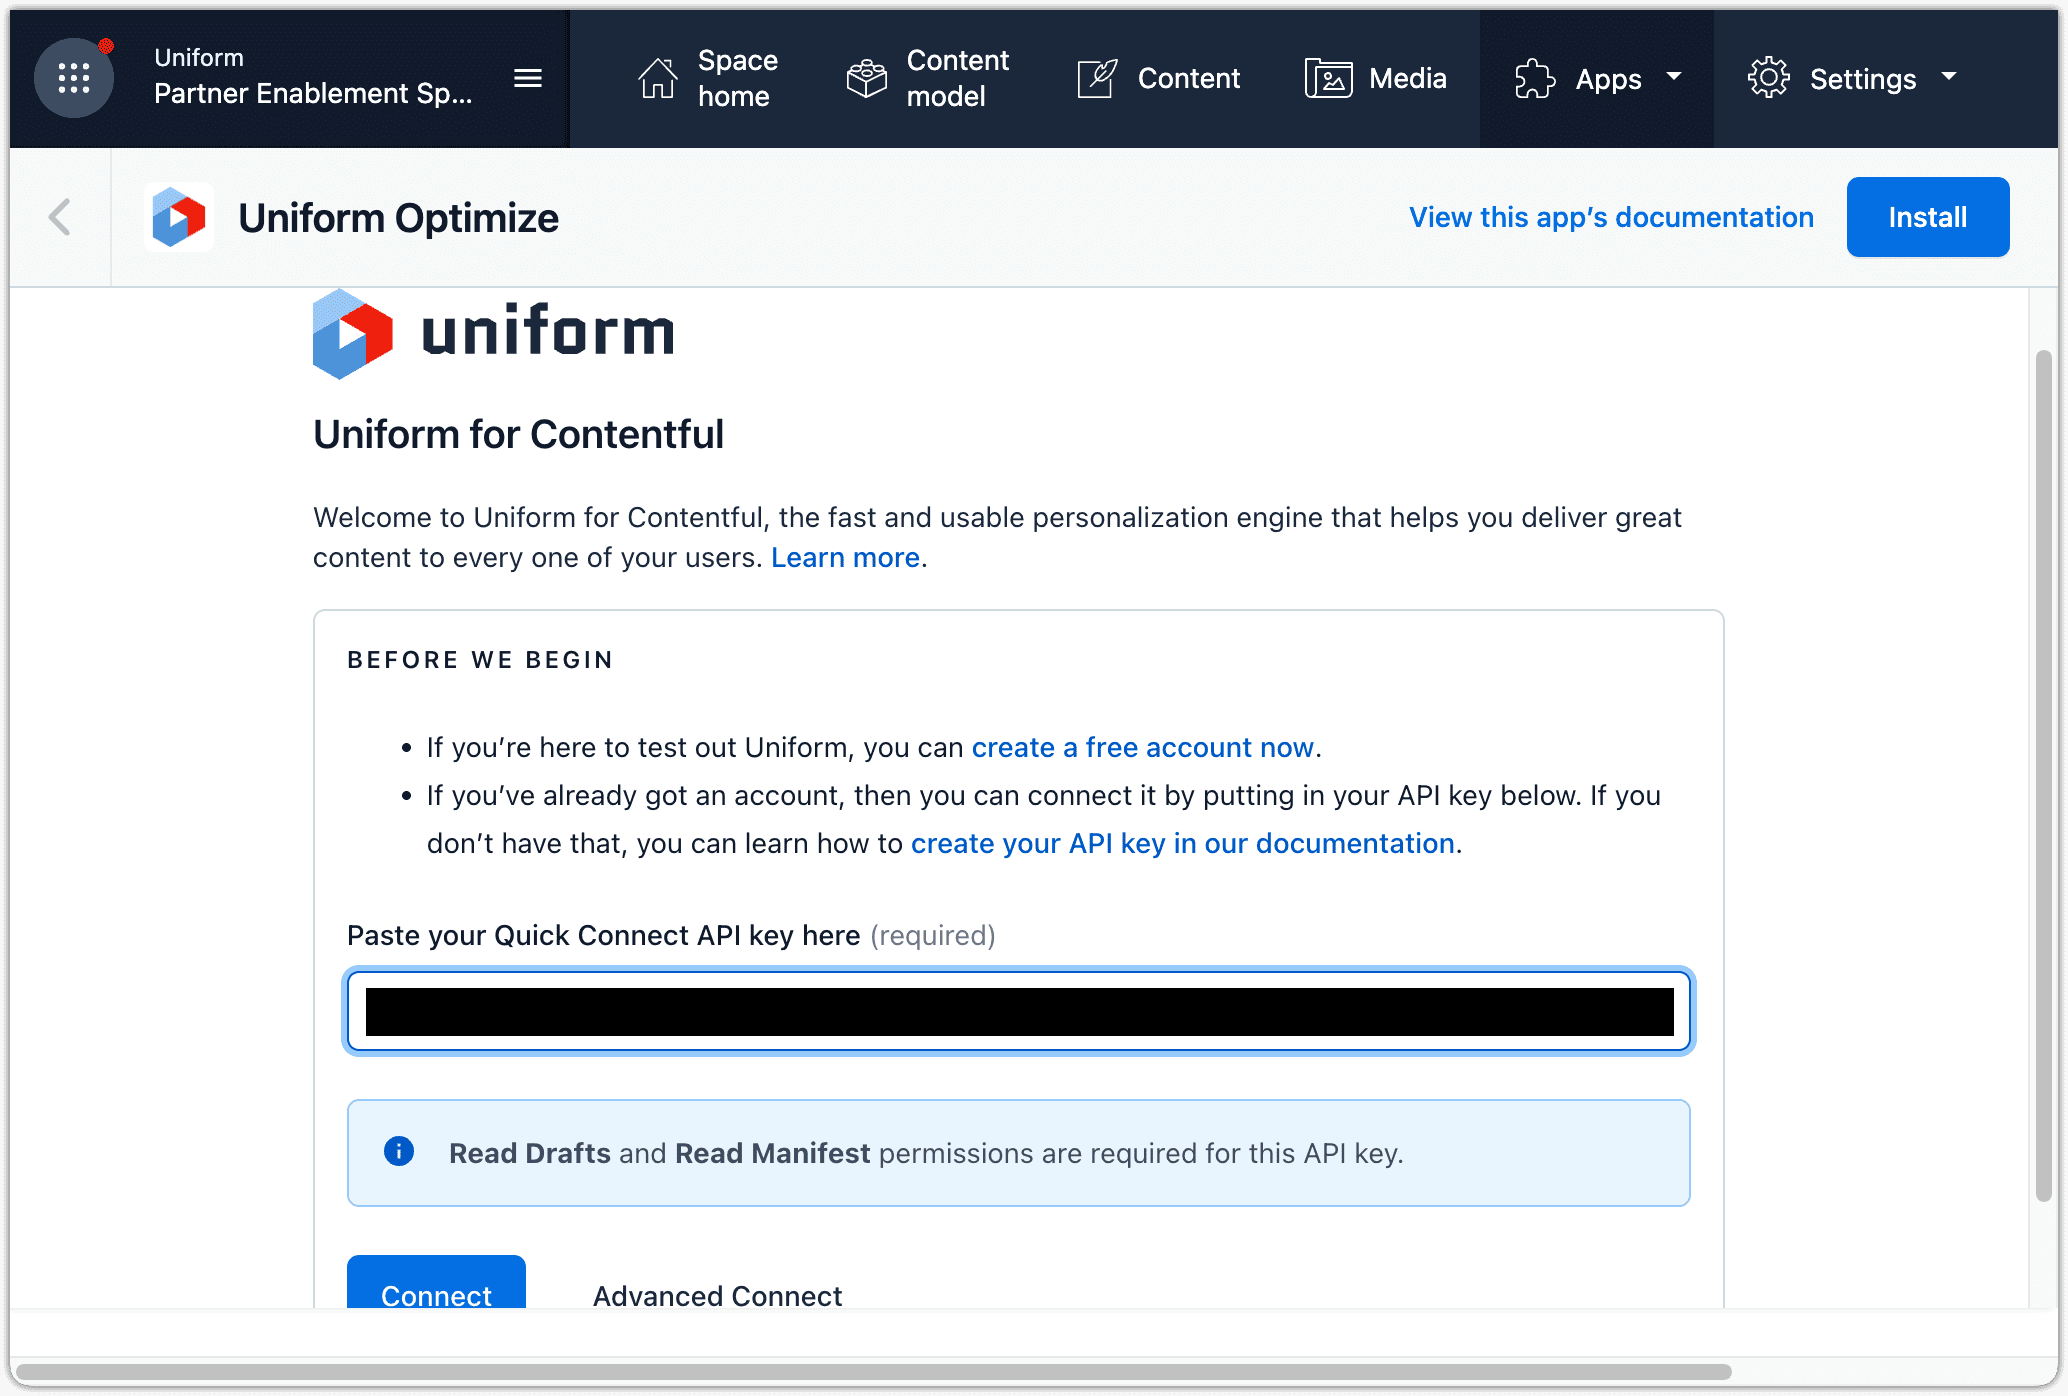
About this step
This is the value you copied when you created the API key in Uniform.
Click Connect.
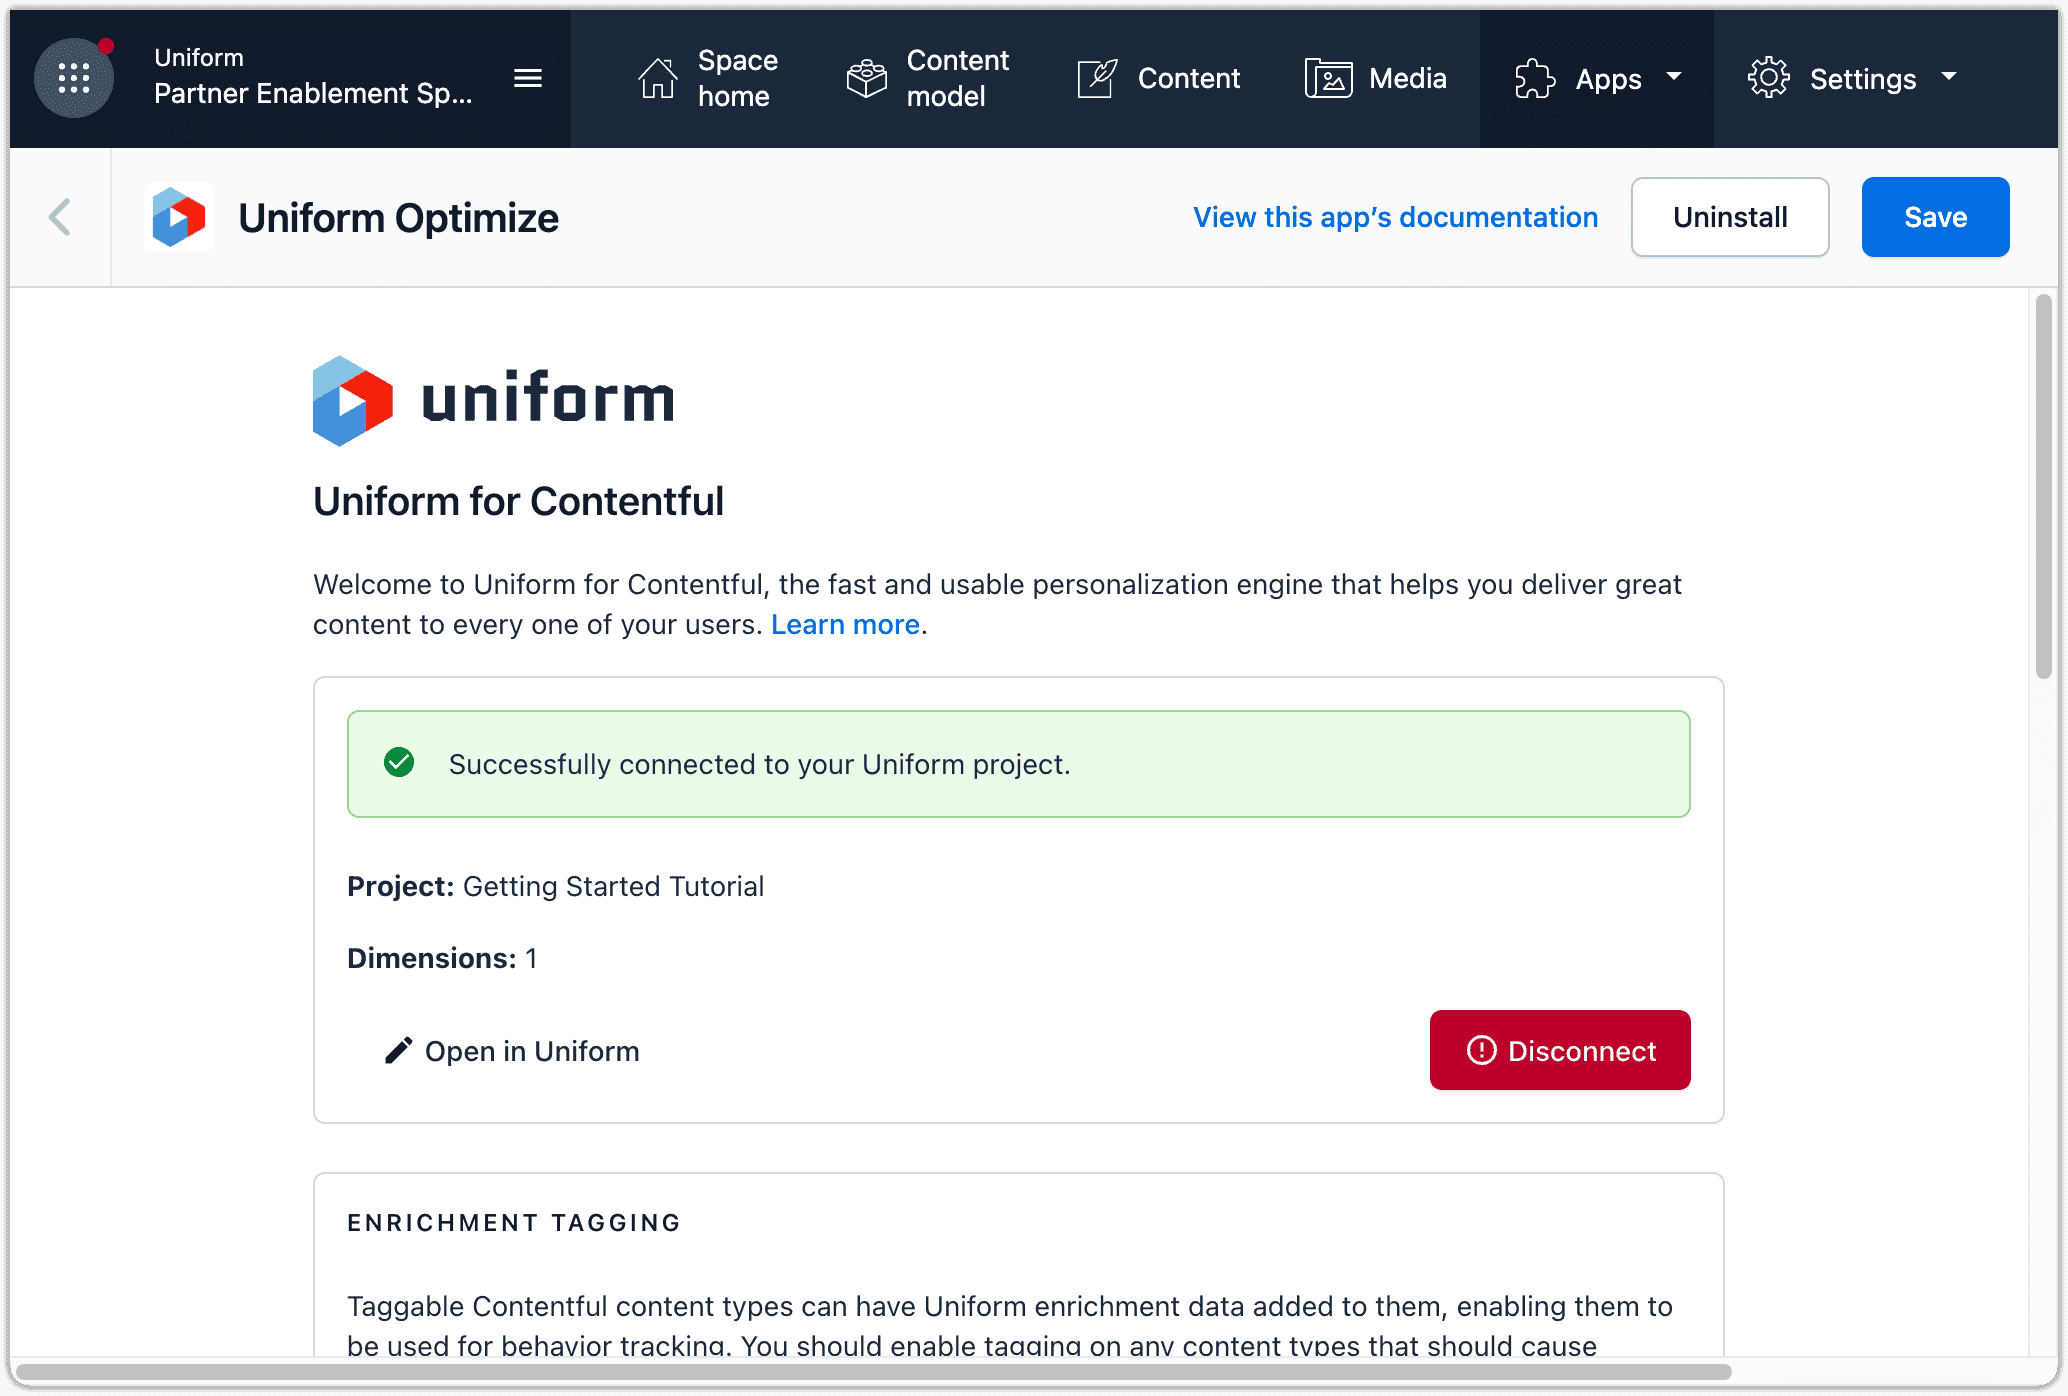
About this step
If the Quick Connect API key you entered is valid, you will see a message indicating the Marketplace app was able to connect to your Uniform project.
In the upper right-hand corner, click Install.
Click Save.
Enrichment tagging#
Enrichment tags can be assigned to Contentful entries. When your front-end application has classification activated, Uniform uses these tags to classify the visitor when the entry is viewed.
Before you start
You should have at least one enrichment defined in your Uniform project. You can enable enrichment tagging without having any enrichments defined, but you won't be able to complete all the steps in this section without them.
Enable enrichment tagging#
You must specify which content types you want content authors to be able to assign enrichment tags to.
In Contentful, open your space.
Navigate to Apps > Manage apps.

In the Installed section, click Uniform Optimize.
Scroll down to the section ENRICHMENT TAGGING.
From the dropdown list, select the content types you want to enable tagging on.
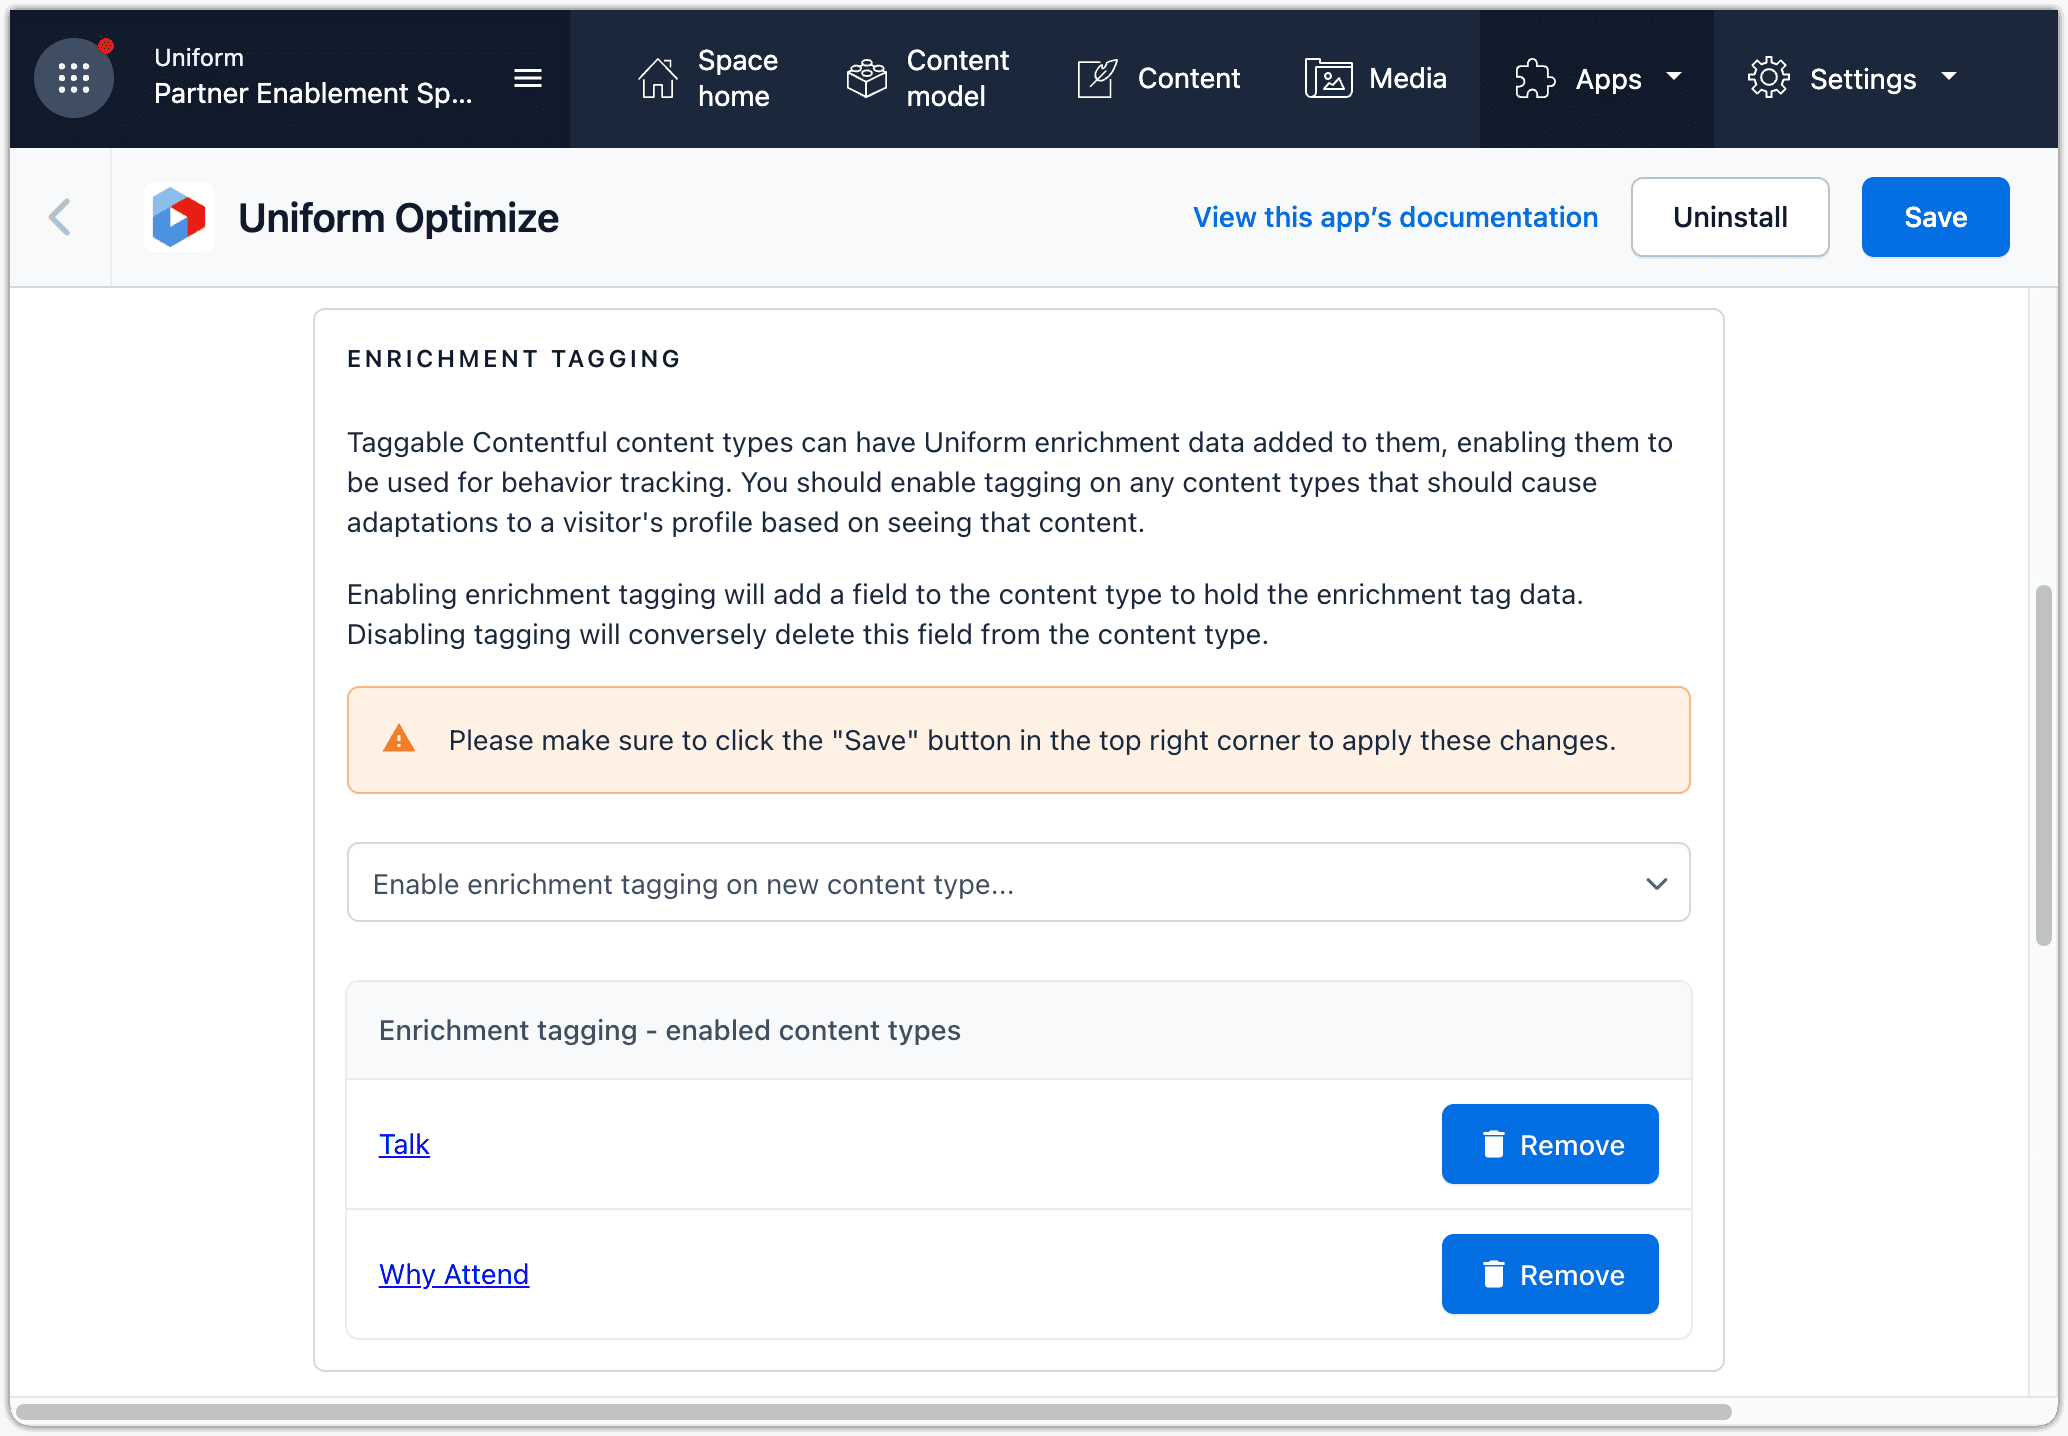
Click Save.
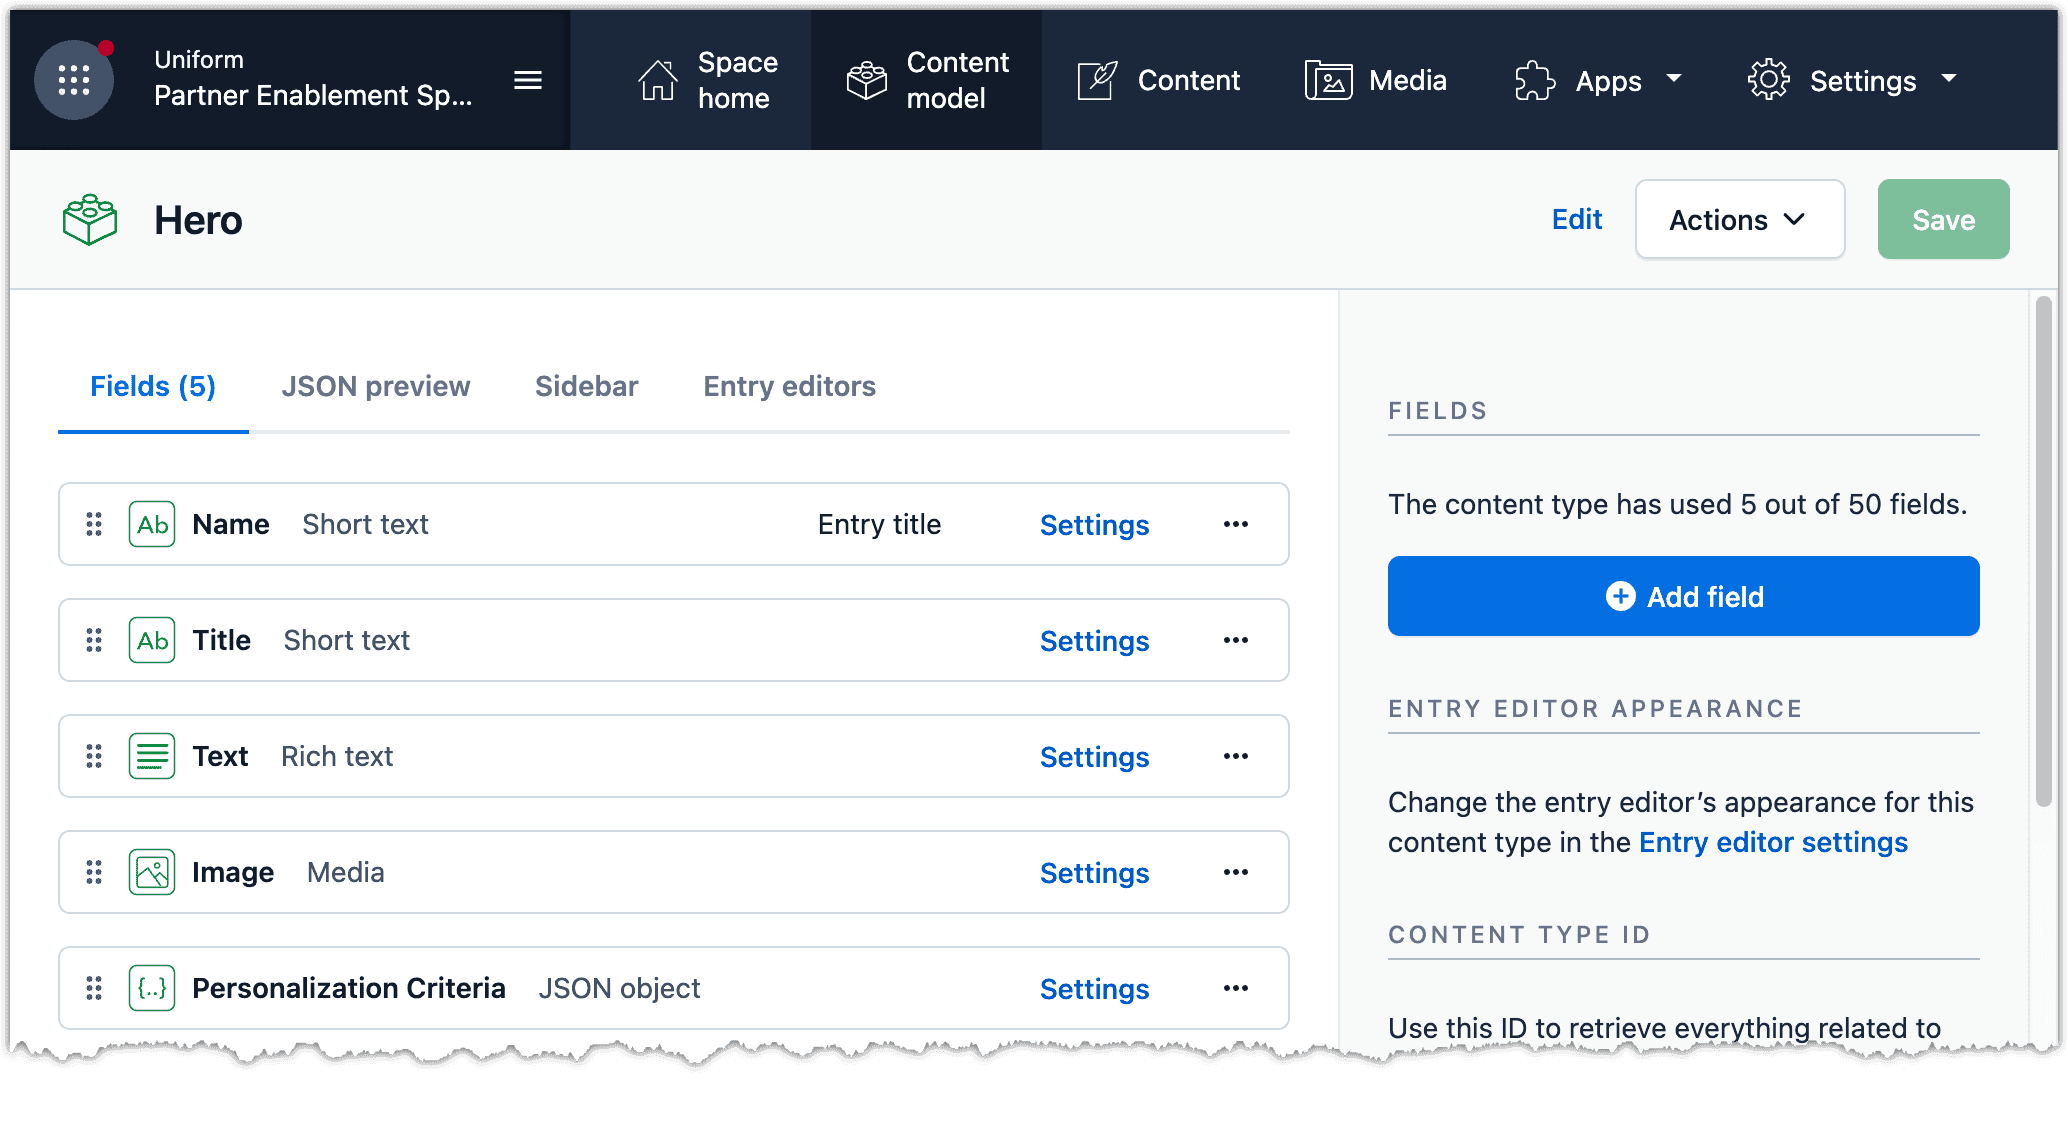
Click a link on one of the content types you enabled. A new field Enrichment Tags is added to the content type.

Assign enrichment tags#
A content author must assign enrichment tags to content entries.
In Contentful, open your space.
Navigate to an entry based on one of the content types you enabled enrichment tagging on.
Scroll down to the field Enrichment Tags.

Click here.

Select the tag you want to assign.
About this step
The value for Strength indicates how much the visitor score increases when the content entry is viewed. The visitor score can act as the basis for personalization criteria.
Click Add.
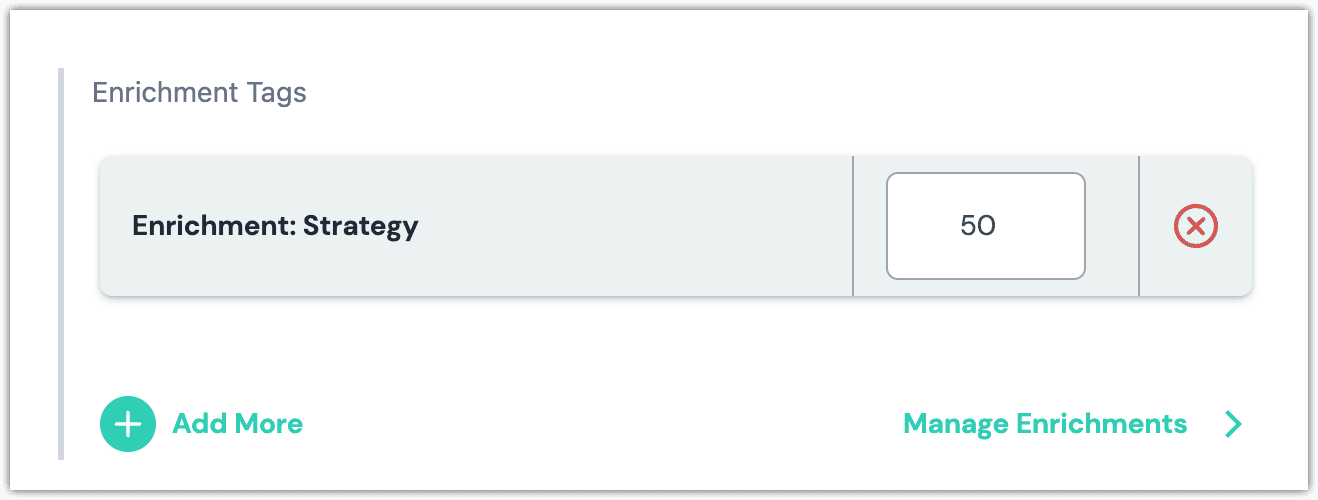
At this point there are several things you can do:
- Change the strength value using the input field.
- Add more enrichment tags by clicking Add More.
- Publish your changes in Contentful.
- Manage enrichments in Uniform by clicking Manage Enrichments.
Personalization criteria#
Personalization criteria can be assigned to Contentful entries. This criteria describes the conditions when the Contentful entry is appropriate to use. When your front-end application has classification and personalization activated, Uniform can show and hide content based on the criteria you configure.
Enable personalization criteria#
You must specify which content types you want content authors to be able to assign personalization criteria to.
In Contentful, open your space.
Navigate to Apps > Manage apps.

In the Installed section, click Uniform Optimize.

Scroll down to the section PERSONALIZATION CRITERIA.
From the dropdown list, select the content types you want to enable personalization criteria on.

Click Save.
Click a link on one of the content types you enabled. A new field Personalization Criteria is added to the content type.
Assign personalization criteria#
A content author must assign personalization criteria to content entries.
In Contentful, open your space.
Navigate to an entry based on one of the content types you enabled personalization criteria on.
Scroll down to the field Personalization Criteria.
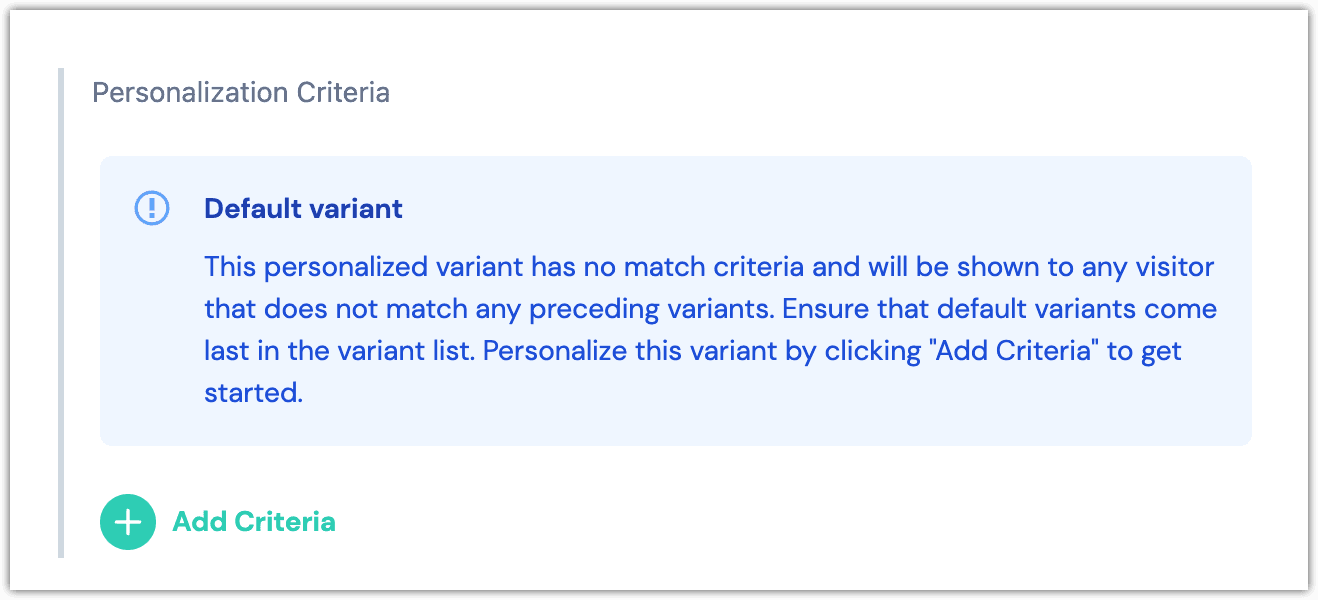
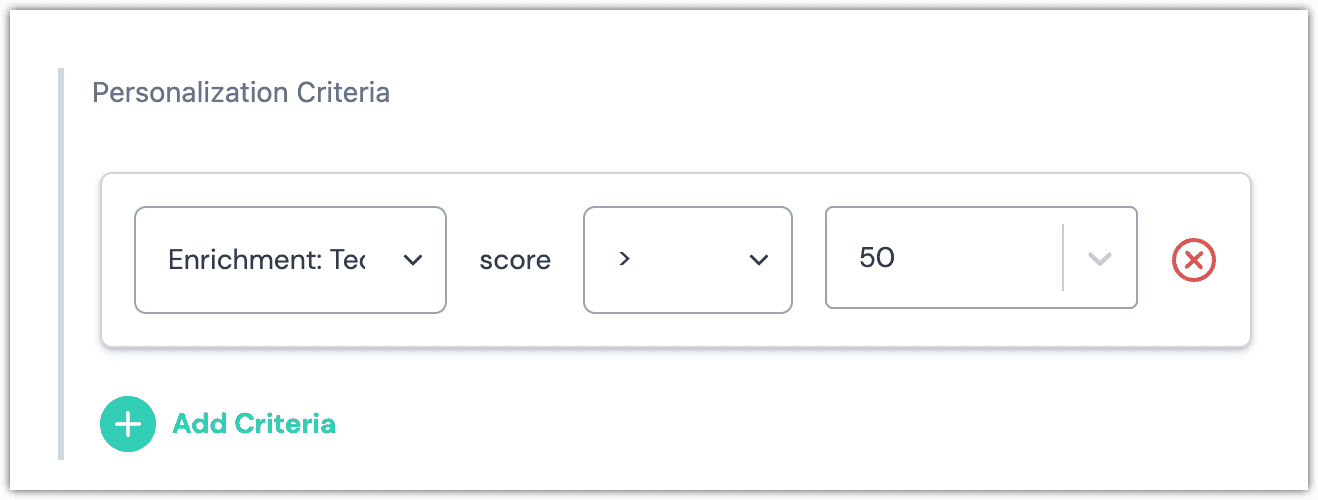
Click Add Criteria.

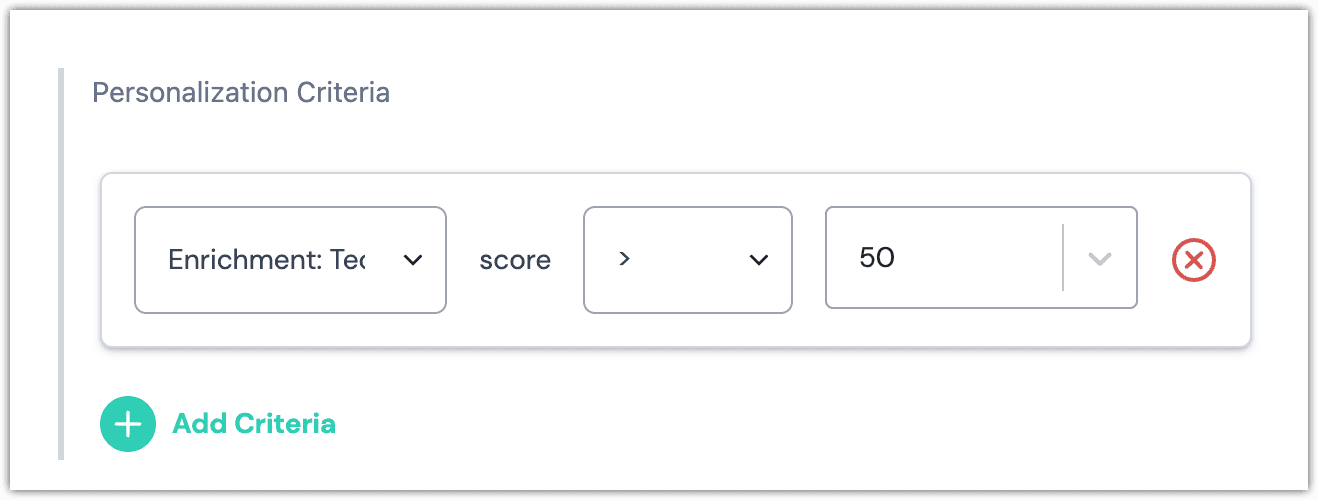
Configure the criteria you want to assign.
About this step
Each criteria consists of three parts:\
- The dimension identifies a property of the visitor.
- The operator specifies how you want to compare the value from the visitor to the value in the criteria.
- The value that the value from the visitor is compared to.
At this point there are several things you can do:
- Add more personalization criteria by clicking Add Criteria.
- Publish your changes in Contentful.
Personalization lists#
Personalization lists allow you to create lists of content entries where the personalization criteria assigned to the entries is used to determine which entries to display to a visitor.
Define a personalization list#
A personalization list is a special type of content type that the Uniform app creates. Once the content type is created, you use it to create entries like any other content type.
In Contentful, open your space.
Navigate to Apps > Manage apps.

In the Installed section, click Uniform Optimize.

Scroll down to the section PERSONALIZATION LISTS.
Click + Create New.
Enter a name for the list.
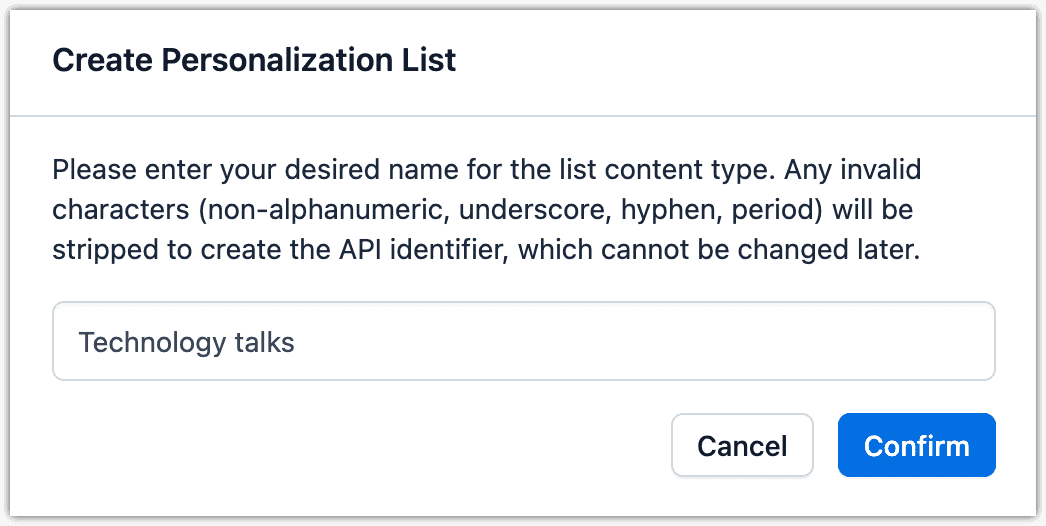
About this step
The name is used to create a new content type.
Click Confirm.
Click Save.
Navigate to the content model section. You will see a new content type created.
Create a personalization list entry#
A personalized list entry should contain content entries that are somewhat related but that shouldn't all be shown to all visitors.
For example, you might have a set of entries that represent products that you want to feature on the homepage of your site. You want the product that's most relevant to the visitor to be displayed. With Uniform, you would enable this by doing the following:
- Content author assigns personalization criteria on the product entries.
- Content author creates a personalized list with the products selected.
- At runtime, Uniform classifies a visitor and determines which of the products in the personalized list is most relevant for the visitor based on the visitor's classification.
The following steps describe how to create a personalized list.
Create a new content entry using the personalized list.
In the field List Items, add content entries.
About this step
You should select content entries with personalization criteria configured.
A/B testing lists#
A/B testing lists work similar to how personalization lists do, with the exception of how the entry is selected. In a personalization list the entry is determined by the personalization conditions assigned to the entries. In an A/B testing list the entry is determined randomly.
Define an A/B testing list#
- In Contentful, open your space.
- Navigate to Apps > Installed apps.
- In the row for Uniform Optimize, click ... > Configure.
- Scroll down to the section A/B TESTING LISTS.
- Click + Create New.
- Enter a name for the list.
About this step
The name is used to create a new content type (e.g. "Personalized Promotion").
- Click Confirm.
- Click Save.
- Navigate to the content model section. You will see a new content type created.
Define an A/B testing list entry#
An A/B testing list entry should contain content entries that are somewhat related but different.
For example, you might be preparing a promotion. You have 3 different combinations of image and text that you think are good, but you are not sure which is the best. Uniform can help you figure this out. With Uniform, you would enable this by doing the following:
- Content author creates 3 content entries, each representing one combination of images and text that describes the promotion.
- Content author creates an A/B testing list with the promotion content entries.
- At runtime, Uniform randomly selects one of the promotion content entries for each visitor.
- As visitors are shown the promotion, analytics are collected. You can use these analytics to determine how the different promotion content entries affect your visitors' engagement.
The following steps describe how to create an A/B testing list:
- Create a new content entry using the A/B testing list.
- In the field List Name, enter a name that reflects the purpose of the list (e.g. "Summer 2024 Promotion").
- Click the button Select A/B Test and select the test from your Uniform project.
- In the field List Items, add content entries.
About this step
You can use any content entries you like, but in most cases you will have a specific content type you would use.
Update front-end application#
Now that you have the ability to assign classification, personlization, and testing to content, next you must update your front-end application to activate these capabilities.
Add environment variables#
Your front-end application must read the various classification and testing settings that are configured in your Uniform project. The Uniform manifest file makes this information available to your front-end application.
| Uniform value | Environment variable |
|---|---|
| API Key | UNIFORM_API_KEY |
| Project ID | UNIFORM_PROJECT_ID |
About this step
The front-end application will use these environment variables to read the classification and testing settings from your Uniform project.
Add Context to app#
Add the following npm packages to your front-end application:
npm i @uniformdev/canvas-next-rscAdd the following file to the root of your front-end application:
uniform.server.config.js
/** @type {import('@uniformdev/canvas-next-rsc/config').UniformServerConfig} */ module.exports = { defaultConsent: true, };Add the following to your
layout.jsorlayout.tsxfile:import { Inter } from "next/font/google"; import "./globals.css"; import { UniformContext } from "@uniformdev/canvas-next-rsc"; const inter = Inter({ subsets: ["latin"] }); export const metadata = { title: "Create Next App", description: "Generated by create next app", }; export default function RootLayout({ children }) { return ( <UniformContext> <html lang="en"> <body className={inter.className}>{children}</body> </html> </UniformContext> ); }About this step
It is important that the
UniformContextcomponent be an ancestor of any component that will use any Uniform functionality.
Add the following npm packages to your front-end application:
npm i -D @uniformdev/cli npm i @uniformdev/context @uniformdev/context-react cookieAdd the following to the
scriptssection in yourpackage.jsonfile:"download:manifest": "uniform context manifest download --output ./contextManifest.json",About this step
This script downloads the latest published manifest from the Uniform project identified by the environment variables you added earlier. Most customers will run this script when the front-end application starts or is built.
Run the following command:
npm run download:manifestAbout this step
A file
contextManifest.jsonwill be created. This file contains the details of the classification and test settings you configured in your Uniform project.Add the following to your
.gitignorefile:# uniform contextManifest.jsonAbout this step
This ensures the manifest file doesn't get added to your source code repository.
Add the following to your
_app.jsor_app.tsxfile:import "@/styles/globals.css"; import { Context, enableContextDevTools, } from "@uniformdev/context"; import manifest from "../contextManifest.json"; import { UniformContext } from "@uniformdev/context-react"; const context = new Context({ manifest, defaultConsent: true, plugins: [ enableContextDevTools(), ] }); export default function App({ Component, pageProps }) { return ( <UniformContext context={context}> <Component {...pageProps} /> </UniformContext> ); }
Activate tracking#
About this example
In order to make these instructions easier to follow, an example is used. Imagine you have a content type City that you have configured to allow content authors to assign Uniform enrichments to. A component named CityDetails is used in your front-end application to display the content from the content type City.
This content type will have a field unfrmOptEnrichmentTag that contains a JSON object that describes any enrichments that were assigned to the content entry. This object must be passed to the component responsible for tracking.
Coming soon
Open the component CityDetail:
export const CityDetail = (props) => { const { name, description } = props; return ( <div> <h2>{name}</h2> <p>{description}</p> </div> ) }About this step
This is the component before any tracking support is added.
Replace the code with the following:
import { Track } from '@uniformdev/context-react'; export const CityDetail = (props) => { const { name, description, unfrmOptEnrichmentTag } = props; return ( <Track behavior={unfrmOptEnrichmentTag}> <div> <h2>{name}</h2> <p>{description}</p> </div> </Track> ) }
Activate personalization#
About this example
In order to make these instructions easier to follow, an example is used. Imagine you have a content type Promotion that stores the region, title, and description for a promotion. You want to allow content authors to personalize the title and description.
Previously, the content type Promotion had separate fields for title and description. You followed the instructions above so content authors can associate personalization conditions the specific title and description values. Now, the promotion is a personalization list. This list has fields for the promotion name and region, along with a reference field unfrmOptP13nList that points to content entries based on a content type Promotion Details.
Each of the Promotion Details content entries has its own fields title and description, along with a field unfrmOptPersonalizationCriteria that defines the personalization conditions.
A component named Promotion is used in your front-end application to display the content from the content type Promotion.
Since references are involved, you must check the logic you use to retrieve content from Contentful. In this example, you must retrieve 1 level of links. For more information, see the Contentful documentation.
About this step
The shape of the data retrieved from Contentful looks like the following when the correct link level is specified:
{ fields: { name: "Summer Promotion", region: "NA", unfrmOptP13nList: [ { fields: { text: "Super Summer Savings", description: "Savings all summer long!", unfrmOptPersonalizationCriteria: { crit: [ { l: "1_2", op: "+" } ] } }, metadata: {}, sys: {}, }, { fields: { text: "Amazing Summer Promotion", description: "Get your summer started right!", unfrmOptPersonalizationCriteria: { crit: [ { l: "1_1", op: "+" } ] } }, metadata: {}, sys: {}, }, ] } }
Coming soon
Open the component Promotion:
export const Promotion = (props) => { const { title, description } = props; return ( <div> <h2>{title}</h2> <p>{description}</p> </div> ) }About this step
This is the component before any personalization support is added.
Replace the code with the following:
import { useEffect, useState } from "react"; import { Personalize } from "@uniformdev/context-react"; /** * The shape of the personalization instructions * must be changed slightly in order to be fully * compatible with the Personalize component. */ function reshapePersonalizationList(list) { const reshaped = list.map(({ fields, sys }) => { const variation = {...fields}; variation.id = sys.id; variation.pz = fields.unfrmOptPersonalizationCriteria; delete variation.unfrmOptPersonalizationCriteria; return variation; }); return reshaped; } /** * Represents the promotion fields that * can be personalized. */ export const PromotionDetails = (props) => { const { title, description } = props; return ( <div> <h2>{title}</h2> <p>{description}</p> </div> ); } /** * Represents the entire promotion, including * the fields that are and are not personalized. */ export const Promotion = (props) => { const { name, unfrmOptP13nList } = props; const [variations, setVariations] = useState([]); useEffect(() => { const reshaped = reshapePersonalizationList(unfrmOptP13nList); setVariations(reshaped); }, []); return ( <Personalize variations={variations} name={name} component={PromotionDetails} /> ) }
Activate testing#
About this example
In order to make these instructions easier to follow, an example is used. Imagine you have a content type Press Release that stores the headline, image, date, and body for a press release. You want to allow content authors to test different combinations of headline and image.
Previously, the content type Press Release had specific fields for headline and image. You followed the instructions above so content authors can define the variations they want to test. Now, the press release is an A/B testing list. This list has fields for the press release date and body, along with a reference field unfrmAbTestList that points to content entries based on a content type Press Release Variation.
Each of the Press Release Variation content entries has its own fields headline and image.
A component named PressRelease is used in your front-end application to display the content from the content type Press Release.
Since references are involved, you must check the logic you use to retrieve content from Contentful. In this example, you must retrieve 1 level of links. For more information, see the Contentful documentation.
About this step
The shape of the data retrieved from Contentful looks like the following when the correct link level is specified:
{ fields: { name: "New Product Announcement", unfrmAbTest: { id: "winter-product-accountment", name: "Winter Product Announcement" }, unfrmAbTestList: [ { metadata: {}, sys: {}, fields: { headline: "Super Exciting News!", image: {} } }, { metadata: {}, sys: {}, fields: { headline: "More News!", image: {} } } ], date: "2024-10-10T00:00-08:00", body: "There is a lot of excitement around..." } }
Coming soon
Open the component PressRelease:
export const PressRelease = (props) => { const { headline, image, body, date } = props; return ( <div> <div> <h2>{headline}</h2> <img src={image?.fields?.file?.url} /> </div> <p>{date}</p> <p>{body}</p> </div> ) }About this step
This is the component before any A/B testing support is added.
Replace the code with the following:
import { useEffect, useState } from "react"; import { Test } from "@uniformdev/context-react"; /** * Set the entry id as the variation id for the test. * understand how each variation affects visitor activity. */ function reshapeAbTestList(list) { const reshaped = list.map(({ fields, sys }) => { const variation = { ...fields }; variation.id = sys.id; return variation; }); return reshaped; } /** * Represents the press release fields that * make up the test. */ export const PressReleaseVariation = (props) => { const { headline, image } = props; return ( <div> <h2>{headline}</h2> <img src={image?.fields?.file?.url} /> </div> ); }; /** * Represents the entire press release, including * the fields that are and are not tested. */ export const PressRelease = (props) => { const { date, body, unfrmAbTest, unfrmAbTestList } = props; const testId = unfrmAbTest?.id ?? "unknown-test"; const [variations, setVariations] = useState([]); useEffect(() => { const reshaped = reshapeAbTestList(unfrmAbTestList) setVariations(reshaped); }, []); return ( <div> <Test variations={variations} name={testId} component={PressReleaseVariation} /> <div>{date}</div> <div>{body}</div> </div> ); };