Migrate Sitecore presentation to Uniform
This guide shows how to migrate presentation layer from Sitecore to Uniform.
Benefits#
- Minimize your dependency on Sitecore and keep sourcing content from it. In other words, use Sitecore as a headless CMS. This simplifies migration and provides you with more future options.
- Use modern visual experience management tools from Uniform with integrated personalization and A/B testing.
- Build experiences with any front-end technology, not constrained by what Sitecore supports. Build with Next.js app router, Remix, etc.
- Combine content from other sources within a single component.
In this section you will perform the following migration:
| Before migration | After migration | |
|---|---|---|
| Content | Managed in Sitecore | Managed in Sitecore |
| Front-end technology | Sitecore renderings & layouts built with MVC | Uniform components (React / Vue) |
| Layout instructions | Sitecore presentation details | Uniform composition |
| Site delivery | Sitecore CD instances | CDN / front-end cloud |
tip
This tutorial involves writing a bit of code. Uniform provides the finished code if you prefer not to have to write the code yourself.
Enable Canvas services#
In Content Editor, navigate to sitecore > system > Uniform > Site Configurations > website > Configuration.
Add an item using the template
Configure: Canvas Integration Service...Set the following fields:
- ApiKey: Use the value from when you created the Uniform API key
- ProjectId: Use the project ID value from when you created the Uniform API key
- Page Component Id:
page
About this step
The Uniform connector uses these settings to communicate with the Uniform service. The one exception is the Page Component Id. This is a value that's used during the component migration process that you run in the next section.
Publish the site.
info
Before the Canvas-specific settings can be configured, some other steps must be completed. You will return to the site configuration later.
Run migration tool#
The Uniform Migration Tool serializes the various presentation settings in Sitecore into a format so they can be pushed into Uniform Canvas.
Serialize renderings#
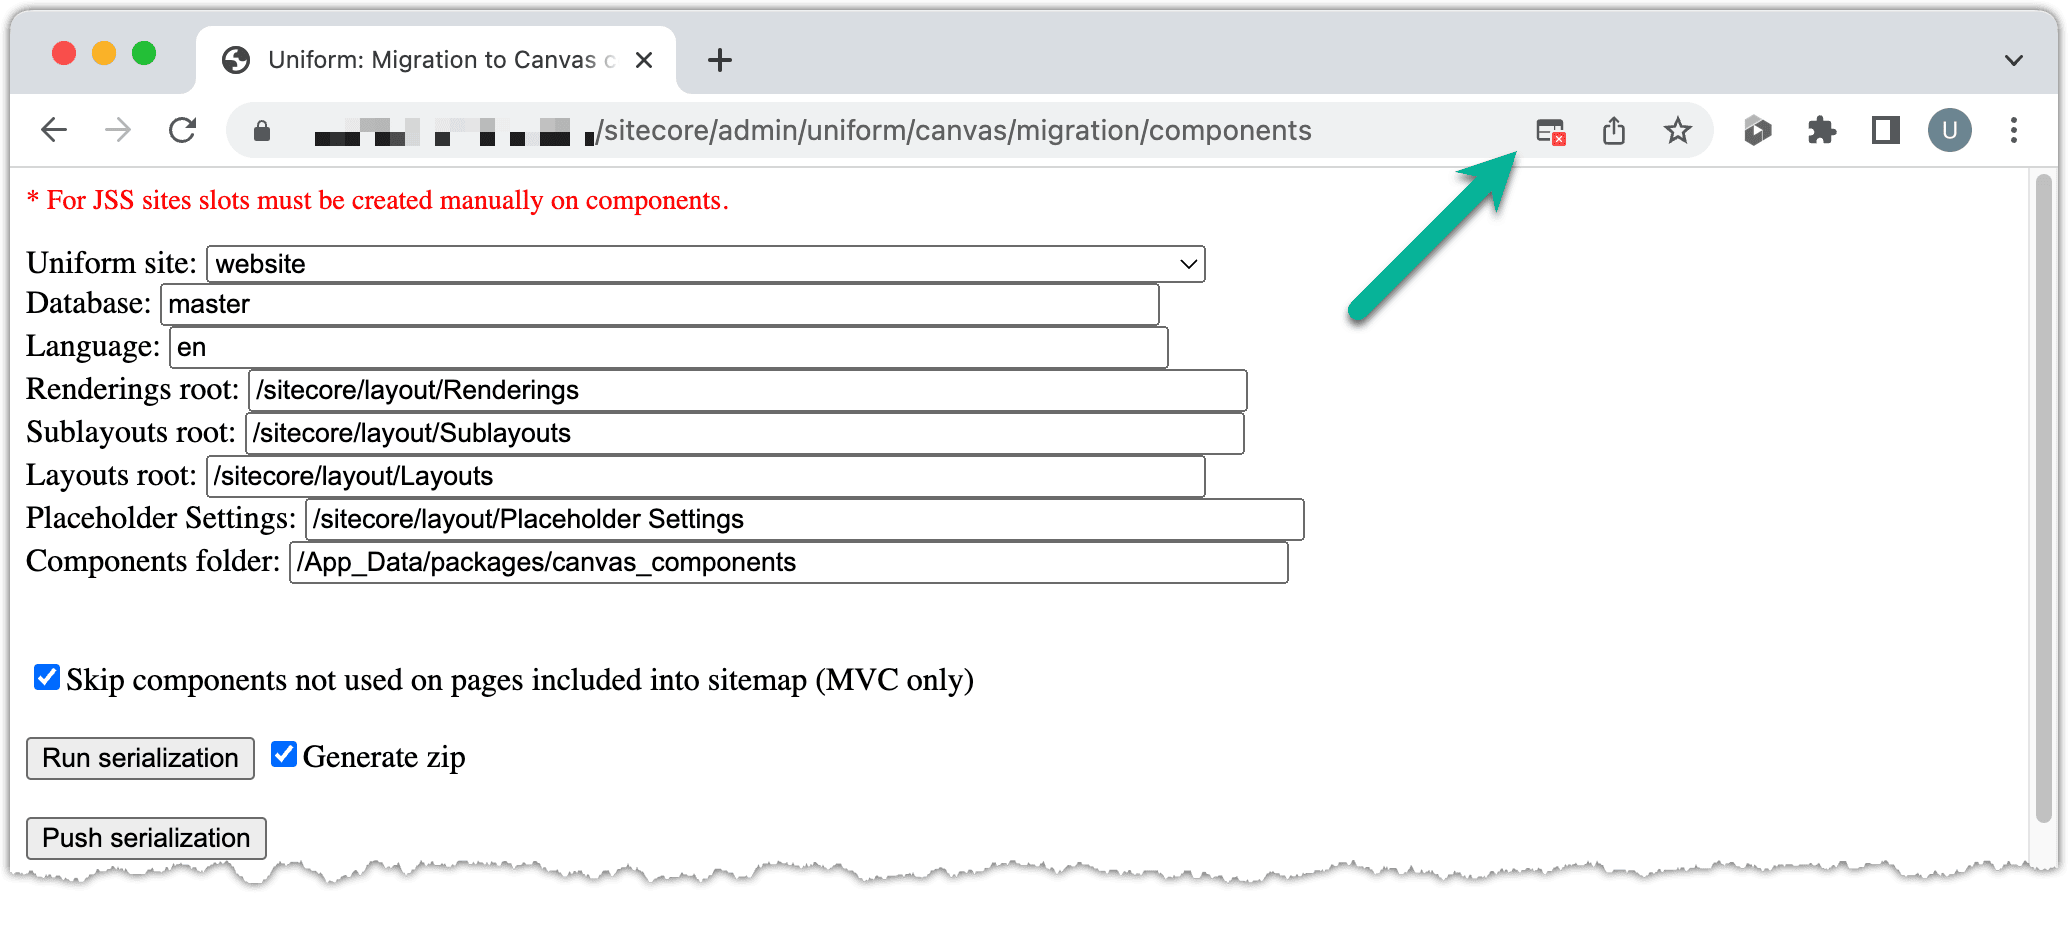
Open a browser window to
/sitecore/admin/uniform/canvas/migration/componentson your Sitecore instance.Tick the option Skip components not used on pages included into sitemap (MVC only).
About this step
This option ensures that only components that are used in your site are serialized. This setting can significantly reduce the number of items that need to be serialized.
Tick the option Generate zip.
About this step
By default, the serialized components are generated as separate files on the Sitecore server. This option results in a zip file being generated that you can download. This enables you to push the serialized components to Uniform using the Uniform CLI.
Click Run serialization.
When the serialization process is finished, a zip file will be sent to your browser. Popup blocking may prevent the file from being available, so check your browser you will see a summary in the DEBUG section.
Push components to Canvas#
On your local development machine, unzip the zip files to the current directory.
Open a terminal to the folder where you downloaded the zip files from the previous section.
Enter the following command:
npm i -g @uniformdev/cli @uniformdev/canvasCreate a file named
.envSet the values from when you created the Uniform API key:
Enter the following command:
uniform canvas component push canvas_componentsYou will see output that indicates 5 components were pushed to Canvas:
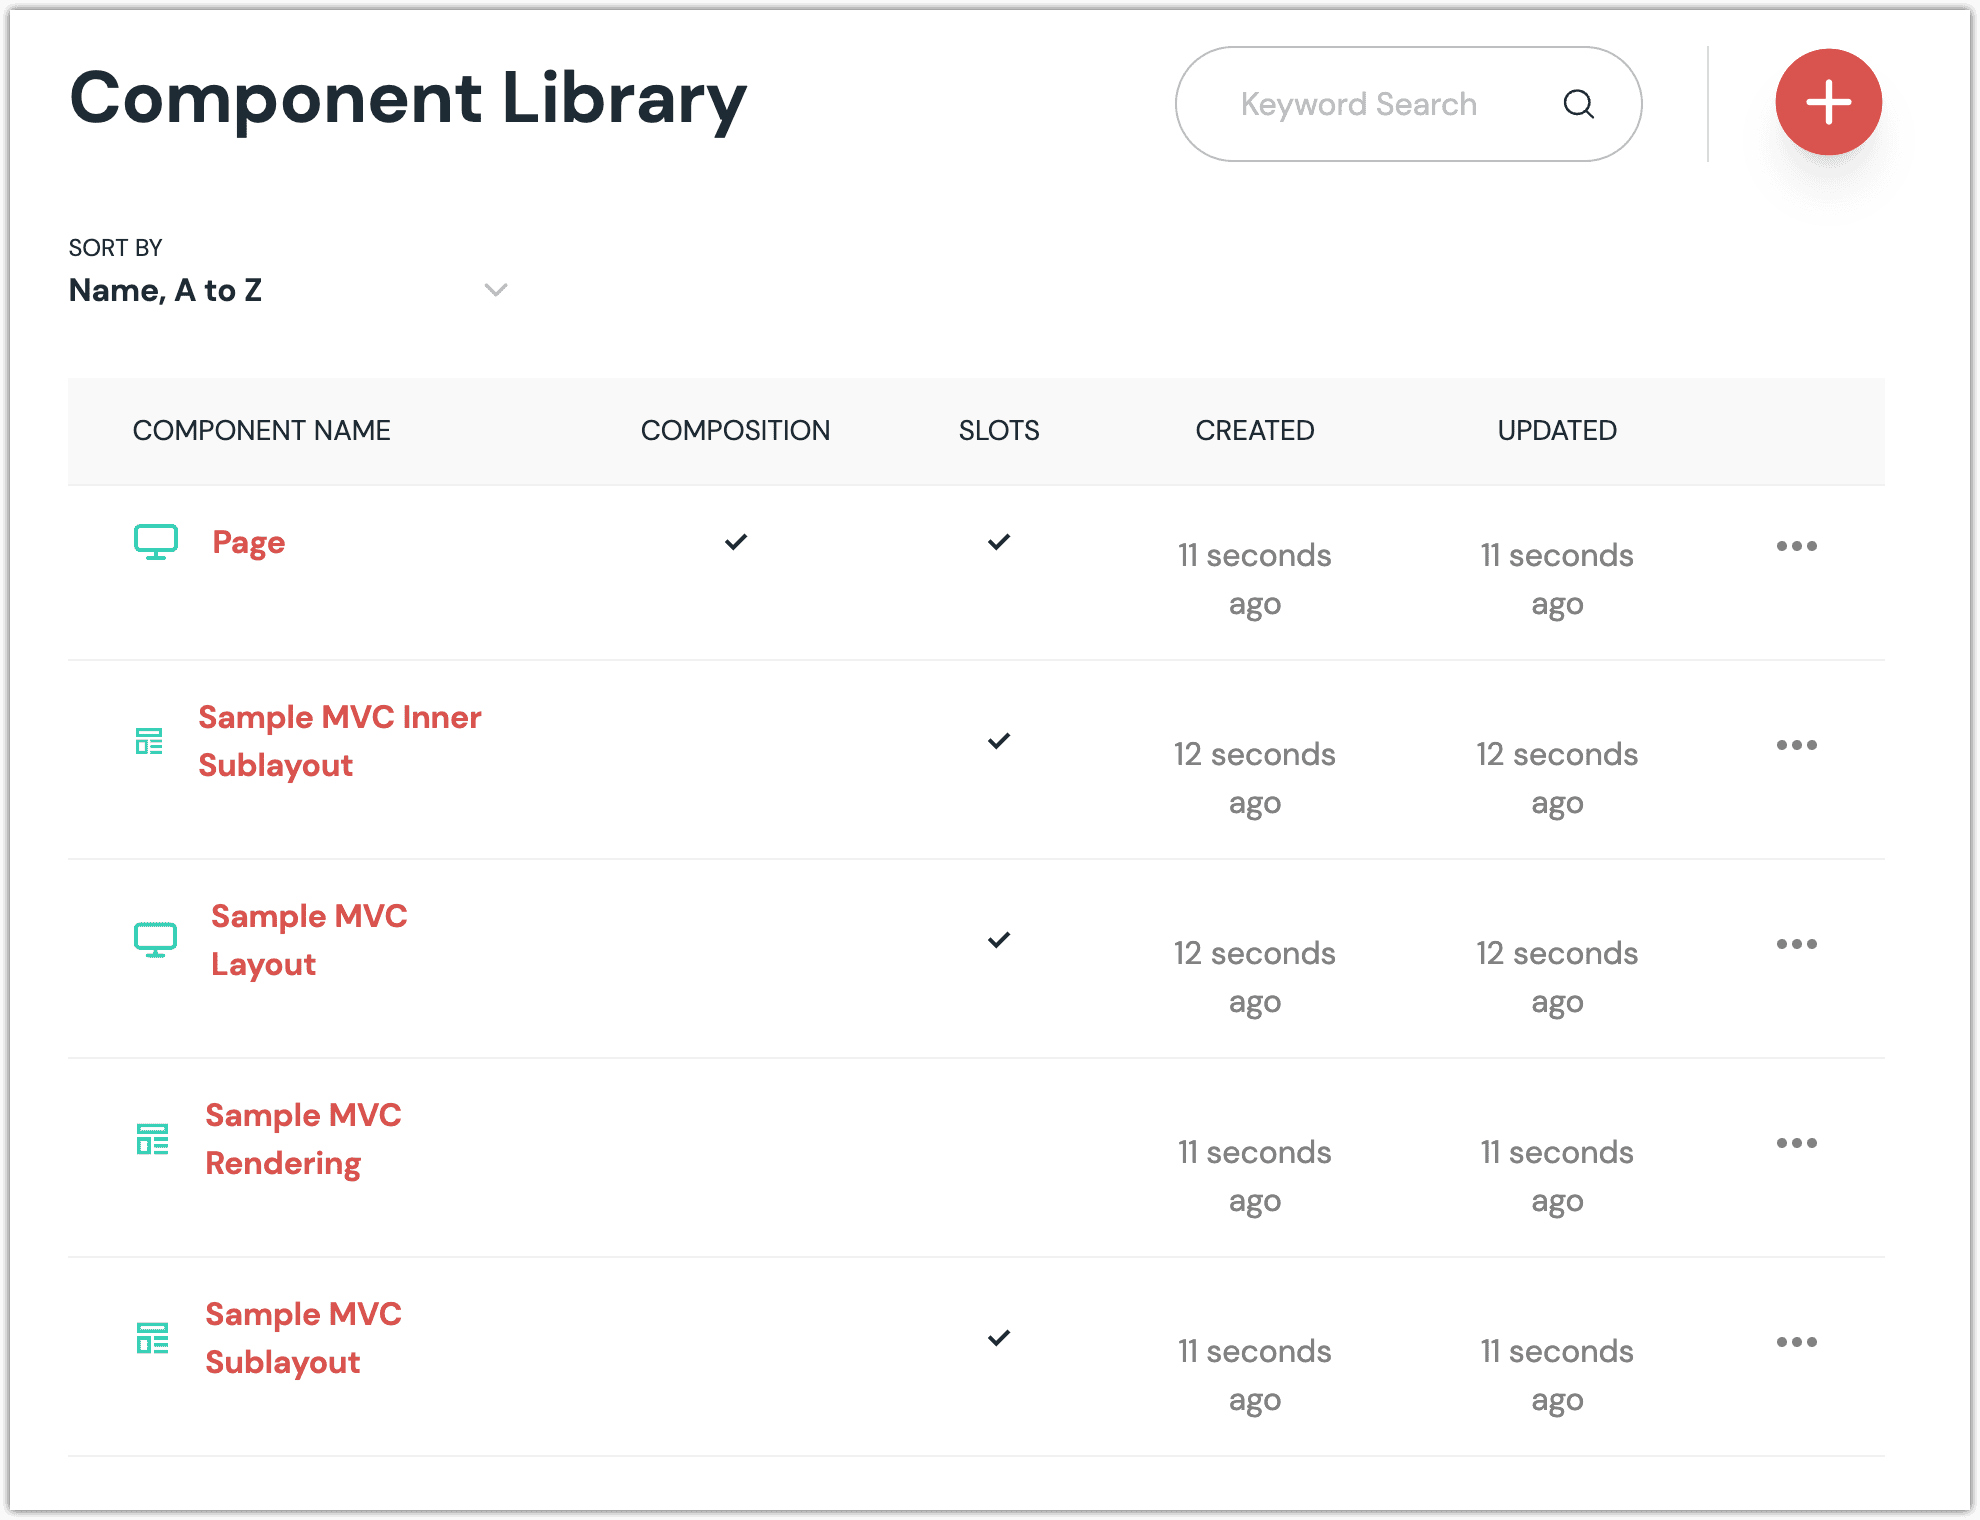
[A] Page (pid: page) [A] Sample MVC Sublayout (pid: sampleMvcSublayout) [A] Sample MVC Layout (pid: sampleMvcLayout) [A] Sample MVC Inner Sublayout (pid: sampleMvcInnerSublayout) [A] Sample MVC Rendering (pid: sampleMvcRendering)In Canvas you will see the 5 components.
Serialize pages#
Open a browser window to
/sitecore/admin/uniform/canvas/migration/compositionson your Sitecore instance.Tick the option Generate zip.
Click Run serialization.
When the serialization process is finished, a zip file will be sent to your browser. Popup blocking may prevent the file from being available, so check your browser you will see a summary in the DEBUG section.
Push compositions to Canvas#
In the terminal, enter the following command (you will need to change the folder path where your extracted files are):
uniform canvas composition push canvas_compositions_################/canvas_compositionsYou will see output that indicates 2 compositions were pushed to Canvas:
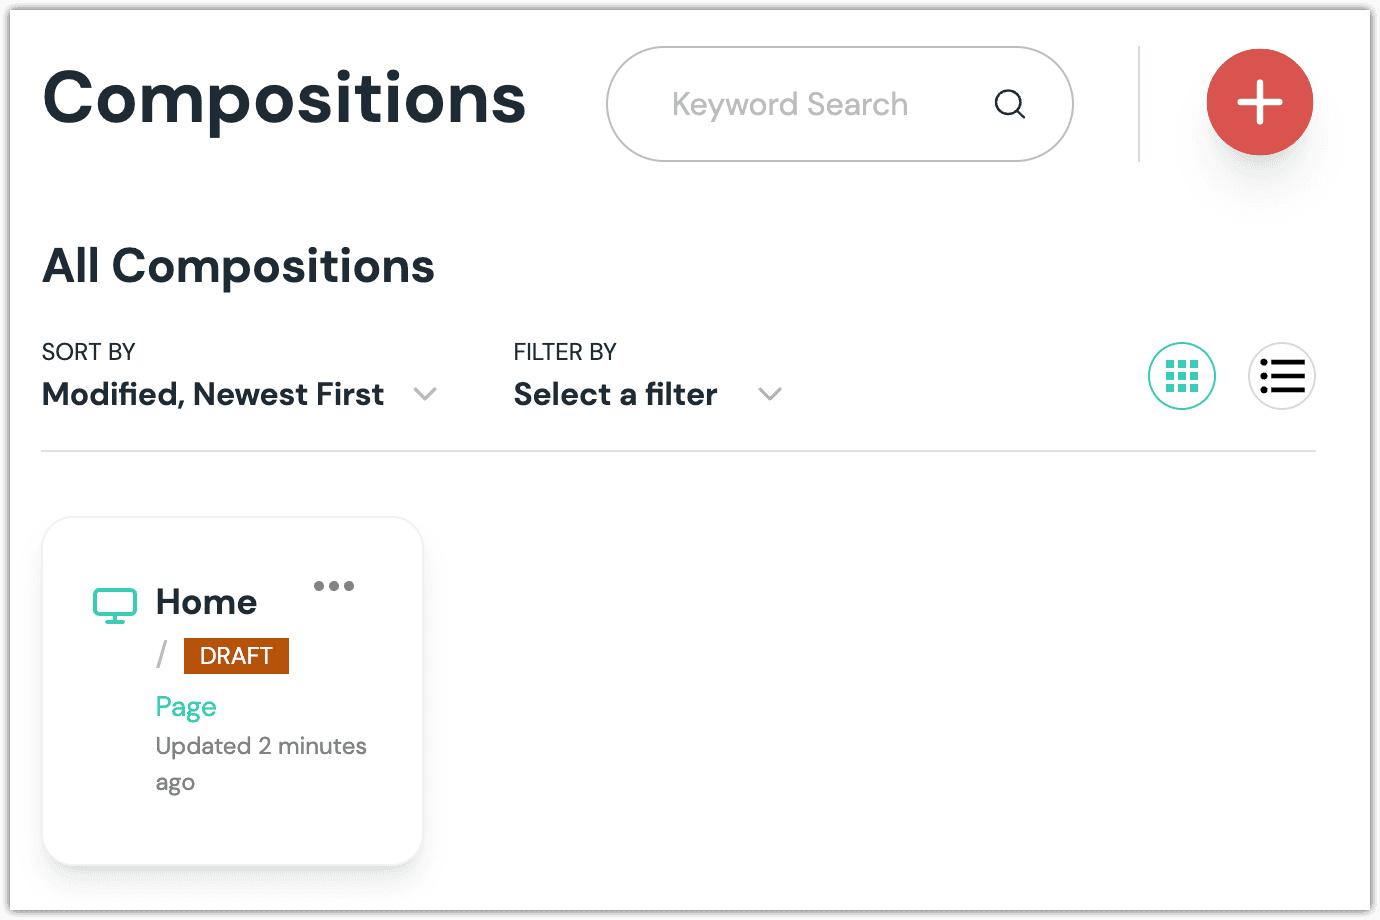
[A] Pattern: [Sample/Sample Item] (pid: 76036f5e-cbce-46d1-af0a-4143f9b557aa) [A] Home (pid: 110d559f-dea5-42ea-9c1c-8a5df7e70ef9)In Canvas, navigate to the composition library.
Click the 1 composition that's displayed.
Click Save > Publish.
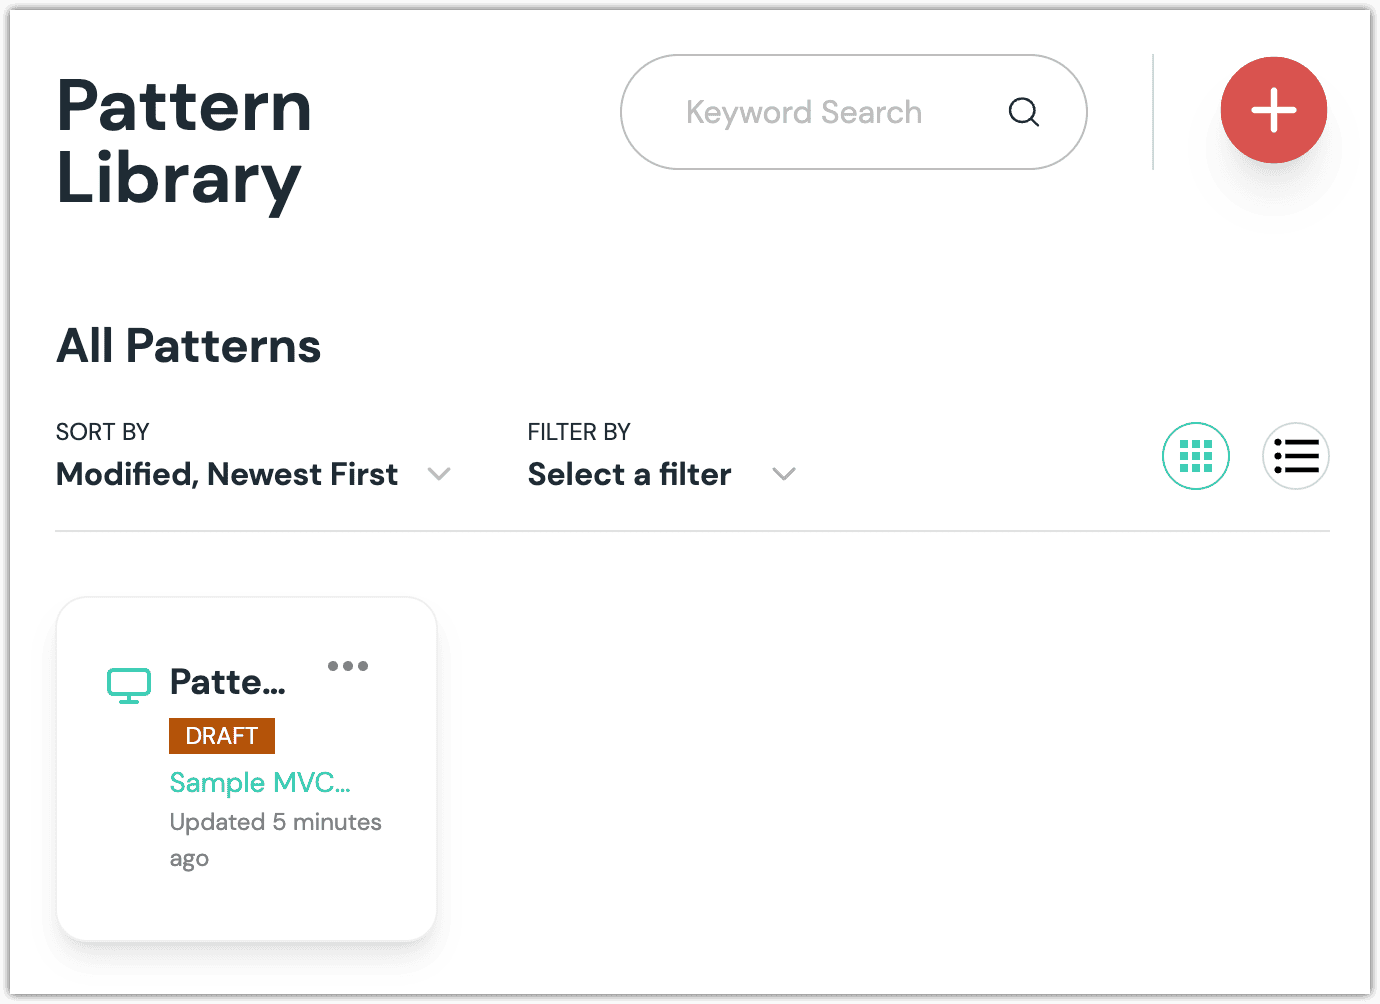
Navigate to the pattern library.
Click the 1 pattern that's displayed.
Click Save > Publish.
Create the front-end#
Now that you have the layout from Sitecore presentation details migrated to Canvas, you need to create an application that uses the layout and implements the front-end components used in that layout.
tip
This example uses Next.js as the front-end framework, but you can use any front-end technology you want. The layout and components defined in Canvas are technology agnostic.
Create web app#
Since you are migrating your site to a new front-end, you must create the web app where you will define that front-end.
Open a command-line interface (CLI).
Enter the following commands:
npx create-next-app sample-mvc-site cd sample-mvc-siteCreate a file named
.envAdd a file
.envand define the following variables:Name Value UNIFORM_API_SITENAMEwebsiteUNIFORM_API_KEYYour Uniform API key. Use the same value as you configured on the Canvas Integration Service in Sitecore. UNIFORM_PROJECT_IDYour Uniform Project ID. Use the same value as you configured on the Canvas Integration Service in Sitecore. UNIFORM_API_URLYour Sitecore URL. Use the same value as you configured in the Uniform integration. SITECORE_API_KEYYour Sitecore API key or any GUID if you use Sitecore 8.2. Use the same value as you configured in the Uniform integration. UNIFORM_API_TOKENYour Uniform API token The file will look like the following:
If your Sitecore instance uses self-signed SSL certificate, define the extra variable:
- Name:
NODE_TLS_REJECT_UNAUTHORIZED - Value:
0
- Name:
Add npm packages#
To add Uniform functionality to your web app, you must add a number of npm packages. Some of these packages are publicly available and some require an npm access token.
Enter the following commands:
Add Uniform configuration#
You must configure Next.js to load Uniform settings when it runs.
- Open the file
next.config.js. - Change the contents to the following:const { uniformNextConfig } = require('@uniformdev/next-server'); module.exports = uniformNextConfig();
Port assets#
The Sitecore layout and components include some links to static assets in Sitecore. These must be ported to the Next.js application or else you will still have a dependency in your app to your Sitecore CD server.
Get the contents the CSS file by opening your browser to
https://your-sitecore-instance/default.css.In your Next.js app, replace the content of the file
styles/globals.csswith the CSS from the Sitecore server.Download the image from
https://your-sitecore-instance/-/media/Default%20Website/cover.ashx.In your Next.js app, copy the image file to the folder
public.In
styles/global.css, find the following line:background: white url('-/media/Default Website/cover.ashx') no-repeat;Replace the previous line with the following:
background: white url('/cover.jpeg') no-repeat;Download the image from
https://your-sitecore-instance/-/media/Default Website/sc_logo.ashx.In your Next.js app, copy the image file to the folder
public.Download the image from
https://your-sitecore-instance/sitecore/images/favicon.ico.In your Next.js app, copy the image file to the folder
public.
Create components#
You need to create the React components that are used to implement the front-end. This involves porting code from Sitecore to React. The following files on your Sitecore server represent the presentation logic that you will port to React:
| Component | File |
|---|---|
| Sample MVC Layout | ...\Website\Views\Shared\Sample MVC Layout.cshtml |
| Sample MVC Sublayout | ...\Website\Views\Sample\SampleMvcSublayout.cshtml |
| Sample MVC Inner Sublayout | ...\Website\Views\Sample\SampleMvcInnerSublayout.cshtml |
| Sample MVC Rendering | ...\Website\Views\Sample\SampleMvcRendering.cshtml |
Component: Sample Layout#
In this component, the webcontrol sc:placeholder is replaced with a React component UniformSlot. Create a file components/SampleLayout.jsx:
tip
The Sitecore layout also includes a link to the CSS file /default.css, which is located on the Sitecore server at C:\inetpub\wwwroot\default.css. In order for these styles to be applied to your page, the contents of this css file can be added to the React file styles/global.css.
This file includes a style that sets an image. You must change the URL to be fully qualified by adding the hostname for your Sitecore server. For example, https://yoursitecore/-/media/Default Website/cover.ashx.
Component: Sample Sublayout#
Create a file components/SampleSublayout.jsx:
Component: Sample Inner Sublayout#
Create a file components/SampleInnerSublayout.jsx:
Component: Sample Rendering#
This component displays fields from the Sitecore data source item. If the data source item isn't selected, it uses a context item (a page item) instead. Uniform makes the item available as a prop that's passed to the component. In the next section you will wire this up.
Create a file components/SampleRendering.jsx:
note
The model field name was chosen by a convention that will be explained in next sections.
Map component name to implementation#
Each component defined in Canvas has a public ID. When you serialized the components from Sitecore, Uniform generated this value from the Sitecore item name.
When your web app reads composition definitions from Canvas, the composition and the components that are assigned to the composition are identified using this value.
You must provide instructions to your web app on how to map the public ID to the front-end implementation of that component. In your web app, React components provide that implementation.
Create a file lib/resolveRenderer.js:
Add Uniform to page#
In Canvas you have a composition that represents the home page and describes the layout for the page. You have a number of React components that represent the implementation of those components. Now you must configure the Next.js app to use the information from the Canvas composition in order to render the page using the React components you implemented.
Add composition component#
Replace the contents of the file pages/index.jsx with the following:
About this code
The component UniformComposition accepts props that represent the composition (which is retrieved from Canvas) and a function that resolves the React component that corresponds to the public id for a component from Canvas.
This code also adds a component to render the slot layout. When the Uniform migration tool serializes pages, it creates compositions for Canvas. Each composition includes a slot named layout. All the presentation details that the migration tool extracted from the Sitecore item is included in this slot.
Retrieve the composition#
- Add the following code to the top of the file
pages/index.jsx:import { CanvasClient, } from "@uniformdev/canvas"; import { UniformComposition, UniformSlot } from "@uniformdev/canvas-react"; import { resolveRenderer } from "../lib/resolveRenderer"; async function getComposition(slug) { const client = new CanvasClient({ apiKey: process.env.UNIFORM_API_KEY, projectId: process.env.UNIFORM_PROJECT_ID, }); const { composition } = await client.getCompositionBySlug({ slug, }); return composition; } export default function Home({ composition }) { return ( <UniformComposition data={composition} resolveRenderer={resolveRenderer}> <UniformSlot name="layout" /> </UniformComposition> ); } - Add the following code to the file
pages/index.jsx:import { CanvasClient, } from "@uniformdev/canvas"; import { UniformComposition, UniformSlot } from "@uniformdev/canvas-react"; import { resolveRenderer } from "../lib/resolveRenderer"; async function getComposition(slug) { const client = new CanvasClient({ apiKey: process.env.UNIFORM_API_KEY, projectId: process.env.UNIFORM_PROJECT_ID, }); const { composition } = await client.getCompositionBySlug({ slug, }); return composition; } export async function getStaticProps() { const slug = "/"; const composition = await getComposition(slug); return { props: { composition }, } } export default function Home({ composition }) { return ( <UniformComposition data={composition} resolveRenderer={resolveRenderer}> <UniformSlot name="layout" /> </UniformComposition> ); }
Add enhancer#
When you retrieve the composition from Canvas, Sitecore item ids are included in the data. You must use an enhancer to retrieve the fields for those items.
- Add the following code to the file
pages/index.jsx:import { CanvasClient, enhance, EnhancerBuilder, } from "@uniformdev/canvas"; import { UniformComposition, UniformSlot } from "@uniformdev/canvas-react"; import { createItemEnhancer, getPageItemId, noopLogger, parseUniformServerConfig, } from "@uniformdev/canvas-sitecore"; ... - Add the following code:export async function getStaticProps() { const slug = "/"; const composition = await getComposition(slug); const config = parseUniformServerConfig(process.env, noopLogger, true); return { props: { composition }, }; }
- Add the following code:export async function getStaticProps() { const slug = "/"; const composition = await getComposition(slug); const config = parseUniformServerConfig(process.env, noopLogger, true); const pageId = getPageItemId({ composition }); return { props: { composition }, }; }
- Add the following code:export async function getStaticProps({ preview }) { const slug = "/"; const composition = await getComposition(slug); const config = parseUniformServerConfig(process.env, noopLogger, true); const pageId = getPageItemId({ composition }); const itemEnhancer = createItemEnhancer({ pageId, config, isPreview: preview, }); return { props: { composition }, }; }
- Add the following code:export async function getStaticProps({ preview }) { const slug = "/"; const composition = await getComposition(slug); const config = parseUniformServerConfig(process.env, noopLogger, true); const pageId = getPageItemId({ composition }); const itemEnhancer = createItemEnhancer({ pageId, config, isPreview: preview, }); const enhancers = new EnhancerBuilder().component( [ "sampleMvcLayout", "sampleMvcSublayout", "sampleMvcInnerSublayout", "sampleMvcRendering", ], (builder) => builder.data("model", itemEnhancer) ); return { props: { composition }, }; }
- Add the following code:export async function getStaticProps({ preview }) { const slug = "/"; const composition = await getComposition(slug); const config = parseUniformServerConfig(process.env, noopLogger, true); const pageId = getPageItemId({ composition }); const itemEnhancer = createItemEnhancer({ pageId, config, isPreview: preview, }); const enhancers = new EnhancerBuilder().component( [ "sampleMvcLayout", "sampleMvcSublayout", "sampleMvcInnerSublayout", "sampleMvcRendering", ], (builder) => builder.data("model", itemEnhancer) ); await enhance({ composition, enhancers }); return { props: { composition }, }; }
Start the web app#
When you run the web app, you should see the page from the default Sitecore site, but Sitecore isn't handling page rendering. Sitecore is only acting as a headless CMS.
- In the terminal, enter the following command:npm run dev
- Open your browser to
http://localhost:3000
Finished code#
You can get the finished code described in this tutorial on GitHub.