Contentstack integration
This integration brings your content from Contentstack into the Uniform's visual experience composition layer. Team members can now leverage your Contentstack content along with content from any of your other sources, to create personalized experiences visually without core or relying on developers.
This integration comes with these archetypes to help connect your Contentstack entities to your Uniform components:
- Single Entry - for selecting a single Contentstack entry
- Multiple Entries - for selecting multiple entries, useful when building lists
- Entries by Field - for selecting an entry by a field, useful when building dynamic compositions, where you need to look up an entry by slug and use it for dynamic input
- Dynamic Query -for creating a dynamic query (for example, the 5 most recent items)
Install the integration#
To install the integration:
Go to the Uniform dashboard at https://uniform.app/.
Select the team and project that you would like to install the integration into.
Navigate to Settings > Integrations. Select the Contentstack integration tile.
 The interface for adding the integration.
Click the Add to project button that appears in the subsequent dialog. This will install the Contentstack integration and make the data source and archetypes available for when you are configuring new external sources. Learn more about connecting to external data sources.
Configure the data source#
Before you start
This guide helps you get started with the Contentstack-specific integration. For more general tips on working with external data sources, check out the guide on connecting to an external data source.
Once you've installed the integration, the next step is to connect your Contentstack space to your Uniform project by creating a new data source.
Navigate to Experience > Data Types. A data type is an element that can be retrieved from a data source, so the first step is to identify a data source.
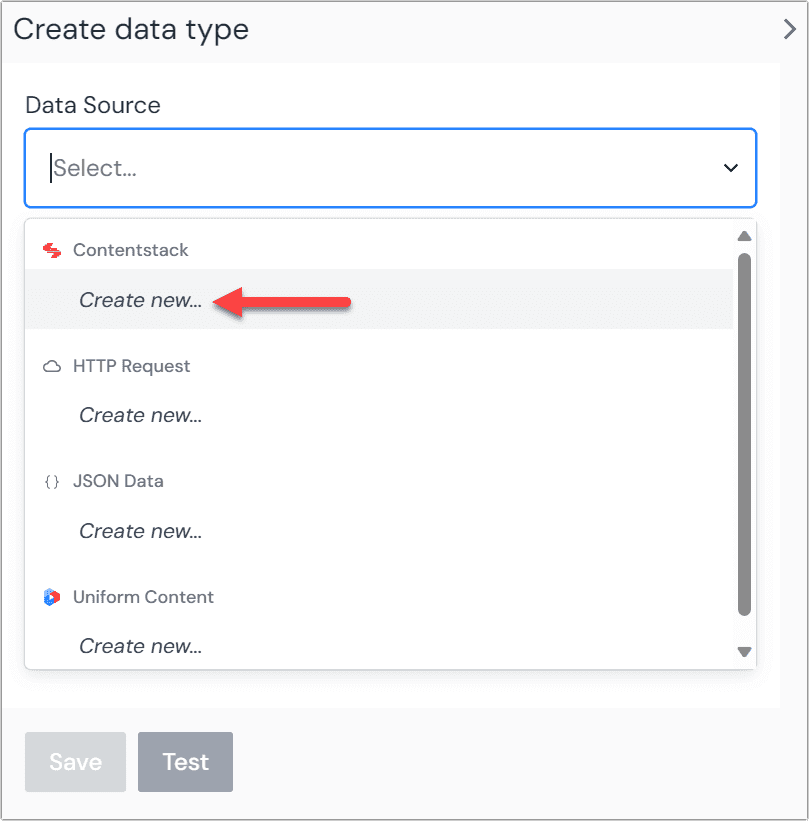
Create a new data source by clicking the Add data type button and select the "Create new" option under the Contentstack label.
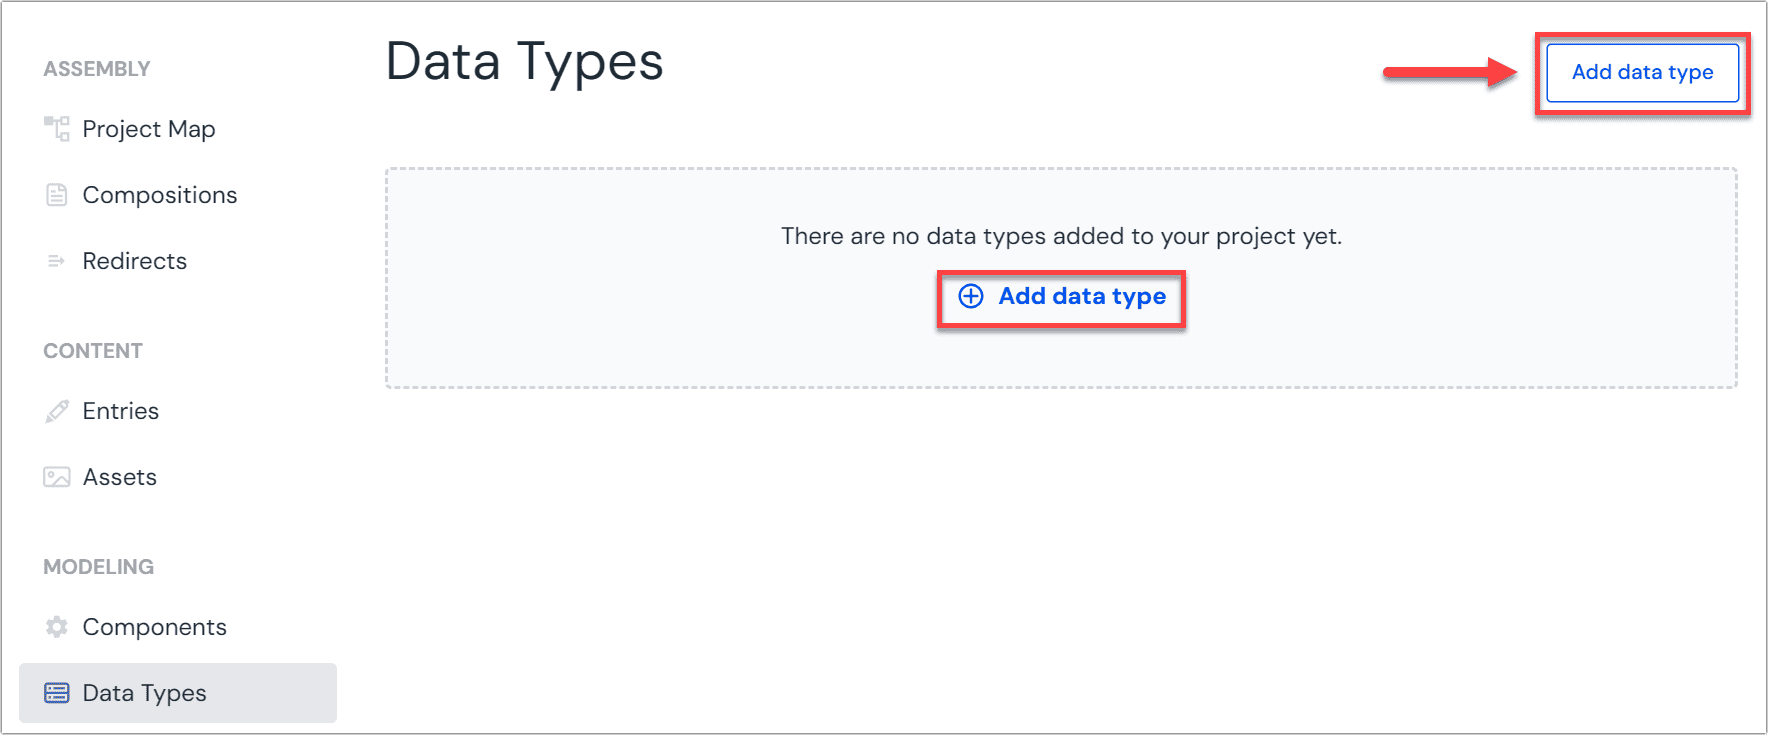 Add data type.
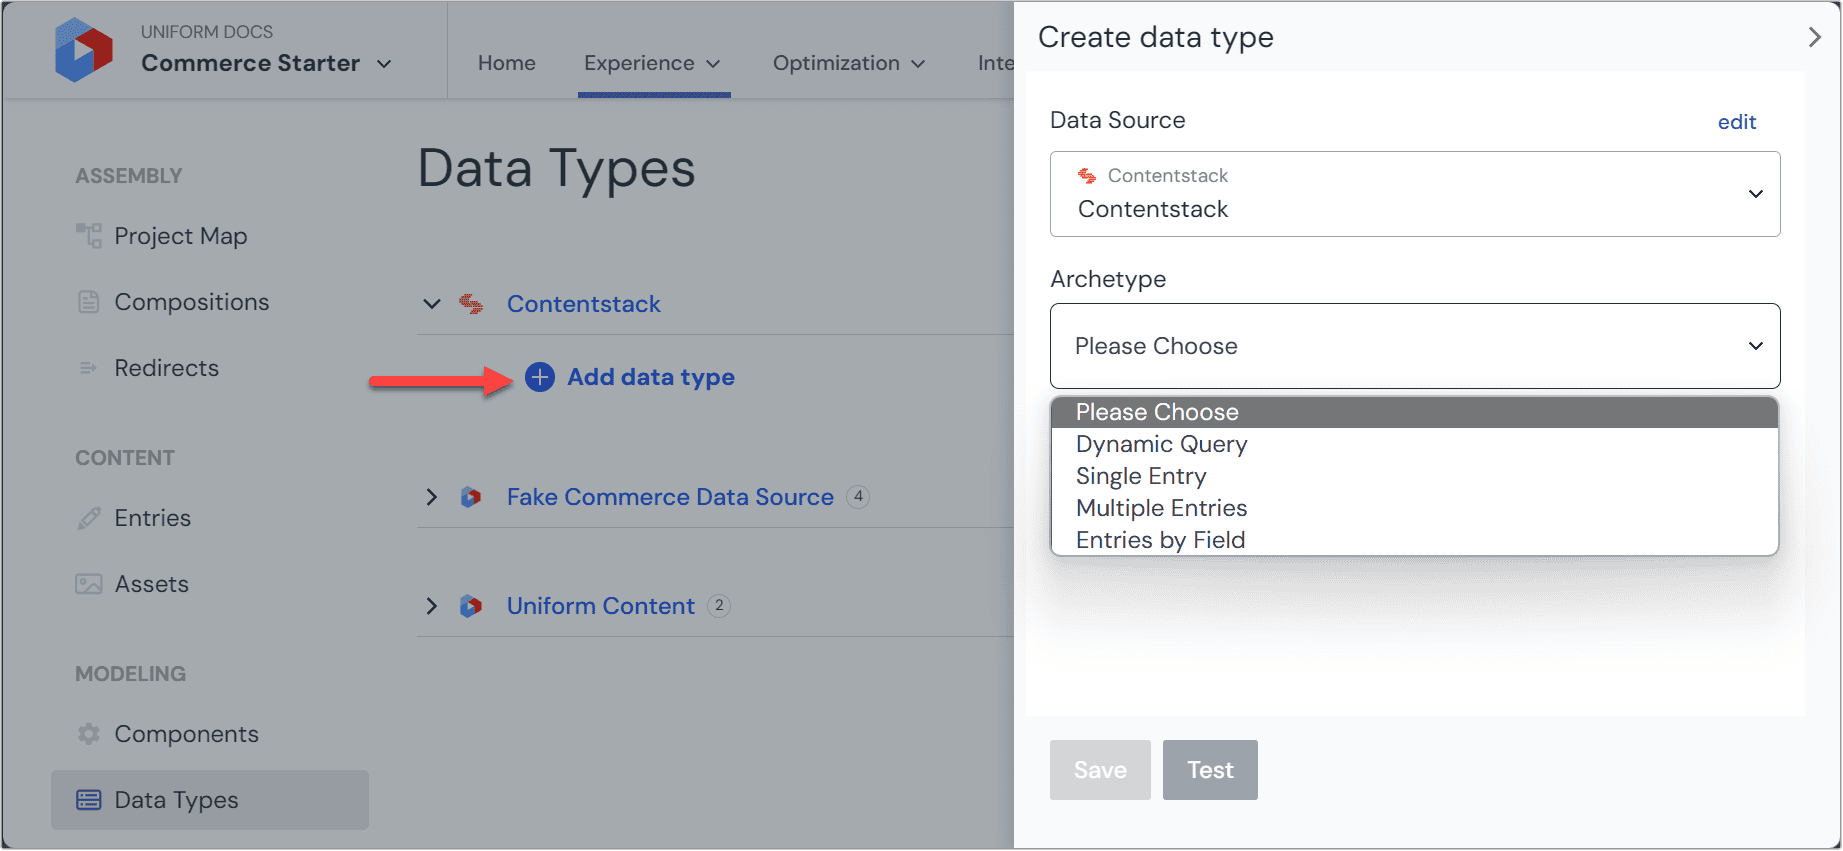 Where to create a new data type from the available data sources.
Provide details specific to the Contentstack space you are connecting to:
Field Description Region Select your region. Stack API Key The API key for your chosen Stack within Contentstack. You can find this under Stack > Settings within Contentstack. Delivery token The appropriate token for your chosen Stack. Find this under Stack > Settings > Tokens within Contentstack. Environment for Delivery Token (optional) Enter the environment associated with the delivery token given. This is optional. Branch (optional) Enter the branch associated with your chosen Stack. Find this under Stack > Settings > Branches within Contentstack. Name your data source. Choose a name that helps to inform your editorial users where the content is coming from. The name of the Contentstack organization and stack is a good option here.
Use multiple stacks
You may have more than one stack that you are using with Contentstack, perhaps to separate content used across different sites or different brands.
By repeating the preceding steps, you can support any number of stacks within a single Uniform project, allowing you to bring content together from across your Contentstack organization.
Unpublished content mode#
With unpublished content mode, content authors can preview and work with draft content in Uniform's visual editor.
To enable the unpublished content mode for the Contentstack integration for a specific data source:
Check the
Enable unpublished modetoggle. This will reveal additional settings in the Contentstack settings section below.Configure the unpublished content strategy by selecting one of the following options:
- Preview Unpublished Content - Use this option to preview draft entries from the same environment using Contentstack's Management API
- Separate environment - Use this option to work with content from a different environment
When using the Preview Unpublished Content strategy, provide the Management Token:
Field Description Management Token The Management API token is required for reading draft content metadata. You can generate this token from your Contentstack account settings under Tokens > Management Tokens. Branch (Optional) The branch where the unpublished content should be fetched from. The Separate environment strategy lets you fetch published content from a different environment. A delivery token for the environment is required. You can optionally provide the Environment name for the delivery token and select a specific Branch to help identify and configure your selected environment.
Field Description Delivery Token (Required) The delivery token for the environment you want to fetch content from. Environment for Delivery Token (Optional) The environment name associated with the delivery token. Branch (Optional) The branch that contains the content you want to fetch.
Contentstack data types#
Before you start connecting Contentstack data to your Uniform compositions, it's important to first create some data types. Data types define which types of Contentstack data editors can use. This could be simple, like allowing an editor to select a single "hero" entity, or more perhaps a more complex query such as "the five latest news article entries."
Go to Experience > Data Types and click the Add data type button from below the Contentstack data source that you set-up earlier.
Next, you will want to select and configure an archetype from the options below:
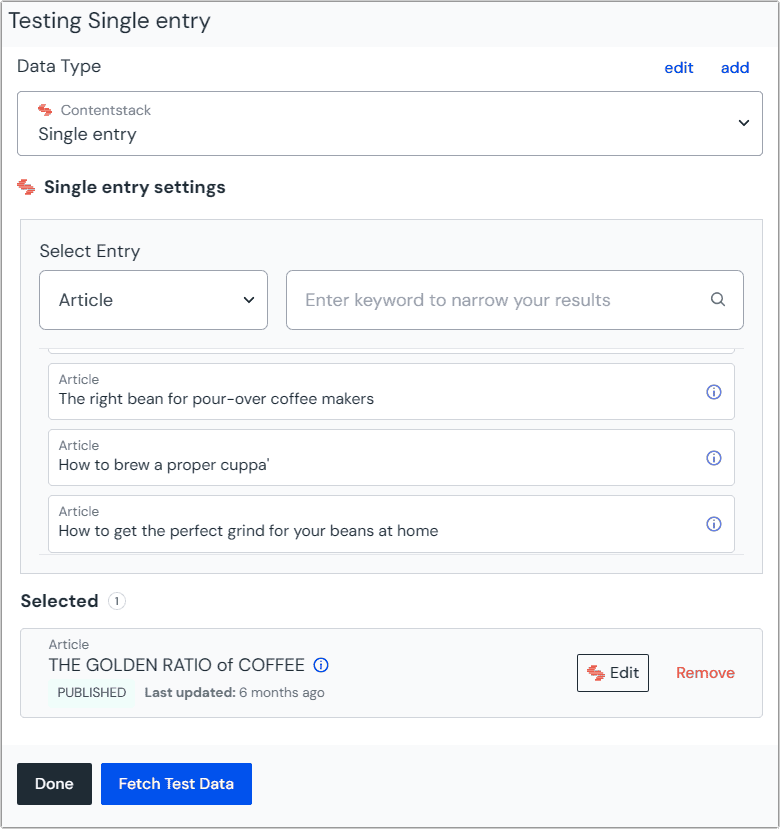
Archetype: Single entry#
The single entry archetype will always return a single entry from Contentstack, based on a selection by the editor in Uniform. This is useful for non-list elements that render as an independent item, such as a single "hero" entry or "article" entry. It can accept a variable from a dynamic token (such as a slug) and retrieve the corresponding entry.
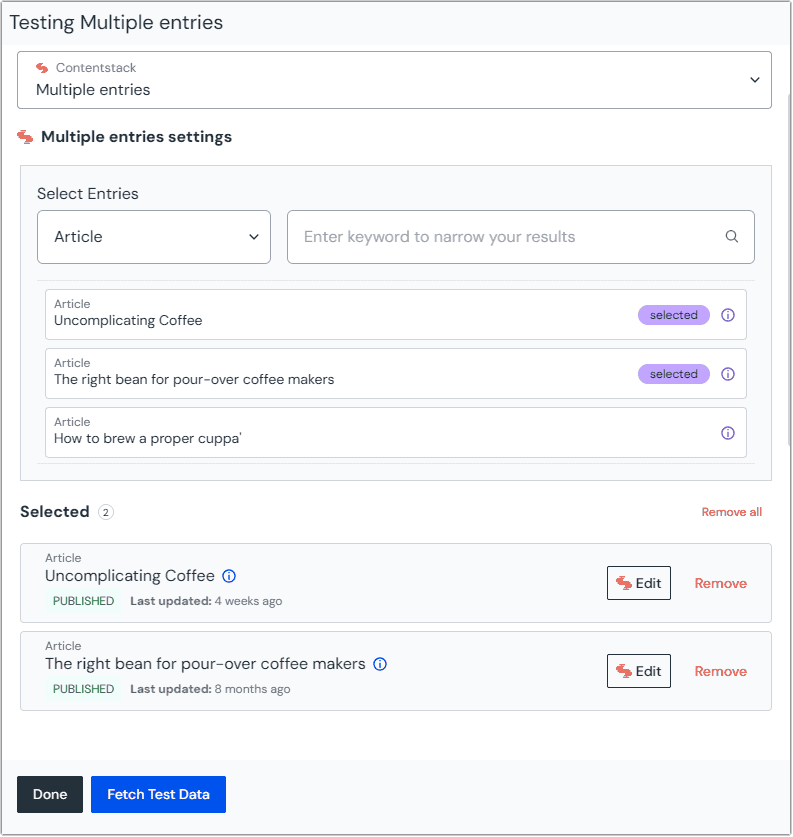
Archetype: Multiple entries#
The multiple entry archetype lets an editor hand pick multiple entries to render as a list. This is useful when a small selection of specific entries is required, such as in a "featured articles" carousel.
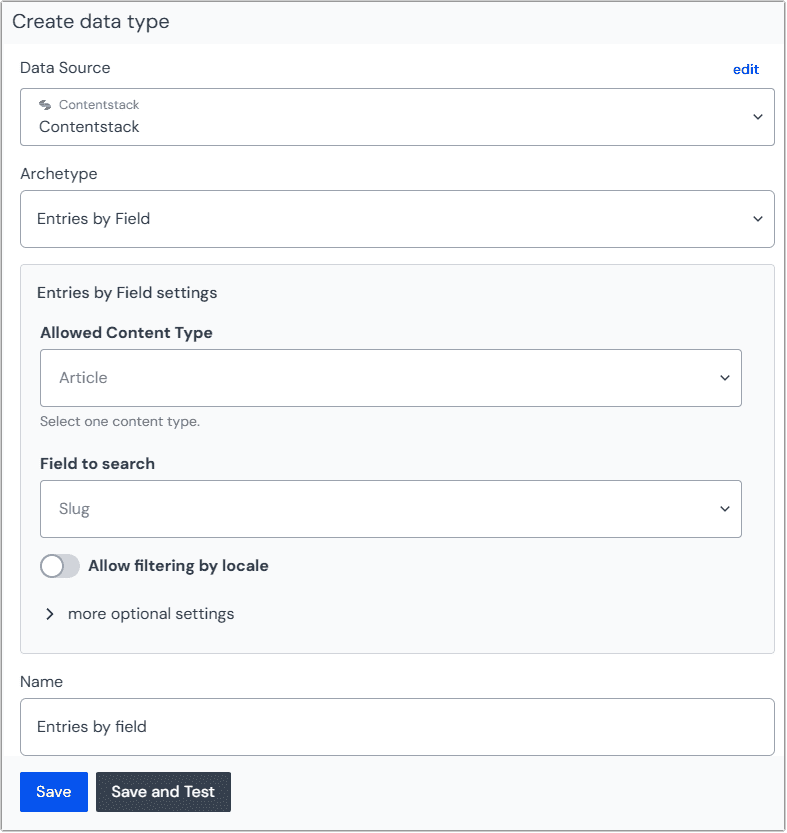
Archetype: Entries by Field#
The entries by field archetype supports dynamic pages, allowing authors to leverage a slug as a dynamic input. You can use this data type for other uses as well, such as finding Contentstack entries by field value rather than using full-text search or other filters.
For example, suppose you have a project map node with a dynamic path segment such as the slug post, where post is a dynamic input for a blog post coming from Contentstack. You can create an entries by field data type to connect the post dynamic input with the slug field of the data resource.
You can find more information about using dynamic inputs with data resources in the composition guides, or learn more about dynamic inputs in the URL management section.
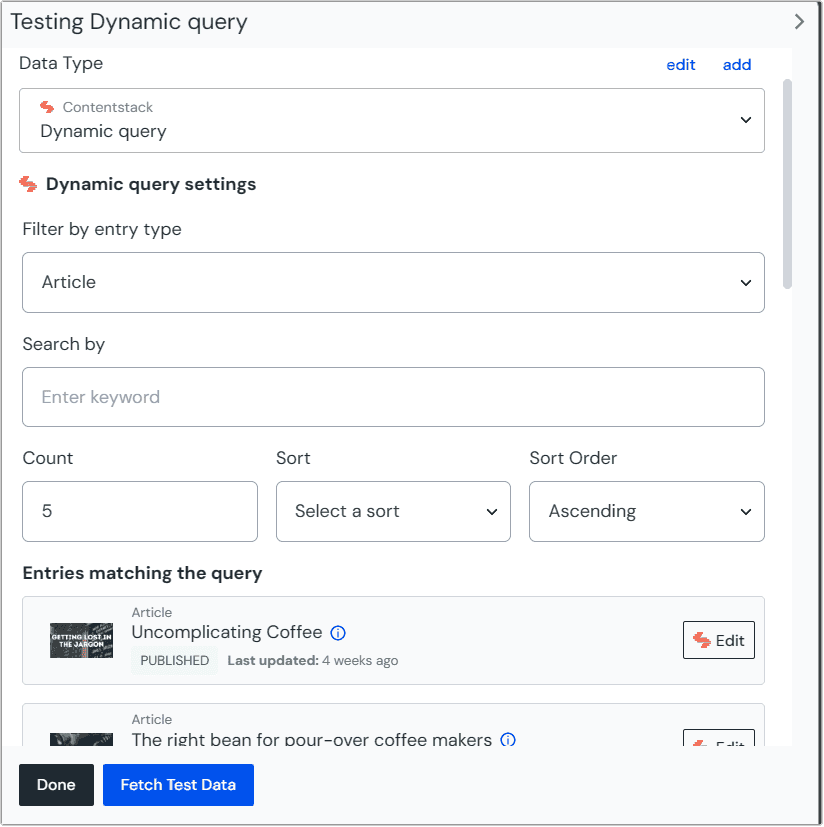
Archetype: Dynamic query#
The query archetype will always return a list of content entries, up to the limit set by the editor in Uniform. This can be useful for dynamic queries where the most up-to-date information is needed, such as a "latest content" section.
Connect data to components and patterns#
Once you have configured your data types to query your Contentstack entries, you will be ready for the final step of connecting your Contentstack data to your components and compositions or content entries from within Uniform's visual editor.
External data guide
Learn how to connect data resources to components and patterns
Setup edge cache invalidation#
Uniform provides Edge Cache invalidation API for invalidating Uniform data type caches by surrogate keys. Surrogate keys enable Uniform to map the CMS items used in a Uniform data type the cached copy of the content in Uniform's edge cache.
The Contentstack integration collects surrogate keys for each data resource (e.g. Contentstack entries) used in a composition.
Endpoints#
Contentstack webhooks can be configured to notify Uniform about changed content and surgically invalidate affected Uniform data resources. Uniform provides the following endpoints that a Contentstack webhook can be configured to use:
Full invalidation#
| URL | https://contentstack.mesh.uniform.app/api/cache-invalidation |
| Description | This endpoint invalidates all caches for the specified data type. No surrogate keys are used. |
| Parameter name | Description | Sample value |
|---|---|---|
projectId | Uniform project ID | 00000000-042b-47e3-95ed-2b0ac0200991 |
dataTypeId | Uniform data type ID | hero |
purgeKey | Uniform purge key | 00000000-ec0c-4fb2-8841-f4c87b8992bf |
The following is a sample URL to call the endpoint:
Granular invalidation#
| URL | https://contentstack.mesh.uniform.app/api/granular-cache-invalidation |
| Description | This endpoint invalidates all caches for the specified data type, using the surrogate keys included in the payload. |
| Parameter name | Description | Sample value |
|---|---|---|
projectId | Uniform project ID | 00000000-042b-47e3-95ed-2b0ac0200991 |
dataTypeId | Uniform data type ID | hero |
purgeKey | Uniform purge key | 00000000-ec0c-4fb2-8841-f4c87b8992bf |
The following is a sample URL to call the endpoint:
Configure webhook in Contentstack#
- Register a new webhook as described in the (Contentstack documentation). Use the URL for the appropriate Uniform endpoint in the field URL To Notify.
- In the Trigger Conditions section, configure the condition to the following:Any Entry from Any content type is Published
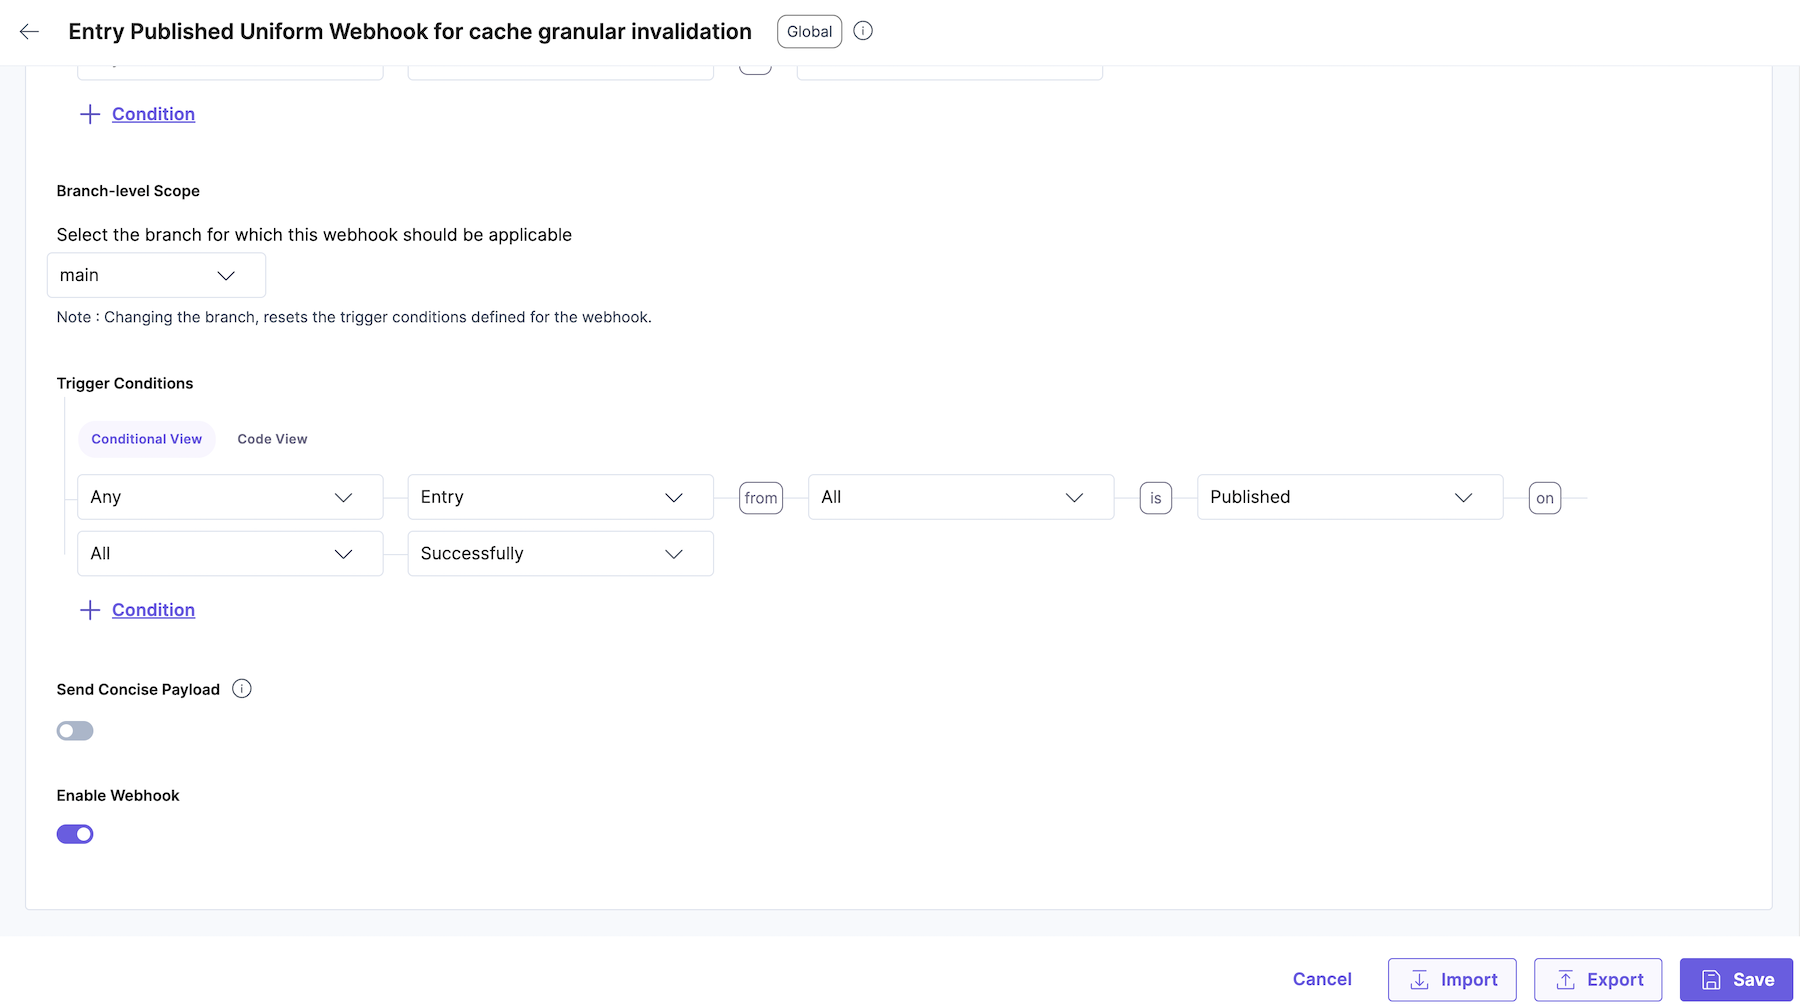 Contentstack configuration page for webhook triggers.
 - Configure the same trigger for Entry Unpublish, Entry Delete, and Asset events.
You should configure a separate webhook for each Uniform data type.