Asset editor
The asset editor is where you author and manage a single asset. It provides everything you need to update metadata, set a focal point, replace the underlying media file, review where the asset is used, and delete the asset.
The same editor surface is used whether you open an asset from the asset library or directly from an asset parameter in a composition or entry, so you only have to learn it once.
Where the editor appears#
The asset editor opens in two places:
- From the asset library: Click an asset's thumbnail or name to open the editor as a dialog over the library.
- From an asset parameter: In an asset parameter modal, open the Overrides menu on the asset and select Edit original to open the editor in place. This is also where you land when you've uploaded a brand-new asset through a parameter and want to fill out its metadata before saving. For details on the parameter flow, see edit original asset.
When the editor is opened in place from a parameter, the header shows an Editing original label or a New chip if the asset is a transient asset that has not yet been saved to the library.
Edits apply everywhere the asset is used
Editing the original asset updates it for every composition, entry, and pattern that references it that does not have overrides. To make a change that should only apply to a single usage, edit the asset's properties on the parameter itself. See overrides.
Editor interface overview#
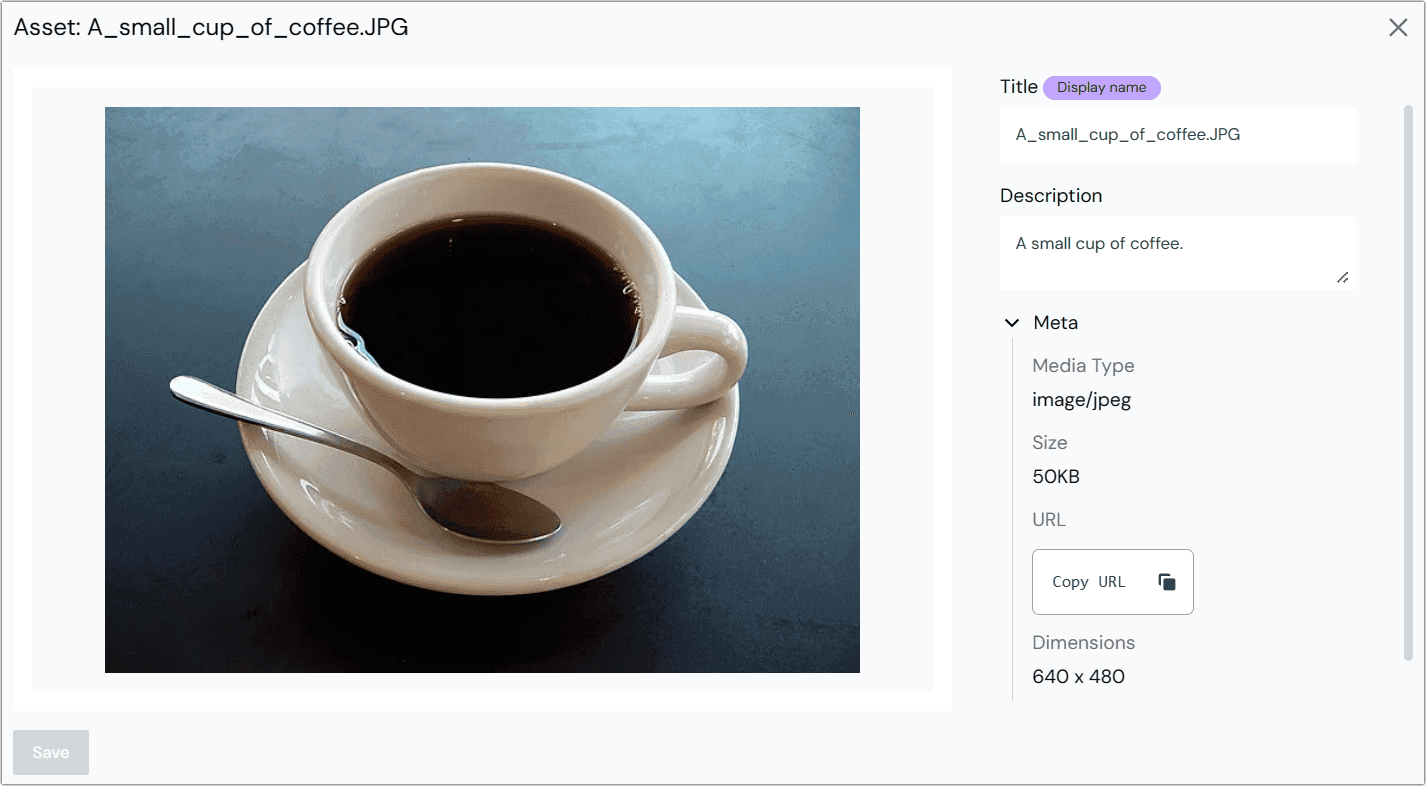
The editor is a two-column layout:
- Preview pane (left): A live preview of the asset's binary file. The pane can be expanded to fill the viewport, and supports images, video, audio, and a generic icon for "other" file types.
- Properties panel (right): The editable fields for the asset, followed by a non-editable Meta section and a Usage section.
Properties#
Title and description#
The asset's title is the human-readable name used in pickers and lists. The description is a longer, optional caption. Both fields support AI quick edits.
Labels#
Use the Labels picker to categorize the asset. Labels make assets easier to find with the quick filter or advanced filter in the library and in asset parameters. See asset labels for the full label workflow.
Focal point#
For image assets, the Focal point field controls which part of the image remains visible when the image is resized to fit different display dimensions. This ensures the most important elements of your image stay in frame regardless of how the image is cropped or scaled.
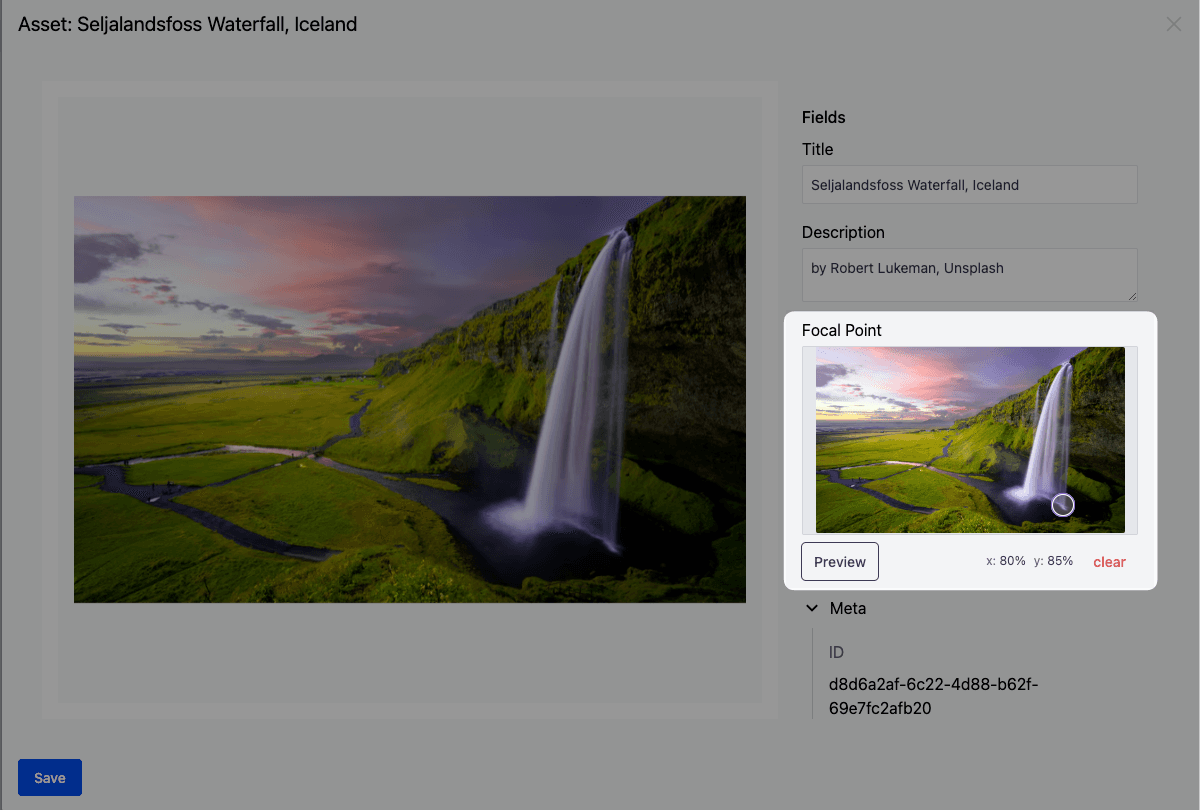
To set the focal point:
- Drag the focal point marker on the preview thumbnail to the desired position.
- Click Preview to see how the image will look at different screen sizes and aspect ratios. Click Accept to keep the preview settings, or Cancel to discard them.
- Click Save to persist the focal point on the asset.
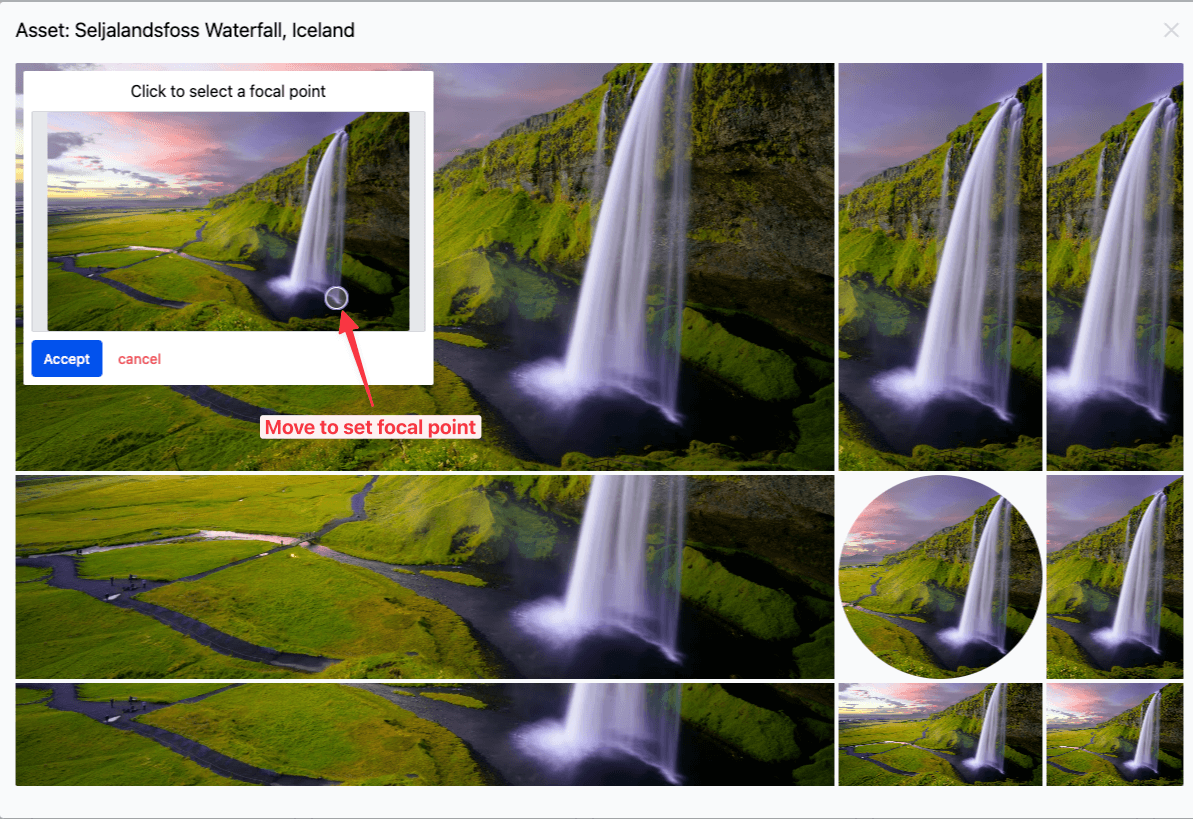
The frontend respects the focal point automatically when you use the imageFrom utility or the Image Delivery API with fit=cover.
Connect the focal point to a data resource#
When an asset is provided by a data resource, the focal point can also be sourced from the data resource. This is useful when the upstream system already stores focal points per image.
Open the Connect to focal point value menu on the focal point field to connect it to a dynamic value, or Disconnect from focal point value to restore a literal { x, y } value.
When you select an asset from a data resource that exposes a focal point, the parameter automatically connects the focal point field for you.
Meta#
The Meta section shows non-editable system information about the asset:
| Field | Description |
|---|---|
| ID | The asset's unique identifier. |
| Media type | The MIME type of the underlying file (for example, image/png). |
| Size | File size of the underlying binary. |
| URL | The URL of the binary file, with a Copy button. |
| Dimensions | Width and height in pixels (for image assets only). |
| Created | When the asset was first added, with the name of the creator. |
| Modified | When the asset was last modified, with the name of the most recent editor. |
Usage#
The Usage section lists every composition, entry, and pattern that references the asset, with a counter on the section header showing the total. Use this section before making destructive changes (replacing the file, deleting the asset) to understand the impact.
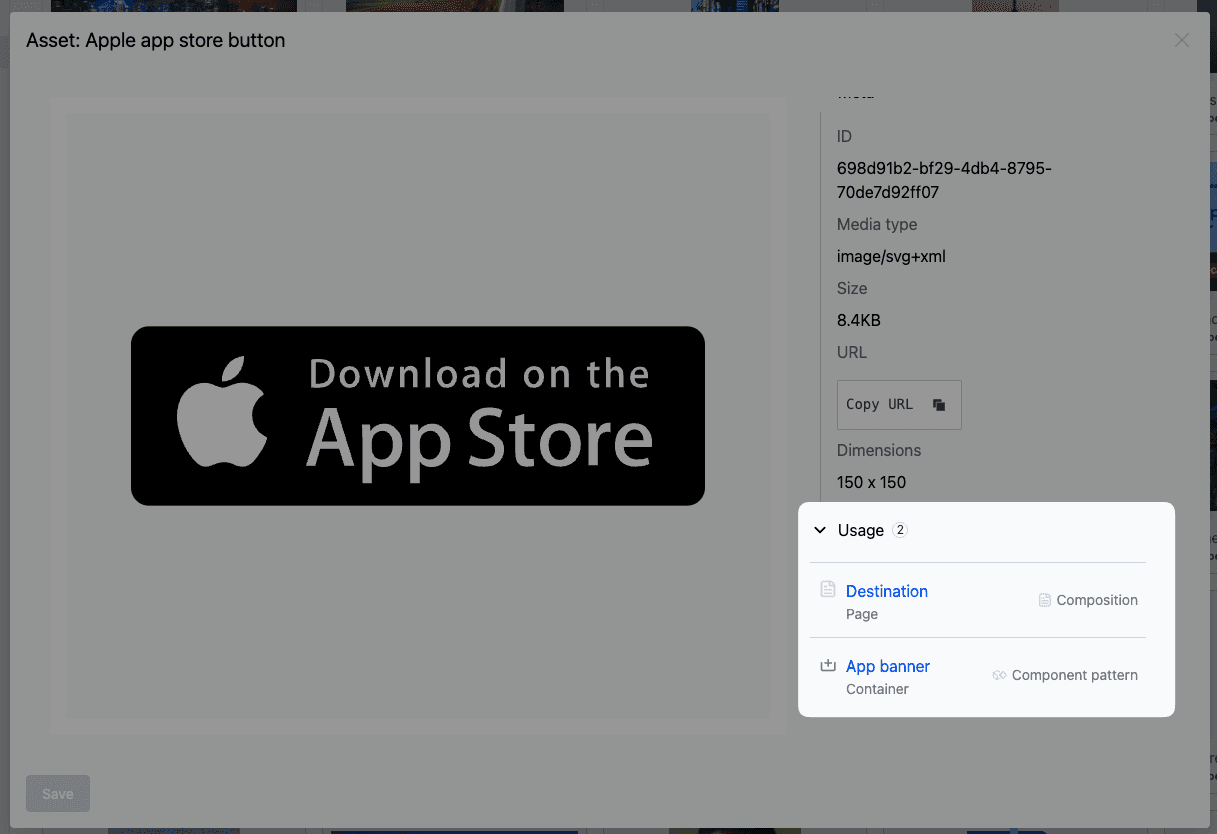
When the editor is opened in place from an asset parameter, the same counter appears next to the Editing original header.
Replace the asset file#
You can replace the binary file behind an asset without changing its URL. This keeps every existing reference intact while updating what end users see.
To replace the file:
- In the preview pane, click Replace media.
- Drag a new file into the dialog or click to browse. The new file must be the same asset type as the existing one (you can't replace an image with a video, for example).
- Once the upload completes, the new file is staged locally; the swap is not yet committed.
- Click Save to commit the replacement. The original URL is preserved and the staged file replaces the existing one, so visitors who have not loaded the asset before see the new file on their next request.
- If you click Cancel instead of Save, the staged file is discarded and deleted server-side.
Replacements apply everywhere the asset is used
A file replacement updates the binary file for every composition, entry, or pattern that references this asset. Check the Usage section first to understand the impact. To swap a file for a single usage only, replace the asset on the parameter instead. See drag-and-drop upload and swap.
When visitors see the new file#
Repeat visitors may see the old file for up to a day
The replacement is served immediately to anyone who has not loaded the asset before. Because the URL does not change, visitors whose browsers have already cached the previous file will keep seeing it until their browser cache expires. That typically happens within 2 hours, but can take up to 24 hours in some browsers.
To confirm the new file is live, open the asset URL in a private or incognito window, or do a hard refresh (Cmd/Ctrl + Shift + R). The same caching can affect the editor preview after you leave and return to the composition.
Delete an asset#
The editor has a Delete asset button at the bottom of the properties panel. Clicking it opens a confirmation dialog, then the asset moves to Trash.
Check usage before deleting
The editor shows the Usage section and a usage counter so you can see how many places reference the asset before you remove it.
Save and discard changes#
- Click Save to persist changes made to the asset. The button is disabled when there are no changes, while validation is running, when there are validation errors, or when you don't have permission to write to the asset.
- To discard your changes, close the editor by clicking the X in the modal header or by clicking outside the modal. A confirmation dialog asks you to confirm before your changes are dropped. For transient assets, confirming the discard also removes the uploaded file from the server.
Permissions#
| Action | Required permission |
|---|---|
| Save changes to an asset | Update on the asset entity group |
| Replace an asset's file | Update on the asset entity group |
| Delete an asset | Delete on the asset entity group |
When you don't have the required permission, the corresponding button is disabled. For details on configuring permissions, see roles and permissions.