Asset labels
Labels let you categorize and organize assets in your project. You can assign labels to assets to make them easier to find, filter, and manage.
How labels work#
Labels help teams organize assets and make them easier to browse, filter, and find in the Asset library and the asset selector. Labels can be used to identify assets by subject, campaign, brand, ownership, or any other internal organization criteria.
If a project has many labels, they can be grouped so related labels are easier to browse and manage.
Labels can be assigned manually or automatically by AI during upload, helping teams keep assets organized from the start. Each label has a name, color, public ID, and optional description, and can be applied across all assets in a project.
Manage labels#
Labels are configured in the project settings. Users with the appropriate permissions can create, edit, and delete labels.
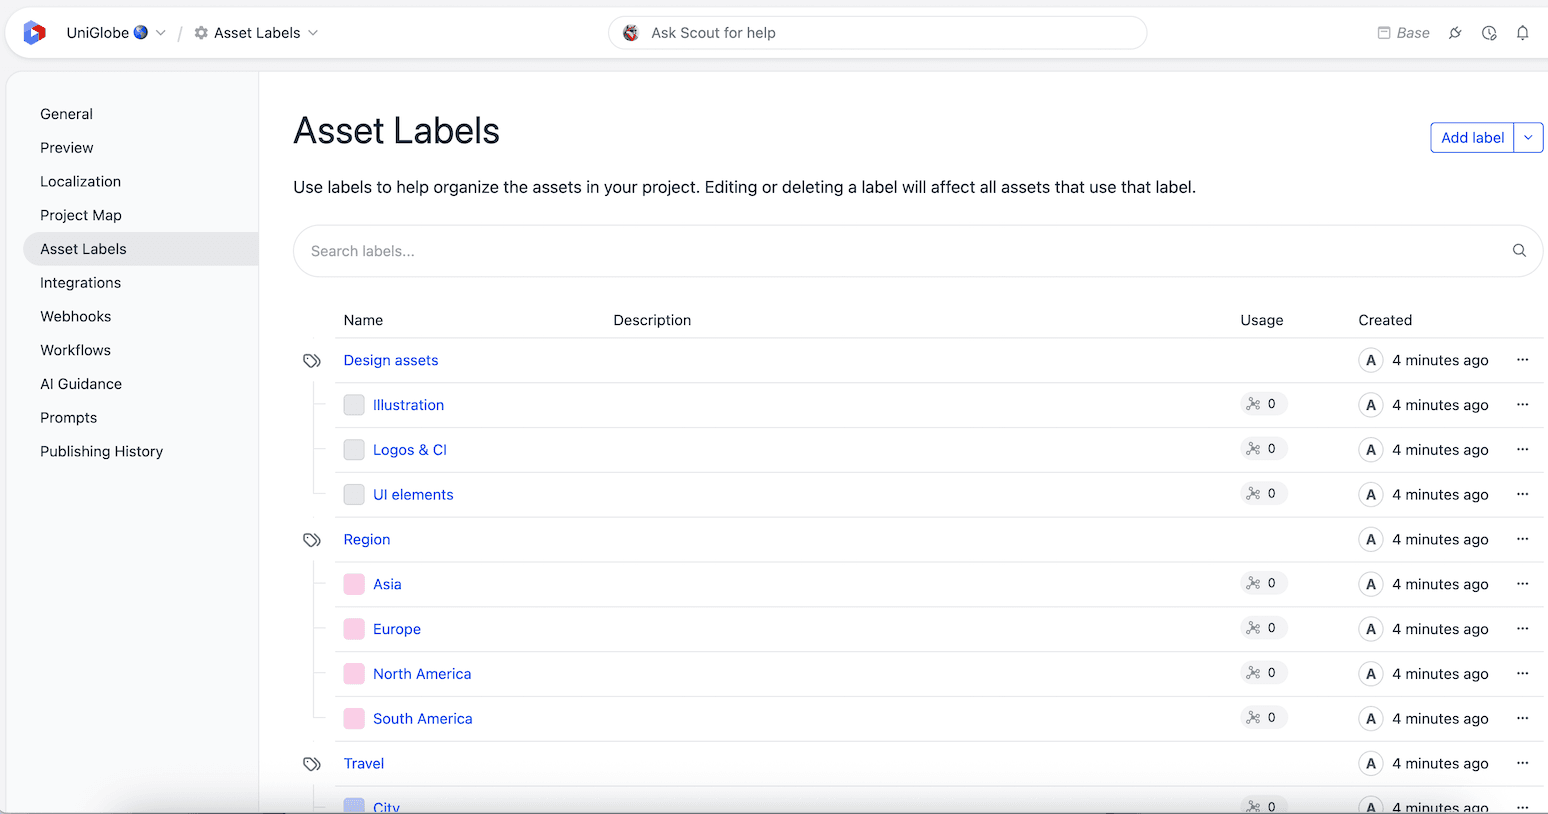
In Uniform, open your project.
Navigate to Settings > Asset Labels.
Click Add label to create a new label.
Enter the following values:
Field Description Display name A human-readable name for the label. Public ID A unique identifier (lowercase, numbers, and hyphens, up to 40 characters). Color A swatch color used to visually distinguish the label. Description Optional text describing the label's purpose. Click Save.
Edit or delete a label#
To edit or delete an existing label, select it from the list on the Asset Labels settings page.
Label groups#
Label groups let you organize related labels under a shared parent.
- Groups help structure large sets of labels into logical categories (for example, "Region", "Campaign", or "Brand").
- Groups appear as visual dividers in the label list and as grouped options in label pickers.
To create a label group:
- On the Asset Labels settings page, click Add label group.
- Enter a display name, public ID, color, and optional description.
- Click Save.
After creating a group, you can assign existing labels to the group or create new labels directly within it.
Manage labels with Scout and MCP#
Scout (in the dashboard) and the Uniform MCP server (from your AI coding assistant) can manage asset labels for you. They can:
- Create, rename, recolor, and delete labels and label groups.
- Move labels in and out of groups.
- Assign labels to one or many assets.
For example, ask Scout to "come up with a set of labels for this project and set them up," or "align the swatch colors of every label in the Region group." Scout stages label changes as pending edits you can review before applying; the MCP server applies them immediately. Both respect your asset label permissions.
Assign labels to assets#
You can assign labels to an asset from the asset editor in the asset library or from the asset detail view inside an asset parameter.
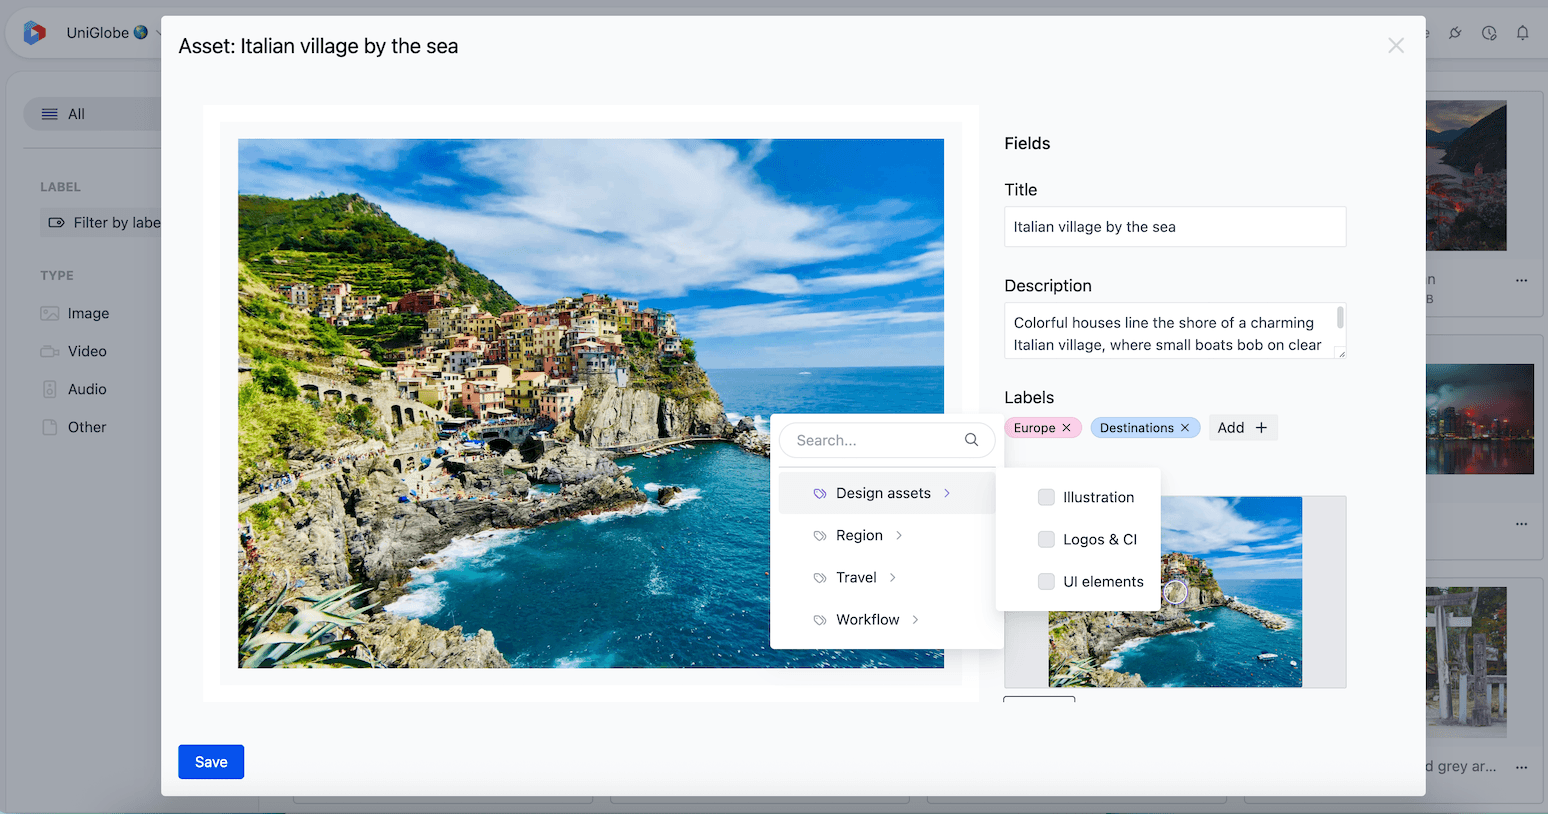
- Open the asset you want to label.
- In the Labels field, select one or more labels from the picker.
- Click Save.
The label picker displays labels grouped by their label group. You can search for labels by name. Group labels cannot be assigned to assets. Only individual (non-group) labels can be assigned. Each asset supports up to 30 labels.
Assigned labels are also visible on asset cards and table rows in the asset library.
Create labels while assigning them
If the label you need does not exist yet, you can create it directly from the picker while adding labels to an asset. Type the label name into the search field, then select Create.
This requires the Create label permission. To add the label to a group or update its color or description later, go to the Asset labels settings view.
AI label assignment at upload#
Requires Uniform AI and AI credits
AI labeling requires Uniform AI features and AI credits to be enabled for your team.
When you upload an image asset, Uniform's AI can automatically suggest labels based on the image content.
- AI labeling happens during the upload flow when AI asset analysis is enabled.
- The AI evaluates the image against labels defined in the project and suggests matching labels.
- You can review and adjust the suggested labels before saving.
- Label guidance can be configured under Settings > AI Guidance > Assets to influence how the AI assigns labels.
Automatic labeling only assigns existing labels
Automatic labeling during upload only suggests labels that are already defined in the project — it does not create new labels. To create new labels, use the Asset labels settings view, create one while assigning it, or ask Scout or the MCP server to set up labels for you.
Filter assets by label#
In the asset library#
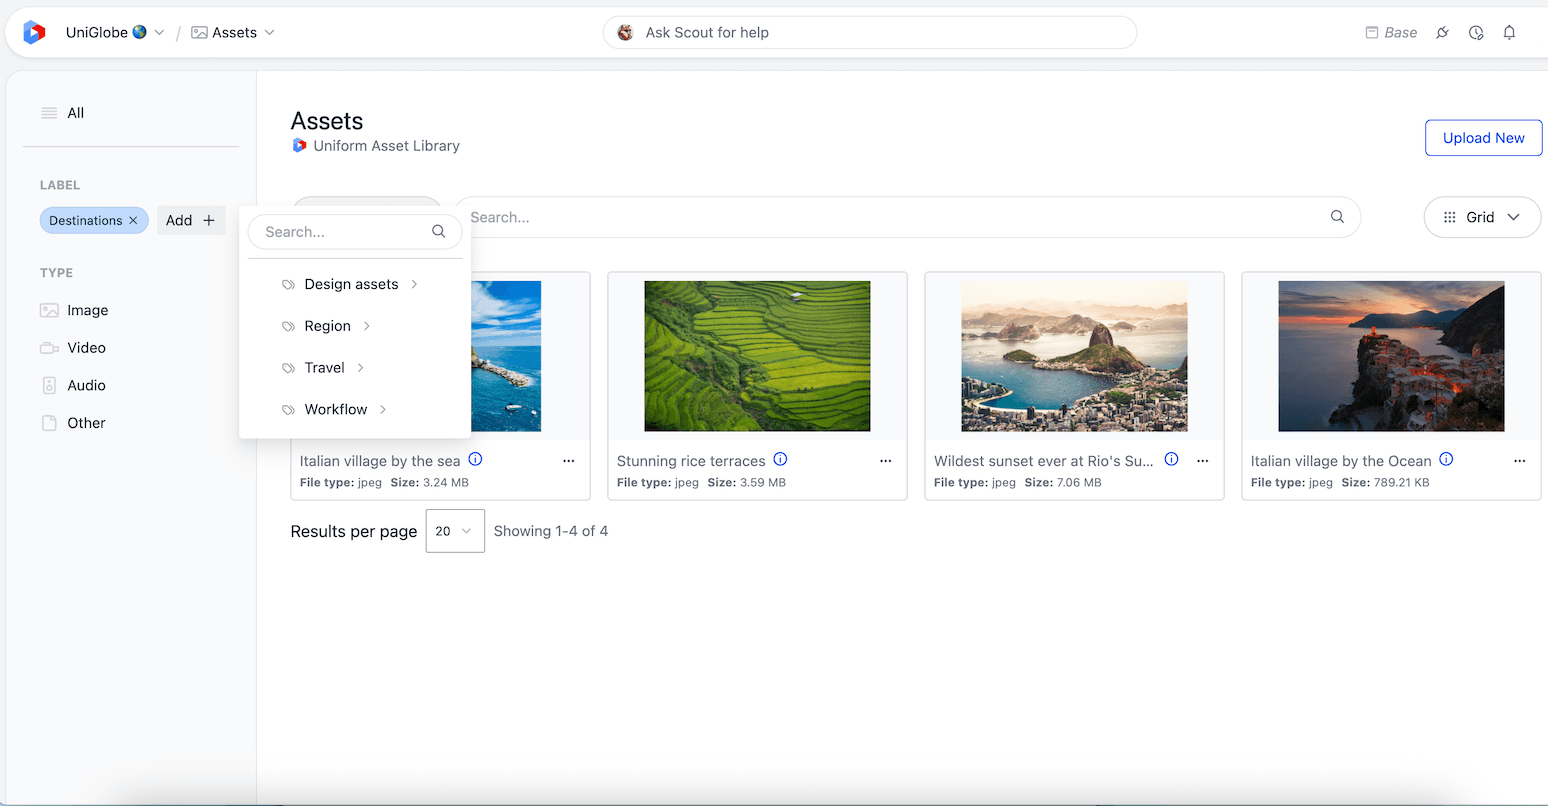
The asset library provides two ways to filter by label. The quick filter is available in the Assets navigation sidebar, where you can select one or more labels to instantly narrow the asset list. For more control, use the advanced filter in the filter bar above the asset list to build label-based conditions with the following operators:
| Operator | Description |
|---|---|
| is | Matches assets with a specific label. |
| is any of | Matches assets with any of the selected labels. |
| is all of | Matches assets that have all of the selected labels. |
| is not | Excludes assets with a specific label. |
| is none of | Excludes assets with any of the selected labels. |
| is empty | Matches assets with no labels assigned. |
| is not empty | Matches assets that have at least one label assigned. |
In the asset selector#
When selecting assets from a component or entry parameter, the same filtering capabilities are available in the Add to selection step:
- Quick filter: Filter by label directly in the sidebar of the asset parameter modal.
- Advanced filter: Use label filter operators (
is,is any of,is all of,is not,is none of,is empty,is not empty) to narrow the selection.
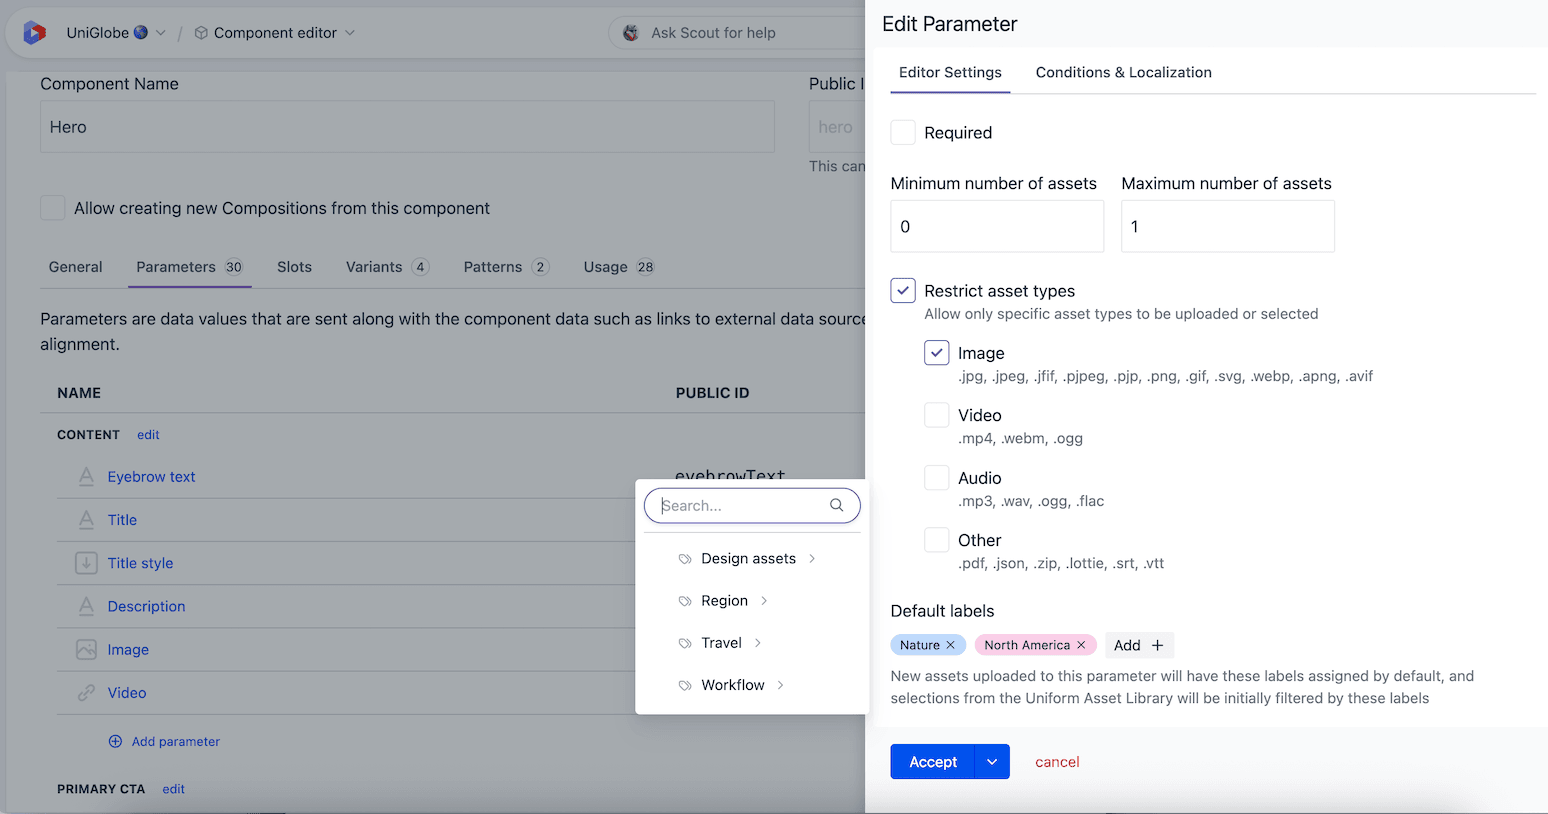
Default labels for asset parameters#
You can configure default labels on an asset parameter so that uploads and selections are pre-filtered.
Set up default labels on an asset parameter#
- Open the component definition or content type that contains the asset parameter.
- Edit the asset parameter configuration.
- In the Default labels section, select one or more labels.
- Save the component definition or content type.
How default labels affect asset selection and uploads#
- Uploads: When a user uploads an asset through a parameter with default labels, those labels are automatically assigned to the uploaded asset.
- Selection: When a user opens the asset selector on a parameter with default labels, the asset list is initially filtered to show assets matching those labels.
Asset label permissions#
Managing labels requires label permissions (Create, Update, and Delete) configured through default permissions or project policies in roles. Read permissions for asset labels are granted by default.
In the built-in role presets, these label permissions are included in the Editor and Developer roles.
For details on configuring these permissions, see roles and permissions and project policies.
CLI commands for labels#
Use the Canvas CLI label commands to back up labels to files and sync them between projects.
Update roles for existing API keys for label sync
Existing API keys used by the CLI must have label Create, Update, and Delete permissions in their role to use the label commands.