Manage releases
The Releases page is the central hub for browsing and monitoring every release in your project. It is organized into three views that correspond to the lifecycle of a release, so editors can focus on the set of releases that is relevant to their current task:
- Scheduled – releases that have a launch date and time assigned.
- Unscheduled – releases that are being prepared and will be launched manually.
- Launched – releases that have already been launched to base.
You can switch between views using the status controls at the top of the page. Each view includes a keyword search that looks across all releases in your project, regardless of the currently selected view.
Scheduled releases#
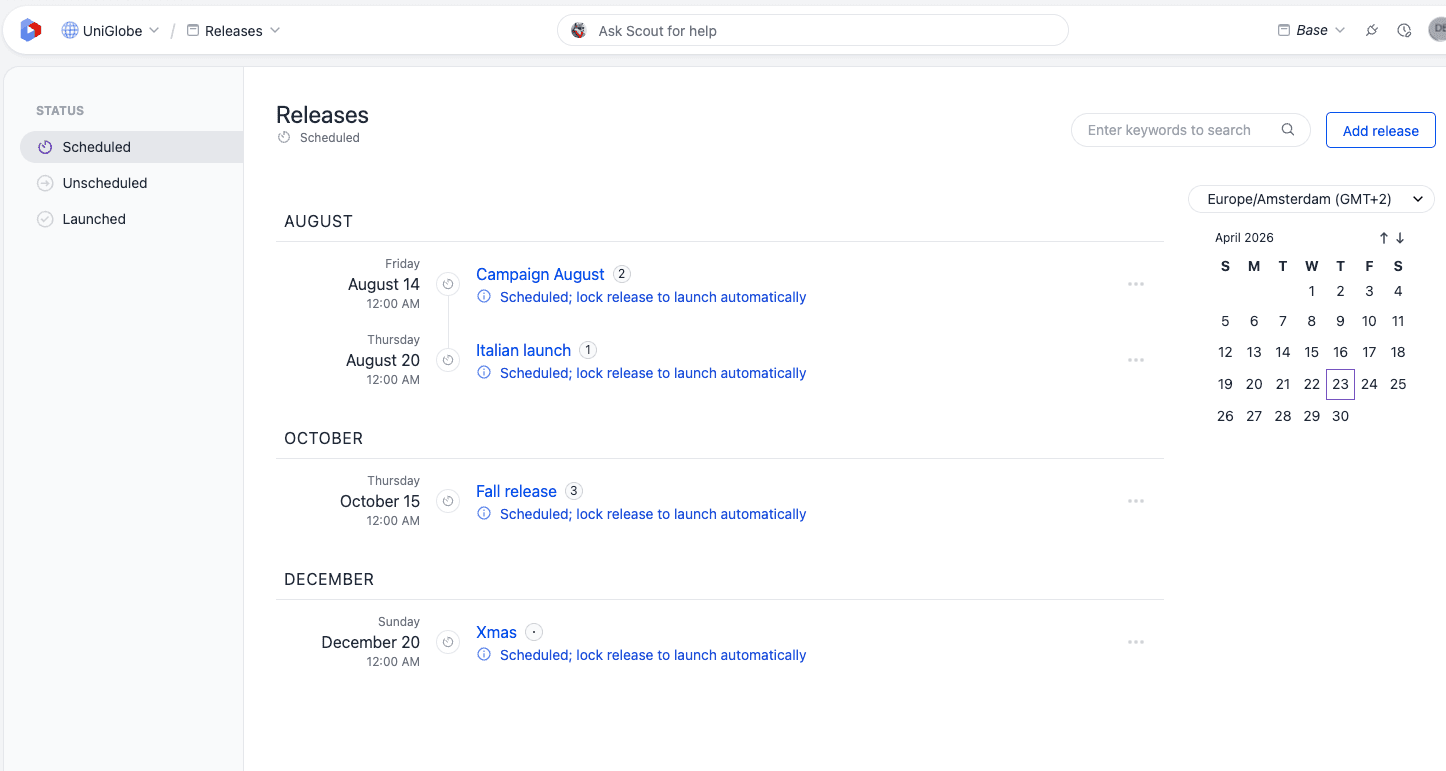
The Scheduled view presents upcoming releases on a timeline, ordered by their scheduled launch date. Releases are grouped by month so editors can see at a glance which campaigns, promotions, or content updates are planned in the weeks and months ahead.
Timeline#
Each row in the timeline represents a single scheduled release and shows:
| Column | Description |
|---|---|
| Scheduled date | The weekday, month and day, and launch time of the release, formatted in the currently selected timezone. |
| Release name | The name of the release, linking to the release details page. A counter labeled "In this release" sits next to the name and shows how many items the release currently contains. Selecting the counter opens a popover that previews recently added compositions, entries, and patterns. |
| Status | A status indicator such as Ready when the release has been locked for launch, Active when the release is the currently active release in your project, or a warning marker when a problem is detected. |
| Actions | A contextual ••• menu with shortcuts to activate, unlock, or delete the release. Available actions depend on the state of the release and on your permissions. |
As you scroll the timeline, additional months of releases are loaded automatically, so large pipelines of upcoming releases remain easy to browse without pagination.
Calendar#
A calendar is displayed alongside the timeline to help navigate across months. Days that contain one or more scheduled releases are highlighted, and today's date is emphasized so that the nearest releases are easy to locate.
- Selecting a highlighted date in the calendar scrolls the timeline to the matching month, which is useful when planning months in advance.
- Moving the calendar forward to future months automatically loads any scheduled releases that fall within them, keeping the timeline and the calendar in sync.
Timezone picker#
A timezone picker sits above the calendar and controls how scheduled launch times are formatted in both the calendar and the timeline. The options are ordered to make the most common choices easy to reach:
- Your detected local timezone is pinned at the top of the list and pre-selected by default.
- UTC/GMT is pinned second so it is always easy to find.
- All other IANA timezones are listed below, sorted by their current UTC offset.
Changing the timezone recalculates how releases are grouped by day and by month, which is particularly important for teams that span multiple regions. The selected timezone only affects how scheduled times are displayed – the actual launch moment for each release does not change.
Unscheduled releases#
The Unscheduled view lists releases that do not yet have a launch date assigned. These are typically releases that are being prepared ahead of time and will be launched manually once the content is ready to go live.
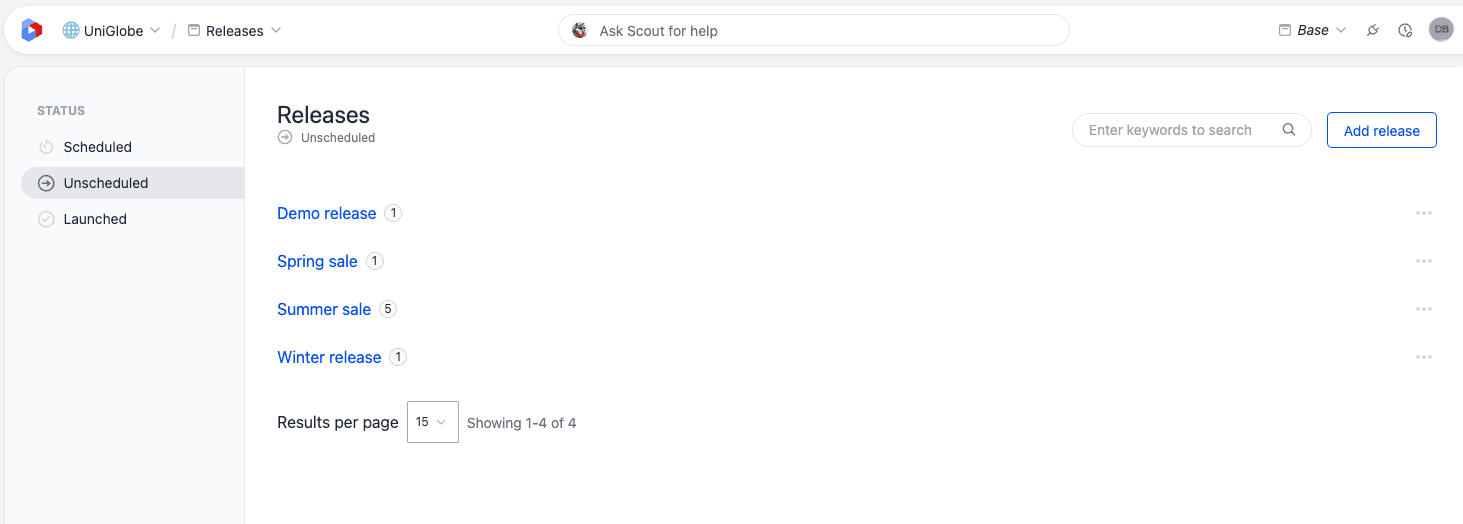
Unscheduled releases are displayed as a paginated table showing the release name, its current state, the number of items in the release, and the actions available for the release.
Launched releases#
The Launched view contains a paginated table of releases that have already been launched to base. Use this view to review past campaigns, audit when content went live, or revisit the items that were part of a previous release.
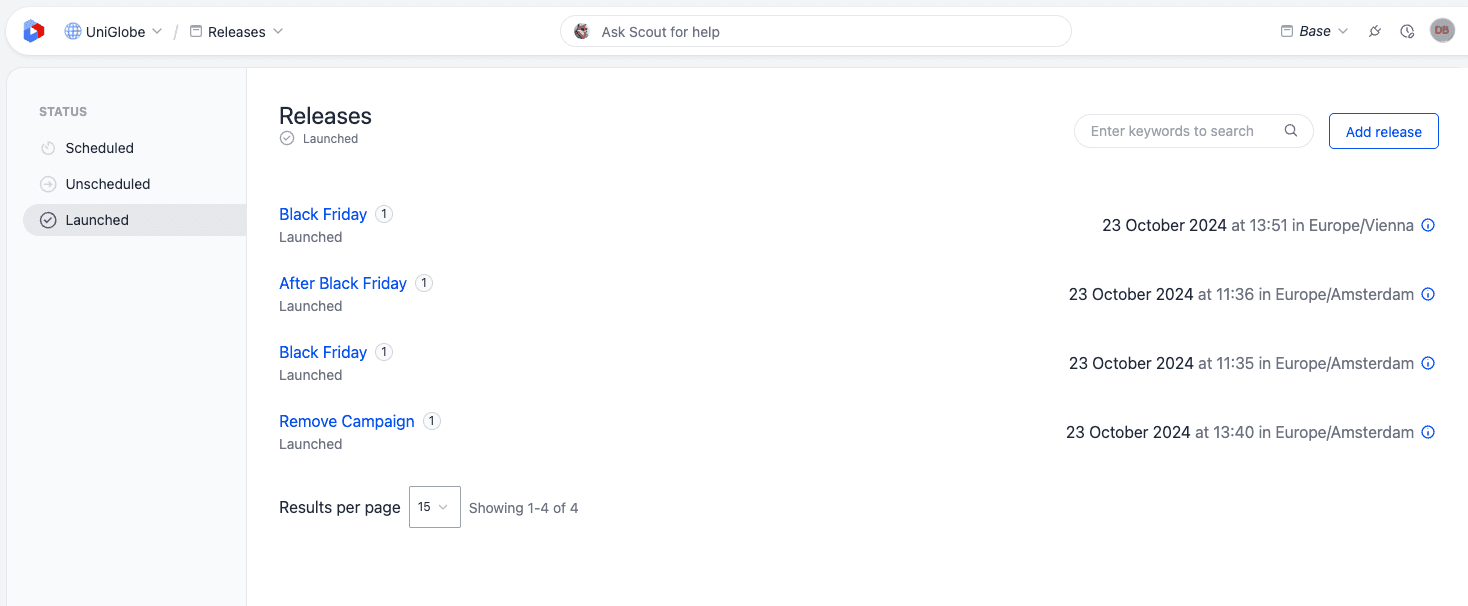
The Launched view refreshes automatically, so releases that finish launching will move out of Scheduled or Unscheduled and appear here without needing to reload the page.
Activating and switching between releases#
The easiest way to start adding content to a release is to activate the release in your project. When a release is active, all content which is created, edited or deleted whilst the release is active will be immediately copied into the release.
There are two ways to make a release active:
- You can activate a pre-existing release at any time by using the release switcher, located in the main navigation.
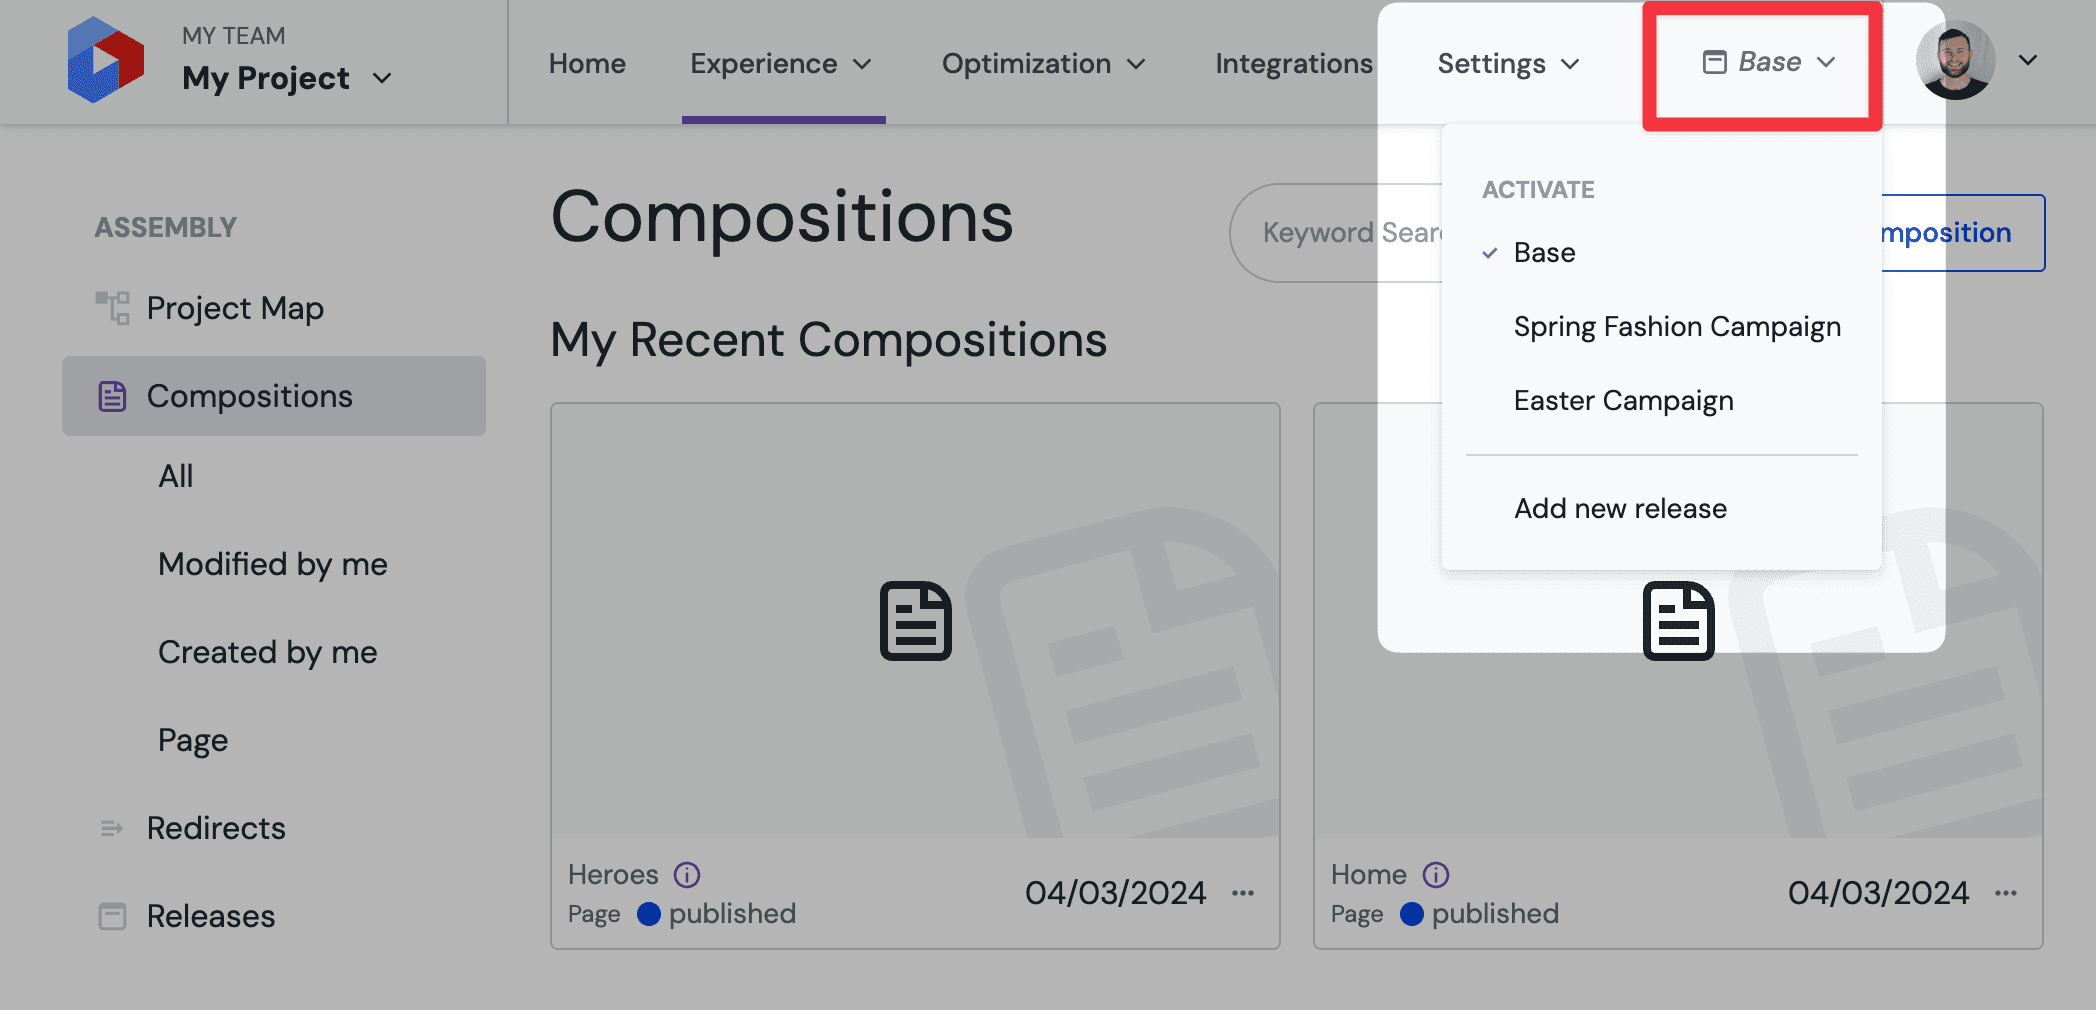
- Releases created through the release dashboard can also be activated by using the three dot menu "•••" located next to the release or on the release details page.
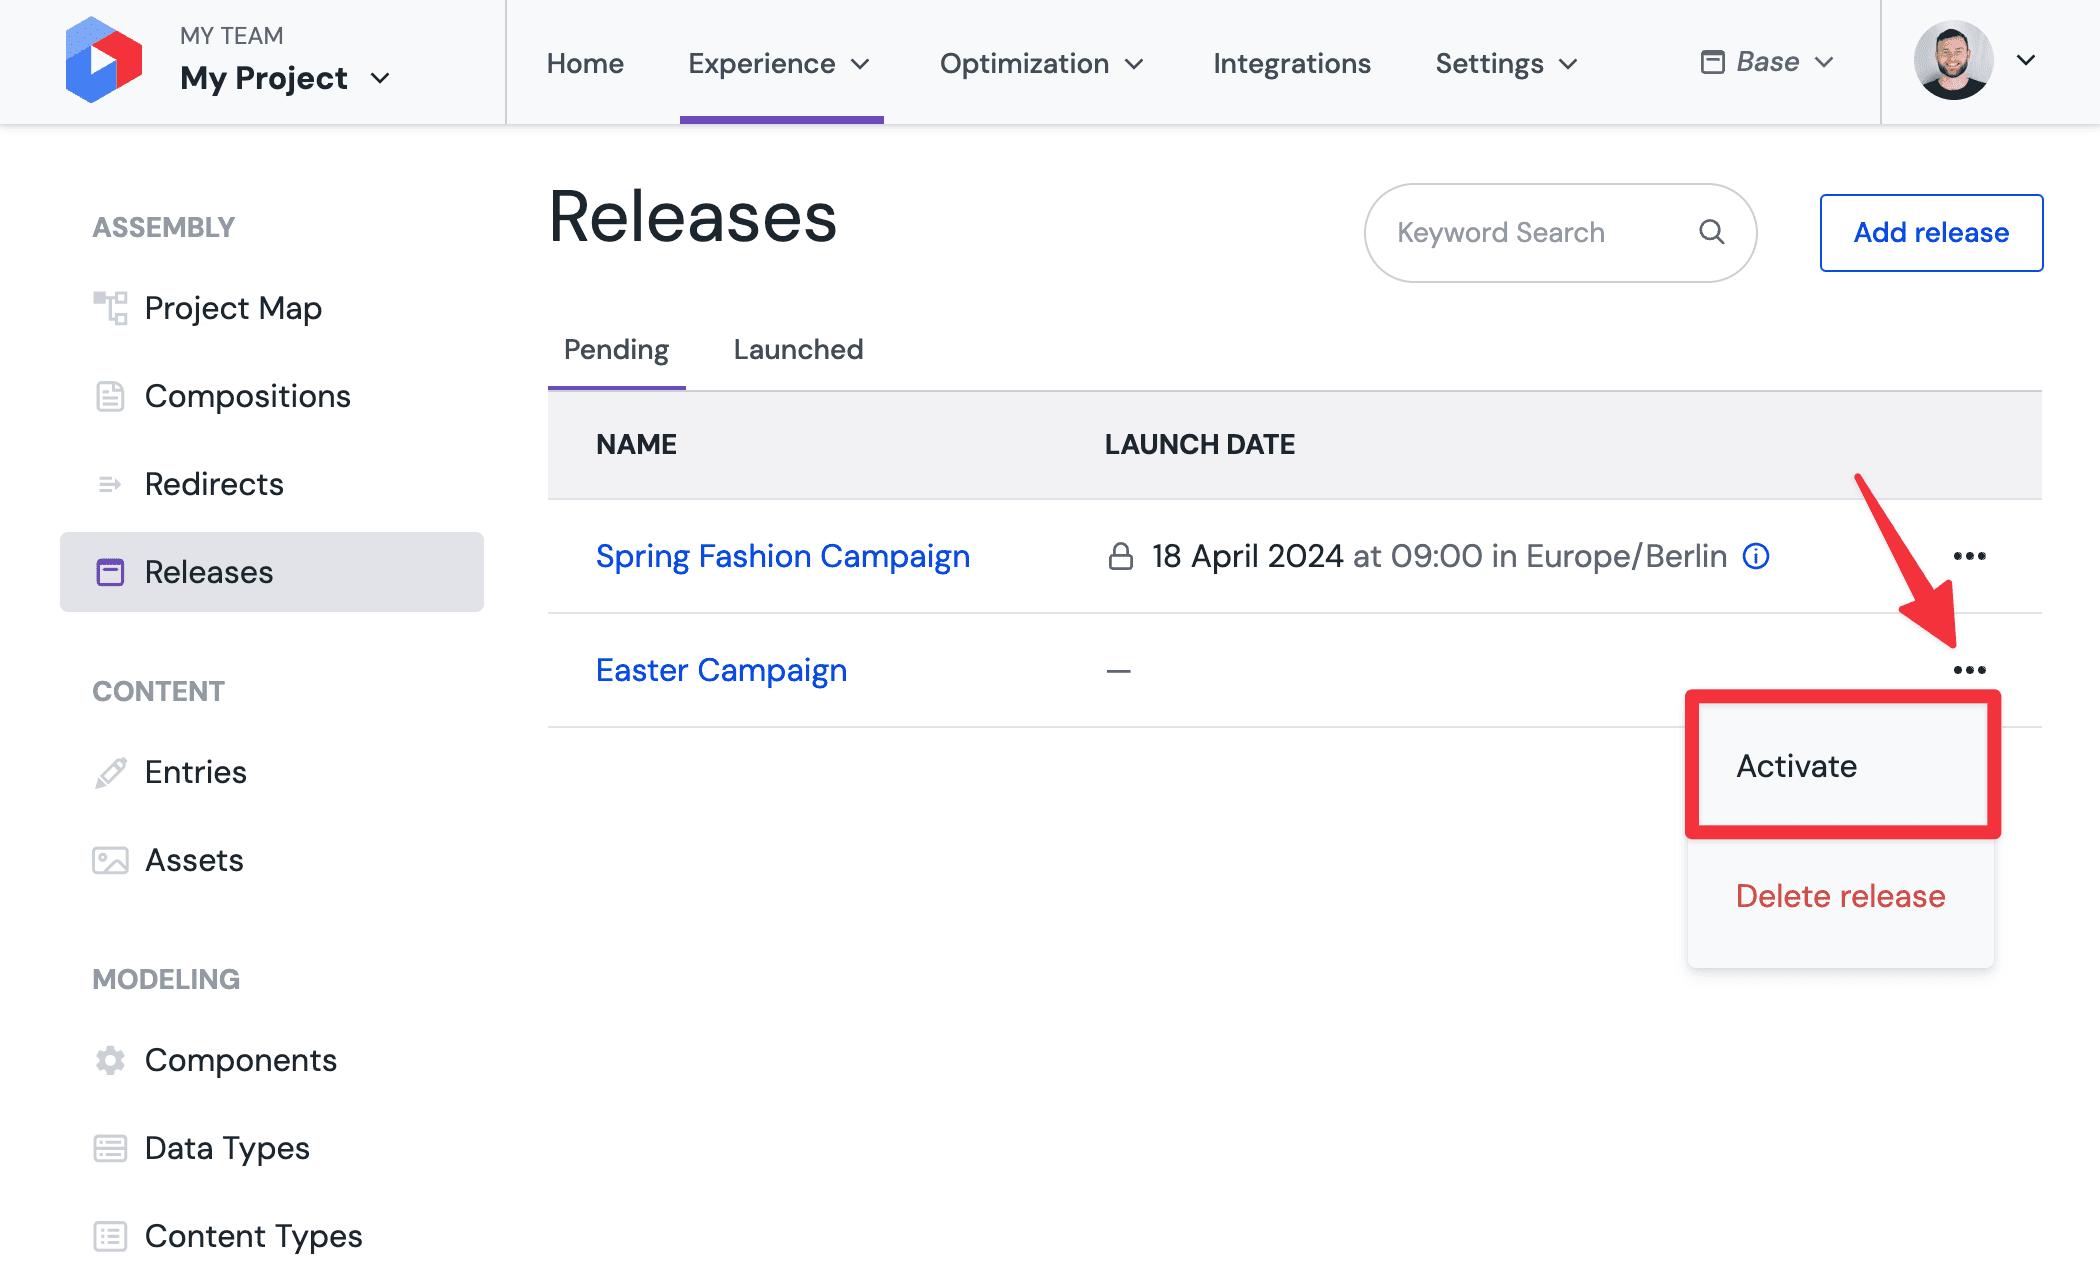
Which release is active?
You can confirm that a release is active by looking at the release switcher in the main navigation bar at any time and seeing which release is currently selected. If the release switcher shows "Base" then no release is currently active.
You can also activate a release from within the editor using the Releases panel in the side rail of a composition or an entry. Selecting a release in that list makes it the active release for your session and highlights it with an active chip. See Releases panel in the visual editor and Releases panel in the entry editor for details.
Once a release is active, head to Create a release and add content to start copying content into it, or to Launch a release when the release is ready to go live.